Working with repair orders in TTP
Adding a new RO in TTP
You can use TTP to add an RO for most units in the TMT unit master. You cannot add an RO for units with the Reports Only status.
-
Select the filter icon in the upper-right corner of the Job Dashboard.
-
Select RO Create.
The Search Units screen opens. The screen shows PMs due in your shop domicile.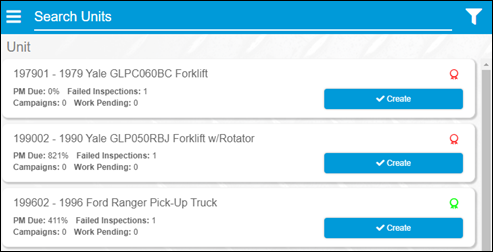
-
Enter the unit number for the new RO in the Search Units text box. This is a smart search and entering a few digits or characters returns matching units. The Unit Section Details screen shows PMs, Work Pendings, Failed Inspection, or Campaign information the unit may have.
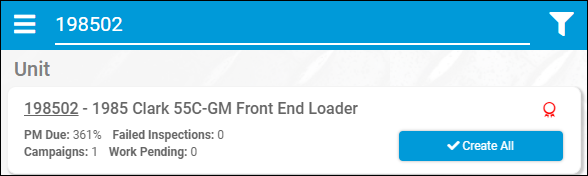
This illustration shows a Unit search for unit 198502.
-
Select Create All or Create for the appropriate unit.
If there are open orders for the unit, the Existing Open Standard Repair Orders pop-up window opens. It helps prevent you from adding unneeded or duplicate ROs.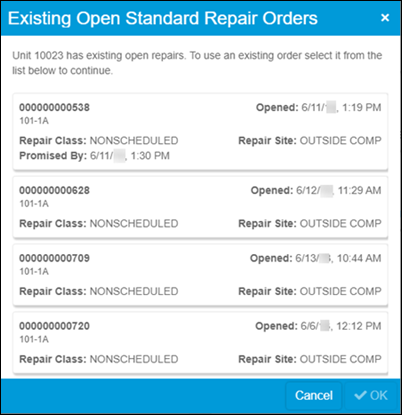
-
If you want to use an existing order, select it and select OK. To create a new RO, select Cancel.
The Add Repair Order screen opens.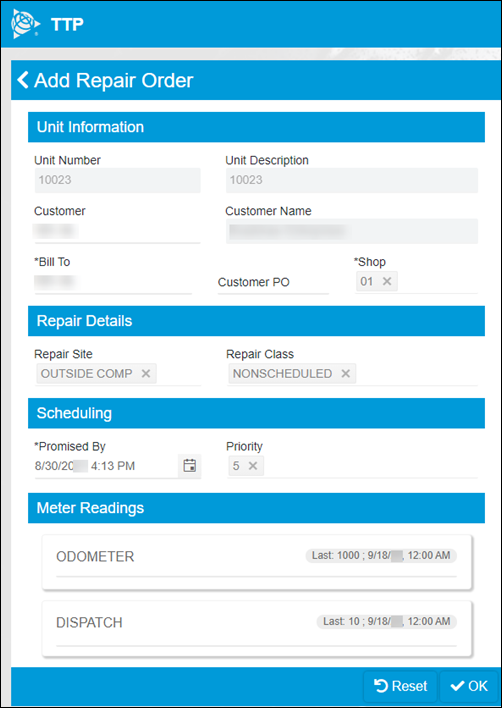
-
Change the default values as needed.
-
If you want, you can enter meter readings.
-
Select OK.
TTP shows the section header for a PM. You can add a new section if you want. If your setup requires you to enter a job code, TTP will prompt you to add one.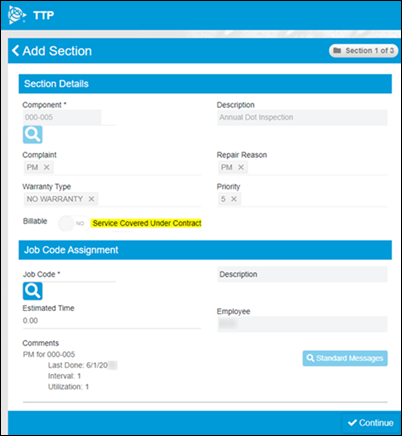
-
If you want, you can add more sections by selecting Continue.
-
When done, select OK.
TTP assigns each added section to you as the creator.
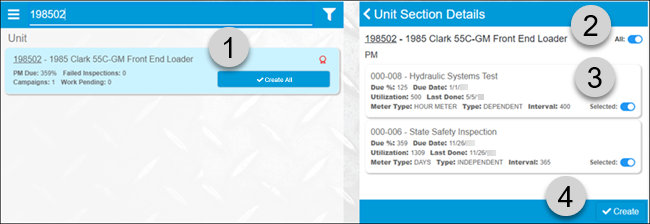
This illustration shows the Unit Search and the Unit Section Details screen for unit 198502.
1 |
Selecting Create All creates an RO for the unit. It includes all sections for any PM or pending items the unit has. |
2 |
You use the All toggle to include all of a unit’s items. Toggle it to off if you do not need all the items. |
3 |
You use the Selected toggle to include an item in the RO. Toggle it to off if you do not need the item. The Selected toggle lets you set whether the RO includes this item. In the illustration, both the Hydraulic Systems Test PM and the State Safety Inspection are selected. If you do not want to include the item, toggle Selected to off. |
4 |
Selecting Create creates the RO with the limitations you have set in the Unit Details screen. |
Adding an RO section in TTP
You can add a section to an existing RO from the Jobs Dashboard.
-
Select the section.
-
Select
 Add in the screen’s lower-right corner.
The Add Section screen opens.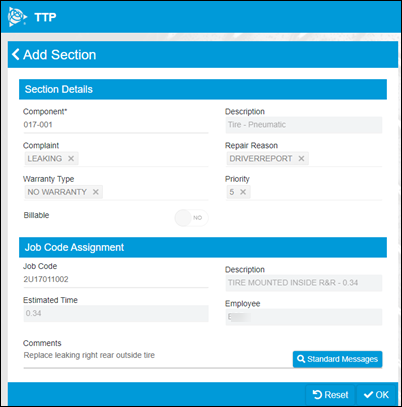
-
Complete these fields:
Required field: *
Read-only field: §
Field Definition Component *
Enter the component information.
Description §
TTP completes this field for you.
Complaint
Enter the complaint.
Repair Reason
Enter the repair reason
Warranty
If you want, you can change the warranty value or accept the default.
Priority
If you want, you can change the priority value or accept the default.
Billable
If you want, you can change the billable value or accept the default.
Job Code
If you want, you can enter a job code.
Description §
TTP completes this field for you.
Estimated Time §
TTP completes this field for you.
Employee §
TTP completes this field for you.
Comments
If you want, you can add section comments.
-
Do one of the following:
-
To save, select OK.
TTP assigns the new section to you as the creator. Other technicians can access the new section by selecting All from the filter menu. -
To clear your changes, select Reset.
-
You can add more sections as needed. Select  Back to return to the Jobs Dashboard.
Adding attachments to an RO in TTP
To add an attachment to a RO or to view existing attachments:
-
Select a card on the Job Dashboard.
The Job Code Assignment card opens. -
Enter a job code and estimated time.
-
Select OK.
The Job Activity screen opens. -
Select
 Attach in the upper-right corner of the Job Activity screen.
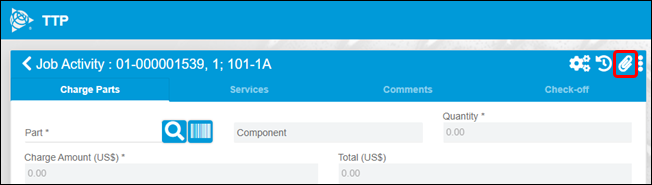
-
Select Upload.
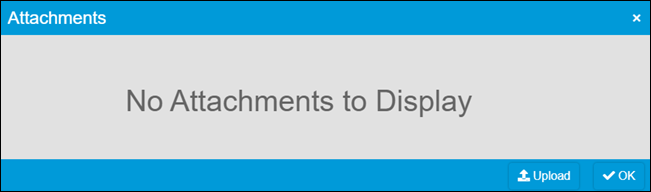
The Attachments screen opens. -
Browse to your attachments and select Upload.
Note: You can select a picture from TTP and attach it to the RO if:
-
Your device has a camera.
-
Your browser can access the camera’s pictures.
If your device does not have a camera, this feature is not available to you.
TTP supports these file formats for attachments:
-
BMP
-
GIF
-
JPG or JPEG
-
PDF
-
RTF
-
TIF
-
TXT
-
-
Select OK.
The Attachments window closes.
This illustration shows the Attachments screen before any attachments are uploaded. If there were existing attachments, the screen would show them.
Adding an RO template in TTP
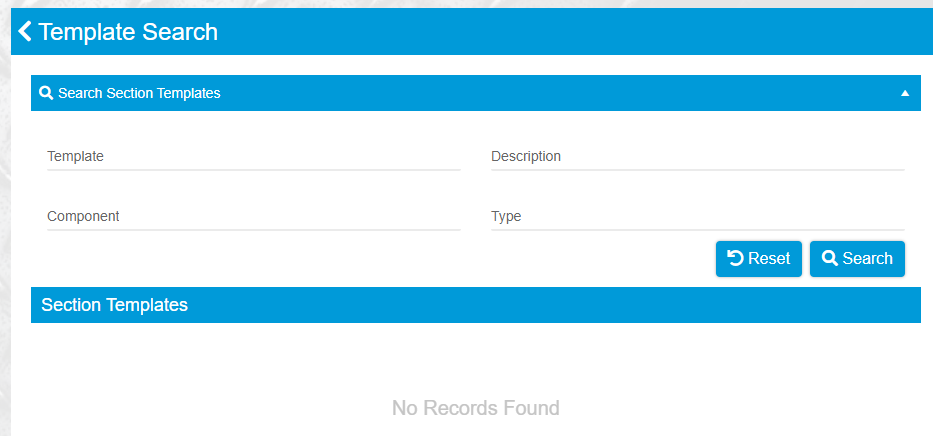
When adding a section, you can select Add Template Section at the bottom of the screen. This opens the Template Search screen.

You can then search for any existing section templates, select them, and add them to the RO.
Pausing an RO in TTP
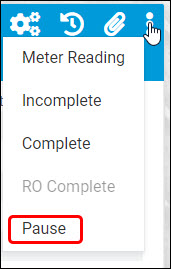
The Job Activity screen has a Pause menu command. Selecting Pause lets you create a new RO while suspending work on your current repair.
Note: To use Pause in TTP, the TMT Fleet Maintenance Allow Job Pause Application option must be set to YES. To find the option in TMT Fleet Maintenance, go to Setup > Options > Application Options > IWS > Repairs. You can also set this option at the Shop level.
-
Select Pause.
TTP sends you to the Login screen. Your status is PAUSED_RO and other technicians may use the kiosk while you go to the new job. -
When you have completed work on the new job, log back in from the kiosk.
You can now select one of three pause options:-
New RO
Selecting New RO opens the Add RO screen. Saving the new RO opens the Job Activity screen for the new RO. TTP records your employee time status as PAUSED_RO. It adds a new record to the ORDERLNTME database table. The record’s status is OPEN.
You cannot pause the new RO. You can mark it as Complete or Incomplete. You can also close the new RO if the
Allow Closing of ROsApplication option is turned on. You can access this option by opening TMT Web and going to Menu > Setup > Application Options > IWS > Repairs.Once you finish the new RO, TTP sends you back to the Job Activity screen for the RO you paused. Your employee status returns to REPAIR. TTP changes the ORDERLNTME table for the original RO record from PAUSED_RO to OPEN. TTP also changes the Status field for the new RO record in the ORDERLNTME table to CLOSED.
-
Existing RO
Selecting Existing RO opens the Job Dashboard screen. You can log in to the existing RO. Once you select Start/Continue on the existing RO, TTP opens the Job Activity screen for that RO. TTP records your employee time status as PAUSED_RO. It also adds a new record to the ORDERLNTME database table. The record’s status is OPEN.
You cannot pause the existing RO once you log in to it. You can mark it as Complete or Incomplete. You can also close the existing RO if the
Allow Closing of ROsApplication option is turned on.Once you finish the existing RO, TTP sends you back to the Job Activity screen for the RO you paused. TTP records your employee status returns to REPAIR. It changes the ORDERLNTME table for the original RO record from PAUSED_RO to OPEN. It also changes the Status field for the new record created for the existing RO record in the ORDERLNTME table to CLOSED.
-
Indirect
Selecting Indirect opens the Indirect Activity screen. TTP records your employee time status as PAUSED_RO. It also adds a new record to the ORDERLNTME database table. The record’s status is OPEN.
You cannot pause the Indirect order. You can add parts, services, and comment lines. You can also mark the Indirect order as Complete or Incomplete.
Once you mark the order as Complete or Incomplete, TTP takes you back to the Job Activity screen for the RO you paused. TTP records your employee status returns to REPAIR. It changes the ORDERLNTME table for the original RO record from PAUSED_RO to OPEN. It also changes the Status field for the new record created for the Indirect order to CLOSED.
-