Cancel repair orders
You may need to cancel a repair order (RO) if it duplicates another order or if it is no longer needed. You can also use the cancellation process to track ROs that were opened but never completed. Canceled ROs can be reopened, if needed.
To mark a repair order as Canceled, the RO cannot have a section with a Complete or Closed status or line items. You cannot add line items to a canceled RO.
-
Look up and open the repair order that you want to cancel.
The Repair Order page opens.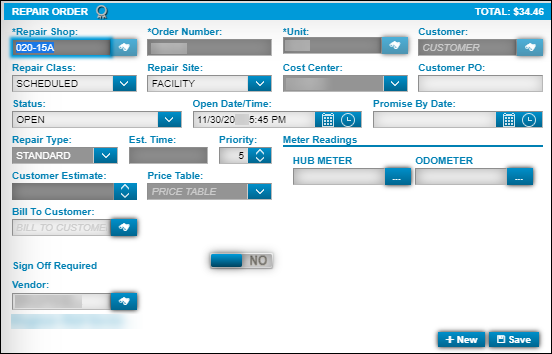
-
In the RO Header Status field, select Canceled.
-
Click Save.
The system saves the RO. The RO and all its now have a status of Canceled.
Look up canceled repair orders
You can use the Repair Orders Listing page to look up canceled repair orders.
-
Go to Menu > Orders > Repair Orders Listing.
The Repair Orders Listing page opens. -
Click
 Search Orders.
The Repair Orders Search section opens. -
In the Status field, select Canceled.
-
In the Order Type field, select the RO type you want. You can select:
-
Standard Repair Order
-
Vendor RO
-
All Repairs
-
-
Click Search.
The Repair Orders Listing page shows only repair orders with a Canceled status.
-
In the Order column, select the link for the canceled order that you want to view.
Reopen a canceled RO
-
Look up and open a canceled repair order.
The Repair Order page displays the order header. -
In the Status field, select Open.
The entry in the Date/Time field defaults to the current date and time.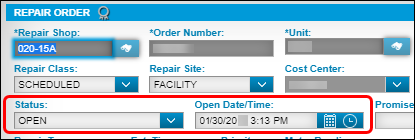
If there are open sections on the repair order, you must change the default date to a date before the section’s Open Date.
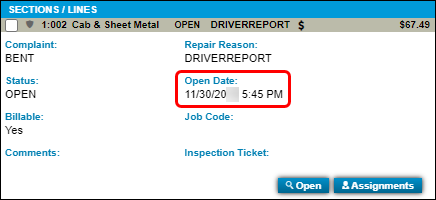
To view a section’s open date, click the section row to expand it.
-
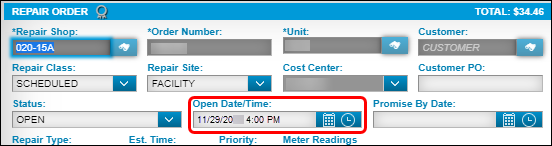
In the order header’s Date/Time field, change the Open Date/Time date to a date that is earlier than the Open Date field for all RO sections.
-
Click Save.
-
Change each section’s status to Open.
-
Click the section row to expand it.
-
Click Open.
The Add/Edit/View Section window opens. -
In the Status field, select Open.
-
Click Save.
-