Driver Pay Register
The Driver Pay Register program is used to update pay entries that have been approved in the Driver Pay Audit program (or the Customer Service or Dispatch programs). The update process changes the status of the entry to Owed, making it available for inclusion on a statement generated by the Driver Statements program.
The Driver Pay Register program also creates general ledger postings to account for the payments. These can be viewed in the GL Journal Entries program.
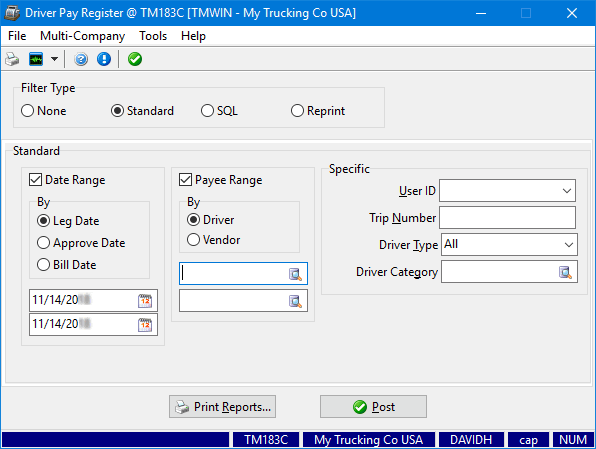
Several different filter types are available. The fields that appear differ depending on the filter type. This illustration shows the fields that appear when you select the Standard filter (default).
To access Driver Pay Register:
| From this location | Go to |
|---|---|
TruckMate Menu and TruckMate Task List |
|
Windows Start Menu |
TruckMate 20xx > Driver Pay Register |
Windows Explorer |
C:\Program Files (x86) > TruckMate 20xx > PayReg.exe |
Application Configurator for Driver Pay Register
The following Application Configurator options are listed under Configuration Options > PAYREG.EXE.
| Option | Definition | Values |
|---|---|---|
Allow Inactive GL |
Determines system behavior when the user attempts to use an inactive General Ledger (GL) account. Options are:
Note: This option has no effect on a Reprint, since these transactions have already been posted. |
|
Allow Zero Charge |
Option to allow Zero Charge Driver Pay Records. Default is set at 'False'. |
|
Auto-Correct Closed Period Posting Dates - Future |
Determines how bad dates will be handled by the register
|
|
Auto-Correct Closed Period Posting Dates - Past |
Determines how bad dates will be handled by the register
|
|
Commit Each Trans |
Sets the flag to commit each transaction so that each posting will be done one-at-a-time. If an error is reached, a dialog box will appear for that posting only. |
|
Default Filter Date |
Sets the default value for the 'Date' filter. Available options are 'Leg' and 'Approved'; default is set at 'Leg'. |
|
FB Pay GL Posting Date |
Indicates whether to use the bill date or trip leg date for the GL date. |
|
Require Category |
When True, you must specify a Driver Category value in the Driver Pay Register program to be able to post the Driver Pay data. |
|
If True, when GLTRANS records are created, all the GL transactions in the audit/register run are grouped/summed together by GL account and date (one lump figure per combination). If False, the figures are grouped/lumped by GL account, date, and source transaction ID. |
|
Security Configuration for Driver Pay Register
The following security configuration is indirectly associated with the Driver Deduction Register since it affects which records can be marked as approved and thereby can be posted using the Pay Register.
Go to Utilities > Security Configuration > Security tab > Business Events > Allow Changes.
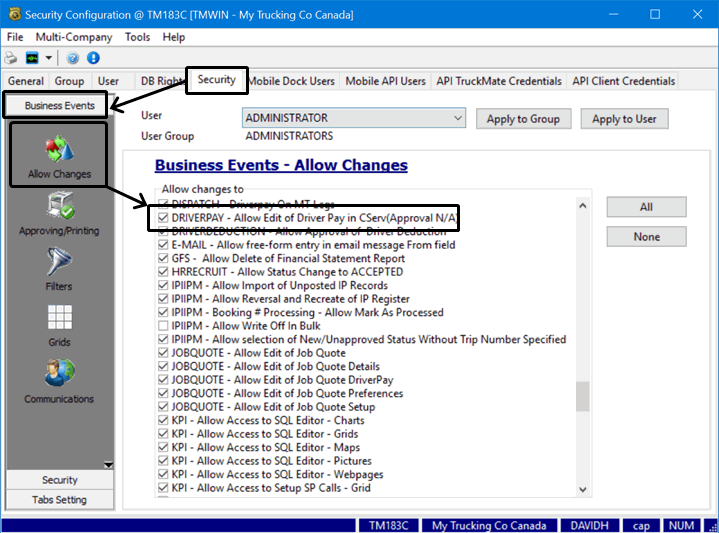
DRIVERPAY |
Allows the selected user / group to create, edit and approve driver pay entries within the Customer Service program window. |
Go to Utilities > Security Configuration > Security tab > Business Events > Misc > Pay Register.
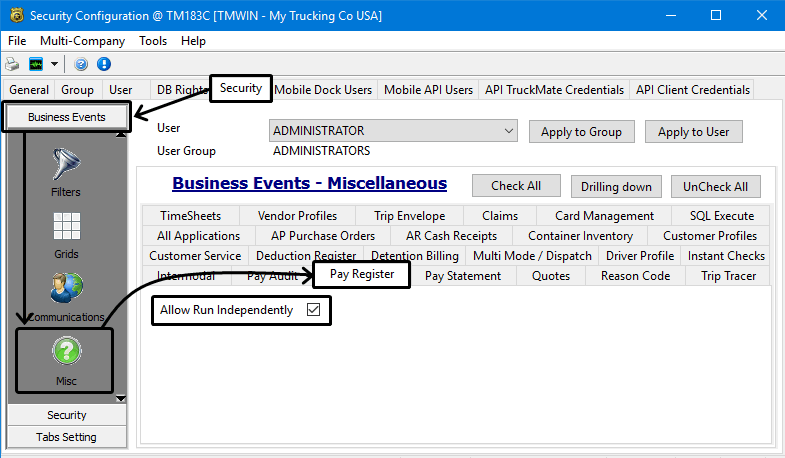
Allow Run Independently |
Allows the selected user / group to be allowed to run the Pay Register by itself without being called by another application like Customer Service. |
Posting Driver Pay Information using the Driver Pay Register
Once the driver’s pay has been approved and is ready to be updated, it must be run through the Driver Pay Register to be processed through the Driver Statement program.
| Remember to also run the Driver Deduction Register before running the Driver Statement Program. |
To update the driver pay information using the Driver Pay Register:
-
Go to Accounting & Finance > Driver Payables > Driver Pay Register
-
Select a filter type. Options are:
-
None
-
Standard
-
SQL
-
-
Enter one or more search criteria, as described below.
-
Once the parameters for the Register are set, you have the option to click the Print Reports button to review the register reports for accuracy prior to posting and ensure the register will update the correct information.
-
Click
 Post.
Post.
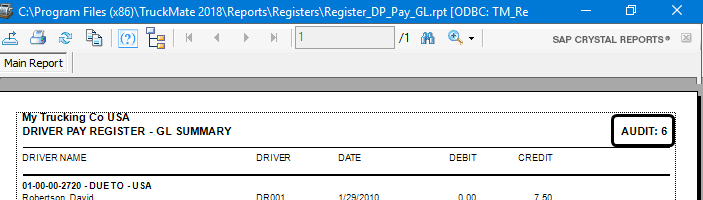
Two reports, Driver Pay Register and Driver Pay Register - GL Summary will display in separate windows. The audit number appears in the upper right corner of the report. -
See Posting driver pay and General Ledger postings for detailed information regarding what happens when you post the driver pay entries.
-
After you have finished reviewing the reports, close the report windows.
A message appears indicating that the posting is complete.Now you can run the Driver Deductions Register (if you have not already), run the Driver Statement program and create the checks.
Notes:
-
Once you post the entries and close the report windows, you cannot make any changes to these records.
-
You can reprint any report.
-
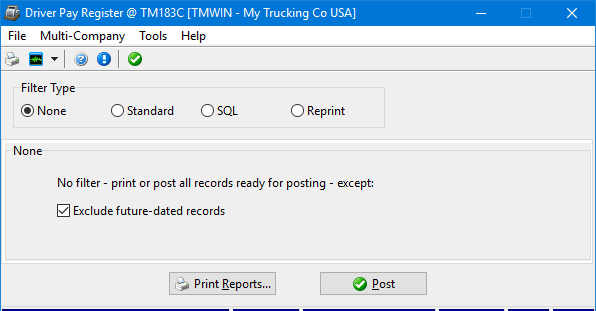
Selecting driver pay entries to post without using a filter
-
In the Filter Type section, select None.
-
By default, future-dated records are excluded. If you want to include them, clear the Exclude future-dated records checkbox.
Selecting driver pay entries to post using the standard filter
-
In the Filter Type section, select Standard.
-
Enter one or more filter criteria. The more criteria you enter, the narrower the results.
Field Definition Date Range
Indicate the preferred filter to search by: Leg Date, Approve Date or Bill Date.
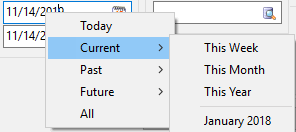
Enter valid dates or click
 Calendar to search for and select a date.
There is also a right-click shortcut menu for additional options.
Payee Range
Indicate the preferred filter to search by: Driver Range or Vendor Range
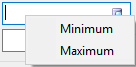
Click
 Pick List to search for and select drivers / vendors from a list.
There is also a right-click shortcut menu for selecting minimum and maximum values.
Specific
-
Specific User ID
Select payments for posting based on the user who approved the payment in the Driver Pay Audit, Customer Service or Dispatch program. Select a user name from the drop-down list box. You can view the user who approved the payment in the Driver Pay Audit program, in the Approved By column. User names are configured in the Security Configuration program. -
Trip Number
Enter a trip number (or multiple trip numbers, separated by commas) to update only the information related to the trip(s). -
Driver Type
Select All, Company, or Owner/Op from the drop-down menu in order to update only the Owner/Operators or only the Company Driver, or all of them if you prefer. -
Driver Category
Click Pick List to search for and select a Driver Category.
The Driver Category refers to the Driver Profiles program > Pay Tab > Other Category field.
-
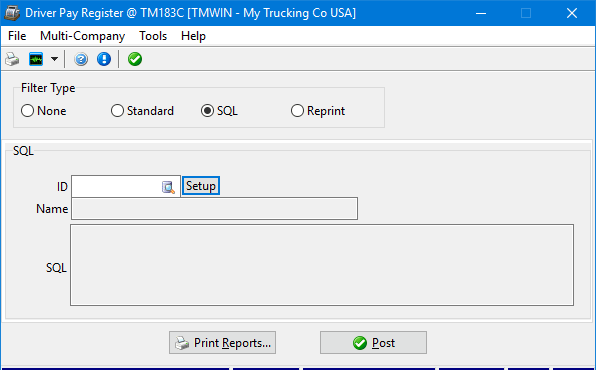
Selecting driver pay entries to post using the SQL filter
-
In the Filter Type section, select SQL.
-
Do any of the following:
-
Enter a valid custom SQL filter ID.
-
Click
Pick List to search for and select a custom SQL filter ID. -
Click Setup and create a custom SQL filter in the SQL Filter window.
The name of the SQL filter and its corresponding SQL code appear in the Name and SQL fields.
-
Printing and reprinting reports in the Driver Pay Register
To see reports listing driver pay entries that meet your search criteria, click Print Reports. Two reports appear, each in a separate window:
-
Driver Pay Register
-
Driver Pay Register - GL Summary
If you click Print Reports prior to posting, the message "Audit Not Posted" appears in the upper right corner of the report. You can review this report for accuracy prior to posting.

After posting, the audit number appears in the upper right corner of the report.
-
Select Reprint in the Filter Type section.
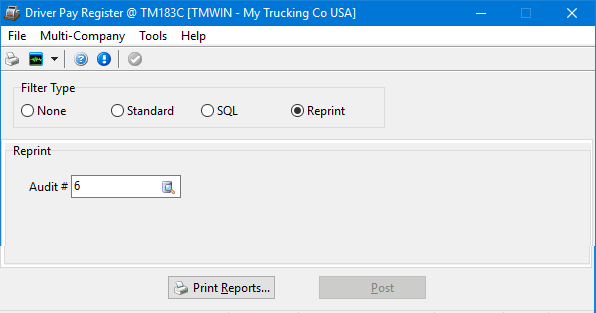
-
Enter a valid audit number in the Audit # field or click
Pick List to search for and select an audit number. -
Click Print Reports.
-
See Printing reports and Printing a report for information about printing functions.
Posting driver pay
When driver pay entries are posted, the status of all included pay entries will be updated to Owed, thus making them available for inclusion on driver statements. General ledger postings will be created for the included pay entries. These can be viewed using the GL Journal Entries program. Until the entries are updated using the GL Journal Entries Register program, they will not be included in the GL Chart of Accounts program balances.
If driver pay is based on a Percentage based rule that has the 'Require AR Payment First' column in the Driver Pay Audit program > Payments Tab set to 'True', then, after you approve the pay and then you run the register, the pay will turn to orange (W=wait) instead of the usual purple (P=owed). You may manually change it to purple/P/owed in the Driver Pay Audit program (via double-click), but the idea is that you leave it in wait state until a cash receipt is received and posted to pay the client’s bill and the state on the driver pay record is then automatically changed to purple/P/owed.
Settings in ConfigExplorer.exe > Billing > BILLINGBR.EXE will have the following effects on the FB based driver pay records when the Require AR Payment First feature is selected:
-
Approve Driver Pay = False AND Post Drv Pay Now = False: This will have no effect on driver pay record, and payment state will be U (black).
-
Approve Driver Pay = True AND Post Drv Pay Now = False: In this case, payment state will be set to A (green).
-
Approve Driver Pay = False AND Post Drv Pay Now = True: In this case, payment state will be set to W (orange).
-
Approve Driver Pay = True AND Post Drv Pay Now = True: In this case, payment state will be set to P (purple).
General Ledger postings
Rule-Based Payments
A credit posting for the amount of the pay entry is created using driver pay control account. To determine the Driver Pay Control Account, the system looks for the lowest numbered general ledger account (as configured in the GL Chart of Accounts program) that fits the following criteria:
-
It is of the 'Driver Payable' type
-
It is not a sub-account
-
It is of the same currency as the pay entry
A debit posting for the amount of the pay entry is created using the Expense Account specified in the header of the driver’s contract (in the Driver Pay Contracts program).
Extra Payments
A credit posting for the amount of the pay entry is created using driver pay control account. To determine the Driver Pay control account, the system looks for the lowest numbered general ledger account (as configured in the GL Chart of Accounts program) that fits the following criteria:
-
It is of the 'Driver Payable' type
-
It is not a sub-account
-
It is of the same currency as the pay entry
A debit posting for the amount of the pay entry is created using the GL Account specified in the Extra Pay code setup in the Driver Pay Contracts program.
Currency Conversions
If the currency of the pay item differs from the Base currency (as configured on the Units tab of the Codes Maintenance program), the debit posting will be converted to the base currency. The pay item’s Leg Date (for rule-based payments and Extra payments) is compared to the Exchange Date (as entered on the Currency tab of the GL Chart of Accounts program). The Exchange Rate entered for the Exchange Date that most closely precedes the leg date is used as the conversion factor. The total pay amount for the entry is multiplied by the exchange rate to arrive at the converted amount. This amount is debited to the account specified in the Expense Account field in the contract header (for rule-based pay entries) or to the account specified in the Extra Pay GL Account field (for extra pay entries).
A credit for the original amount is created using the Driver Payable control account that matches the entry’s currency. To determine the Driver Pay control account, the system looks for the lowest numbered general ledger account (as configured in the GL Chart of Accounts program) that fits the following criteria:
-
It is of the 'Driver Payable' type
-
It is not a sub-account
-
It is of the same currency as the pay entry
To account for the difference between the debit and credit postings, a credit or debit posting (depending on the relative values of the two currencies) is made to the Foreign Exchange account specified in the contract header.