Printing reports
Clicking File > Print Reports from any TruckMate program opens the Report Selection window where you can select a report file. The list will include the standard default TruckMate report(s) and any custom reports created locally using the Crystal Reports application.
Printing a report
Printing the report may involve a few steps since some reports will prompt you to enter some values first to define a range or subset of data before displaying a preview image.
Almost all TruckMate program windows will offer the Print Report menu option in the File menu. To print a report:
-
Ensure you have the desired record or set of records in the current program window.
-
Select the File > Print Reports menu option to open the Report Selection window.
-
Select the desired standard or custom report if more than one report appears in the list.
-
Click the Print Preview button to open the Preview window.
-
Click the
 Print Report button from the toolbar.
Note: If you do not see the toolbar at the top of the window, right-click and select the Toolbar option from the shortcut menu to enable the toolbar.
-
The standard Microsoft operating system Print window for your workstation will appear and allow you to select a printer.
| The Dispatch Load Listing program uses a specialized printing tool called Quick Reports. |
E-mailing/faxing a report
-
Ensure you have the desired record or set of records in the current program window.
-
Select the File > Print Reports menu option to open the Report Selection window.
-
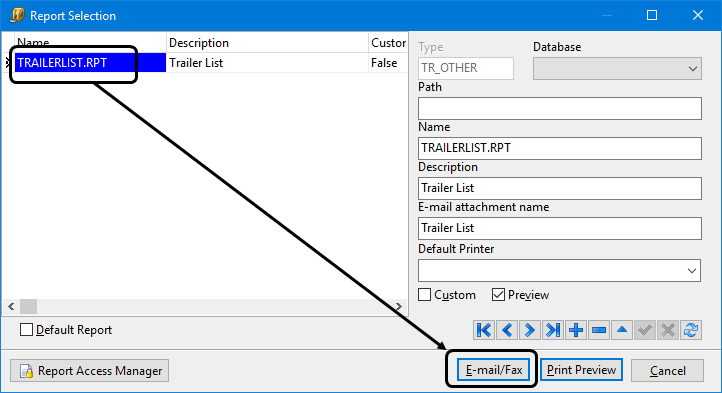
Select the report and click the E-mail/Fax button.
-
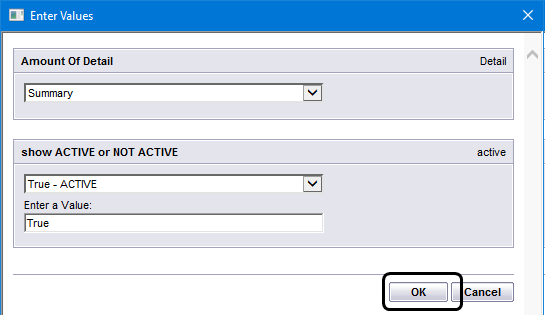
If there are some additional parameters required by the report, an Enter Values window will appear allowing you to control some aspects of the report. Click OK.
-
Set the parameters to filter the data and click OK.
-
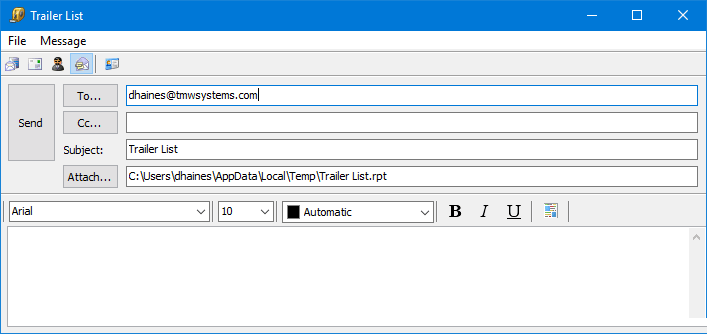
A preview of the report will be displayed and the e-mail window will appear. The report is already attached to the e-mail in .rpt (Crystal Reports) format. Once the e-mail is sent, the .rpt attachment will be converted to a .pdf file.
-
Make whatever changes are required and click Send.
-
The e-mail is processed by the TruckMate E-mail system and sent out. If there is an .rpt file attached, it is automatically converted to .pdf format.
-
To send the message to a fax machine, the receiving fax hardware device must be setup on your network to be able to receive emails as faxes.
Exporting a report
-
Ensure you have the desired record or set of records in the current program window.
-
Select the File > Print Reports menu option to open the Report Selection window.
-
Select the desired standard or custom report if more than one report appears in the list.
-
Ensure the Preview checkbox is selected.
-
Click the Print Preview button to open the Preview window.
-
If there are some additional parameters required by the report, an Enter Values window will appear allowing you to control some aspects of the report. Click OK.
-
Click the
 Export Report button from the toolbar.
 -
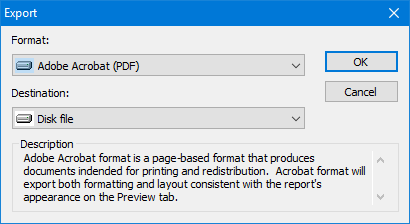
The Export window opens. (This dialog box is part of the Crystal Reports application.)
-
Use the Format drop-down menu to select a document format. (e.g. PDF, CSV, TXT, etc.)
-
Use the Destination drop-down menu to indicate where the file should be created or what the system should do with the report.
-
For example, if the Format is set to Separated Values (.CSV) and you select Application as the destination, the report will be opened using your workstation’s default spreadsheet program. Select Disk File as the destination to store the report as a file on your local hard drive or server.
-
Click OK.
-
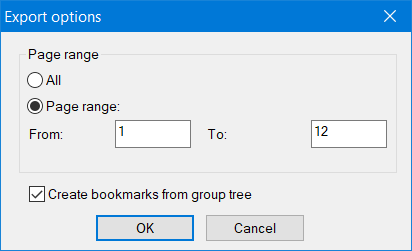
The Export Options window will be displayed with whatever options are appropriate for the selected format and destination.
-
For example, if you selected the PDF format, the Create bookmarks from group tree checkbox may be offered (if appropriate) to allow you to create a PDF file with bookmarks.
-
Enter values for the options and click OK.
-
Depending on the selected format and destination, other windows will be displayed allowing you to store the report as a file, or open an application to display the data, etc.
Printing multi-company reports
For Multi-Company installations there is a configuration option in TruckMate > Utilities > Application Configurator > REPORTS. This setting enables the ability to print reports for other companies.
| Option | Default value | Description |
|---|---|---|
AllowCompanySelect |
False |
When set to True, shows a Company Selector option in the Report Select windows for all the programs that feature Reporting, and adds the Company Selector drop-down menu to the GL Financial Statements program. |
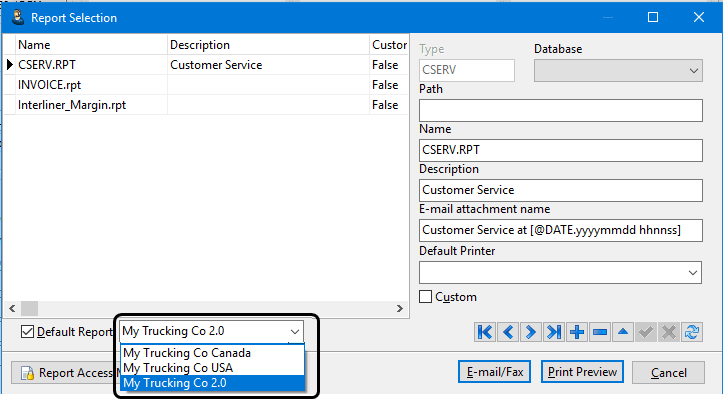
When enabled, the company drop-down list is displayed on the Report Selection window.
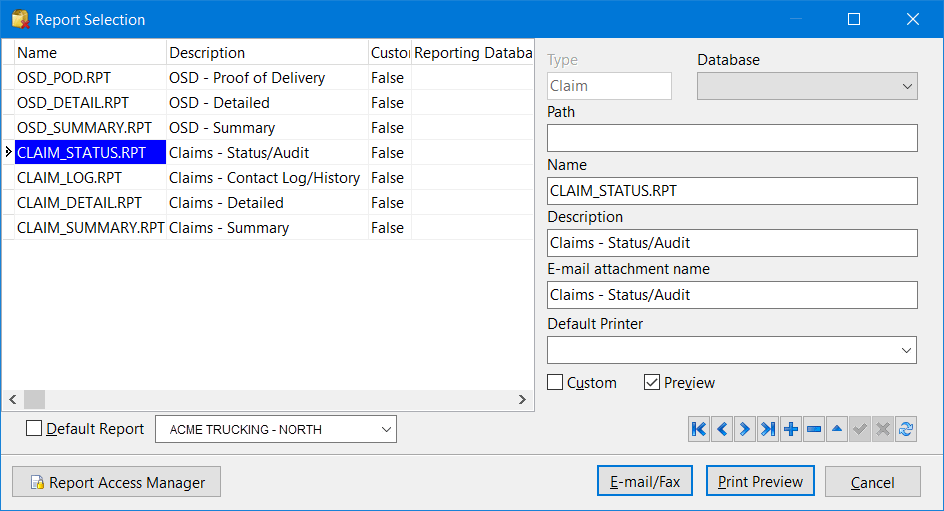
Report Selection window
The Report Selection window is used to select the desired report template for printing. It is also used to register additional custom (and customized) Crystal Report templates with the appropriate relevant TruckMate programs.
Some programs like Profiles > Trailer Profiles are often associated with a single default TruckMate report. Others like Billing > Claims & OSD will be associated with several different standard reports. If your company has created its own custom reports using the Crystal Reports development environment, the report selection window is used to link the new custom report with the relevant TruckMate application.
Note: The standard default TruckMate reports are stored in the Reports directory within the TruckMate program directory location.
(C:\Program Files (x86)\TruckMate 20xx\Reports\).
| Custom report templates must be stored in a folder outside of the standard TruckMate Reports folder to ensure they are not overwritten during a TruckMate software upgrade. |
If the Path field is left blank in the report selection dialog, the system will look for the reports in the default directory. However, if the report path is blank, and the report does not exist in the subdirectory, but it does exist in the application directory, that report will still be loaded (backwards compatibility for hybrid users).
Type |
The Type will default according to the report function that was selected and which program you are working with. When adding a new report template, you cannot change the Type value and it will default to the type associated with the underlying program. |
Path |
To select a different file location for a custom template, enter the path or double-click the Path field for a standard browse window. |
Name |
The name of the Crystal Report template file will be displayed in this field. Enter the name of the report template file here or double-click for a standard browse window. |
Description |
Enter a description of the report template in this field. |
E-mail Attachment Name |
With TruckMate’s e-mail functionality; you can attach reports to e-mails as .PDF documents. If you set an E-mail attachment name value, the .PDF document will be renamed using this value as the attachment name. If no value is specified, the .PDF will use the same file name as the Crystal Report. |
Default Printer |
Use the drop-down list to indicate the desired default printer if this report should be sent to a particular printer for this user. |
Custom |
Default report templates that are distributed with the TruckMate system do not, by default, have this box checked. When entering new report templates, check this box to indicate that the report template is a customized version of a standard TruckMate report, or an entirely custom report template that you have created from scratch. |
Preview |
Toggles the bottom middle button from Print to Print Preview which presents a preview of the report prior to printing. |
Default Report |
You can specify which report template is the default for this reporting function and this user. Select the report and check the Default Report checkbox. Each user can have a different default report template. The default is linked to the user’s login name, as configured in the Security Maintenance program. After you select the desired report template, click OK to continue. In some cases, you will be required to enter selection criteria for the report. When complete, click OK to continue. The report will preview to the screen. |
Company selector |
For Multi-Company installations, there is a configuration option in TruckMate > Utilities > Application Configurator > REPORTS: AllowCompanySelect. When set to True, a Company Selector option is available in the Report Selection window, and a Company Selector drop-down menu appears in the GL Financial Statements program. |
Adding / Editing / Deleting Crystal Reports |
If your TruckMate User has been granted the security privileges to do so in the Security Configuration program > Security > Approving/Printing tab, you can use the standard TruckMate Navigation Bar icons to Add/Edit and/or Delete Crystal Reports displayed in the Report Selection window. |
Report Access Manager |
Opens the Report Access Manager window which allows you to configure which Crystal Reports are available in the TruckMate system, or which reports are available for selection by a particular User Group or a specific TruckMate User. Note: Access to the Report Access Manager requires that the Allow Report Access Management security option is properly configured. See Security Configuration program > Business Events > Approving / Printing tab for more information. |
E-mail/Fax Button |
This button allows the user to e-mail and/or fax the report. This feature has been integrated into the comprehensive TruckMate E-mail System.
Note: Many of the options that control how the generated e-mail will be sent are set on the Codes Maintenance program > E-Mail Setup tab, such as whether to use SMTP or MAPI e-mail functionality, including the server setup (in the case of SMTP) and other criteria. |
Print Preview |
Opens the Report Preview window where you can print or export the report. |
Setting the default path for Report Selection
-
Open the Report Selection window and enter the path into the Path field.
-
The default directory for the TruckMate report templates is:
C:\Program Files (x86)\TruckMate 20xx\Reports\. -
Click
 Post to save your changes.
 -
This is also a convenient way to set other defaults for the Report Selection window such as your Default Printer.
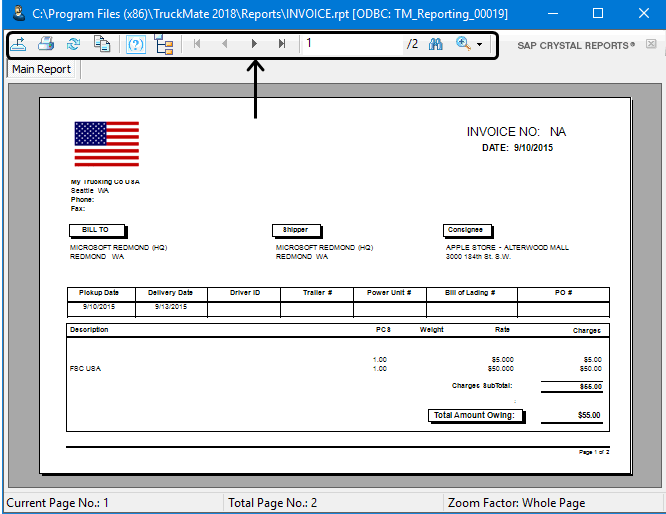
Report Preview window
The Report Preview window includes a toolbar at the top of the window with functions to allow you to print or export the report.
Report Preview toolbar
| Menu option | Toolbar icon | Description |
|---|---|---|
Export Report |
|
Selecting this option allows you to export a Crystal report as a number of different file formats including MAPI to send the report as an e-mail attachment. See Exporting a report. |
Print Report |
|
Sends the currently displayed report preview to the printer currently selected as the default printer for your workstation. |
Refresh |
|
Refreshes the Crystal Report to include any recent data changes. Use this to enter different parameter settings. |
Copy |
|
Copies the currently selected text. |
Toggle Parameter Panel |
|
<Not Used> |
Toggle Group Tree |
|
<Not Used> |
Navigation Controls |
|
View the First, Previous, Next or Last page. |
Page location |
|
Enter a page number to view that specific page. |
Search Text |
|
Displays a pop-up a window and allows you to search for a text string within a generated Crystal Report (allowing you to narrow in on a specific Freight Bill listing on a multi-page invoice report, for example). |
Magnification |
|
Select a percentage value from the drop-down list. |