Security Configuration

The Security Configuration program is used to configure users, user groups, and access rights. Security can be applied at various levels. You can assign the right to run specific programs to specific user groups on the Group tab. Alternatively, you can set rights for all programs on the Group tab. You can apply rights to user groups at the level of the database also. On the DB Rights tab, you can configure rights for specific database tables. On the Security tab, you can set filter defaults, grid customization rights, and access rights for tabs in the Customer Service application.
To access Security Configuration:
| From this location | Go to |
|---|---|
TruckMate Menu and TruckMate Task List |
|
Windows Start Menu |
TruckMate 20xx > Security Configuration |
Windows Explorer |
C:\Program Files (x86) > TruckMate 20xx > Security.exe |
How Do I?
How to Use the Security Configuration application
The Security Configuration application is used to configure users, user groups, and access rights. Security can be applied at various levels. You can assign the right to run specific programs to specific user groups on the Group tab. Alternatively, you can set rights for all programs on the Group tab. You can apply rights to user groups at the level of the database also. On the DB Rights tab, you can configure rights for specific tables in the database. On the Security tab , you can set filter defaults, grid customization rights, and access rights for tabs in the Customer Service application, as well as others.
-
Open Security Configuration.
-
The General tab displays a summary of users and user groups, and shows the rights applicable to the selected user. This tab is a "display-only" tab that summarizes the information entered on the Group and User tabs.
-
A Group is a set of Users that have the same access rights. You need to create the group before you can create individual users. However, you can set the access rights for a group after users have been assigned to it. When you add a new Group, you will be asked if you want to copy User rights from another Group. If you do, select that Group from the drop down list box that will display after clicking the Okay button.
Note: You must have supervisor rights in order to be able to create Groups.
-
The User tab is used to create User IDs and passwords. Users are required to enter their User ID and password each time they start a TruckMate session. After users have entered their User ID and password for the first TruckMate program they open, they will not be required to enter it again when subsequent programs are opened. However, if all TruckMate programs are closed, users will be required to enter their User ID and password when they next open a TruckMate program. If your company uses multiple databases, and you want to have the same user names on each database, make sure that the user names have the same password on each database. For example, if the User name BOB has the password 123456 on database A, the user name BOB must have the password 123456 on database B.
-
The DB Rights tab is used to assign rights to specific database tables. By using this function, you can restrict access to certain aspects of a program, rather than restricting access to the entire program. For example, you might have a group of users who need to use the Codes Maintenance application to add zone codes. However, you do not want them to be able to add or edit Accessorial Charge codes. By applying Read Only rights to all the ACHARGE tables, users in this group would be able to view Accessorial Charge codes, but not add, edit or delete them.
-
The Security (Business Events) tab is used to configure miscellaneous defaults and restrictions for specific Users or for User Groups.
-
The various other settings tabs (tab Settings) are used to configure miscellaneous defaults and restrictions for specific Users or for User Groups.
How to Apply Business Events to a New User
When you use the Security Configuration program to create a new user, Business Events are not automatically applied to that user, even if that user is part of a user group that contains associated Business Events.
-
Create a new user and select its user group on the User tab using the Security Configuration application.
-
During the creation of the new user, the Choose User Settings window will appear, allowing you to either default all Business Events and tab Settings options to selected/un-selected (enabled/disabled) or to copy the settings of an existing user.
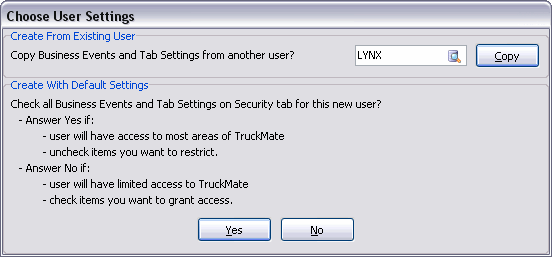
This window allows you to easy ways to set the new user’s access rights:
Create From Existing User
If you would like to assign the new user the access rights of a previously configured TruckMate user, click the Database Search button icon to specify the user you would like to copy from and click the Copy button.
The new user will have all their default access criteria set to those of the existing user.
Create With Default Settings
If you would like to quickly default all of the settings on the Security > Business Events tab and Security > tab Settings tab to selected (enabled), select the Yes button. You can then go through and disable the specific options you do not want the user to have access to.
If you would rather have all the options in these two sections default to un-selected (disabled), select the No button. You can then go through and enable those specific options you wish the user to have access to.
-
Alternatively, you can open the Security tab of the Security Configuration program and choose a user that has had their Business Events previously setup and which is also part of the user group you added your new user into.
-
Click the Apply to Group button to add the Business Events to all users within the user group, including the new user you created.
| If you do not want to propagate the Business Events selections to all the usernames in a specific user group, you must setup the Business Events manually for your new user by going through the menu bar sections and checking the appropriate checkboxes on each page. |
Menu and toolbar options
There are no unique menu and toolbar options and functionality specific to the Security Configuration window.
For information about common menu and toolbar options (i.e. File menu, Refresh, Multi-Company, etc.), see General menu and toolbar options in TruckMate basics.
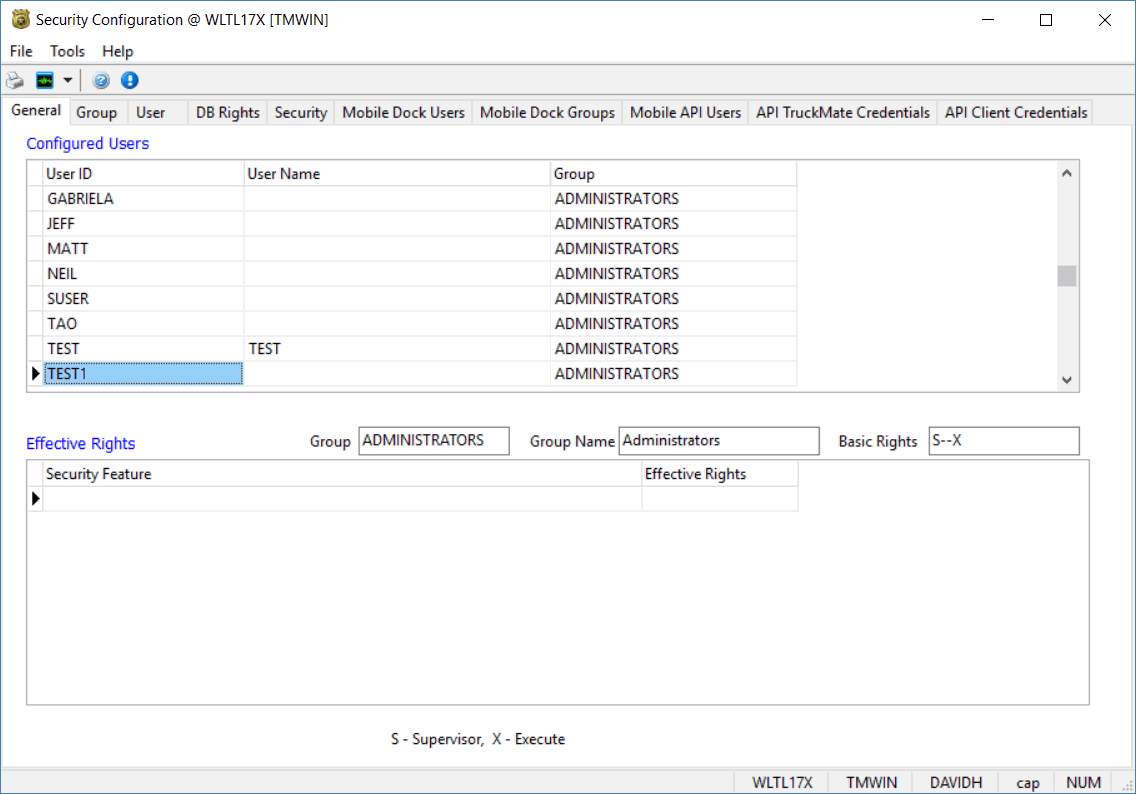
General tab
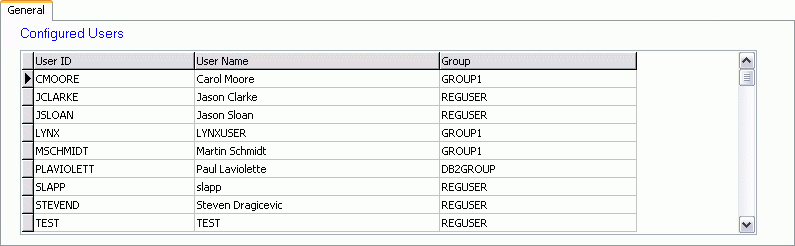
The General tab displays a summary of users and user groups, and shows the rights applicable to the selected user. This tab is a 'display-only' tab that summarizes the information entered on the Group and User tabs. The Configured Users grid (top grid) displays the User ID and User Name, and the group to which the user is assigned. These values are configured on the User tab.
The Effective Rights grid displays the rights for the group to which the user (selected in the Configured Users grid) is assigned. Rights are assigned to user groups on the Group tab.

Group tab
A Group is a set of users that have the same access rights. You need to create the Group before you can create individual users. However, you can set the access rights for a group after users have been assigned to it. When you add a new group, you will be asked if you want to copy rights from another group. If you do, select that group from the drop down list box that will display after clicking the 'OK' button.
Note: You must have supervisor rights in order to be able to create users.
When installing or converting to DB2 and setting up your users, please consider the following steps:
-
Make sure your users on the NT domain or Active Directory are identical to those in TruckMate. The TruckMate user will use his domain password to Login.
-
Ensure that your Active Directory user group is setup exactly like your TruckMate user group. For example: create a goup called TMWIN in the Active Directory (or NT domain) and attach all the TruckMate users to it. In TruckMate, create a user Group with the same name (TMWIN) and all of the same users. If you have sub-Groups for your TruckMate users (such as a Dispatch group,) then you must have the same sub-groups setup in the Active Directory.
-
Proceed with your group creation assignment as usual in the Security Configuration program.
Note: When logging in with DB2, the password used is the NT password.
Group Setup
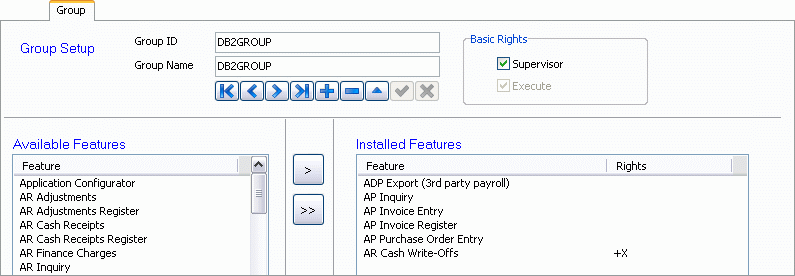
Group ID
Enter a code for the group. This can up to 10 characters in length. When you configure users, you will assign users to a group according to this code.
Group Name
Is used for information and reporting purposes. Enter a description for the Group ID.
Basic Rights
Are the overall rights for all programs. 'Supervisor' gives users who belong to the group all rights to all programs, regardless of the specific program rights configured in the Installed Features grid. 'Execute' gives users who belong to the group the right to execute any program (except Security Maintenance) if no programs in the Installed Features grid are disallowed. You can qualify the rights of a group with Execute Rights by adding (or removing) rights to specific programs using the Installed Features grid. If you do not designate the group as either 'Supervisor' or 'Execute', members of the group will only have access to the programs defined (but not disallowed) in the Installed Features grid.
Note: Certain keywords are reserved for special circumstances and not to be used. If you attempt to use one of the 'reserved' words, you’ll receive an error message. For further assistance, contact your TMW Support representative.
The group SCHEMAOWNER now only has 3 features to assign to it: Database Switcher, SQL Execute and Security Configuration. It’s also no longer able to grant basic execute rights- the 'Execute' checkbox is disabled.
Available Features / Installed Features
The 'Features' available in the Available Features grid largely correspond to programs within TruckMate. However, the 'Checks for Account Payable', 'Checks for Payroll', 'Checks for Driver Pay' and 'Checks for COD' features refer to the ability of users belonging to the selected group to view or print checks of specific types in the Check Printing and Instant Checks applications. For example, if you disallow rights to the 'Checks for Payroll' feature, users belonging to the group will be able to run the check printing applications and print checks of all types except for checks generated by the Payroll Register application.
It is only necessary to configure specific applications rights for user groups whose Basic Rights are neither 'Execute' nor 'Supervisor'. Note that users with Basic Rights set to 'Execute' can be disallowed from certain programs using the Installed Features grid. To add a 'Feature' (ie, a program) to the Installed Features grid, click and drag the feature from the Available Features grid to the Installed Features grid. Alternatively, select an item in the Available Features grid, and click the button labeled with the single arrow that points to the right. To move all items from the Available Features grid to the Installed Features grid, click the button labeled with the double arrow that points to the right.
Rights
After moving features from the Available Features grid to the Installed Features grid, you can specify rights for individual programs by clicking in the Rights field in the grid. A form with three Execute Access options will be displayed. The Disallow option will cause a '-X' symbol to display in the Rights field. The Allow option will cause a '+X' symbol to display in the Rights field. The No Change option will leave the Rights field blank. Remember to post your changes using the button labeled with a check mark symbol in the bottom right corner of the screen.
Disallow
Will prevent users who belong to this Group from running this program (unless they have been assigned the Basic Right of 'Supervisor' in the Group Setup).
No Change
Will use the Basic Rights configured in the Group Setup. Thus, if the Basic Rights are set to 'Execute', the execute right will apply to this program. If neither the 'Supervisor' nor the 'Execute' Basic Right was assigned in the Group Setup, users who belong to this Group will not be able to run this program. If the Basic Right was set to 'Supervisor', rights in the Installed Features grid are ignored.
Allow
Will grant users assigned to the Group the right to run the program.
User tab
The User tab is used to create User IDs and passwords. Users are required to enter their User ID and password each time they start a TruckMate session. After users have entered their User ID and password for the first TruckMate program, they will not be required to enter it again when subsequent programs are opened. However, if all TruckMate programs are closed, users will be required to enter their User ID and password when they next open a TruckMate program. If your company uses multiple databases, and you want to have the same user names on each database, make sure that the user names have the same password on each database. For example, if the user name 'BOB' has the password '123456' on database A, the user name 'BOB' must have the password '123456' on database B.
For a new user to be able to work with TruckMate, several requirements must be met. See Group tab for some important details.
Note: Make your 'user' part of a Group that has Supervisor rights, in order for the grid propagation to work correctly.
User ID
Enter a code for the user. Note that all characters in the User ID must be in upper case. The system will automatically convert any lower case letters to upper case. You cannot include spaces or special characters (ie, asterisks or slashes) in User IDs.
New users will by default have several Tabs disabled in the Customer Service program (and other important applications). Make sure that you use the Security tab to grant and/or disallow access to the areas of TruckMate that this user will need to work with.
You can delete a user by selecting the '-' button on the TruckMate Navigation Bar. When deleting user records, you will be asked to delete all Business Events and tab settings associated with the user. Select 'Yes' to delete these settings (recommended) or 'No' to keep them in the Database.
When creating a new User ID (via the '+' button on the TruckMate Navigation bar) the Choose User Settings window will appear, allowing you to quickly set some options before the user is created.

This window allows you to easy ways to set the new user’s access rights:
-
Create From Existing User
If you would like to assign the new user the access rights of a previously configured TruckMate user, select the Database Search button to specify the user you would like to copy from. Then, simply select the 'Copy' button.
The new user will have all their default access criteria set to those of the existing user.
-
Create With Default Settings
If you would like to quickly default all of the settings on the Security > Business Events tab and Security > tab Settings tab to selected (enabled), select the 'Yes' button. You can then go through and disable the specific options you do not want the user to have access to.
If you would rather have all the options in these two sections default to un-selected (disabled), select the 'No' option. You can then go through and enable those specific options you wish the user to have access to.
Name
Enter the name associated with the User ID. This can be up to 40 characters in length, and is usually the user’s full name.
Title/Job Description
Enter the name title or job description associated with the User ID. This can be up to 40 characters in length.
User Group
Select a user group (as configured on the Group tab) from the drop down list box.
Terminal ID
Use the Database Search button to add a default Terminal ID code for the new user. This will set the default Terminal when opening the City Dispatch program and CrossDock program so that user cannot select an incorrect Terminal.
Terminal ID records are configured in the Terminal Setup form, accessed via the Menu Bar in both the CrossDock and City Dispatch programs. For more information on the Terminal Setup form, click here.
System User
Any user that is expected to use system-wide applications, such as the Mileage Server program, EDI Communications Manger program or Communications Manager program (or any other program that processes jobs across an entire Company installation) will need to have this flag enabled.
Note: This flag SHOULD NOT BE SELECTED for normal users. Only Administrators that need complete database access (or use the above system-wide applications) should have this option flagged.
Search
Selecting the Search button causes a dialog box to open. You are able to search by User ID, or Username.
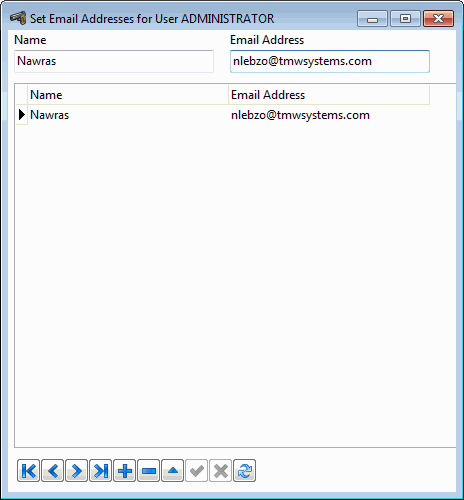
Set Email Address
Selecting this button will invoke the Set e-mail Address window to store e-mail addresses for the selected user. Those e-mail addresses will then be available in the 'From' drop down in Compose e-mail form within TruckMate applications.
DB Rights tab
The DB Rights tab is used to assign rights to specific database tables. For information about database tables, refer to the System tables Index. By using this function, you can restrict access to certain aspects of a program, rather than restricting access to the entire program. For example, you might have a Group of users who need to use the Codes Maintenance program to add zone codes. However, you do not want them to be able to add or edit Accessorial Charge codes. By applying 'Read Only' rights to all the ACHARGE tables, users in this Group would be able to view Accessorial Charges codes, but not add, edit or delete them.
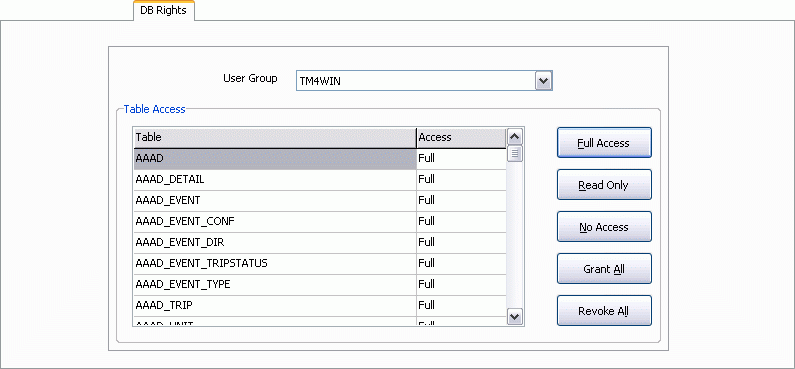
User Group
Select the user group for which you want to configure table Access rights from the drop down list box. Groups are configured on the Group tab.
table Access
Click on the table for which you want to configure rights. The current access rights are displayed in the Access field of the grid.
Full Access
Gives users in the selected user group full access to the selected table. They can add, edit or delete records from the selected table.
Read Only
Gives users in the selected user group 'read-only' access rights to the selected table. They will be able to view records that are stored in the table, but will be unable to add, edit, or delete them.
No Access
Denies users in the selected user group all rights to the selected table. When users of this Group load a program that uses the table to which access has been denied, or switch to a tab in a program that uses the table, a message will be displayed informing the user that they have no permission for the table.
Grant All
Will grant 'Full Access' rights to all tables for the selected user group.
Revoke All
Will grant 'No Access' rights to all tables for the selected user group.
Security tab - General Information
User
Select a User ID from the drop down list box. User IDs are configured on the User tab.
User Group
The Group to which the user belongs will display in this field.
Apply to User
Click this button to apply the settings on the Security tab to the user selected in the user field.
Apply to Group
Click this button to apply the settings on the Security tab to the user group displayed in the user group field.
Note: This button can be disabled via an Application Configurator program option.
Security tab - Business Events Section
The Security Business Events section is used to configure miscellaneous defaults and restrictions for specific users or for groups. It is broken down into seven Tabs: 'Filters', 'grids', 'Communications', 'Approving / Printing', 'Allow Changes', 'Misc' and 'Special Events'. The tab you are currently viewing will have it’s name highlighted with blue text.
Note: When you create a new user, Business Events are not automatically applied to that user, even if that user is part of a user group that contains associated Business Events. For more information on adding Business Events to a new user, see the Need to know How? documentation.
Click on the green links below for more details on a specific Business Events Section tab:
Allow Changes tab
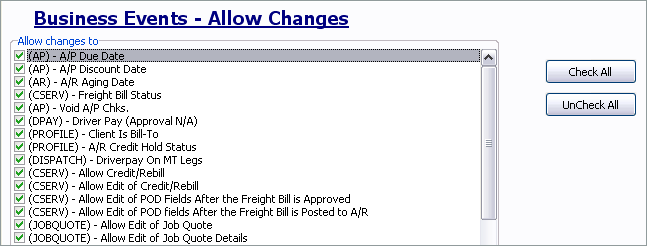
Using the Allow Changes tab you can restrict access to specific options in the following programs by un-checking the corresponding box.
The following sections list options in alphabetical order.
AMAN (Manifest Maintenance)
| Option | Description |
|---|---|
AMAN - Allow Terminal Change |
Enables the Terminal Setup button on the tool bar of the Manifest Manifest (Aman.exe) program used to create and edit terminal definitions. |
AP
| Option | Description |
|---|---|
Allow changes to a closed batch in Pay Bills |
Permits editing a closed batch in the Pay Bills function. |
Allow Edit of A/P Discount Date |
Enables the 'Change Invoice Discount Date' option in the A/P Inquiry program > Invoice menu. |
Allow Edit of A/P Due Date |
Enables the 'Change Invoice Due Date' option in the in the A/P Inquiry program > Invoice menu. |
Allow Edit of A/P Aging Date |
Enables the 'Change Invoice Aging Date' option in the in the A/P Inquiry program > Invoice menu. |
Allow Edit of A/P Payment Hold Status |
Placing a checkmark in this box enables the user to change the Status of Clients who are set to 'Payment Hold' in the A/P Inquiry program. |
Allow Void of A/P Chks |
Now you can specify which users are allowed to void checks. In previous versions, anyone could do it, but it’s recommended that those in authority have this enabled. Checks can be voided from the Employee Profile program, the A/P Inquiry program, the Bank Reconciliation program, and the Driver Pay Audit program. |
APNCR
| Option | Description |
|---|---|
APNCR - Allow Service Configuration Button |
Enables the Check Register program > Windows Service tab > Service Configuration button used to configure a Windows service. |
AR
| Option | Description |
|---|---|
Allow Edit of A/R Aging Date |
Placing a checkmark in this box enables a right-mouse menu option in the AR Inquiry program. |
Allow Edit of A/R Credit Hold Status |
Placing a checkmark in this box enables the user to change the Status of Clients who are set to 'Credit Hold' in the AR Inquiry program. |
Allow Edit of A/R Credit Limit |
Allows a user or user group to change the 'Credit Limit' field (on the Customer Profiles program > Credit Info tab). |
Allow Edit of Client-is-Bill-to |
Placing a checkmark in this box enables the user to change the 'Bill To' status of a Client attached to an invoice in the AR Inquiry program. |
Allow Edit of Customer Collection Information |
Allows the selected user to add Notes to the Customer Collection Information window in the AR Inquiry program. If this option is unchecked, the user will be able to access the window using the Customer Collection Information button on the toolbar, but will not be able to enter/modify the contents of the window. |
Allow Edit of Statement Numbers |
Allows the selected user access to the 'Add to Statement' and 'Remove from Statement' options in the AR Inquiry program’s 'Invoice' menu as well as the two program grids. |
Allow Void of A/R Cash Receipts |
Allows a user or user group the ability to use the 'Void/Reverse Cash Receipt (NSF)' option on the AR Inquiry > Payment History window. |
BILLCONS
| Option | Description |
|---|---|
Allow Commit - One Group |
Allows the selected user the permission to use the 'Commit - All Groups' Context Menu option in the New tab of the Billing Consolidation program. |
Allow Setup Filters |
Allows the selected user the permission to access the Filter Setup window in the Billing Consolidation program. |
Allow Setup Processing Options |
Allows the selected user the permission to access the Processing Options Setup window in the Billing Consolidation program. |
Allow Undo Void (Regroup) |
Allows the selected user the permission to use the 'Undo Void (Regroup)' Context Menu option in the Committed tab of the Billing Consolidation program (available when the 'View' is set to 'Voided Groups'). |
Allow Void - All Groups |
Allows the selected user the permission to use the 'Void/Ungroup - All Groups' Context Menu option in the Committed tab of the Billing Consolidation program. |
Allow Void - One Group |
Allows the selected user the permission to use the 'Void/Ungroup - One Group' Context Menu option in the Committed tab of the Billing Consolidation program. |
CARDMGMT
| Option | Description |
|---|---|
Allow Cancel of E-Checks |
This setting enables / disables the ability to cancel created E-Checks in the Card Management program > E-Checks tab for the selected user. |
Allow Edit of Auto-Approve Flag in E-Checks |
This setting enables / disables the use of the 'Approve' flag in the Card Management program > E-Checks tab for the selected user. |
Allow Edit of Deduction Code in E-Checks |
This setting enables / disables the ability of users to change the Deduction Code attached to an E-Check on the Card Management program > E-Checks tab. |
Allow Edit of Post Flag in E-Checks |
This setting enables / disables the use of the 'Post' flag in the Card Management program > E-Checks tab for the selected user. |
Allow Issue of E-Checks |
This setting enables / disables the ability to issue E-Checks in the Card Management program > E-Checks tab for the selected user. |
Allow Log Purge |
This setting enables / disables the ability to purge the Logs in the Card Management program > Log tab for the selected user. |
Allow POS Purge |
This setting enables / disables the ability to purge the Point of Sale records in the Card Management program > POS tab for the selected user. |
CHKREC
| Option | Description |
|---|---|
Allow View of Direct Deposits |
This setting enables / disables the ability to drill down direct deposit records in the Bank Reconciliation Program. |
CITYDISP
Option |
Description |
Allow Create/Edit Trip Schedules |
This setting enables / disables the Tools Menu > 'Edit Trip Schedules' option in the City Dispatch program. |
Allow Generate Trips from Trip Schedules |
This setting enables / disables a specific user from being able to create Trips based on Trip Schedule information in the City Dispatch program. |
Allow Terminal Change |
This setting enables / disables the ability of a User to change Terminals (via the 'Terminal Select' Toolbar option) in the City Dispatch program. With this option disabled, the user will be restricted to working within their default Terminal (as configured on the User tab > 'Terminal ID' field). |
CLAIM
Option |
Description |
Allow Setup of Claim Types |
This setting enables / disables the ability of a user to setup Claim Types in the Claims program. |
Allow Setup of Status Codes |
This setting enables / disables the ability of a user to setup Claim Status Codes in the Claims program. |
CODES
Option |
Description |
Allow Edit of Acc.Codes Header |
This setting if checked allows the user to edit the 'Accessorial Codes' header information in Codes Maintenance > Accessorial Charges tab. If unchecked the user would still be able to find and view accessorial codes but will get an error if he tries to insert, delete or edit an accessorial code; this restriction applies only to the header section, the restricted user can still edit the details section of an accessorial code. |
Allow Modify/Delete of OP Codes |
This setting enables / disables the ability of a user to modify and/or delete Operations Codes while working on the Codes Maintenance program > OP Codes tab. |
CONINV
| Option | Description |
|---|---|
Allow Yard Management Edit |
This setting enables/disables the ability of a user to edit the equipment information once they are In-Gated in the yard (Container Depot) in Container Inventory control Program. |
CROSSDOCK
| Option | Description |
|---|---|
Allow Create/Edit Trip Schedules |
This setting enables / disables the Tools Menu > 'Edit Trip Schedules' option in the Crossdock program. |
Allow Generate Trips from Trip Schedules |
This setting enables / disables a specific user from being able to create Trips based on Trip Schedule information in the Crossdock program. |
Allow Terminal Change |
This setting enables / disables the ability of a user to change Terminals (via the 'Terminal Select' Toolbar option) in the Crossdock program. With this option disabled, the user will be restricted to working within their default Terminal (as configured on the User tab > 'Terminal ID' field). |
CSERV
CRM
| Option | Description |
|---|---|
Allow add/edit/delete of agents on appointments for which the user is not the organizer |
Selecting this option will allow the selected group/user to (add/edit/delete) agents on appointments even if the selected user is not the 'Organizer' of an 'Appointment' in Customer and Vendor Profiles > Appointments Window > Details/Attendees section > Agents tab |
Allow add/edit/delete of contacts on appointments for which the user is not the organizer |
Selecting this option will allow the selected group/user to (add/edit/delete) 'Contacts' on 'Appointments' even if the selected user is not the 'Organizer' of an 'Appointment' in Customer and Vendor Profiles > Appointments Window > Details/Attendees section > Contacts tab |
Allow deleting of appointments for which the user is not the organizer |
Selecting this option will allow the selected group/user to delete appointments even if the selected user is not the 'Organizer' of an 'Appointment' in Customer and Vendor Profiles > Appointments Window. |
Allow edit of basic appointment info for which the user is not the organizer |
Selecting this option will allow the selected group/user to edit basic appointment information even if the selected user is not the 'Organizer' of an 'Appointment' in Customer and Vendor Profiles > Appointments Window. |
Allow edit of 'For' filter to view other appointments |
Selecting this option allows the user to change the appointment selecting filter, to be able to view appointments set for different parties ('Agent', 'Client', 'Agent fora client/vendor', 'Contact of a client/vendor' or 'All') in Customer and Vendor Profiles > Appointments Window. |
Allow viewing of appointments for which the user is neither the organizer nor an agent |
Selecting this option allows the selected group/user to view appointments event if the selected user is neither the organizer of the appointment nor the agent in Customer and Vendor Profiles > Appointments Window. |
Allow viewing of detail info (subject/location) on conflict appointments |
This option if selected, will allow the user to view detail information like the 'Subject' and the 'Location' of conflicted appointments, in Customer and Vendor Profiles > Appointments Window > Details/Attendees section > Agent Conflicts/Contact Conflicts Tabs. |
DISPATCH
| Option | Description |
|---|---|
Allow Cancellation of Active Trip |
If this option is selected for you, you will be allowed to cancel an active trip. If this option is not selected for you, and you try to cancel an active trip you will be stopped. Even though this option is setup for dispatch, the same concept is enforced on any cancellation attempts from Multi Modal dispatch, City Dispatch or IMC plan in Customer Service. |
Allow Carrier Assignment when Safety Rating Red Limit Exceeded |
If this option is checked, this particular user will be able to override a Carrier411 rejection notice when attempting to assign a Carrier with a safety rating that exceeds the Red Limit in Dispatch program > Carrier Assign window. |
Allow Carrier Assignment when Safety Rating Yellow Limit Exceeded |
If this option is checked, this particular user will be able to override a Carrier411 rejection notice when attempting to assign a Carrier with a safety rating that exceeds the Yellow Limit in Dispatch program > Carrier Assign window. |
Allow Create/Edit Trip Templates |
This setting enables / disables the use of the 'Trip Templates' form (accessible from the Dispatch program > Tools Menu) for the selected user. |
Allow Create Trips from Trip Templates |
This setting enables / disables a specific user from being able to create Trips based on Trip Template information in the Dispatch program > Trips grid. |
Allow Dispatch Resource Repositions |
Allows the selected user the permission to Reposition Dispatch Resources. |
Allow Load Offer All Trips |
This setting enables / disables the ability to create Load Offers for all Trips available on the Dispatch program > Trips grid (using the 'Load Offer for All Trips in this Filter' option). |
Allow Resource Reposition / Status Change - Driver/Chassis/Container/Misc. Equipment/Power Unit/Trailer |
These six options serve the same purpose but for different resources. Selecting any of these options will allow the selected group/user to Reposition and/or Change Status of the corresponding resource, using the right-mouse click in Dispatch > Resources tab. |
Allow Trip Status Change Without Chassis |
Allows the selected user to change Trip Status values without having a Chassis assigned to the Trip. |
Allow Trip Status Change Without Container |
Allows the selected user to change Trip Status values without having a Container assigned to the Trip. |
Allow Trip Status Change Without Driver |
Allows the selected user to change Trip Status values without having a Driver assigned to the Trip. |
Allow Trip Status Change Without Miscellaneous Equipment |
Allows the selected user to change Trip Status values without having any Miscellaneous Equipment assigned to the Trip. |
Allow Trip Status Change Without Power Unit |
Allows the selected user to change Trip Status values without having a Power Unit assigned to the Trip. |
Allow Trip Status Change Without Trailer |
Allows the selected user to change Trip Status values without having a Trailer assigned to the Trip. If this option is not selected for you, you can’t change the status of a trip that has no trailer assigned to it. The update button in the status change window will be disabled. However, there is one exception to this, if the next leg has no freight bill assigned to it, TruckMate will assume it’s a Bobtail, and will allow the status change regardless of the value of this option. |
Allow Trip Status Change for Freight Without Trailer |
Allows the selected user to change Trip Status value when there is Freight on a Trip without a Trailer. |
Allow Trip Status Change for Freight Without Container |
Allows the selected user to change Trip Status value when there is Freight on a Trip without a Container. For example, a truck can proceed through empty legs of a trip to pick up a resource ( a container for instance) before moving on to pick up freight. |
Driver Pay on MT Legs |
Allows the selected user to apply Driver Pay to a Driver who is performing Empty Trip Legs (reposition legs). |
DRIVERPAY
| Option | Description |
|---|---|
Driver Pay (Approval N/A) |
Allows the selected user to approve Driver Pay records within a variety of TruckMate applications. By unchecking this item for a user, that user will still be able to view and approve Driver Pay and Driver Deductions, but not add, delete or update them. |
HRRECRUIT
| Option | Description |
|---|---|
Allow Status Change to ACCEPTED |
Allows the selected user the permission to set prospective Employee Statuses to 'Accepted' when the Company has decided to hire them. |
IPIIPM
| Option | Description |
|---|---|
Allow Import of Unposted IP Records |
Allows the selected user to access 'N' status records (i.e. IP charges from freight bills that have not yet been passed through the Billing Rester) in the IP Audit program. If this flag is unchecked, the selected user will not see the 'Unposted IP' flag in the lower grid of the IP Audit program. |
Allow Reversal and Recreate of IP Register |
If this option is checked the user will have the ability to credit and rebill IP records. If this option is not checked, the user will not have the ability to credit and rebill IP records and the option will be grayed out on the Interliner Details grid right click menu. |
Booking # Processing - Allow Mark as Processed |
Allows the selected user to use the Booking # form and mark Booking Numbers as 'Processed'. |
Allow Write Off in Bulk |
Allows the selected user to write off several entries simultaneously. |
Allow Selection of New/Unapproved Status Without Trip Number Specified |
If this option is selected for a user, the user will be allowed to select and view 'New/Unapproved' IP records even if there is no trip number specified in the 'Filter By Trip' field. If not selected for a user, a trip number must be provided in the 'Filter By Trip' field in order for 'New/Unapproved' IP records to be fetched and displayed. |
IPIIPR
| Option | Description |
|---|---|
IPIIPR - Allow Service Configuration Button |
Enables the Interline Payable Audit Register program > Windows Service tab > Service Configuration button used to configure a Windows service. |
JOBQUOTE
| Option | Description |
|---|---|
Allow Edit of Job Quote |
Allows the selected user to edit Job Quote information within the Job Quote application. |
Allow Edit of Job Quote Details |
Allows the selected user to edit Job Quote details within the Job Quote application. |
Allow Edit of Job Quote DriverPay |
Allows the selected user to edit Job Quote Driver Pay information within the Job Quote application. |
Allow Edit of Job Quote Preferences |
Allows the selected user access to the Preferences options within the Job Quote application. |
Allow Edit of Job Quote Setup |
Allows the selected user access to the Setup options within the Job Quote application. |
MMDISP
| Option | Description |
|---|---|
Allow Delivery of Split Bill |
Allows the selected user to assign a split freight bill (prior to merger) to a delivery trip. |
PAYAUDIT
| Option | Description |
|---|---|
Allow Import to Driver Deductions |
Selecting this option for a user will allow the user to use the Import Driver Deductions feature to import driver deductions from a text file. |
Allow Import to Driver Pay |
Selecting this option for a user will allow the user to use the Import Driver Payments feature to import driver payments from a text file. |
Apply Terminal Filter Security |
If this option is checked, it will grey out the Driver Pay Audit program’s 'Terminal' Filter and check it off. |
PROFILE
| Option | Description |
|---|---|
A/R Credit Hold Status |
Allows the selected user the ability to set a Client to 'Credit Hold' status on the Customer Profiles program > Credit Info tab. |
Client is Bill-To |
Allows the selected user the ability to default a Client record to always be the Bill-To party of a Freight Bill, using the Customer Profiles program > Notes tab. |
ROUTESMANAGEMENT
| Option | Description |
|---|---|
Allow Create Trip |
Allows the user to create Dispatch Trips whle using the Routes Management program. |
Allow Edit Routes |
Allows the user to edit imported routes while using the Routes Management program. |
Allow Import |
Allows the user to complete a Routes import using the Routes Management program. |
SAFETY
| Option | Description |
|---|---|
Allow Change of Completed Incident Record |
This setting allows/disables the ability for a user to update an Incident record in the Safety & Compliance program after it has been completed. |
Allow Delete of Incident Record |
This setting allows/disables the ability to delete Incident records in the Safety & Compliance program for the selected user. |
TIMESHEET
| Option | Description |
|---|---|
Allow Viewing Restricted Batches |
This setting enables / disables the ability to view Restricted Payroll Batches while browsing records in the Payroll Time Sheets program for the selected user.
|
Approving/Printing tab
Notice that there’s now an Approving/Printing section in the Invoice Printing program where you can specify further user options. Place a checkmark in the spaces provided if you wish a user to have Freight Bill approval authority, edit any approved Freight Bills, unapprove a Freight Bill, create a status update on invoice printing, create a status update on statement printing (a new program), and create a status update on the billing register. No checkmark in these options will result in a grayed out (disabled) area appearing in the appropriate program.
Allow Approve FB
Placing a checkmark in this box determines who has Freight Bill approval.
Allow Edit of Approved FB - Main
Placing a checkmark in this box allows editing the header section of approved Freight Bills.
Allow Edit of Approved FB - Trace No’s
Placing a checkmark in this box allows editing of approved Freight Bill’s Trace Numbers.
Allow Edit of Approved FB - user Fields
Placing a checkmark in this box allows editing of approved freight bill’s user fields.
Allow Edit of Approved FB - IM tab
Placing a checkmark in this box allows editing of Intermodal tab details on previously approved Freight Bills.
Allow Edit of Approved FB - IP tab
Selecting this checkbox allows the selected user/group to edit the Interline Payable tab in Customer Service program even if the freight bill has been already approved.
Allow Edit of Approved FB - Driver Pay tab
Placing a checkmark in this box allows the user to edit Driver Pay after a freight bill has been approved. Otherwise, the user cannot edit driver pay on an approved bill.
Allow Edit of Approved FB - Checklist tab
Placing a checkmark in this box allows the user to edit Checklist Items after a freight bill has been approved. Otherwise, the user cannot edit checklist items on an approved bill.
Allow Edit of Docked FB - Main
Placing a checkmark in this box allows editing the header section of freight bills that are in a DOCKED status.
Allow Edit of Docked FB - Trace No’s
Placing a checkmark in this box allows editing the Trace Numbers of freight bills that are in a DOCKED status.
Allow Edit of Docked FB - User Fields
Placing a checkmark in this box allows editing the user fields of freight bills that are in a DOCKED status.
Allow Edit of Docked FB - IM tab
Placing a checkmark in this box allows editing of Intermodal tab details on freight bills that are in a DOCKED status.
Allow Edit of Docked FB - Driver Pay tab
Placing a checkmark in this box allows the user to edit Driver Pay on a freight bill that is in a DOCKED status.
Allow Unapprove FB
Placing a checkmark in this box determines who has the veto (un-approval) authority for previously approved Freight Bills. In other words, once a Freight Bill has been approved, the user who has a checkmark in this box has the authority to veto (unapprove) a Freight Bill.
Allow Status Update on Invoice Printing
Placing a checkmark in this box allows for status updates to be selected to occur during invoice printing.
Allow Status Update on Statement Printing
Placing a checkmark in this box allows for status updates to be selected during statement printing.
Allow Status Update on Billing Register
Placing a checkmark in this box allows for status updates to be selected during the Billing Register printing.
Allow Edit of Posted (Bill Reg) FB - Trace No’s
Placing a checkmark in this box allows editing of posted Freight Bill’s Trace Numbers in the Customer Service program.
Allow Edit of Posted (Bill Reg) FB - User Fields
Placing a checkmark in this box allows editing of posted Freight Bill’s user fields in the Customer Service program.
Allow Edit of Posted (Bill Reg) FB - IM tab
Placing a checkmark in this box allows editing of posted Freight Bill’s Intermodal tab details in the Customer Service program.
Allow Edit of Consolidated FB - IM tab
Placing a checkmark in this box allows editing of Intermodal Details for individual Freight Bills on a the IM tab of a Master Freight Bill in the Customer Service program.
Allow Edit of Posted (Bill Reg) FB -IP tab
Selecting this option allows editing of posted (run through the Bill Register) Freight Bill’s Interline Payable tab in Customer Service program.
Allow Edit of Posted (Bill Reg) FB - Pickup Details
Placing a checkmark in this box allows editing of posted Freight Bill’s Pickup Details in the Customer Service program (via a pop-up window accessed by double-clicking the 'Date' field.)
Allow Edit of Posted (Bill Reg) FB - Delivery Details
Placing a checkmark in this box allows editing of posted Freight Bill’s Delivery Details in the Customer Service program (via a pop-up window accessed by double-clicking the 'Date' field.)
Allow Edit of Posted (Bill Reg) FB - Status Changes
Placing a checkmark in this box allows Status Changes on a posted Freight Bill’s in the Customer Service program.
Allow Printing of Freight Bills (Invoice Print)
This flag allows / disallows printing from within the Invoice Print program for the selected user. If un-checked ('False'), only 2 options will be shown in Invoice Print:
'Delivery Receipt (Unprinted)' and 'Delivery Receipt (Printed or Unprinted)'.
Allow Posting of Payments & Deductions (Driver Statements)
This flag allows/disallows the user from posting Driver Pay and/or Driver Deductions while working with the Driver Pay Statements program.
Allow Adding / Editing Reports (Report Selection Dialogue)
This flag allows/disallows the user from Adding (or Editing existing) Crystal Reports on the Report Selection window.
Allow Deleting Reports (Report Selection Dialogue)
This flag allows/disallows the user to Delete existing) Crystal Reports from the Report Selection window.
Allow Report Access Management (Report Selection Dialogue)
This flag allows/disallows the user from accessing the Report Access Management window from the Report Selection window.
Communications tab
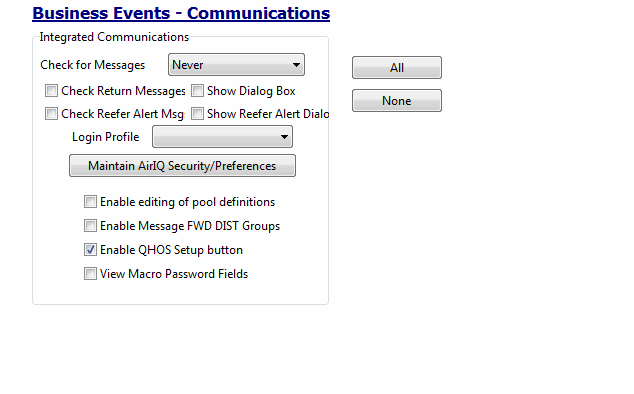
We have a mobile communications module where you can determine how often they want users (and each one can be different) to check for messages either every hour or every 10 minutes. You can select one for each user, or the entire Group. As well, you can show a dialog box explaining that there is new mail, if you so desire.
Check for Messages
Select the drop-down menu and view all options available.
Check Return Messages
Select this option if you want to enable the selected group/user to be able to check the return messages sent back from different resources.
Show Dialog Box
Select if you would like to view a new mail dialog box when new mail arrives.
Check Reefer Alert Messages
Selecting this option will allow the selected group/user to check alert messages generated by reefer monitoring systems.
Show Reefer Alert Dialog
This option if selected will shoe the reefer alert dialog for the selected group/user.
Login Profile
Use the pull-down arrow to view Login choices.
Maintain AirIQ Security Preferences
Selecting this button opens the AirIQ Setup dialog box where you can specify your profile name, Username, and password, as well as other specific requirements. See below for more information on Maintaining AirIQ Security Preferences.
Enable editing of pool definitions
Checking this box allows the Editing of Pool Definitions.
Enable Message FWD DIST Groups
Selecting this option enables the Manage Forward Message Distribution Groups window in the Driver Call-In program.
Enable QHOS Setup button
Selecting this option allows the user to access the 'QHOS Setup' button in the Driver Profiles program and Power Unit Profiles program, allowing you to manage the QHOS Depots.
View Macro Password Fields
Certain Macros used by the Mobile Communications module may contain Password information (the 'Request Payroll' macro, for example). With this flag selected, you will be able to see these passwords as they are entered in these Macros, which is a possible security risk.
If you wish to have the password data replaced by asterisks (*) ensure that this flag is NOT selected.
Filters tab
Filters
In the Customer Service program (on the Filters tab), in the Dispatch program (on each right mouse grid menu) and in the Local Dispatch program, users can create filters that limit the data that displays in the grid. If the 'Allow Filter Setup' box is checked, users have access to the Filter functions mentioned above, and can select from all available saved filters. If the box is not checked, the Filter functions will not be available, and users cannot select filters.
Note: Users can only access the CServ’s Filter tab options when this flag is checked.
Default Filters
This group of drop down list fields, allows the administrator to set a default filter for a selection of grids (based on each drop down list). The grids are from different TruckMate applications. A different setup can be used for each user or group. When the user accesses one of the grids, the selected default filter for that grid will be available and accessible by the user. The following is a list of available grids from different TruckMate applications that can have a default filter set for them:
AP Purchase Order Entry
You can select a default filter for the Purchase Order Entry program. Select a filter from the drop down list.
Customer Service
You can specify a default filter that will apply to the Customer Service program > Filters tab. If the 'Allow Filter Setup' box is not checked, users will not be able to select a different filter, or configure their own. Select a pre-defined filter from the drop down list box.
Dispatch
In the Dispatch program, filters can be configured for each grid by selecting the grid Name (blue text). grid Filters can be Grouped together to form Filter Templates, which are applied using the drop-down menu at the bottom of the Dispatch program window. You can specify a default filter template for this user (or user group) by selecting a filter template title from the drop down list box. If the 'Allow Filter Setup' box is not checked, users will not be able to select a different filter template, or configure their own.
Local Dispatch
In the Local Dispatch program, users can configure filters for the Freight Bill grid. If the 'Allow Filter Setup' box is not checked, users will not be able to select a different filter, or configure their own. Select a pre-defined filter from the drop down list box.
City Dispatch Deliveries
In the City Dispatch program, users can configure Filters for Deliveries. The Administrator can select one of these Delivery Filters to be the default for users that log into the City Dispatch program.
City Dispatch Pickups
In the City Dispatch program, users can configure Filters for Pickups. The Administrator can select one of these Pickup Filters to be the default for users that log into the City Dispatch program.
Crossdock
This allows users to control access to filters in the CROSSDCK.EXE program.
MMDisp
For the Multimode Dispatch program you can set default filters in multiple different grids. Each grid has a separate drop down list for default filter selection. Select a default filter from the desired drop down list(s). The following drop down lists are available for Multi Mode Dispatch:
-
MMDisp Doors
-
MMDisp Inbound
-
MMDisp Outbound
-
MMDisp P&D
-
MMDisp Planning
-
MMDisp Trips
Allow Change
Checking the 'Allow Change' flag for any of the default Filters attached to an application will enable users to change filter from that set as the default while working in the respective TruckMate program.
CServ’s Filter tab
Allow INSERT
With this option checked, the user will be able to use the 'INSERT' command in any custom SQL Filters on the Customer Service program > Filter tab.
Allow EDIT/DELETE
With this option checked, the user will be able to use the 'EDIT' and 'DELETE' commands in any custom SQL Filters on the Customer Service program > Filter tab.
AR Inquiry Filters
Allow Clear/Edit Filter - Collector
If this flag is unchecked, then when the user launches the AR Inquiry program, the 'Filter on Collector' filter will be checked, the drop-down will be set to their login User ID, and both the checkbox and drop-down will be disabled. In other words, they will only be allowed to access clients for whom they are the collector.
When checked, the user will have full control on enabling/disabling this filter as well as choosing from any User ID in the system when filtering on collector.
Allow Clear/Edit Filter - Sales Agent
If this flag is unchecked, then when the user launches the AR Inquiry program, the 'Filter on Sales Rep/Agent' filter will be checked, the drop-down will be set to their login User ID, and both the checkbox and drop-down will be disabled. In other words, they will only be allowed to access clients for whom they are the sales agent.
In order for this functionality to fully operate, you need to either:
-
Set the Application Configurator program > CSERV.EXE > 'Sales Agent' config option to 'V' (vendor/user), or
-
If the config is set to 'E' (Employees) or 'D' (Drivers), make sure to include all your login User ID’s in either the Employee Profiles program or Driver Profiles program.
Either way, the 'Sales Rep/Agent' field on the Customer & Vendor Profiles program > Customer > Misc tab must also be populated for all clients.
When checked, the user will have full control on enabling/disabling this filter as well as choosing from any User ID in the system when filtering on sales rep/agent.
Allow Clear/Edit Filter - Active
If this flag is unchecked, then when the user launches the AR Inquiry program, the filter will be disabled and set to 'Active Only'; in other words, the user will not be able to access inactive/terminated clients.
If this flag is checked, then, as usual, the user may chose among 'Active', 'Terminated Only' or 'All' customers and their choice is "remembered" to registry when they close AR Inquiry and reset to the remembered choice the next time they run AR Inquiry on that machine.
grids tab

These settings enable / disable several options available via the right-click Context Menu in all TruckMate programs.
Allow grid Customization
If this box is checked, the Customize grid context menu option will be available, and the user (or user group) will be able to change the grid layout. If this box is not checked, the menu option will be displayed in grey text, and will not be available for selection.
Allow grid Propagation
In the Customize grid form, there is a button labeled 'Propagate to All users'. This button is used to distribute the changes made to the grid to all users. If the Allow grid Propagation box is checked, users will be able to use this button. If the box is not checked, the 'Propagate to All users' button will not be available.
Allow Show SQL
This setting enables / disables the 'Show grid’s SQL' option, available for all the grids in TruckMate applications (via the right-click Context Menu). This option allows a user to see the SQL language 'SELECT' statement that is used to populate the selected grid. Disabling this option can prevent users from modifying a SELECT statement to access sensitive information.
Allow Save to File
This setting enables / disables the 'Save grid Contents to File' option, available for all the grids in TruckMate applications (via the right-click Context Menu). This option allows a user to save the contents of a program grid to an external file (.TXT or .CSV).
Miscellaneous tab
The Miscellaneous Business Events have been divided into separate Tabs, to ease organization and use.
The following tab buttons work within whatever tab is currently displayed.
-
Check All
Select this button to quickly check all options available in the Business Events - Miscellaneous window.
-
Drilling Down
Clicking this button opens a new window where you may select which accounts to allow the current user 'Drill Down' functionality. Check the accounts within the GL Chart of Accounts program you would like to grant 'Drill Down' access to, and click 'OK'.
-
UnCheck All
Select this button to quickly un-check all options available in the Business Events - Miscellaneous window.
AR Cash Receipts tab
Underpayment Threshold
This field designates the 'Underpayment Threshold' for the A/R Cash Receipts program. If you have a value of '600' (dollars) in this field, when you have a bill for $4000 and payment is $3600, there are $400 outstanding which will be compared to the Underpayment Threshold value. So if underpayment of $400 is less than $600 (threshold), a Write Off is automatically created for the remaining $400.
Overpayment Threshold
This field designates the 'Overpayment Threshold' for the A/R Cash Receipts program. If you have a value of '500' (dollars) in this field, when you have a bill for $4000 and payment is $4200, there is extra $200 that will be compared to the Overpayment Threshold value. So if overpayment of $200 is less than $500 (threshold) a Write Off is automatically created for the remaining $200.
Card Management tab
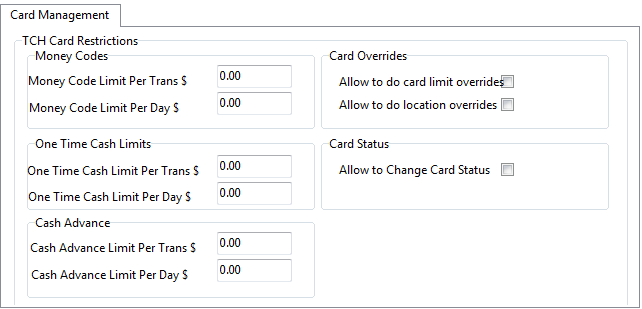
This tab can be used to impose restrictions on users when setup TCH cards. In other words, the restrictions defined in this tab, will apply to the selected user / group when setting up TCH cards to be used by card holders.
Money Codes
Money Code Limit Per Trans $ / Money Code Limit Per Day $
These fields can be used to restrict the amount of money code limit that the selected user / group is allowed to set on a card. The restriction can be imposed per transaction or per day. Enter the desired dollar value limit in the appropriate field.
Card Overrides
Allow to do card limit overrides / Allow to do location overrides
These fields control the ability of a user to allow over rides on a TCH card. The selected user / group can be allowed / disallowed to grant override rights on a card. Both card limit overrides and location overrides can be controlled. Select the checkbox of the override type you want the user to be able to allow on a TCH card.
One Time Cash Limits
One Time Cash Limit Per Trans $ / One Time Cash Limit Per Day $
These options limit the ability of the selected user / group to set cash limits on cards. Cash limit per transaction and cash limit per day can both be limited. Insert the amount you want the user to be able to allow as cash limit on a TCH card. Insert the amount in the type of cash limit you want to restrict (transaction / day).
Card Status
Allow to Change Card Status
Selecting this checkbox will allow the selected user / group to change the TCH card status. Don’t select if you want the selected user / group to be disallowed from changing TCH card status.
Cash Advance
Cash Advance Limit Per Trans $ / Cash Advance Limit Per Day $
These fields can be used to restrict the amount of cash advance limit that the selected user / group is allowed to set on a card. The restriction can be imposed per transaction or per day. Enter the desired dollar value limit in the appropriate field.
Container Inventory tab
No Disp Checkbox visible
Check this option to disallow the option of using the Dispatch checkbox within the Container Inventory Control program.
Allow Setting No Charge Checkbox
This flag will allow / disallow access to the 'No Charge' flag within the Container Inventory Control program > InGate section.
Customer Profiles tab
Filter by Status Sub-tab
This sub-tab can be used to control group/user access to client records based on client status. All available Client statuses are listed with a drop down list button for each. Select the type of access you want to grant to the selected group/user for each client status. Available access types are 'No' in which case the user/group access is denied, 'Yes - Full Access' in which case full access rights will granted to the selected group/user and 'Read Only' in which case a read only access right will be granted to the selected group/user for the selected client status.
All/None/Read-Only
If you want to grant the same access rights collectively on all statuses to the selected group/user you can select one of these buttons. 'All' will grant full access on all statuses, 'None' will deny access on all statuses and finally, 'Read-Only' will grant read-only access rights on all statuses to the selected group/user.
Auditing Sub-tab
Allow Customer Changes (Vet = Changes Must be Reviewed and Approved by a Different User)
This section is for granting basic 'Auditing and Vetting Options' on 'Client Profiles' through three sub groups ('Adds', 'Edits' and 'Deletes'), each consisting of three radio buttons ('No', 'Yes' and 'Vet') and an additional checkbox on each sub group ('Allow Approval of Adds', 'Allow Approval of Edits' and 'Allow Approval of Deletes').
A user or group can be granted or denied the right to 'Add' a new client, 'Edit' an existing client or 'Delete' a client based on the 'Yes' or 'No' radio button selected, If the 'Vet' radio button is selected then the action that is done by the user must be reviewed and approved by another user. The three 'Allow Approval of < action >' checkboxes will allow or deny the user or group to approve other users' actions.
Note: For this entire group to be visible and accessible, the 'Audit/Vet Client Changes' APPS Config option must be set to 'True' in Application Configurator program > PROFILE.EXE.
Misc Sub-tab
Enable Mileage
Check this option to enable user access to the Mileage Button within the Customer Profiles program.
Enable Sales Info Button
Check this option to enable user access to the Sales Info Button within the Customer Profiles program.
This flag controls the ability of the user to manually override an auto-generated Customer Code when working with the Application Configurator program > PROFILE.EXE > 'Auto Gen Client Key' option set to 'Client Info' (see link for more information on the config).
When the user has this flag checked, upon selecting the 'P' button (in CSERV.EXE, LTLBE.EXE or PROFILES.EXE) they will be asked to manually type in the Custom Code required. If this flag is not checked, the system will simply present them with an auto-generated Customer Code and give the user two options: 'Yes' or 'No'.
Allow Access To Clients For Which User is Not an Agent
This option, if selected, will allow the selected group/user access to client profiles even if the selected user is not the assigned Agent for the client.
Allow Edits to Agents grid
Selecting this option will grant the user edit rights on the Reps/Agents grid in Customer and Vendor Profiles.
Allow Removal of Main Account Links
Select this option if you want the selected user / group to be allowed to remove records from Customer and Vendor Profiles > Customer Profiles > Sub-Accounts tab.
Allow Quick Client Profile Creation
If you select this option, the selected user / group will be able to use the ![]() button to quickly create a client profile via a simplified form for that purpose in Customer and Vendor Profiles > Customer Profiles > Sub-Accounts tab.
button to quickly create a client profile via a simplified form for that purpose in Customer and Vendor Profiles > Customer Profiles > Sub-Accounts tab.
Customer Service tab
Allow Copy of Freight Bill
Check this option to allow a user the ability to Copy Freight Bills.
Allow Manual Rate
Check this option to allow a user the option of using Manual Rating.
Allow Access to Quote Button
Check this option to allow the user to click the 'Quote' button to create a new Quote. By default this check-box will be set for all users (which is the current situation) which means that any user can convert an 'NA' bill to a Quote bill. Removing the check from the box indicates that the currently selected user (or group) will not be allowed to click on the Quote button and covert an 'NA' bill to a Quote bill.
Allow Approving of Quotes
Check this option to allow the user to 'Approve' a displayed Quote. By default this check-box will not be set for all users, which means that no user can by default approve a quote for use. Removing the check from the box indicates that the specified user and/or user group will not be allowed to mark a quote as approved.
Allow Copying of Quotes
Check this option to allow the user to 'Copy' an existing Quote. By default this check-box will be set for all users (which is the current situation) which means that any user can copy a Quote bill to an 'NA' or auto-posted freight bill bill. Removing the check from the box indicates that the currently selected user (or group) will not be allowed to click on the Quote button and covert an 'NA' bill to a Quote bill.
This setting enables / disables the Image Audit Mode toolbar option in the Customer Service program.
Allow Driver Pay Advances
This setting enables / disables the user’s ability to issue Driver Pay advances from the Customer Service program > Driver Pay tab. If you want to allow the user to issue advances to Drivers, select this flag. You can specify the maximum allowable Driver Pay advance using the 'Max DP Advance Allowed' field (below). If there is no value in this field, or a zero value (i.e. $0.00) there will be no limit to the amount that can be advanced to the Driver.
Allow Approval of Driver Pay Records / Allow Approval of Driver Deduction Records
These options allow users the ability to approve Driver Pay/Deduction records from within the Customer Service program > Driver Pay tab. Set these as they apply to your users. This will prevent the status change to Approval and Hold only, all other changes (i.e. to 'Wait' status) will be allowed.
Allow Posting of Driver Pay Register / Allow Posting of Driver Deduction Register
These options allow users the ability to post Driver Pay/Deduction records from within the Customer Service program > Driver Pay tab (i.e. no need to open the Driver Pay/Deduction Register applications).
Allow Run Pay Statements
This option allows a user the ability to run the Driver Pay Statements from within the Customer Service program > Driver Pay tab (i.e. no need to open the Driver Pay Statements program).
Pickup / Delivery
This setting enables / disables the ability of a user to edit the 'Pickup Date' or 'Delivery Date' of a processed Freight Bill, and applies to the Customer Service program as well as the Dispatch program. You may select one of three options from the drop-down menu:
-
Disallow Editing:* no editing of Pickup / Delivery dates is allowed.
-
Audit Edits:* editing of the Pickup / Delivery dates is allowed, but the user ID and time of edit is recorded.
-
Edit Without Audit:* editing the Pickup / Delivery dates is allowed, and no audit information is captured (same as in previous versions of TruckMate).
Display in Status Bar
Select the information you wish to have displayed on the Status Bar of the Customer Service program, which is at the very bottom of the program window. Simply check the flag of the details you wish to appear for the selected user or user gGroup.
Detention Billing tab
Purge Cancelled Events
Check this option to allow the user to purge all 'Cancelled' events in the Detention Billing program.
Allow Posted Edits
Check this option to allow the user to edit 'Posted' events in the Detention Billing program.
Note: This option will only be available to the user if the Application Configurator program > SECSETUP.EXE option 'Detention Billing: Posted Edits Security' is set to 'True'.
Driver Profile tab
Enable Mileage Button
Check this option to enable user access to the Mileage Button within the Driver Profiles program.
Enable Password Service Setup Button
Check this option to enable user access to the 'Setup' button within the Driver Profiles program > Passwords tab.
Can View Driver Licenses
Check this option to allow users to view the information contained in the 'CDL #/State/Expiry' fields of the Driver Profiles program > Details tab.
If this flag is unchecked for a user, that user will see asterisks ('*') in the fields, instead of the actual information.
Can View SSN/SIN
Check this option to allow users to view the information contained in the 'SIN/SSN' field of the Driver Profiles program > Details tab.
If this flag is unchecked for a user, that user will see asterisks ('*') in the field, instead of the actual information.
Allow Changes of Pay Audit Filter Group
If checked, this flag will allow the selected user to change and edit the 'Pay Audit Filter Group'. The user can add new Grouping Codes, edit existing ones and delete unwanted Grouping Codes.
Intermodal tab
AP Purchase Orders tab
Approve PO
Check this option to allow a user the ability to approve Purchase Orders.
Maximum Amount
Check this option to allow a user the ability to approve up to a maximum amount.
Include Own PO
This checkbox if checked enables the user to approve a Payment Order that was created by the user himself. If you DON’T want the user to approve his own payment orders then keep this option un-checked.
Reason Code tab
CServ Status Changes
Check this option to enable user access to Status Change Reason Code (Service Failure Codes) entry within the Customer Service program. When checked, whenever a user attempts a Status Change in Customer Service, they will be prompted to select a Reason Code for the change.
Local Dispatch Status Changes
Check this option to enable user access to Status Change Reason Codes (Service Failure Codes) entry within the Local Dispatch program. When checked, whenever a user attempts a Status Change in Local Dispatch, they will be prompted to select a Reason Code for the change.
Dispatch Status Changes
You have one of three options to choose from regarding when the user will be asked for a Reason Code (Service Failure Code) during Status Changes in the Dispatch program:
-
None:* The Reason Code prompt will never appear when doing Status Changes, regardless of date.
-
All:* The Reason Code prompt will always appear if certain criteria are met (Pick / Delivery after expected Date/Time, etc.).
-
Picks:* The Reason Code prompt will only appear when a Pick occurs and meets the criteria (is late, etc.).
-
Drops:* The Reason Code prompt will only appear when a Drop occurs and meets the criteria (is late, etc.).
Instant Checks tab
Allow Delete Instant Checks
This option sets the level of control a specific uer has over the deletion of checks in the Instant Checks program. The various settings apply as follows:
-
Disallow:* The user will not be able to delete any checks from the system, regardless of who created them.
-
My Checks:* The user will be able to delete only those checks which he/she created originally.
-
Any Checks:* The user will be able to delete any checks that exist in the system.
Note: The default setting for this field can be configured using the Application Configurator program > CHEQUE.EXE > 'Default Allow Delete' option.
Trip Tracer tab
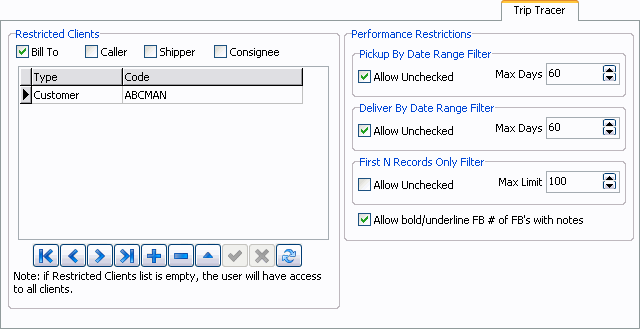
Restricted Clients
This section allows the administrator to limit the ability of a user while using the Trip Tracer program. If any of the four flags in the 'Restricted Clients' section is checked, then the selected user will only be able to Trace by those Client IDs added to the grid in that respective Trace-By field. The user may be able to select different Client IDs, but when they use the 'Run Trace' button, nothing will happen.
Bill To / Caller / Shipper / Consignee
These flags are used to specify which Trace-By fields the selected Client Code (in the below grid) will be available for when Tracing.
If, for example, 'CLIENT1' is chosen in the 'ID' field (and 'Customer' is selected in the 'Type' field), and the 'Bill To' flag is selected, the currently displayed user will only be allowed to successfully Trace against the 'CLIENT1' Client in the 'Bill To' Trace-By field.
You can assign a single Customer / Group to multiple flags.
Type / ID
In the 'Type' field you can select either 'Customer' (single Customer ID) or 'Group' (Customer Group), and then use the 'ID' field to select which customer/group is available for the user to Trace-By.
Performance Restrictions
This section allows the administrator to limit the Pickup and Delivery Date Ranges for Freight Bill / Trip tracing, as well as limit the number of records returned by a trace. These restrictions have been put in place so that administrators can be certain that their users will not attempt to run traces that will tax the database.
Allow Unchecked / Max Days
For each of the 'Pickup By Date Range', 'Deliver By Date Range' and 'First N Records Only' Filters, selecting this flag will allow your users to circumvent the 'Max Days' restriction you configure on this tab (i.e. allow them to configure their own date ranges).
If you are setting up specific date ranges that you do not want your users to deviate from, ensure that this flag is unchecked (i.e. users are locked into using traces that do not exceed the 'Max Days' value). This is the recommended configuration style.
Note: If the 'Max Days' value is left at zero (default), the user may enter any range or limit they wish
Allow bold/underline FB # of FB’s with notes
When this flag is selected, Freight Bills that have had notes entered against them (via the 'Notes' button on the Customer Service program > Summary tab) will have their Freight Bill number bold/underlined. The extra logic used to determine if a Freight Bill has notes can lead to performance hits when doing traces, however, so the option to disable this functionality has been provided.
Multi Mode / Dispatch tab
Refresh Interval
This field accepts an integer value which will then be used as the time interval (in seconds) between automatic refreshes of the Dispatch program when it is open on a workstation.
Allow Carrier Assign Without Meeting CarrierBuy Margin
If set to No or Warn, and the existing Dispatch CarrierBuy Margin is set to a number greater than zero, then a margin calculation is done in carrier assign. The total revenue for the trip, less the total carrier costs for the trip (gross margin), is checked to see whether it meets the percentage (of revenue) specified in the Margin Calculation configuration. If the total revenue for the trip does not meet meets the percentage (of revenue) specified in the configuration, you will either be prompted with a warning or be disallowed from completing the carrier assign. The default is set to 'Yes'.
TimeSheets tab
Settings in this tab allow you to select which options are available in the Quick Entry Earnings tab PopUp menu.
Vendor Profiles tab
Filter by Status Sub-tab
This sub-tab can be used to control group/user access to vendor records based on vendor status. All available Vendor statuses are listed with a drop down list button for each. Select the type of access you want to grant to the selected group/user for each vendor status. Available access types are 'No' in which case the user/group access is denied, 'Yes - Full Access' in which case full access rights will granted to the selected group/user and 'Read Only' in which case a read only access right will be granted to the selected group/user in vendor records of the selected vendor status.
All/None/Read-Only
If you want to grant the same access rights collectively on all statuses to the selected group/user you can select one of these buttons. 'All' will grant full access on all statuses, 'None' will deny access on all statuses and finally, 'Read-Only' will grant read-only access rights on all statuses to the selected group/user.
Filter By Type Sub-tab
This Sub-tab can be used to grant access rights to groups/users based on their types.
Allow Access To Vendors of Type
All vendor types are listed with checkboxes. Select all the vendor types you want to grant access rights on to the selected group/user by selecting (checking) the adjacent checkbox.
All/None
If you want to grant access on all types at once you can use the 'All' button. Or on the other hand, if you want to deny access on all vendor types at once, you can select the 'None' button.
Misc Sub-tab
Allow Access To Vendors For Which User is Not an Agent
This option, if selected, will allow the selected group/user access to vendor profiles even if the selected user is not the assigned Agent for the vendor.
Allow Edits to Agents grid
Selecting this option will grant the user edit rights on the Reps/Agents grid in Customer and Vendor Profiles.
Pay Audit tab
Viewable Driver Grouping Code
Grouping Code
This value determines which drivers can be viewed by the selected user in 'Pay Audit' program. The user can only view drives belonging to the 'Grouping Codes' set in this field when using the Pay Audit program. However, if no Grouping Codes are set for the user then this user is able to view all drivers. The Grouping Codes are defined in Driver Profile > Details tab
Pay Register tab
Allow Run Independently
If you want the selected user / group to be allowed to run the Pay Register by itself without being called by another application like Customer Service then select this option.
Pay Statement tab
Allow Run Independently
If you want the selected user / group to be allowed to run the Pay Statement by itself without being called by another application like Customer Service then select this option.
All Applications tab
TruckMate Monitor Access
Select the checkbox if you want to allow the user / access group to use the TruckMate monitor.
Deduction Register tab
Allow Run Independently
If you want the selected user / group to be allowed to run the Deduction Register by itself without being called by another application like Customer Service then select this option.
Trip Envelope tab
Allow Inserting Pickup / Delivery Status History
This option allows the selected user / group to be able to insert Pickup / Delivery status history.
Allow Adjusting Paid Driver Pay
Assigning this option to a user / group will allow them to make adjustments to driver pay records after they are already paid.
Allow Approving Driver Pay
This option allows the selected user / group to be able to approve driver pay records.
Claims tab
Allow Check-List Edit
Selecting this checkbox grants the selected user / group the right to edit check-lists.
Allow Check-List Add
Selecting this checkbox grants the selected user / group the right to add new check-lists.
Allow Check-List Delete
Selecting this checkbox grants the selected user / group the right to delete check-lists.
Screen Design tab
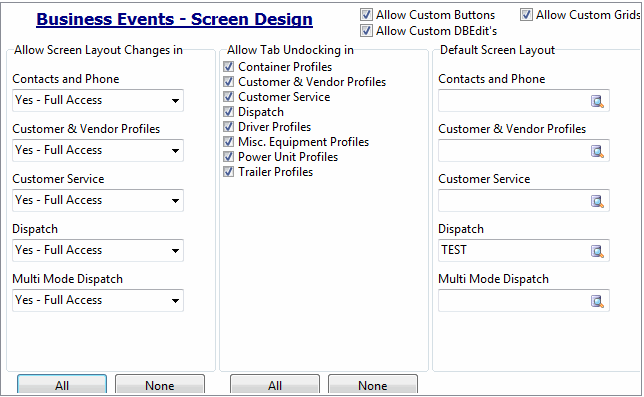
Selecting the 'Screen Design' option under Business Events will display a screen with two sections listing all applications into which Screen Design and tab Undocking features have been integrated, as well as a third column, which lets you specify a Default Screen Design Layout (by applicable TruckMate program).
If a user has been allowed into screen design for a specific application, but has been disallowed from viewing one or more Tabs (within the allowed application), then all controls on the disallowed tab(s) will not show up in the drop-down control selector in the screen design property editor. This is to prevent a security loophole where the user could check the 'Visible' tag and then see the tab (and all its contents), even though they had been disallowed.
By default, these features are enabled (where integrated), but you can disable either or both for a user or group by selecting the 'None' button.
Note: These two lists are loaded dynamically from the BEVENT_PAS table, so if either list is shorter than expected (or even empty), then you are missing a patch.
Allow Screen Design Changes in
For both the Customer Service program and Dispatch program, the administrator can select one of four security levels in regard to Screen Design by using the drop-down menu:
-
No*: selected user has no access to Screen Design functionality for the application.
-
Yes:* - Full Access: selected user has full access to all Screen Design features for the application.
-
Load/Clear Only*: selected user can Load (apply) and/or Clear any available Screen Design onto/from the application.
-
Load/Clear/Import/Export*: selected user can Load, Clear, Import and Export Screen Designs in the application (no editing).
Allow Custom Buttons
This option will allow or disallow a user from creating custom buttons while in Screen Design mode. Uncheck this flag to disallow a user from adding custom buttons (of course, only applicable if user is allowed into Screen Design for at least one application).
Allow Custom DBEdit’s
This option, when selected, allows the selected user to access Screen Design functionality (depending on the other options on this tab) but disallows them from creating Custom DBEdit boxes. This has its own security because Custom DBEdit boxes can be created that can access sensitive information, like Driver SSN, SINs, passwords, salary information, etc.
Allow Custom grids
This option controls the users ability to create Custom grids (read only copies of existing grids), to allow a user to create read-only grids in screen design check this option.
Default Screen Layout
The Default Design Layout can be assigned on a per-user or per-group basis. The administrator can assign any Screen Design Layout to a user regardless of whether the design is flagged as 'Public' or 'Private'. The fact that the screen design was flagged as private only restricts the ability of other users from editing and changing the design, it does not restrict the administrator from assigning the design to other users. The default layout set for a user in this option, will auto-load in the application at startup. The "remembered" layout (saved to registry last time user ran an application) is ignored.
Note: This option works whether or not user is given rights to make screen design changes (separate Security Setup option). For more information on Screen Design, click here.

Security tab - Tabs Setting Section
The Tabs Setting Section is used to configure which Tabs the selected user will be able to access in certain TruckMate applications. Simply select the flags to allow/disallow which Tabs you would like the user to be able to access. Depending on the active tab (for example, Customer Service or Trip Envelope), several of the check-boxes are expandable. Clicking the expandable entry displays subentries for the sub-tabs of the given tab. For example, if your company doesn’t use D83; you can check the I/P tab, but you can clear the D83 sub-tab under it. Clicking the Dispatch icon now displays a third check-box list, enabling you to control which sub-tabs are visible in the Payments tab of the Assign Carrier form.
Note: All 3 apps (Customer Service, Trip Envelope, and Payments tab in Carrier Assign) have their own set of business events for sub-tabs of the I/P tab. For example, if you want to hide the D83 tab everywhere, you must clear the D83 option in all 3 places. This also means that you can show the D83 tab in one app, but hide it in the other 2 (or any other desired combination).
For extended flexibility, a feature has been added to TruckMate that allows administrators to set a default tab for different applications. The default tab will be the active one when the application is accessed. This feature is available for most applications. To set the default tab for an application you have to select the tab from the drop down menu 'Default tab' which is only visible in 'Tabs Settings' section of the 'Security' tab for those applications that support this feature.
Note: Codes Maintenance can be accessed from other TruckMate applications. However, if you do not have security access to the tab being opened, Codes Maintenance will open but you will receive an error message and be unable to access that tab.
Check All / Uncheck All
These four buttons, divided into two sections, allow for easier manipulation of the records for each program, or for the entire TruckMate system at one time. The right-most 'Check All' and 'Uncheck All' buttons are constant, and allow you to Check every option for every TruckMate program (full access) or to uncheck every TruckMate program option (no access).
The left-most buttons change depending on the program selected on the left side menu, and allow you to Check or uncheck all options for that specific program.
Vendor Popup Tabs
Using the Vendor Popup section, you can restrict access to context menu options in a variety of applications that allow you to access Vendor information.
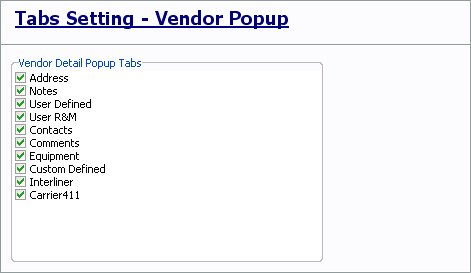
The settings control the 'Vendor Information' Context Menu options in a variety of applications, as determined by the available flags. Selecting a flag in this window allows right-click access to the Vendor information from that respective field.
For example: choosing 'Address' in this tab will allow you to right-click any 'Address' field in any of the applicable TruckMate programs and select 'Vendor Information'. Doing this will open a pop-up window with the Vendor’s full address and other information.
Security tab - Security Section
Administration tab
The Administration tab allows you to modify what the selected user may view within the Security Configuration application itself.
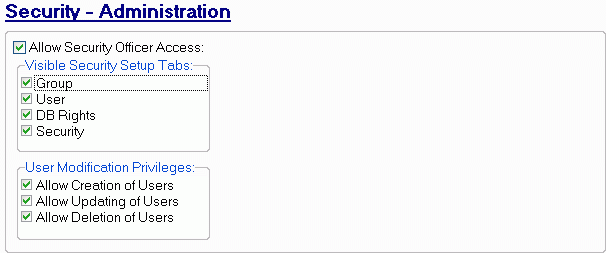
Allow Security Officer Access
Check this option to allow Security Officer Access for the selected user.
Visible Security Configuration Tabs
Group
Uncheck this option to disallow access to the Group tab of the Security Configuration program.
User
Uncheck this option to disallow access to the User tab of the Security Configuration program.
DB Rights
Uncheck this option to disallow access to the DB Rights tab of the Security Configuration program.
Security
Uncheck this option to disallow access to the Security tab of the Security Configuration program.
User Modification Privileges
Allow Creation of Users
Uncheck this option to disallow Creation of users for the selected user.
Allow Updating of Users
Uncheck this option to disallow Updating of user information for the selected user.
Allow Deletion of Users
Uncheck this option to disallow Deletion of users for the selected user.
Clearance tab
The Clearance tab allows the user to set the Security Clearance level of the selected Uuser for the 'Safety & Compliance', 'Diary' and 'Employee Program' modules of TruckMate.
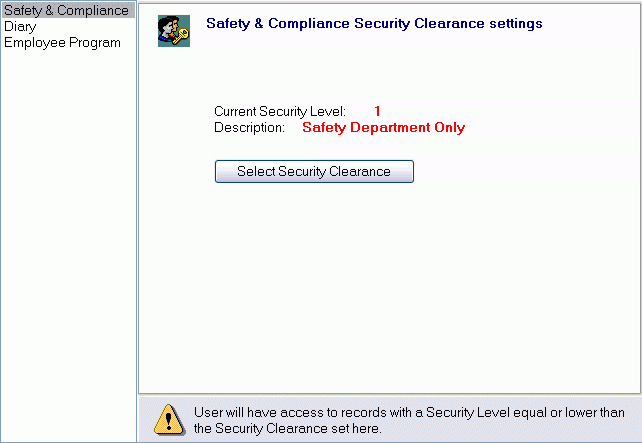
Security Clearance is applied on a user-specific basis. The 'Clearance Level' of a logged in user will determine the access they have to records in the TruckMate applications listed on the left-side menu. Each new entry in the affected systems will be assigned a security level of 0 by default and available to everyone to view and edit. You must manually change the entry’s security level to a higher level to restrict access.

For example: if a user with a Security Clearance Level of 3 opens the Safety & Compliance program and creates some new incident records, the records will be assigned a security level of 0. If the user uses the shortcut menu and changes the security level for the entry to 3, a user with a lower clearance level (2 or below) will not be able to view or edit the records that the first user created.
Select Security Clearance
Clicking this button will open the Safety & Compliance Security Clearance window, where you may choose a new Security Clearance.
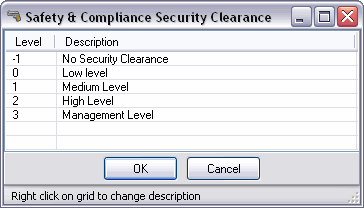
Choose the new Security Level by clicking it and then click the 'OK' button to change the Security Level. You can also right-click any of the descriptions on this grid to edit their description, which is then recorded to the DROPDOWN table.
Payroll tab
The Payroll tab allows the user to restrict certain Tabs and applications from the Payroll module, so that not everyone can view his/her payroll information.
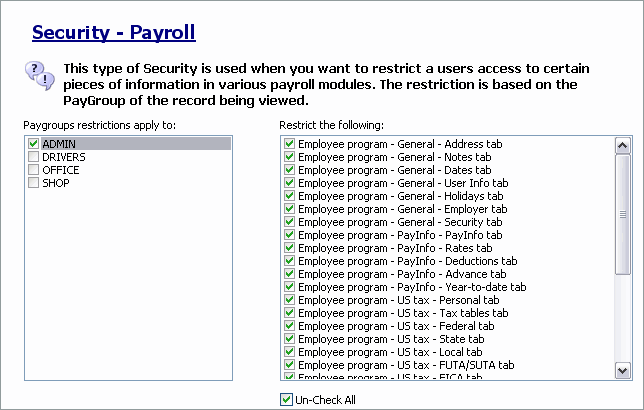
On the left hand menu, select the PayGroup you want to apply restrictions to, either 'Admin', 'Driver' or 'Shop' PayGroups. Then, on the right hand side of the screen, check the Tabs you wish to restrict. You can use the 'Check All' checkbox to quickly highlight all of the tab options available for restriction.
Notes tab
The Notes tab allows the user to restrict 'Write' access to the Note windows in the Customer Service program and Customer & Vendor Profiles program.
The Notes tab allows the administrator to set some permissions for the notes sections of various applications. There are three sections on this tab, which correspond as follows:
-
Customer Service Notes tab: the options listed in this section apply to the Customer Service program > Notes Window.
-
Client Notes tab: the options listed in this section apply to the Client Notes (accessed via the Customer & Vendor Profiles > Customer > Tools Menu > 'Notes' option).
-
Vendor Notes tab: the options listed in this section apply to the Vendor Notes (accessed via the Customer & Vendor Profiles > Vendor > Tools Menu > 'Notes' option).
There are two flags that can be used to control how the selected user will have access to the various notes sections above:
-
Editable
Checking the 'Editable' option will allow the selected user to edit notes available in the associated program area. If the 'Editable' flag is not checked, the user cannot edit the notes.
-
Visible
If the 'Visible' flag is checked, the selected user will be able to view the notes entered in the associated program area. If this flag is not checked, the corresponding notes tab will be completely hidden from the selected user.
The 'All' and 'None' buttons can be used to quickly populate all the flags on this tab.
Mobile Dock Users tab
The Mobile Users tab is used to configure the users that will be allowed to access the Crossdock Handheld application.
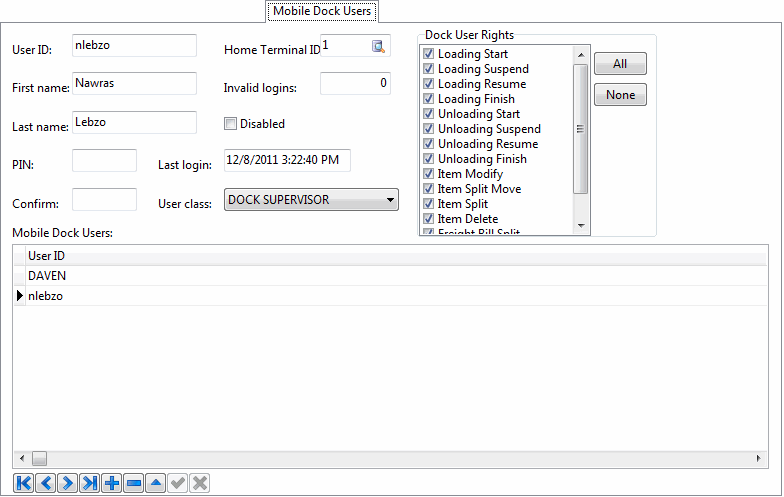
User ID
Enter a text value that will be used as this user’s 'User ID'.
First Name / Last Name
Enter the user’s first and last names in the fields provided.
PIN / Confirm
Enter the user’s PIN number, used to verify their identity when the log into the Crossdock Handheld application. In the 'Confirm' field, enter the same PIN number.
Note: The PIN number must be no larger than 4 digits. When you save the record, the values in these two fields will disappear, but don’t worry- they have been saved.
Home Terminal ID
Click the 'database' button within this field to select a 'Home Terminal ID' for the currently displayed user. These 'Terminal' values are maintained in the Codes Maintenance program.
Invalid Logins
The 'Invalid Logins' field controls the number of times a user may mistake his login information before the Crossdock Handheld application refuses he/she access. Enter a numeric value in this field.
Disabled
The 'Disabled' field, when checked, tells the Crossdock Handheld application that the displayed User ID is set to 'Disabled' status, and should not be allowed access.
Last Login
This is a read-only field that displays the date stamp of the last successful login by the currently displayed user.
User Class
Use the drop-down menu to select the appropriate User Class for the currently displayed user. The user will have access to more or less functionality depending on the User Class selected. Available options are: 'Dock Worker', 'Dock Supervisor', 'Hostler Driver' and 'Yard Gate'.
Dock User Rights
This group of checkboxes lists all the functions a dock user can potentially perform. Selecting any of the available functions for a specific user, will allow the user to perform that function without a supervisor’s approval. If on the other hand a function is not selected for a user, that user can only perform that function with a supervisor’s approval.
All/None
These two buttons are to make it easier to assign all the available functions at once or deny them all at once with one click of the mouse.
Mobile API Users tab
The Mobile API Users tab is used to configure your generic Mobile Users' passwords.
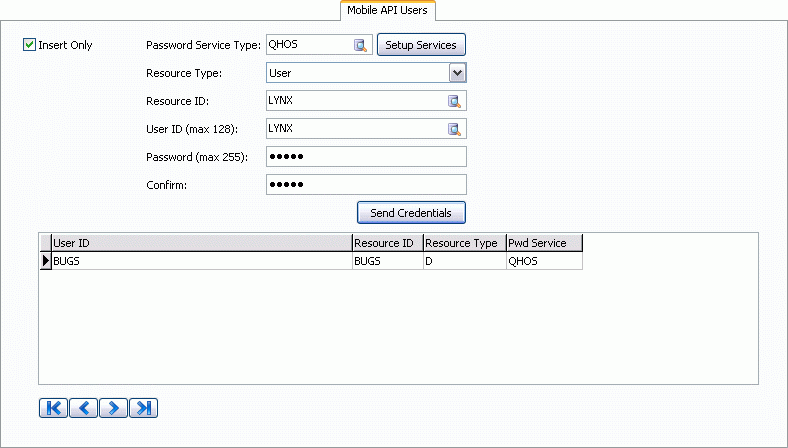
Insert Only
If this box is checked, user records will not be browsed in the data entry fields. If unchecked, browsing data in the grid results in the data entry fields being populated with data from the record displayed in the grid below.
Password Service Type
Currently there are 4 password services that TMW provides services for: 'TMAPI' (TruckMate API), 'OnRoute', 'QHOS' (Omnitracs Hours of Service), and 'TChek'. Double click this filed to indicate which service will be used by this user.
Setup Services button
Selecting this button will launch the Setup Password Services window, where the user can enter additional password service linkages.
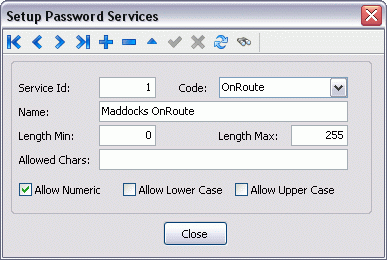
Click the '+' button to begin creating a new Service Password Code, or use the 'Find' button to browse your Database for existing Password Codes to modify.
| Field | Definition |
|---|---|
Service ID |
This field is automatically generated when you click the '+' button to generate a new record. |
Code |
Use the drop-down menu to choose which 'Service' this Password will apply to.
|
Name |
Enter a descriptive name for this Password Service Code. |
Length Min |
The integer value entered here will control the Minimum Length that the Password for this Password Service Code must be. |
Length Max |
The integer value entered here will control the Maximum Length that the Password for this Password Service Code can be. |
Allowed Chars. |
Enter any 'special' characters that you wish to allow as valid Password character values. These could be, but are not limited to, values such as the following: '#', '$', '%', etc. |
Allow Numeric |
Check this flag if you wish to allow Numerical values as Password Characters. |
Allow Lower Case |
Check this flag if you wish to allow Lower Case text values as Password characters. |
Allow Upper Case |
Check this flag if you wish to allow Upper Case text values as Password characters. |
Resource Type
Presently, Mobile Users will be categorized as: 'Driver', 'Machine Operator' or 'User'. If 'Driver' is chosen, the Mobile User will be linked to a DRIVER record. If 'Machine Operator' or 'User' is chosen, the user will be linked to a TruckMate USER. Use the drop down menu to select which type of Resource this user will belong to.
Resource ID
Based on the resource type selected, the resource list will display either drivers, or uers.
User ID
Enter a User ID that will be used when entering the login information (this should usually be the same as the 'Resource ID'.
Password / Confirm
Enter a Password in both of these fields to set the Password for the currently selected uer.
Send Credentials
This will Insert, Update, or Delete a Mobile API user record to/in/from the database. If a user record doesn’t exist, one will be inserted. If the update sent encounters an existing record, it will be update. If User ID and Password are left blank, the selected Resources user record will be deleted.
AirIQ Security Preferences Maintenance
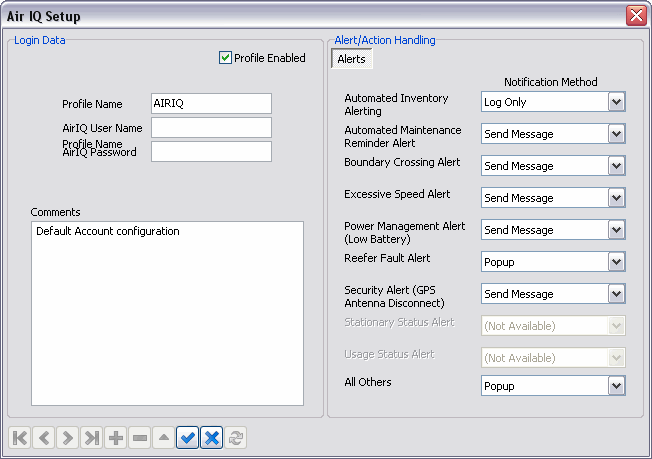
The Air IQ Setup window allows you to configure a number of settings for use with the Air IQ communications system.
Login Data
Profile Name
Enter an alpha-numeric profile name of up to 10 characters in length.
Profile Enabled
Place a checkmark in the box provided to enable this profile.
AirIQ Username
Enter your chosen username. You can enter a username up to 20 characters in length.
AirIQ Password
Enter your chosen password. You can enter a password up to 20 characters in length.
Comments
Enter any relevant comments in the space provided.
Alert / Action Handling
Select either 'Aler’t or 'Action Handling' for the messages. Either method produces different selection options.
Alert Options
Automated Inventory Alerting
Select one the notification methods as shown: 'Log Only', 'Send Message' or 'Popup'.
Automated Maintenance Reminder Alert
Select one the notification methods as shown: 'Log Only', 'Send Message' or 'Popup'.
Boundary Crossing Alert
Select one the notification methods as shown: 'Log Only', 'Send Message' or 'Popup'.
Excessive Speed Alert
Select one the notification methods as shown: 'Log Only', 'Send Message' or 'Popup'.
Power Management Alert (Low Battery):
select one the notification methods as shown: 'Log Only', 'Send Message' or 'Popup'.
Reefer Fault Alert
Select one the notification methods as shown: 'Log Only', 'Send Message' or 'Popup'.
Stationary Status Alert
Not available.
Usage Status Alert
Not available.
All Others
Select one of the notification methods as shown: 'Log Only', 'Send Message' or 'Popup'.
Action Handling Options
Call Office Light
Select one the default notification methods as shown: 'Log Only', 'Send Message' or 'Popup' or the availability in program where your choices are Dispatch, or Repairs and Maintenance.
Maintenance Reminder Reset = 0
Select one the default notification methods as shown: 'Log Only', 'Send Message' or 'Popup' or the availability in program where your choices are Dispatch, or Repairs and Maintenance.
Remote Vehicle Disable
Select one the default notification methods as shown: 'Log Only', 'Send Message' or 'Popup' or the availability in program where your choices are Dispatch, or Repairs and Maintenance.
Remote Vehicle Enable
Select one the default notification methods as shown: 'Log Only', 'Send Message' or 'Popup' or the availability in program where your choices are Dispatch, or Repairs and Maintenance.
Vehicle Location
Select one the default notification methods as shown: 'Log Only', 'Send Message' or 'Popup' or the availability in program where your choices are Dispatch, or Repairs and Maintenance.
Remote Door Unlock
Select one the default notification methods as shown: 'Log Only', 'Send Message' or 'Popup' or the availability in program where your choices are Dispatch, or Repairs and Maintenance.
All Others
Select one the default notification methods as shown: 'Log Only', 'Send Message' or 'Popup' or the availability in program where your choices are Dispatch, or Repairs and Maintenance.