Creating and registering custom report templates
If you created a new custom report template to use with the Customer Service program, use the following steps to ensure this report is properly registered and available for your users.
-
Verify that the new report is stored in a server location the TruckMate software can access.
-
Open the Customer Service program. (e.g. TruckMate > Dispatch > LTL > Customer Service)
-
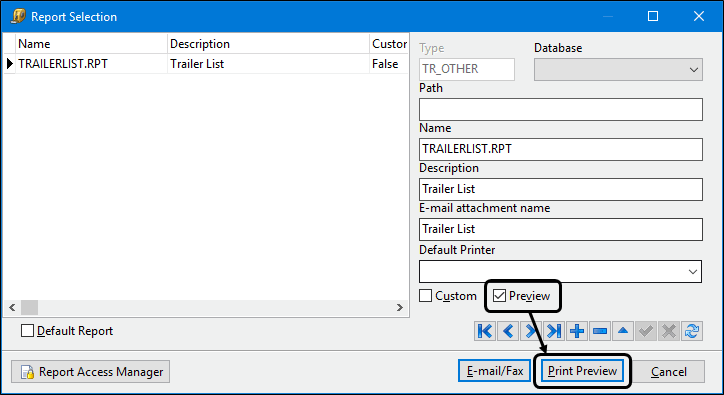
Select the File > Print Reports menu option to open the Report Selection window.
-
Click
 Insert to create a new entry. Notice the fields will be cleared.
Warning: Make sure you are editing the information for the correct report. If you forgot to click the Insert button, you will be editing the data for an existing report.
-
Accept the default value for Type.
-
If you are accessing multiple databases, use the Database drop-down list to select the correct data source, otherwise accept the default.
-
Enter the Path and a Description for the report template.
-
If this report is intended to be attached to an e-mail as a PDF document, enter text into the E-mail attachment name field. The .PDF document will be renamed using the value you enter. If no value is specified, the .PDF will use the same file name as the underlying Crystal Report.
-
Use the drop-down list to indicate the desired default printer if this report should be sent to a particular printer for this user.
-
Select the Custom checkbox if this is a customized version of a standard TruckMate report or an entirely custom report template that you have created from scratch.
-
Selecting the Preview checkbox will toggle the bottom middle button to switch from Print to Print Preview, which presents a preview of the report prior to printing.
-
Click
 Post to save your entries.
 -
Perform a test print and verify the report is working
-
By default, the new report is setup as a public report available to all users who have access to this program. If it is necessary to restrict which users can access the report, click the Report Access Manager button (if you have the appropriate security permissions to access the Report Access Manager window).