Diary
The Diary feature available in the shortcut menu for certain record types (Driver, Power Unit, Trailer, Container and Equipment) is as an advanced note-taking tool. Unlike the normal TruckMate Notes window, the Diary allows you to make multiple entries and it has its own special mechanism for security clearance level settings.
For each entry, you assign a 'Date', 'Communication Type', a 'Note Subject', and either long notes (in a free format field) or a picture. There are columns for each resource type (power unit, trailer, etc.) so the Diary entry can be cross-referenced and accessed in the application that calls it.
Right-click the grid within the appropriate programs and select Open Diary from the shortcut menu to access the Diary entry form. Some programs may have a toolbar button that also allows access.
| The Diary is only available to those who have adequate security permissions. |
Header
The Header section of the Diary window will display different information depending on the type of record that is chosen and if the information it requires exists in the detail line record.
Diary Entry Grid
The Diary Entry Grid is the main work area of the Diary window. Use this window to add the details of the various entries you make into the Diary for whatever application you are working in. Click the '+' button at the bottom of the Diary window to create a new record.
A blue asterisk (*) indicates that an entry is required.
Date/Time * |
When you click the '+' button to create a new detail line in the Grid, the 'Date/Time' field will automatically populate with the current Date/Time. You cannot manually alter these time stamps. |
Communication Type * |
Options to describe the type of diary entry include: 'E-MAIL', 'LETTER', 'PHONE' and 'FAX'. |
Notes |
Use this field to enter a brief outline of the more descriptive text entry that will be made into the larger Note / Picture section in the bottom half of the window. |
Driver / Power Unit / Trailer / Container / Equipment |
Depending on which application you are using to access the Diary window, one of these fields will be automatically populated when you click the '+' button. You can enter other information, if required, by double-clicking the field you wish to populate and choosing a value from the search list that appears. The values in these search windows are maintained within their respective Profiles. |
Client / Vendor / Employee |
To include 'Client', 'Vendor' or 'Employee' information for the Diary entry you are creating, double-click within these fields to bring up value search windows |
Other |
This field is a free-format text field, similar to the Notes field described above and can be used for any additional information. |
User |
Automatically displays the user who created the note. |
Shortcut Menu
Refer to General menu and toolbar options for a description of the standard shortcut menu options.
Change Security |
The Change Security option offers a more specific level of Diary restriction than the Public checkbox. By promoting an individual Diary Grid to a specific Security Level, you will disallow Users who do not have that level of security from seeing the record.
This also reveals what the current Security Level setting for any given entry is. For example, if the entry is set to a Security Level 2, it could only be promoted to Level 3 or demoted to level or less.
Security Clearance levels are configured and applied to users using the Security Configuration program. |

| You can only change the Security Level of a Grid Entry if you are the user who created that Entry. |
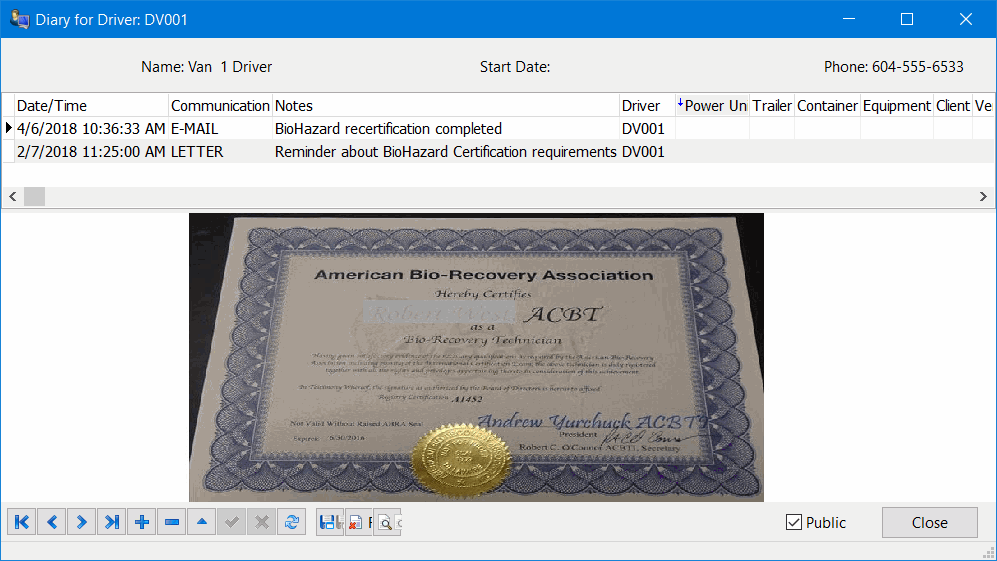
Note / Picture section
The Note / Picture Section is used to record the main body of your Diary entry, or to include a picture to supplement your other Diary entries. To enter text notes, click within the bottom section of the Diary window and begin typing. To add a picture, click the Add/Update File button in the footer.
A browse window will open where you must select an image file from your system. This file must be in JPEG format, and can be up to 2500KB in size.
Footer
The standard TruckMate Navigational Bar is used to navigate through existing entries, to create, edit and delete entries and to add and edit pictures or supporting documents.

The three buttons beside the standard record navigation toolbar in the footer are used to add, delete and view attachments such as photo images or documents. The Public checkbox is used to indicate whether this Diary entry is private or public.
Add/Update File |
Opens a standard Select Image browse window to locate the desired file to attach to the Diary entry. Only one attachment is allowed per Diary entry line. Photos can be up to 2500KB in size and should be in JPEG format to present a preview image. |
Remove File |
Removes the selected attachment |
View File |
Opens up the appropriate viewer and displays the selected attachment. Your workstation must have the appropriate viewer to view the attachment. |
Public checkbox |
When checked, the selected Diary entry can be viewed by any user who accesses a Diary-enabled program. When the user that creates this Diary entry unchecks this option, the entry is no longer public and can only be viewed by the User who created it. Note: The 'Public' option works on a record-by-record basis. |