Reviewing and requesting available loads
An available loads board displays orders that are presented by the company hosting this website to carriers who may want to request them. You view the list of loads that are available. Depending on your login, you can either request the one you want or self-assign yourself to the load.
Searching for available loads
To find loads the hosting company has that you would like to perform, you can view a list of all the loads the hosting company has. Alternatively, if your login allows it, you can search for loads starting in locations where you have available equipment. If your equipment needs to be in a specific location in the near future, your location search can also include specific destinations.
Using a map to find available loads
A quick way to search for loads that begin and end in specific states is by selecting the states on a map.
To find available loads on a map, follow these steps.
-
Go to Menu > Carrier > Load Search > Map Search.
The Map Search page opens.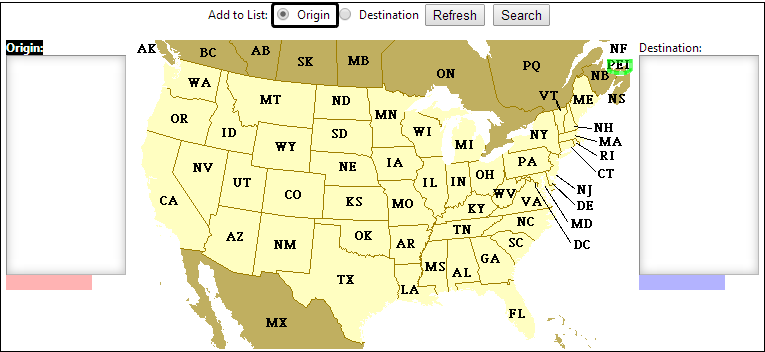
Note: The hosting company may have provided a link from its home page to this load search page. If you accessed the search page using such a link, you can conduct a search and see the results. Other functionality will not be available to you. If you are a registered user, you can click Go to Login at the top of the page and enter your user ID and password. This will make all functionality associated with your login available to you.
-
The Origin radio button is selected by default. Click on all the states for which you want to find available loads having that state as the starting point of the trip. As you make your selections, the states are added to the Origin list.
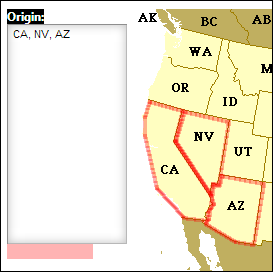
Note: If you select a state and decide you do not want it as a search criterion, click on it again to remove it from the list.
-
If you want, select the Destination radio button.
-
Click on all the states for which you want to find available loads having that state as the ending point of the trip. As you make your selections, the states are added to the Destination list.
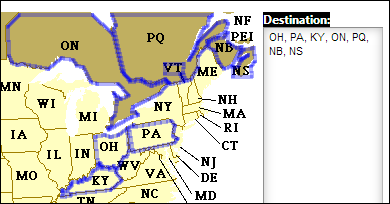
Note: If you select a state and decide you do not want it as a search criterion, click on it again to remove it from the list.
-
Click Search.
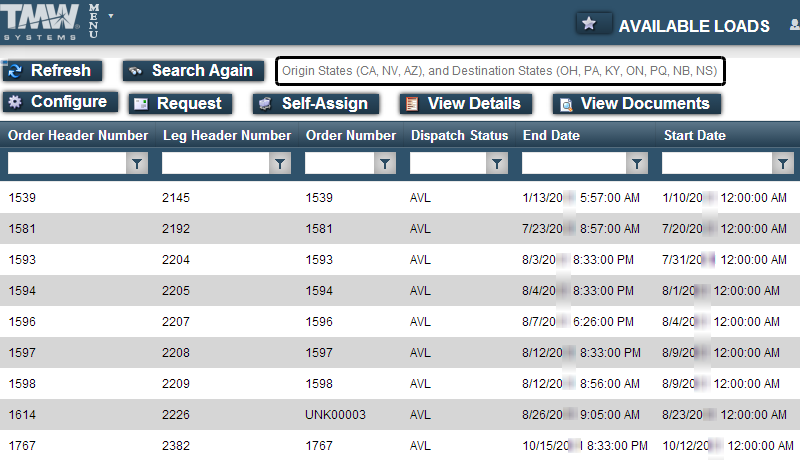
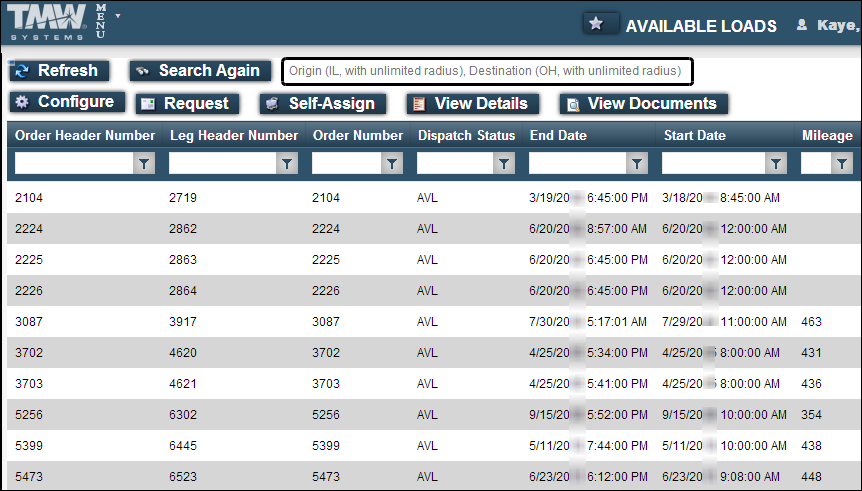
The Available Loads page displays all the trips that match your criteria.
The top of the page shows the states you used as origins and destinations for your search.
-
Do one of the following
-
To determine if a load is a good match with your available equipment, select it and view the load details.
-
To perform another search, click Search Again.
-
If your login permits it, you can request the load assignment.
-
If your login permits it, you can self-assign the load.
-
Looking for loads in a certain city
To more quickly find available loads that start where your equipment is located, you can use a specific city as the origin and specify how far you want to travel to start that load. You can also search for loads that need the specific type of equipment you have available at, or close to, that location.
To look for loads, follow these steps.
-
Go to Menu > Carrier > Available Loads.
The Available Loads page opens. -
In the Origin Location field, enter a city/state combination or just a state.
Notes:
-
If the city/state information was incomplete, or if the city/state does not exist in the hosting company’s database the way you entered it, the system will not return available loads.
-
You can specify a state by entering its 2-letter abbreviation or the entire name.
-
-
To widen the search area, you can record a distance from the specified city in the origin’s Radius field. The system will search for loads starting within the specified number of miles from the identified city.
-
If you want, enter a city/state combination or just a state in the Destination Location field.
-
To widen the search area, you can record a distance from the specified city in the destination’s Radius field. The system will search for loads ending within the specified number of miles from the identified city.
-
Click Search.
The Available Loads page displays all the trips that match your criteria. -
Do one of the following:
-
To determine if a load is a good match with your available equipment, select it and view the load details.
-
To do another search, repeat Steps 1-6.
-
If your login permits it, you can request the load assignment.
-
If your login permits it, you can self-assign the load.
-
Looking for loads that start in certain states
You can search for loads that start/end in specific states and require a specific type of equipment.
To look for loads starting in specific states, follow these steps.
-
Go to Menu > Carrier > Load Search > State Search.
The State Search page opens.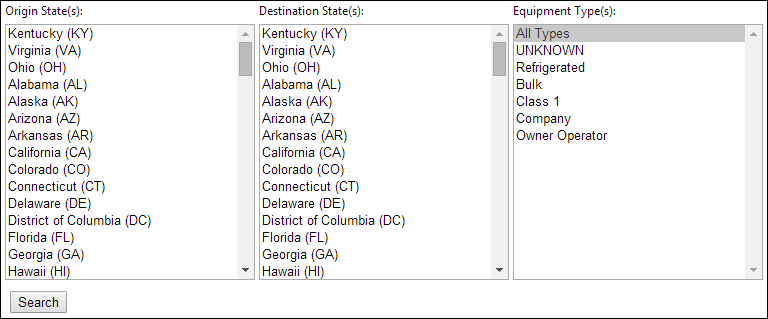
Note: The hosting company may have provided a link from its home page to this load search page. If you accessed the search page using such a link, you can conduct a search and see the results. Other functionality will not be available to you. If you are a registered user, you can click Go to Login at the bottom of the page and enter your user ID and password. This will make all functionality associated with your login available to you.
-
In the Origin State(s) list, select the states where you have equipment available for assignment.
Note: You can select multiple states by using the CTRL or SHIFT key while selecting.
-
If you want to limit the list to trips ending in certain states, select those states in the Destination State(s) list.
Note: You can select multiple states by using the CTRL or SHIFT key while selecting.
-
If you want, in the Equipment Type(s) field, select the type that matches the equipment you have available.
Note: The default value in the field is All Types. If you want to see all loads the hosting company has available with your specified origin/destination entries, do not change the entry in this field.
-
Click Search.
The Available Loads page displays all the trips that match your criteria.
The top of the page shows the state(s) you used as origins and destinations for your search. It also shows the equipment type you selected, if you selected something other than the All Types default.
-
Do one of the following:
-
To determine if a load is a good match with your available equipment, select it and view the load details.
-
To do another search, click Search Again.
-
If your login permits it, you can request the load assignment.
-
If your login permits it, you can self-assign the load.
-
Viewing available loads
The Available Loads page displays the loads for which the company hosting this website needs to find carriers.
To view the available loads, follow these steps.
-
Go to Menu > Carrier > Available Loads.
The Available Loads page opens.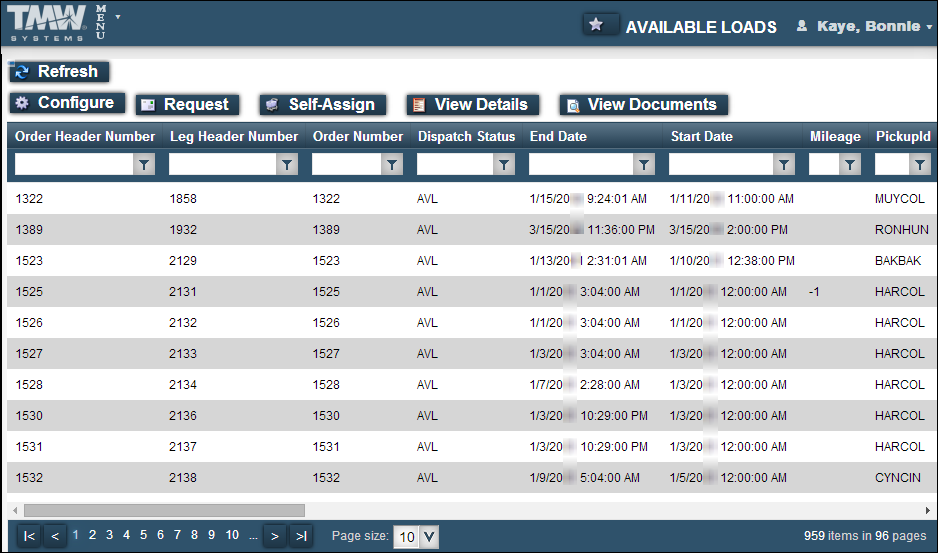
Notes
-
Loads that are listed and the actions you can take are restricted by the setup associated with your login. Your grid may differ from this illustration.
-
The company hosting this website may have divided an order into segments that will be performed by different carriers. Such a movement is called a split trip. The segments of split trips are identified by a hyphen and the letter S or F following the order number. The letter S identifies any segment that is not the last segment of the trip. The letter F identifies the final trip segment for a split trip. This information is necessary for the hosting company’s tracking of loads.
-
-
If multiple views have been set up for your login, select a different view from the Load Filter drop-down list, as needed.
A view is a set of restrictions that the hosting company defines to specify which loads you see when you view trips in CarrierHub. These views are linked to your login by the hosting company.
-
To see all available loads, use the paging bar.
-
If you want, manipulate the data grid.
Viewing load details
When viewing load details, you can view reference numbers and stop or commodity information.
To view load details, follow these steps.
-
To view information about a load, click on the load in the grid and click View Details.
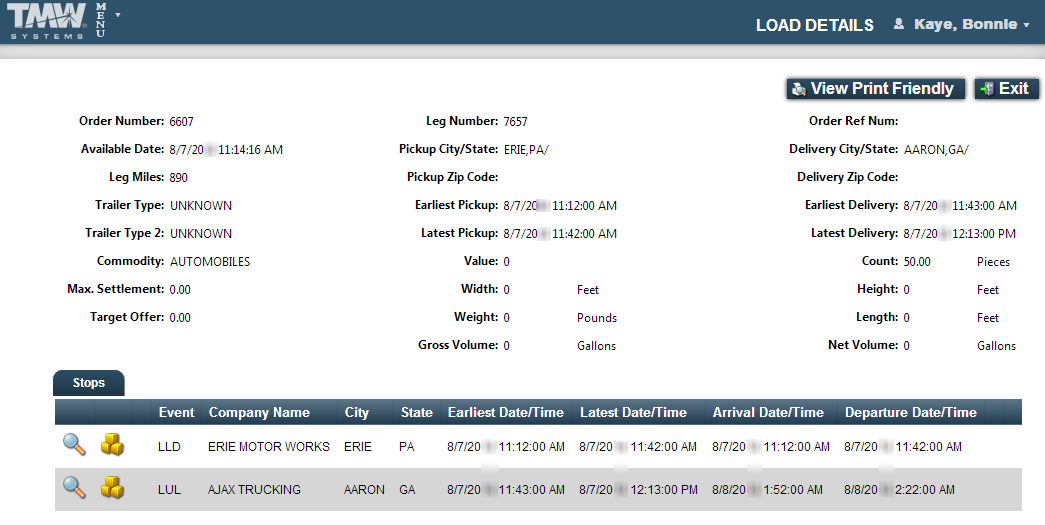
Load information is shown on the Load Details page.-
The top pane of the page shows summary information about the trip.
-
The bottom pane of the page shows stop details.
-
-
While viewing details for a load, you can:
-
To return to the list of available loads, click Exit.
Viewing load details for available fuel orders
When viewing load details for a consolidated fuel order, you can display each order separately.
To view load details for available fuel orders, follow these steps.
-
To view information about a load, click on the load in the grid and click View Details.
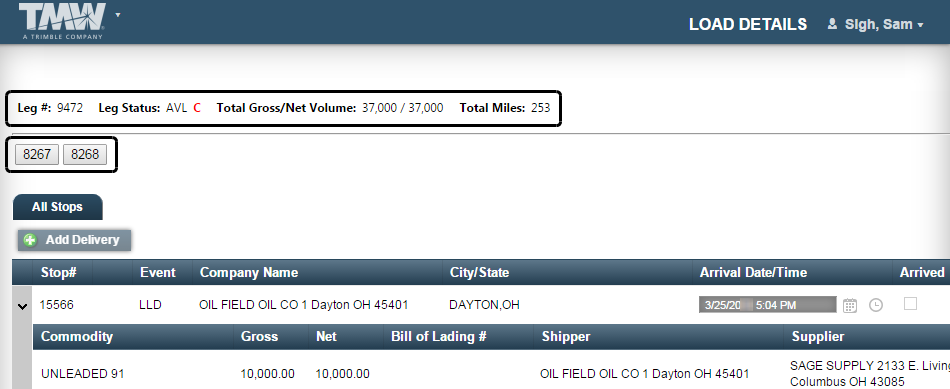
Load information is shown on the Load Details page. The leg number, leg status, load volume, and total miles appear at the top of the page.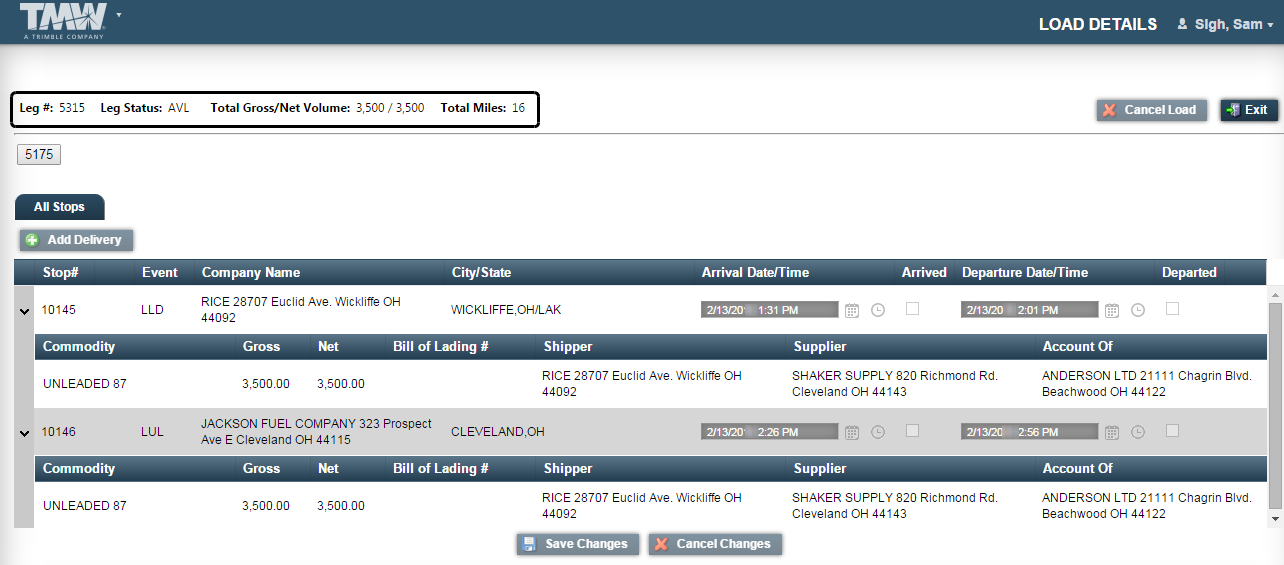
If you select a consolidated order, the Load Details page displays the leg number, leg status, load volume, and total miles. A button displays for each order consolidated into the trip.
-
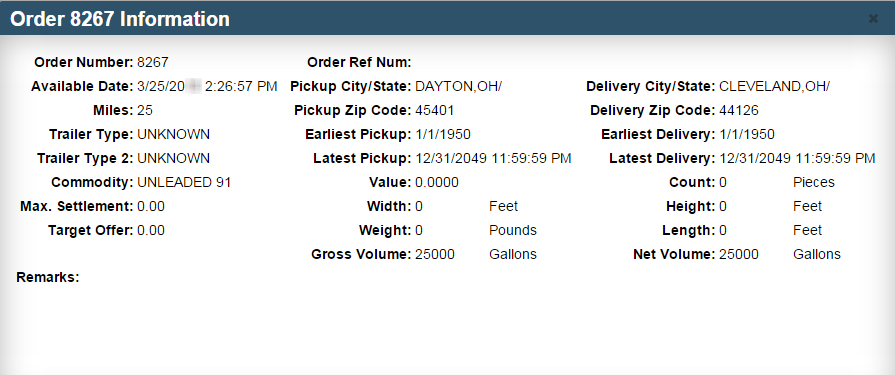
Click a button to open a pop-up window with details about that order.
Requesting an available load
Your login determines whether you can request available loads. When you request a load, you are required to provide contact information about your company. When you submit the request, it is forwarded to the hosting company via e-mail. Your request is acknowledged via e-mail. If you are selected to transport the load, a representative of the company hosting this website will contact you by phone, fax, or e-mail to let you know that you were awarded the load.
If your login allows you to request a load, follow these steps.
-
Click on the load in the grid and click Request.
The Load Request Details pane appears.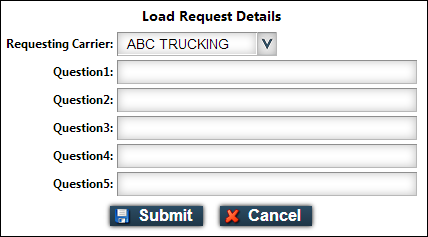
-
Answer the questions in the fields provided.
The fields in this sample represent information that may be requested. Your form may look different from this sample.
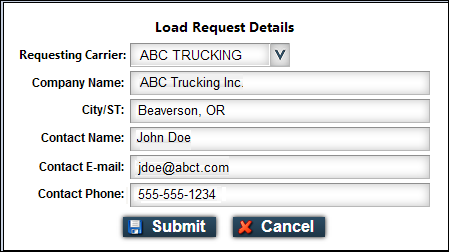
Note: The hosting company may have associated your login with multiple carrier IDs. In this case, the Requesting Carrier field appears in the Load Request Detail section. The value in the field is the name of the default carrier associated with your login.
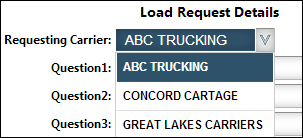
If needed, click in the field to display the list of carriers associated with your login and select a different carrier.
-
Click Submit.
Your request is submitted via e-mail.
The top of the page displays a confirmation that your load request for the order was successful.
Self-assigning a load
Your login determines whether you can self-assign loads. This feature allows you to take ownership of a load without first having the company hosting the website approve the assignment.
If your login allows you to self-assign a load, follow these steps.
-
Click on the load in the grid and click Self-Assign.
The Assign Carrier page appears.The Carrier field displays the name recorded for you in the hosting company’s dispatch system. Information from your user profile appears in the Contact section. If necessary, you can change this information.
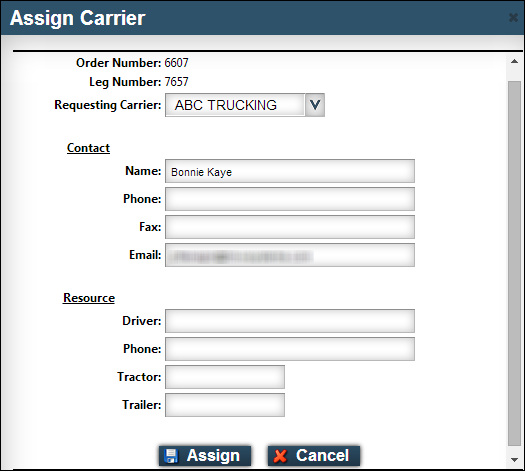
Note: The hosting company may have associated your login with multiple carrier IDs. In this case, the Carrier field shows the name recorded for your default Carrier ID. If you need to, click in the field and select a different carrier.
-
In the Resource section, enter contact information for the driver, and IDs for the tractor and trailer you will use on the assignment.
Note: Your entries here do not update the contact information in your user profile.
Field Definition Contact
Name
Displays the contact name from your user profile
If necessary, enter a different contact name.
Phone
Displays the contact’s area code and phone number from your user profile
If necessary, enter a different phone number.
Fax
Displays the contact’s area code and fax number from your user profile
If necessary, enter a different fax number.
Email
Displays the contact’s e-mail address from your user profile
If necessary, enter a different e-mail address.
Resource
Driver
Enter the driver’s name.
Phone
Enter the driver’s area code and phone number.
Tractor
Enter the name/ID of the tractor to be assigned to the load.
Trailer
Enter the name/ID of each trailer to be assigned to the load.
-
Click Assign.
Your request is submitted via e-mail. The top of the page displays a confirmation that your self-assignment of the load was successful.

You will be contacted regarding the load by phone, fax, or e-mail.
Note: Self-assigned loads appear on the Assigned Loads tab on the Assigned Loads page.