Managing data grid permissions
You control who can access any of the application’s data grids. You also can restrict the actions a user role can perform when viewing a grid.
All grids have a system-default configuration that specifies which user roles have access to it. If you want other user roles to have access to a grid, you can add roles to the grid’s configuration. However, you must save the configuration with a new name if you are:
-
Changing a system-default grid configuration created by the adminacct login or
-
Changing an existing grid configuration created by another user
By default, all users may configure grids. These permissions are managed by theme settings. You can restrict the actions a user role can perform when viewing a grid by changing default theme settings.
Assigning roles to grid configurations
All grids have a system-default configuration that has certain user roles assigned to it. Users cannot access a grid if their role has not been assigned to at least one of the grid’s configurations.
Users who try to access a grid that is not set up for their role receive a No Filter Exists message.

If you want other user roles to have access to a grid, you can add roles to the grid’s configuration.
|
You must save the grid configuration with a new name if you are:
|
To assign a role to a grid, follow these steps:
-
Go to the page with the grid to which you want to assign a role.
-
In the Filter list, select the grid configuration to which you want to assign the role.
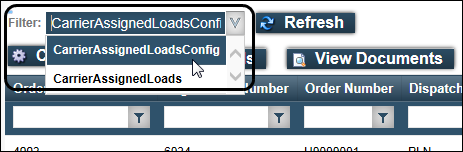
Note: Every grid has a system-default configuration. It has Config at the end of its name. If the system-default configuration is the only one that exists for the grid, the Filter list does not appear.
-
Click Configure.
The Grid Configuration page for the grid configuration you selected opens.Note: If the Configure button does not appear on the page, you may not have permission to configure grids.
-
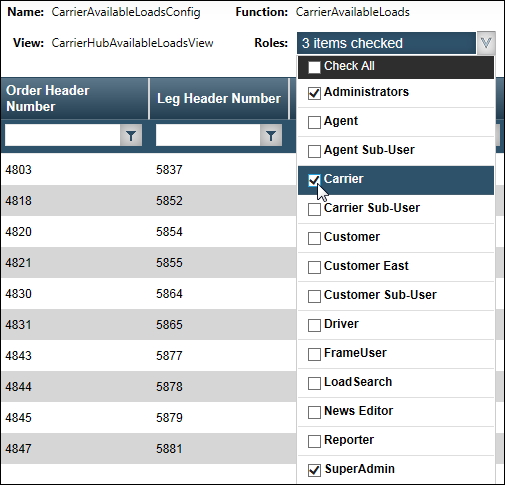
In the Roles list, select the roles for which you want to allow access.
Note: Users who do not have an administrator role do not have the option to assign roles to a grid configuration.
-
Save the grid configuration.
-
If you are modifying an existing grid configuration you did not create, save it with a new name.
-
Click Save As.
The Save Grid Setup pop-up window opens.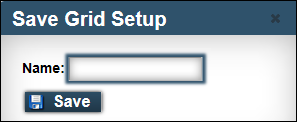
-
Enter a name for the new grid configuration and click Save.
A message confirms the new grid configuration was saved successfully.
-
-
If you are saving changes to a grid configuration you created, click Save.
A message confirms the configuration was saved successfully.
-
|
Before deleting a role, remove that role’s assignment to any grid configurations. If a deleted role remains assigned to any grid configurations, the affected configurations may not function properly. To remove a role assignment from a grid configuration:
|
Preventing users from changing or setting up grids
By default, all users may create new grid configurations. Users also may change the contents and appearance of a grid while they are viewing it. Grid configurations set up by non-administrators are not available to other users.
You can restrict the actions a user role can perform when viewing or setting up a grid. These permissions are managed by theme settings.
Because grid configuration settings are saved to a theme, you may want to create a new theme just to control how users interact with grids. Or, you can change the settings for the theme to which the user roles already are assigned. For more information about setting up specialized themes for different roles, see Creating and maintaining themes.
To limit the actions a user can perform when viewing or setting up a grid, follow these steps:
-
Go to Menu > Admin > Theme > Customize Site.
The Customize Site page opens. -
In the Theme Selection list, select the theme for which you want to change grid configuration settings.
-
Click these tabs: Control Settings > Grid.
Enable or disable the appropriate grid configuration options.
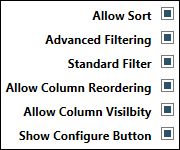
Field Definition Allow Sort
Select to allow column data to be sorted in ascending or descending order.
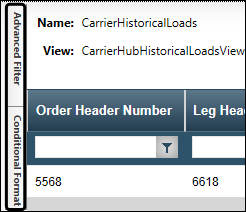
Advanced Filtering
Select to allow access to the Advanced Filter and Conditional Format tabs on the Grid Configuration page.
Standard Filter
Select to allow access to the filter row.

Use the filter row to set filters for any column. The filters are in effect until you leave the page.
Allow Column Reordering
Select to allow grid columns to be rearranged.
Allow Column Visibility
Select to display the Columns button on the Grid Configuration page.
Clicking Columns for a grid opens a pop-up window that allows you to select which grid columns display and how the title for each column appears.
Show Configure Button
Select to display the Configure button.
Clicking Configure on a grid opens it in the Grid Configuration page. This page provides access to grid configuration options, such as creating and saving grid configurations, advanced column filtering, and conditional formatting.
-
Click Save Theme.
A message confirms the theme was saved successfully.