Working with crude orders
Your hosting company may allow you to enter orders for crude deliveries. Depending on your login, you can enter them on any of the following pages:
-
Crude Order Entry
This illustration shows a basic order entry page.
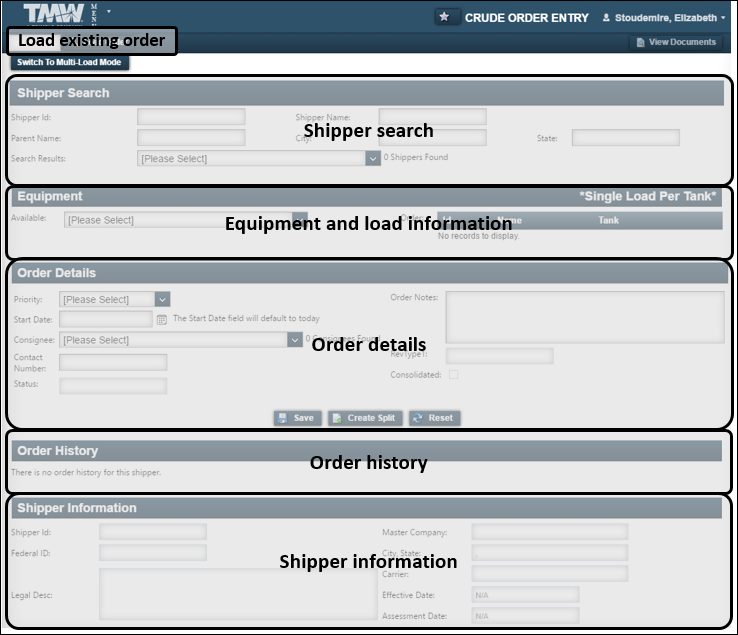
On this page, you can enter one or more orders for a single pickup and drop. You can also create split orders by specifying two or more pickups for a single drop.
-
You enter search criteria in the Shipper Search section. You can select a shipper from the list of shippers that match your criteria.
-
In the Equipment section, you select one or more tanks. If you choose multi-load mode, you can select one or more loads for each tank.
-
In the Order Details section, you specify the consignee. You also set the start date, order priority, and other information.
-
The Order History section shows all orders that have the shipper you selected in the Shipper Id field.
-
The Shipper Information section shows more information about the shipper. This section is read-only.
-
-
Crude Mass Order Entry
This illustration shows a basic mass order entry page.
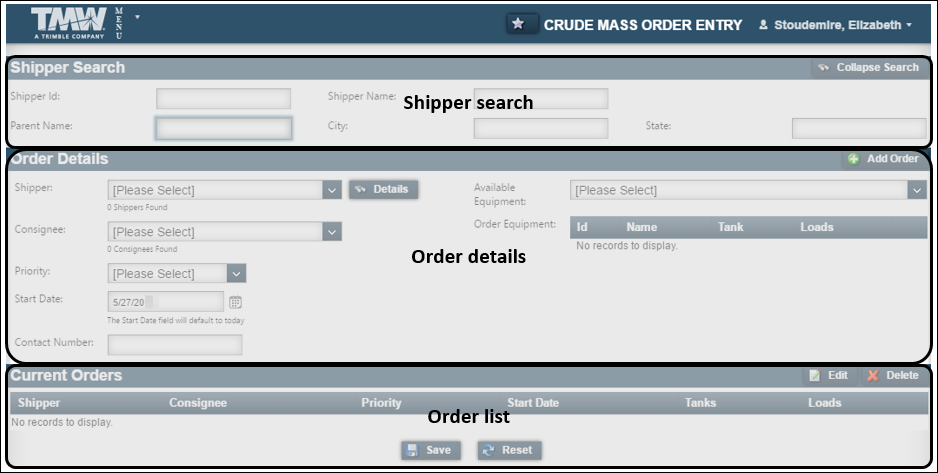
On this page, you can enter one or more orders for multiple pickups and drops.
-
You enter search criteria in the Shipper Search section.
-
You enter information for each order in the Order Details section. This includes the shipper, consignee, start date, tank(s), and load(s). Clicking Add Order adds the order to the list of orders.
-
The Current Orders section contains information about the orders you have created. Clicking Save saves all the orders in this section.
-
-
Crude Order Import and Crude Order Management
On this page, you can import order files. These files follow a predefined comma-delimited (*.CSV) file format.
When you import orders, missing or incorrect data can produce an error. You can edit orders to correct errors directly on the Crude Order Management page.

Creating a crude order
If your login permits, you can enter crude orders on the Crude Order Entry page. On this page, you can specify one or more tanks belonging to a single shipper. Loads are delivered to a single consignee.
To enter a crude order on the Crude Order Entry page, follow these steps:
-
Go to Menu > Customer > Crude > Crude Order Entry.
The Crude Order Entry page opens.By default, the Crude Order Entry page opens in single-load mode. In this mode, for each tank selected, you can specify a single load, as indicated in the Equipment section.

If you want to specify two or more loads for each tank, click Switch to Multi-Load Mode. Text in the Equipment section changes to indicate multi-load mode.

To switch back to single-load mode, click Switch to Single-Load Mode.
-
In the Shipper Search section, enter shipper criteria in one or more fields.
-
Enter at least one character in any of the search fields (Shipper Id, Shipper Name, Parent Name, City, State).
-
Press TAB.
Text to the right of the Search Results field indicates the number of shippers that meet the criteria you specify.
Note: You can repeat Steps a and b to further restrict the search results.
-
-
In the Search Results field, select the shipper.
The Shipper Search section collapses. Only the selected shipper name is displayed.
Notes:
-
To change the shipper, click Change Shipper. The Shipper Search section expands, allowing you to enter different search criteria.
-
If there are existing orders for this shipper, they appear in the Order History section. By default, this section displays orders created within the previous 30 days. Your hosting company may change this value.
-
-
In the Equipment section, select a tank in the Available field.
The Order area displays tank information.
Note: To delete the tank information from the order, click Delete. -
If you are working in multi-load mode, enter the number of loads for the tank.

Note: By default, you can enter a maximum of 50 loads per tank. Your hosting company may change this value.
-
Repeat Steps 4 and 5 for each tank to which you want to add a load.
Note: Every load you select is treated as a single order. If you are working in single-load mode, and you select a load from two or more tanks, the system consolidates those orders when you save them.
-
In the Order Details section, enter additional information about the order.
Required: *
Field Definition Priority
The dispatch priority for the order
Options available are:
-
48 Hours (default)
-
ASAP
-
12 Hours
-
24 Hours
-
UNKNOWN
Start Date *
The earliest date scheduled for the pickup to occur
The value in this field defaults to the current date.
Consignee *
The company that will receive the delivery
Text to the right of the field displays the number of consignees available in your database.

To change the value, type one or more letters that begin the company name. A list of companies that meet the criteria appears in the field.
Contact Number
The phone number of a company contact
Status
Current dispatch status of the trip. This is a read-only field.
Order Notes
Notes about the order
RevType1
The revenue classification value defined for the shipper in the hosting company’s dispatch system. This is a read-only field.
Consolidated
Indicates whether the order is part of a consolidated trip
This is a read-only field.
-
-
Click Save.
The Saved Orders window opens. It displays information about the order(s) created. The type of information differs depending on the number of tanks and loads selected.-
Single-load mode, one tank selected
This illustration shows a single order. In this case, one tank was selected.

-
Single-load mode, multiple tanks selected
This illustration shows two orders. In this case, two tanks were selected. Note that the orders are consolidated.

-
Multi-load mode, one tank selected
This illustration shows two orders. In this case, two loads were entered for a single tank.

-
Multi-load mode, multiple tanks selected
This illustration shows four orders. In this case, two tanks were selected, and two loads were entered for each tank.
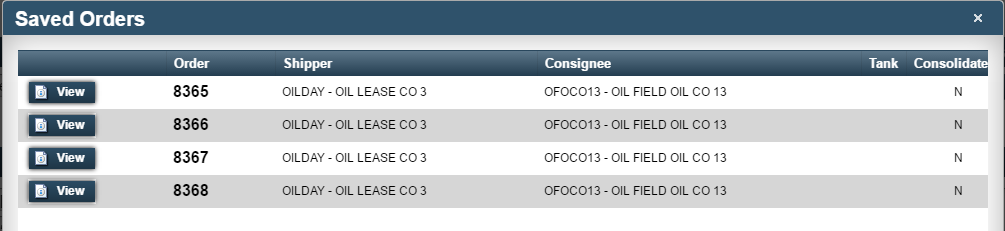
To see an order’s details, click View next to it. A new instance of the Crude Order Entry page opens, displaying the order information. If you want, you can make changes to the order on this instance.
Note: If the instance does not appear, make sure your browser allows you to view pop-up windows for your site.
-
-
To close the Saved Orders window, click Close.
Creating a split order
On the Crude Order Entry page, you can split an order among two or more shippers for delivery to a single consignee. By default, the system consolidates split orders onto a single trip.
| You cannot create split orders in multi-load mode. |
To create a split order, follow these steps.
-
Go to Menu > Customer > Crude > Crude Order Entry.
The Crude Order Entry page opens. -
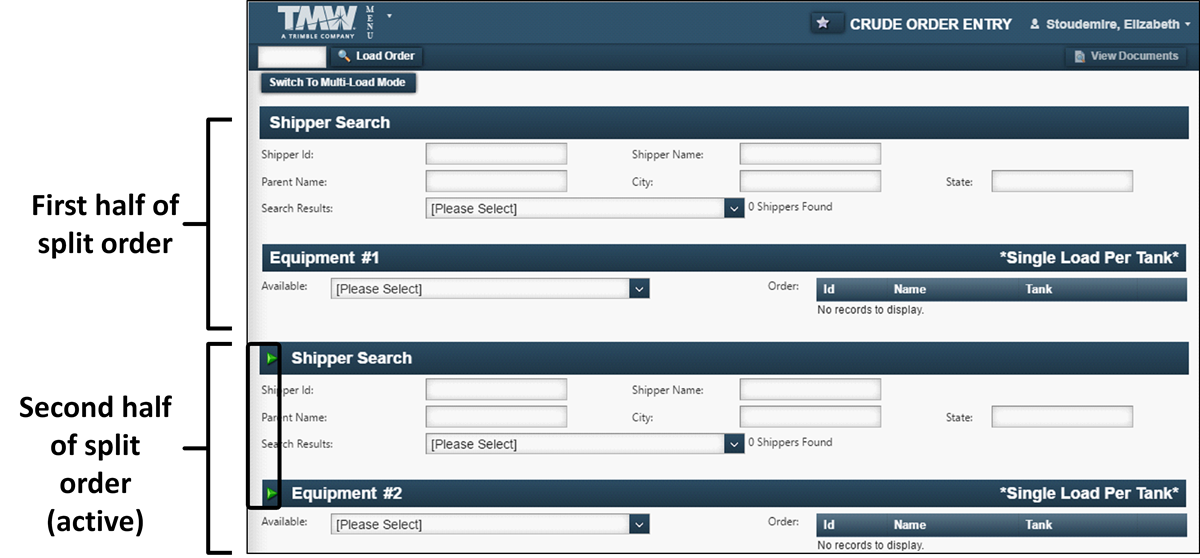
In the Order Details section, click Create Split.
Additional Shipper Search and Equipment sections appear. The active shipper/equipment areas contain a green triangle.This illustration shows an order split into two halves.
-
Repeat Step 2 for each split you want to create.
Note: Your hosting company can limit the number of splits. If you reach this limit, the Create Split button is disabled.
-
For each part of the split, enter shipper and equipment information.
-
In the Order Details section, enter order details.
-
Click Save.
The Saved Orders window opens. It displays information about the order(s) created.This illustration shows three orders. In this case, two tanks were selected for the first shipper and one tank was selected for the second shipper. Note that the orders are consolidated.

To view an order, click View next to the order. A new instance of the Crude Order Entry page opens displaying the order information.
Note: If the instance does not appear, make sure your browser allows you to view pop-up windows for your site.
-
To close the Saved Orders window, click Close.
Creating multiple crude orders
If your login permits, you can enter multiple crude orders on the Crude Mass Order Entry page. On this page, you can specify shipper, equipment, product, and consignee information for each order.
To create multiple crude orders, follow these steps.
-
Go to Menu > Customer > Crude > Crude Mass Order Entry.
The Crude Mass Order Entry page opens. -
In the Shipper Search section, enter shipper criteria in one or more fields.
-
Enter at least one character in any field.
-
Press TAB.
In the Order Details section, text beneath the Shipper field indicates the number of shippers that meet the criteria you specify.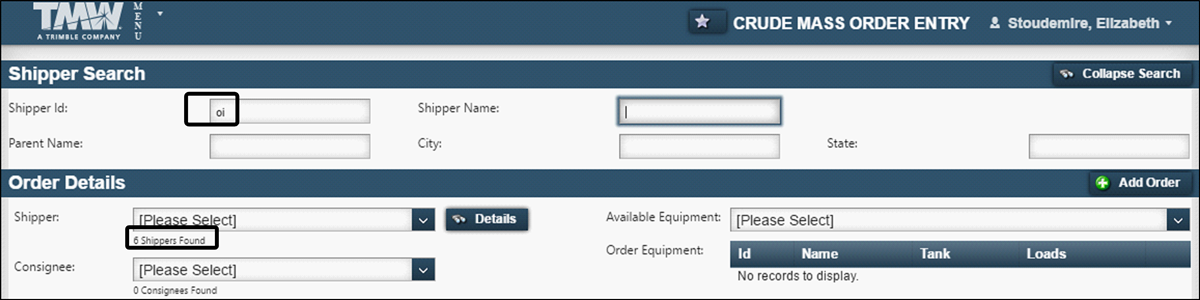
Note: You can repeat Steps a and b to further restrict the search results.
-
-
In the Order Details section, select the shipper in the Shipper field.
The Shipper Search section collapses.Notes:
-
To change the search criteria, click Refine Search. The Shipper Search section expands, allowing you to enter different or additional information.
-
To see information about the shipper, click Details.
The Shipper Details window opens. It displays information the hosting company has on file about the shipper and its order history. To close this window, click Close.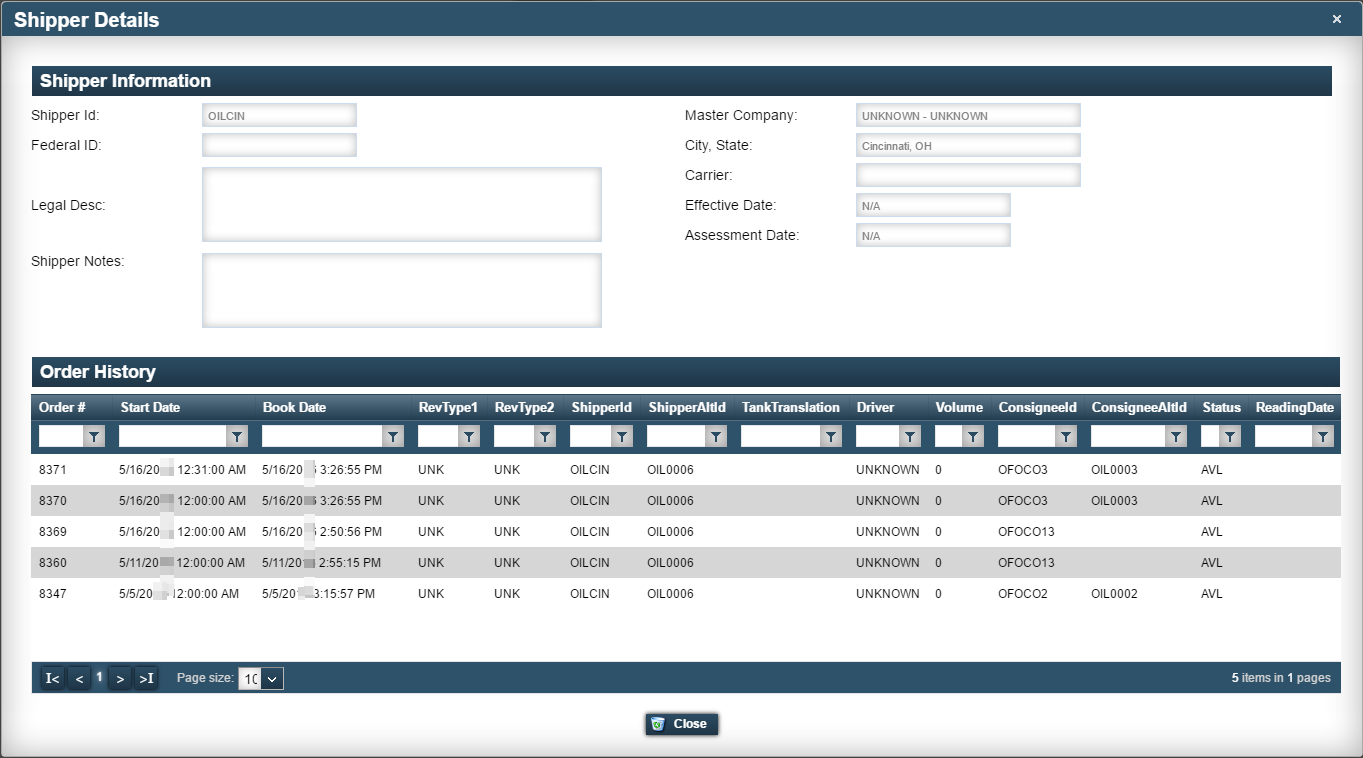
-
-
In the Order Details section, enter information about the order.
Required: *
Field Definition Consignee *
The company that will receive the delivery
Text below the field displays the number of consignees available in your database.

To change the value, type one or more letters that begin the company name. A list of companies that meet the criteria appears in the field.
Priority
The dispatch priority for the order
Options available are:
-
Low Priority (default)
-
Medium Priority
-
High Priority
-
UNKNOWN
Start Date*
The earliest date scheduled for the pickup to occur
The value in this field defaults to the current date.
Contact Number
The phone number of a company contact
-
-
In the Available Equipment field, select a tank.
The Order Equipment area displays tank information.
Note: If you selected the wrong tank, you can remove it by clicking Delete. -
The Load field defaults to a value of 1. If needed, enter the number of loads for the tank.

-
Repeat Steps 5 and 6 for each tank to which you want to add one or more loads.
-
Click Add Order.
The Current Orders grid displays information about the orders you have created.
-
Repeat Steps 3-8 for each order you want to add. The Shipper field retains the search results of the criteria you entered in Step 2.
-
When you have added all your orders, you can review them in the Current Orders grid.
-
To delete an order, select it in the grid and click Delete.
-
To edit an order:
-
Select it in the grid.
-
Click Edit. The Order Details section displays the order information.
-
Make changes as needed.
-
When you have completed your changes, click Update Order.
If you do not want to keep your changes, click Cancel Edit.
-
-
-
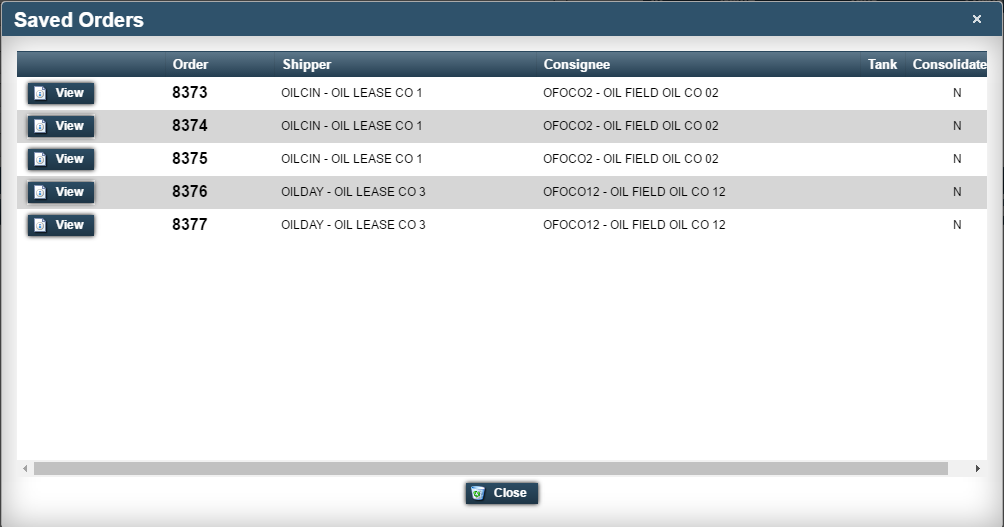
When you have created all the needed orders, click Save.
The Saved Orders window opens. It displays information about the order(s) created. An order is created for each load specified.This illustration shows five orders. Three of the orders were created for one shipper and consignee. Two of the orders were created for a different shipper and consignee.
To see an order’s details, click View next to it. A new instance of the Crude Order Entry page opens, displaying the order information. If you want, you can make changes to the order on this instance.
Note: If the instance does not appear, make sure your browser allows you to view pop-up windows for your site.
-
To close the Saved Orders window, click Close.
Editing a crude order
If your login permits, you can edit a crude order until it has a status of Started.
-
Go to Menu > Customer > Crude > Crude Order Entry.
The Crude Order Entry page opens. -
Enter the order number in the field to the left of the Load Order button.

-
Click Load Order.
The order appears on the page. -
Make changes as needed.
Note: If the order has a status of Planned or Dispatched, you can change only the contact number, order notes, and/or priority. -
When you are done, click Save.
Importing crude orders
If your login permits, you can import crude orders on the Crude Order Import page. The page accepts comma-delimited (.CSV) files that follow a predefined file format.
You can view imported orders and correct any field errors on the Crude Order Management page.
Importing a file
Your hosting company determines the file format for your system. To import a file, follow these steps.
-
Go to Menu > Customer > Crude > Crude Order Import.
The Crude Order Import page opens. -
Click in the Import File field, or click Select.
A window opens, prompting you to select a file to import. -
Locate and select the file.
-
Click Open.
The name of the file is displayed.
-
Do one of the following:
-
To import a different file, click Remove and repeat Steps 2-4.
-
To import the file you selected, click Import Order File.
-
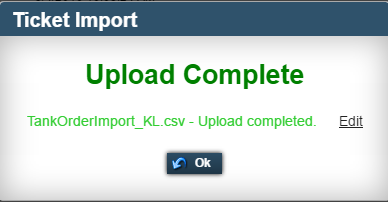
If the import is successful and there are no data errors, the Ticket Import message is displayed. It lists the name of the file and states that the upload is complete.
If the import is successful, but there are data errors, the message lists the file name and states that the upload completed with errors.
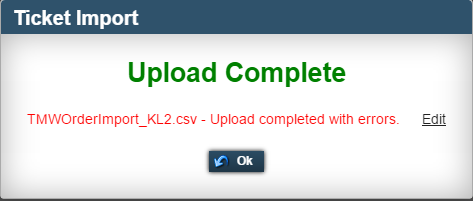
To view the import results, click Edit. The Crude Order Management page opens. On this page you can review and edit file information.
You can also click OK to close the message. The Crude Order Import page opens with a new line item representing the batch import results.
Viewing and editing an imported file
You can view and edit order information in an imported file up to a few hours prior to the start time. To view and edit the contents of an imported file in the Crude Order Import page, follow these steps.
-
Go to Menu > Customer > Crude > Crude Order Import.
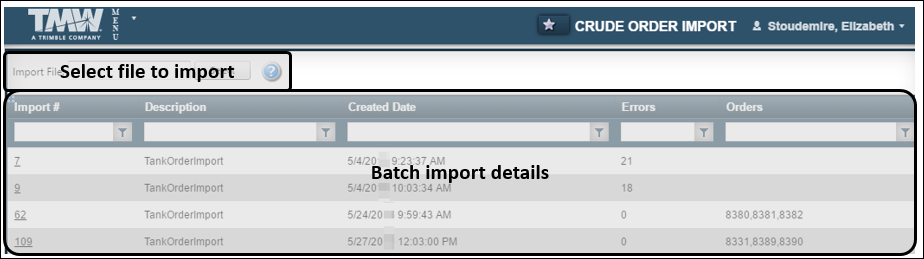
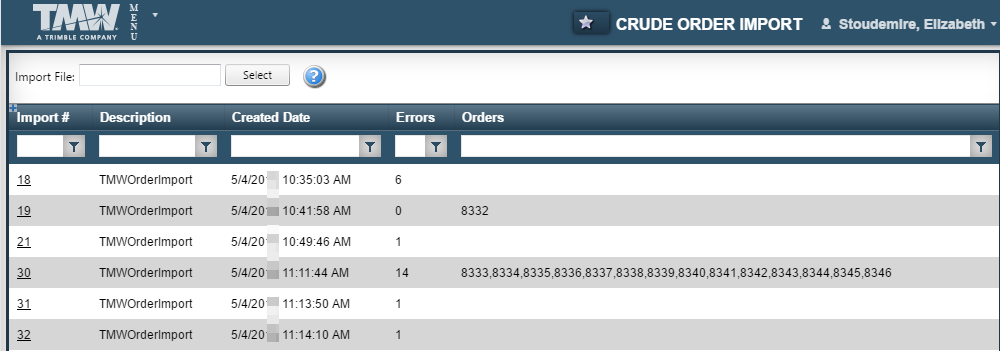
The Crude Order Import page opens. It lists all the imports that have been performed.Field Definition Import #
System-generated number representing the imported file
Description
File format as determined by your hosting company
Created Date
Date the file was imported
Errors
Number of data errors in the imported file
Orders
Original order numbers as specified in the import file
Note: The system will create a new order number for each imported order. The original order number is stored as a customer reference number.
-
In the grid, do one of the following:
-
Click the import number corresponding to the file you want to view.
-
Right-click on the row corresponding to the file you want to view and select Edit.
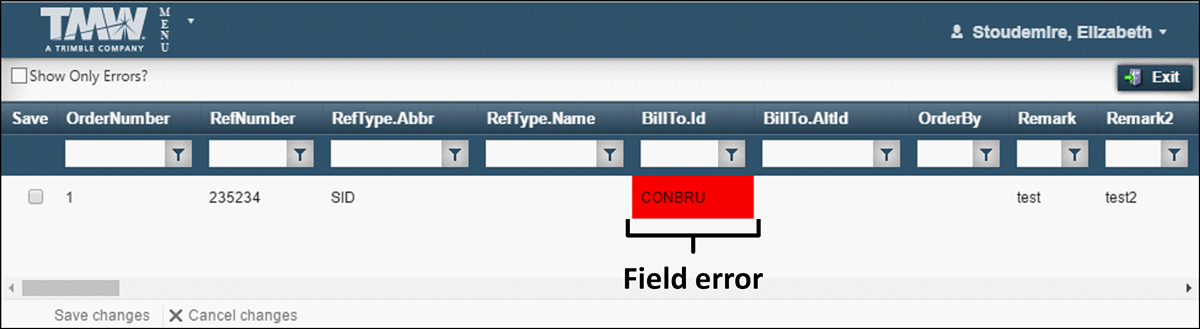
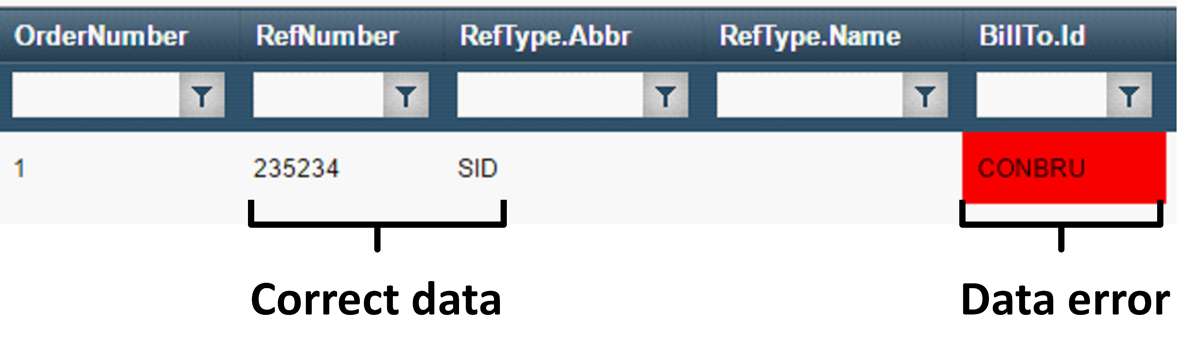
The Crude Order Management page opens. It displays a row for each imported order. Fields with errors, such as missing or incorrect data, are highlighted in red.
-
-
Make any needed edits.
-
Click in the field corresponding to the order you want to edit.
-
Make your changes.
Notes:
-
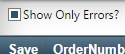
To display only rows containing data errors, select the Show Only Errors check box.
-
If an order contains data errors, you must correct them. The system cannot import orders with errors.
-
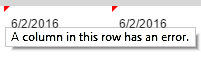
If you make a change that may result in a data error, a red triangle appears in the top left corner of the field. Position your pointer over the field to view a ToolTip.
-
-
-
Repeat Step 3 for each order you want to edit.
-
To save your changes, do the following:
-
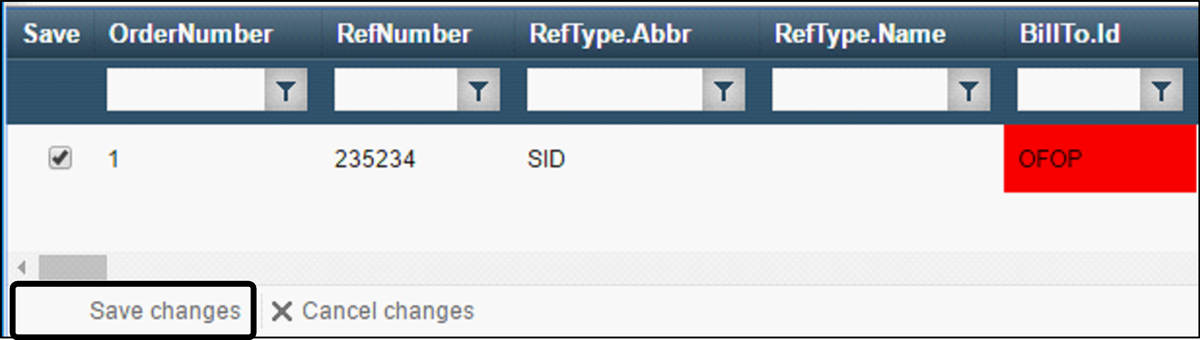
Click the Save check box next to each order you want to save.
-
Click Save Changes at the bottom of the page.
The Crude Order Management page redisplays with the changes made.
-
-
Click Exit twice to return to the Crude Order Import page.
If the changes were accepted, a new row appears, displaying the numbers of the orders that were created.
