Allowing users to edit fuel shipments
By default once a user submits a fuel order as a tendered shipment, they cannot make further changes to that order. You can use the Allow Edit of these Statuses feature to edit tendered fuel orders. This setting is located on the Shipment Tracking - 3 sub tab in the Settings Manager.
You can edit the following statuses:
-
Tendered
-
Available
You use the View Tendered Loads page, fields defining the order can be edited. The bottom of the Fuel Shipment Tender page contains four editing-related command buttons.
-
Update This Shipment
The system will save the changes to the shipment using the same order ID that was assigned when the shipment was first submitted. -
Submit as New Shipment
The system will save the changes to the shipment and assign it a new order ID. -
Cancel this Shipment
The system will change the status of the shipment to Canceled. It will not be available for assignment to resources. -
Clear for New Shipment
The currently displayed order will be cleared from the Fuel Shipment Tender page so that the user can create a new shipment.
| Verify that the Process Tendered Shipments setting for this user is cleared, which is the default status. It is located at Menu > Security > Work with Users > Review Users > Customer. If this check box is selected, users will be able to process tendered shipments, but will not be able to edit tendered or available loads. |
To allow users to edit their tendered shipments:
-
Go to Menu > Configuration > Settings Manager.
The Settings Manager page opens. -
Do one of the following:
-
If you want the setting change to apply to all roles, verify the Role field is set to [Global Settings].
-
If you want the setting change to apply to a specific role, select it in the Role field.
A message asks you to verify that you want to change the role. Click OK.
Notes:
-
The default roles for fuel users are CustomerFuel and CustomerFuel Sub-User. Your company may have created other roles for fuel users.
-
If the setting has already been changed for at least one role, its text label is bold and italic.
-
-
-
If needed, select Customer in the Module Selection field.
-
Select the Modules tab.
-
Click these tabs: Application Settings > Shipment Tracking and Reports > Shipment Tracking - 3.
-
In the Allow Edit of these Statuses section, select the statuses that users can edit.
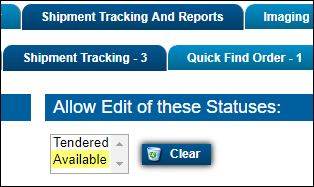
Notes:
-
To select both statuses, hold the CTRL key as you select the second status.
-
If you incorrectly select a status, click Clear.
-
-
Click Save.
A confirmation message is displayed at the top of the page. It states, "Settings saved successfully."If you are making changes for a specific role and this is the first time the setting has been changed for any role, the text label style changes to bold and italic. If you do not want to save, click Revert.