Installing components on the web applications server
Trimble Transportation recommends installing Trimble Web Products using the following two-server configuration:
-
On the web services server, install:
-
Trimble web services
-
Imaging services
-
Fuel services (if using the Fuel pages in eStat® and/or CarrierHub®)
-
Data Warehouse services (if using)
-
TripAlert Map services (if using)
First available in Trimble Web Products 2018.3
In addition, if you are using Freight Order components, install them on this server. -
-
On the web applications (DMZ) server, install:
-
Licensing services
-
Web Products framework services
-
Trimble Web applications
-
Add-on modules (if using)
-
TMW SSRS Report Library (if using)
-
|
This table lists the components you can install on the web applications server.
| Type of component | Component |
|---|---|
Services |
Web Framework WCF Services |
Web Applications |
|
Reporting |
|
Add-Ons (as needed) |
|
To install components on the application server, follow the steps listed in these sections. Follow the sections in order from top to bottom.
Beginning the installation process
-
Go to the location where you saved the Trimble Web Products installer (*.EXE).
-
Right-click on the .EXE file and select Run as administrator.
The installer home page opens.
-
Click Install Trimble Transportation Products.
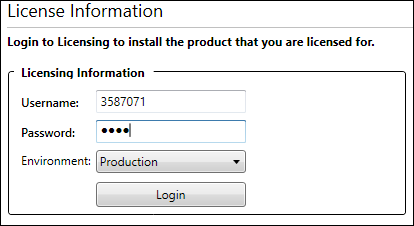
The License Information window opens.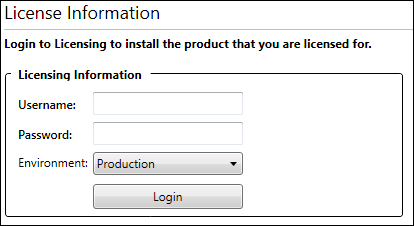
-
Enter your Client Center information and the type of environment you are creating.
-
In the Environment field, select the environment needed.
Options are:
-
Development
-
Test
-
QA
-
Production
-
-
Click Login.
If the information entered is incorrect, the window redisplays with red fields. Reenter the information and try again. If you are still unable to log in, contact Support.If the information is correct, two lists of items display.
-
The Modules Found section lists the number and names of modules included in the installer.
-
The Dispatch Systems Found section lists the number and names of Trimble Transportation dispatch systems with which you can use Trimble Web Products.
An icon is displayed next to each item. The type of icon differs depending on your licenses and existing instances.
Icon Definition 
You do not have a valid license for the module or system.

You have a valid license for the module or system. You can install related components for the environment you selected.

You have a valid license for the module, however, the environment type selected is used in a different installation of the application. another configuration is using it in the same environment. You can proceed with the installation. However, doing so reallocates the license to the new environment.

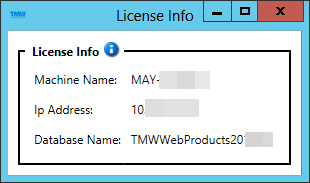
Click this icon to open the License Info window. It displays information about the configuration that is using the module in the environment you selected.
-
-
Click Next.
The Installation Type window opens.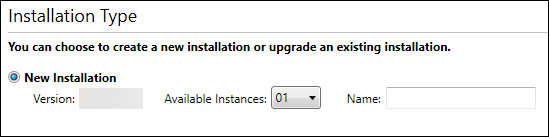
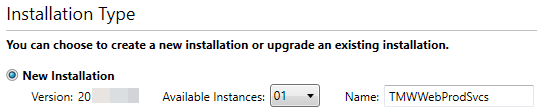
Specifying the installation type
This procedure describes a first-time installation of a single instance of Trimble Web Products. For information on installing additional instances, see Adding another instance of Trimble Web Products. For information on modifying existing instances, see Modifying, upgrading, or removing an existing Trimble Web Products instance.
To specify the installation type:
-
If needed, select New Installation.
-
Leave the Available Instances field value at 01.
-
In the Name field, enter the name of this instance.
The installer uses this name to identify the instance.
Note: Write down the name of this instance because you will enter it again when installing components on the web applications server.
-
When you have finished entering the name, press TAB.
The Next button is enabled. -
Click Next.
The Products window opens.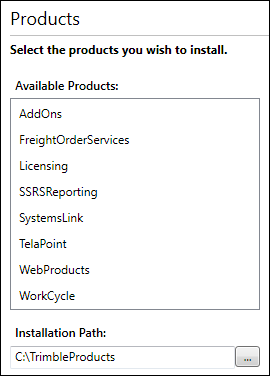
-
Follow the steps listed in "Specifying the products to install," below.
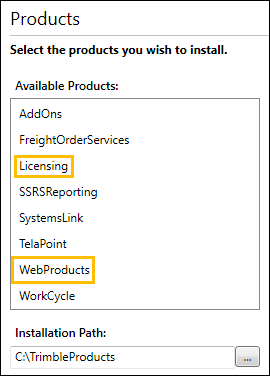
Specifying the products to install
-
In the Available Products section, select Licensing and WebProducts.
-
To install add-on modules, select AddOns.
-
To install the TMW SSRS Report Library, select SSRSReporting.
-
-
In the Installation Path, specify the installation location.
The default value is C:\TrimbleProducts.
To change this value, click
 Browse. In the window that opens, you can create a new folder location or select an existing location.
 -
Click Next.
The Setup window opens. -
Follow the steps listed in "Specifying the options to install," below.
Specifying the options to install
-
In the Services field, select Web Framework WCF Services and Licensing API.
-
In the SQL Installations field, select Web Framework.
-
Make additional selections as needed.
If your instance is using Make any or all of these selections in Web Applications Make this selection in SQL Installations Trimble Web Products
-
Agent
-
Carrier
-
Customer
-
Driver
Operations
Trimble Web Products Fuel
-
Carrier
-
Customer
Fuel Dispatch
Trimble Web Products Crude
-
CarrierCrude
-
CustomerCrude
Crude Oil
Data Warehouse
Data Warehouse
Data Warehouse
TMW.Suite Go
Mobile
Note: Before Trimble Web Products 2019.2, this was TMWGoHost.
n/a
TripAlert
TripAlert
n/a
-
-
Make selections in the Reporting section as needed.
-
SSRS Reports (Operations)
-
SSRS Reports (Fuel)
-
Microsoft Dynamics GP Reports
-
Total Mail Reports
-
-
Click Next.
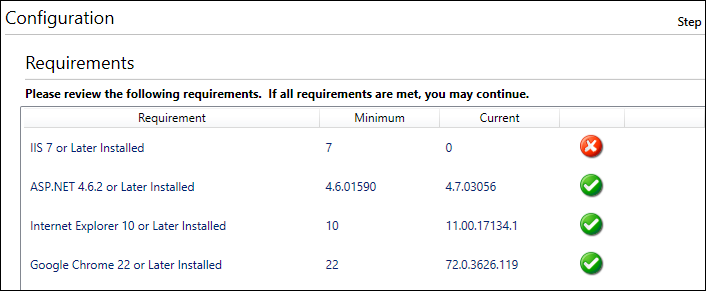
The Check Requirements window opens.This illustration shows an installation with missing requirements.
-
For each requirement that is met, a
confirmation icon is displayed. -
For each requirement that is not met, an
error icon and Install button are displayed.To install the missing requirement, click Install and follow the on-screen instructions.
Notes:
-
If one or both browser requirements are not met, but all other requirements are met, you can proceed with the installation.
-
You cannot proceed with the installation if one or both of the following are true:
-
The IIS and/or ASP.NET requirement is not met
-
The SQL server requirement is not met and you are installing a version of Trimble Web Products that is earlier than 2017.3
-
-
For versions 2017.5 and later, the minimum SQL Server requirement is 2012. If your machine does not have this version installed, and you are installing version 2017.5 or later, contact Trimble Transportation Support. If you do not already have an account, you can create one by clicking Sign Up.
-
This illustration shows an installation with no errors.

-
-
Click Next.
The IIS Setup window opens.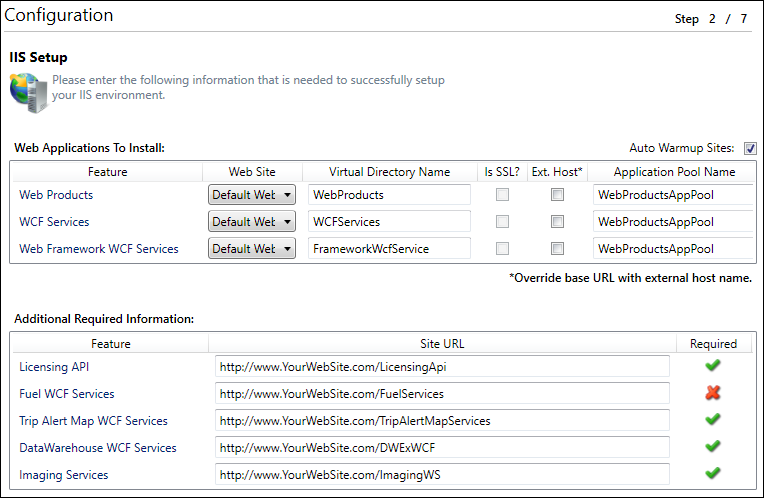
-
Follow the steps listed in "Specifying IIS settings for applications," below.
Specifying IIS settings for applications
-
Make entries in the following fields for each application that you are installing.
Field Definition Web Site
The root-level web site in IIS Manager defaults to Default Web Site.
If needed, select the name of your web site from the drop-down field.
Virtual Directory
The virtual directory receives queries and directs each query to the appropriate data source.
The default name for the services virtual directory appears in the field. If you want, enter another name for the virtual directory.
Is SSL?
First available in Trimble Web Products 2018.2
Select this option if the application is using Secure Socket Layer (SSL).
Ext. Host
First available in Trimble Web Products 2018.2
Select this option if the URL for the application will be called externally.
Application Pool Name
In IIS 7.0 and later, you group your web applications and services by assigning each to an application pool. Applications that call similar processes could be in the same application pool.
The default name for the application pool appears in the field. If you want, enter another name for the application pool.
Site URL
The default name for the application virtual directory. If you want, enter another name for the virtual directory.
-
Click Next.
The Mail Setup window opens.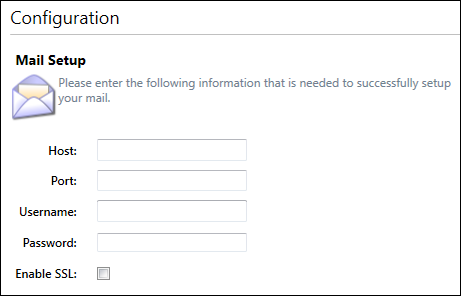
-
Follow the steps listed in "Specifying mail settings," below.
Specifying mail settings
-
Make entries in the following fields.
Field Definition Host
Enter the name of the SMTP host used for e-mail connectivity.
Port
-
By default, SMTP uses TCP port 25.
-
For mail submission, use port 587.
-
SMTP connections secured by SSL (known as SMTPS) default to port 465.
Username
If needed, enter the SMTP user name used for e-mail connectivity.
Password
If needed, enter the SMTP password used for e-mail connectivity.
Enable SSL
Select the check box to enable your network mail for the SSL protocol (recommended).
-
-
Click Next.
The SQL Setup window opens.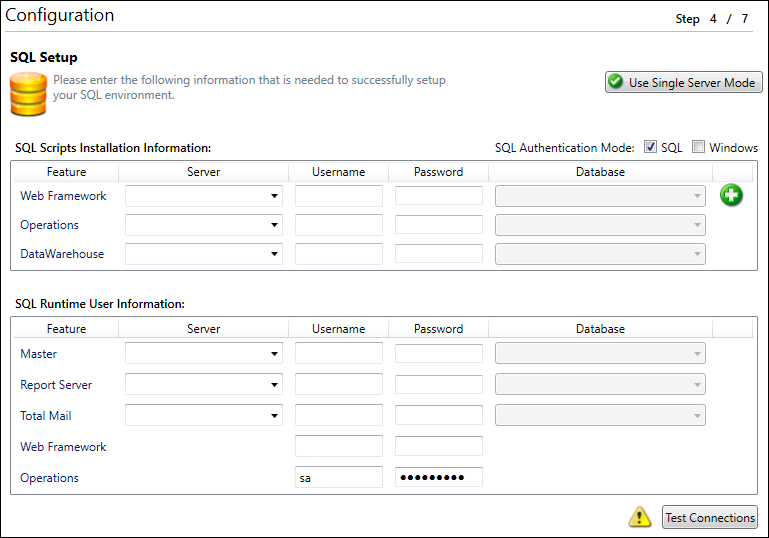
-
Follow the steps listed in "Specifying database locations," below.
Specifying database locations
Depending on your installation and licensing, you will be prompted for one of the following:
-
TMW Operations database
-
Fuel Dispatch database
-
Data Warehouse database (if licensed)
-
In the SQL Authentication section, do one of the following:
-
Select the SQL check box.
Select this option if you want to use the SQL server admin username and password to connect to the databases. -
Select the Windows check box.
Select this option if you want to use Windows Authentication to connect to the databases.
-
-
In the Server field, enter or select your server (for example, MAY-DOC-SQL\SQL).
Note: In the SQL Runtime User Information section, the Server field automatically updates with the information you specified.
-
Do one of the following:
-
If you selected the SQL check box, enter the server’s admin username and password.
Note: You must enter the admin’s username and password in both the SQL Scripts Installation Information and SQL Runtime User Information sections.
-
If you selected the Windows check box, go to Step 4.
-
-
In the Database field, do the following:
-
For the framework database, click
 Create New Database and enter a unique database name.
 -
For the other databases, select the TMWSuite database.
Note: In the SQL Runtime User Information section, the Database field automatically updates with the information you specified.
-
-
If installing the TMW SSRS Report Library, make entries in the SQL Runtime User Information section as needed.
Field Definition Server
Enter the name of the SQL or report server or select it from the field.
Username
Enter a user name used to connect to the server.
Password
Enter the password used to connect to the server.
Database
For the master database and report server, select the database this instance will use.
-
Click Test Connections.
-
If the information is correct, a
 confirmation icon is displayed.
 -
If it is incorrect, an
error icon is displayed and the fields that are in error are highlighted in red. Correct the information in the fields and repeat this step.
-
-
Click Next.
The TTS Setup window opens.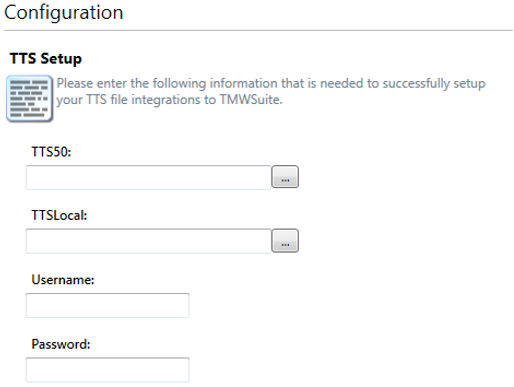
-
Follow the steps listed in "Specifying TTS information," below.
Specifying TTS information
-
In the TTS50: field, enter the location and name of the TTS50 file.
-
In the TTSLocal field, enter the location and name of the TTSLocal file.
Note: If needed, you can click
Browse. This will open a window in which you can navigate to and select the file. -
In the Username field, enter the user’s ID.
-
In the Password field, enter the user’s password and press TAB.
If the information you entered is incorrect, the fields that are in error are highlighted in red.
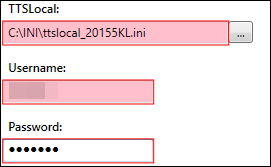
Correct the errors and repeat Steps 3 and 4.
If the information you entered is correct, the Next button becomes active.
-
Click Next.
The SSRS Server Setup window opens.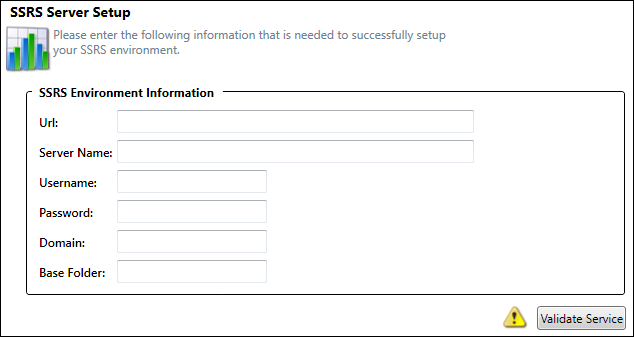
-
Follow the steps listed in "Configuring the SSRS server," below.
Configuring the SSRS server
-
In the Url field, enter the URL of the management endpoint (for example, http://may-doc-sql/reportserver/reportservice2005.asmx).
-
In the Server Name field, enter the name of the report server (for example, http://may-doc-sql/reportserver).
-
In the Username field, enter the username used to connect to the report server.
-
In the Password field, enter the user’s password.
-
In the Domain field, enter the domain name of a Windows user account that can manage reports on the report server (for example, Trimble).
-
In the Base Folder, enter the name of the folder where the SSRS Report Library will be installed.
This illustration shows an example of the SSRS Report setup.
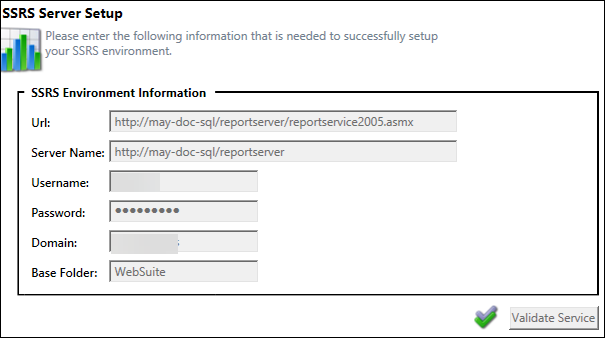
-
Click Validate Service.
-
If the information is correct, a
confirmation icon is displayed. -
If it is incorrect, an
 error icon is displayed. Correct the information and repeat this step.
-
-
Click Next.
The Add Ons Setup window opens.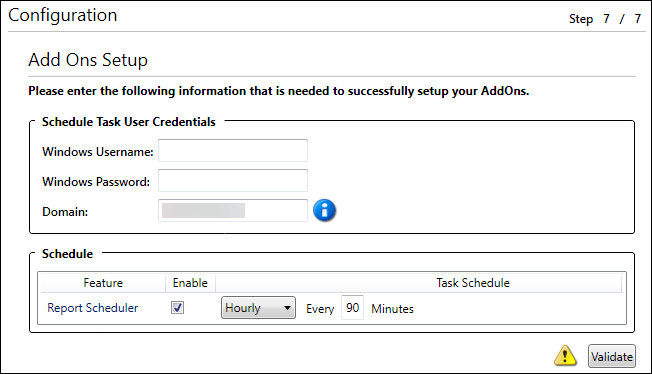
-
Do one of the following:
-
If you selected one or more add-ons to install, the Add Ons setup window opens. Follow the steps listed in the Configuring add-ons section.
-
If you did not select any add-ons to install, follow the steps listed in Completing the installation.
-
Configuring add-ons
-
In the Schedule Task User Credentials section, make entries in the following fields.
Field Definition Windows Username
Enter the Windows login of the task administrator.
Windows Password
Enter the Windows password of the task administrator.
Domain
Enter the name of the Windows domain.
-
If you selected Carrier Auction Exporter and/or Report Scheduler, enter schedule information in the Schedule section.
Read-only field: §
Field Definition Feature §
Name of the feature being installed
Enable
This check box is selected by default.
To disable it, clear this check box.
Frequency
Select the frequency with which the schedule will run.
Options are:
-
Hourly
-
Daily
-
Weekly
-
Monthly
Interval
Enter the time between tasks, in minutes.
Note: It is recommended that you set this number to at least 60. If the task still does not complete, add 30 minutes to this number and try again. Repeat, increasing the value by 30 minutes each time, until the task completes.
-
-
Click Validate.
-
If the information is correct, a
confirmation icon is displayed and the Next button is activated. -
If it is incorrect, an
error icon appears and the fields that are in error are highlighted in red. Correct the information in the fields and repeat this step.
-
-
Click Next.
The Installation Review window opens.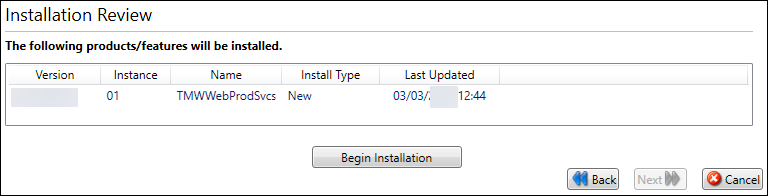
-
Follow the steps listed in "Completing the installation," below.
Completing the installation
-
In the Installation Review window, verify that the information you have provided is correct.
-
Click Begin Installation.
When the installation is complete, the Installation Complete window opens.
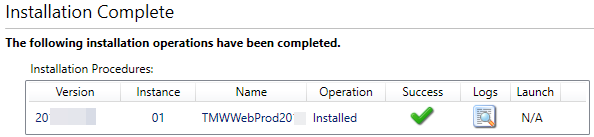
The icon in the Success field indicates whether the installation is successful.
Icon Definition The installation was not successful.
Contact your Support representative. Be prepared to provide a copy the log file, which will reside on the machine’s desktop. You can view the file by clicking
 Open Log. This will display the file in a text editor.
The installation was successful but one or more post-installation processes failed. Position your cursor over the icon to view a ToolTip describing the issue.
Contact your Support representative. Be prepared to provide the information in the ToolTip as well as a copy of the log file.

The installation was successful.
Click
 Launch Application to open Trimble Web Products in a browser or click Finish to close the installer.
Proceed to Preparing Trimble Web Products for first use.