Updating load details for fuel orders
You can select fuel loads for updating from the Assigned Loads page or the Direct Load Updates page.
-
The Assigned Loads page displays a list of the loads assigned to you.
If the list displays multiple rows for the same order, the order has multiple delivery locations. Each row shows information for the first delivery. -
The Direct Load Updates page allows you to retrieve the detail for a particular order.
When viewing load details and updating load information from either page, you can do the following:
-
Record arrival and departure dates/times for a stop and set its status to Completed
-
Update commodity information
-
Add a commodity to a load
-
View and add order notes
-
Print a trip sheet for the load
Accessing the load you want to update
To access a load for updating, do one of the following.
-
Go to Menu > Carrier > Assigned Loads.
Select an order and click View Details. -
Go to Menu > Carrier > Direct Load Updates - Fuel.
Enter the order number or leg number and click Lookup Order/Leg.
The Load Detail page shows the selected order.
If you select a consolidated order, the Load Details page displays the leg number and leg status. Just below that, a button displays for each order on the consolidated order.
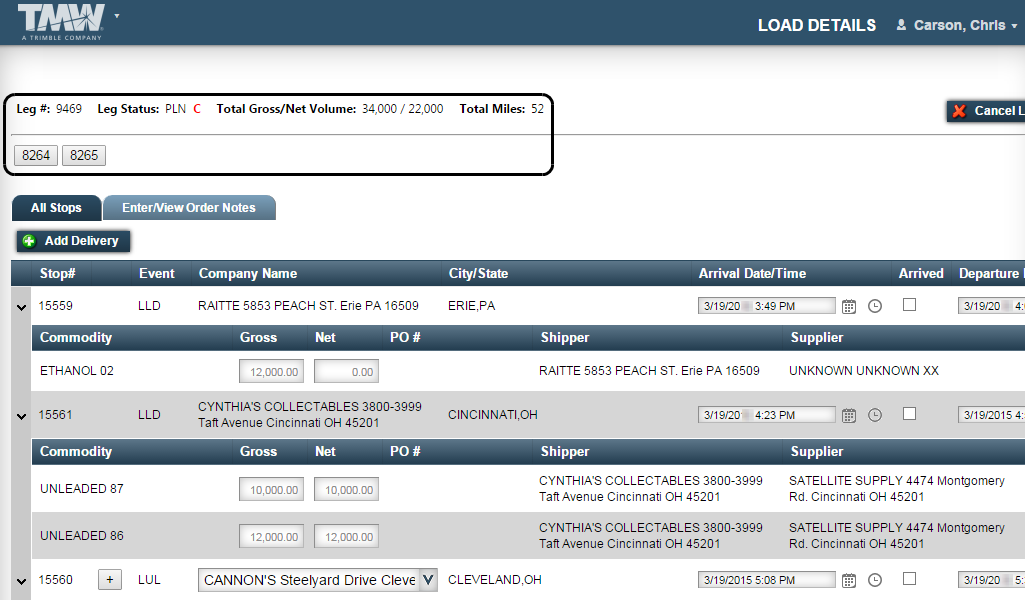
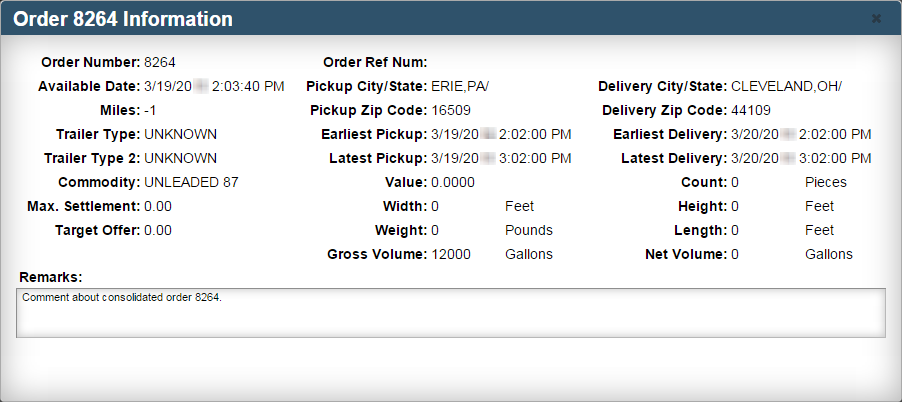
Click a button to open a pop-up window with details about that order.
If you want, you can enter comments about the order in the Remarks field. You cannot make any other entries in the pop-up window. To close it, click ![]() in the window’s upper right corner.
in the window’s upper right corner.
Recording arrivals and departures
You can update stop information by:
-
Recording the date/time of the arrival and/or departure.
-
Marking the arrival and/or departure as completed.
To record arrivals and departures, follow these steps.
-
Access the load you want to update.
The All Stops tab displays the arrival and departure date/time recorded for each stop on the load.
-
If needed, you can change the date and enter the time the arrival/departure was completed.
-
Select the Arrived or Departed check box to mark the arrival or departure as completed.
Notes:
-
Selecting the Departed check box for a commodity sets the arrival to Completed as well.
-
Once you select a check box, the corresponding date field is no longer editable.
-
-
Click Save Changes.
A message at the top of the page states that your update was successful.
Updating commodity information
When you update the information for a commodity, you can change the commodity or commodity weight or unit of measure, as well as the shipper, supplier, and Account Of location. You can also update the reference number for the commodity on a stop.
To update commodity information, follow these steps.
-
Access the load you want to update.
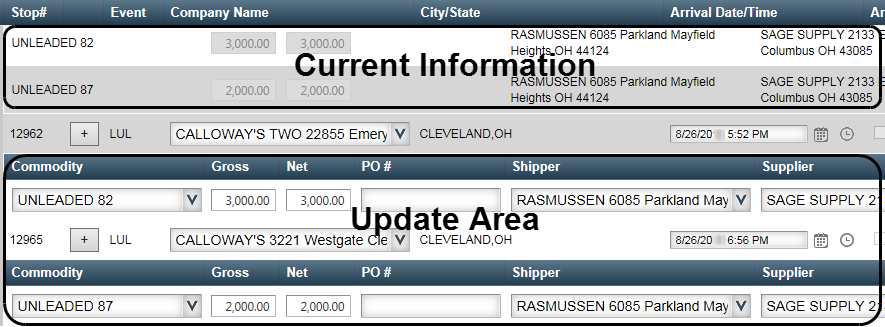
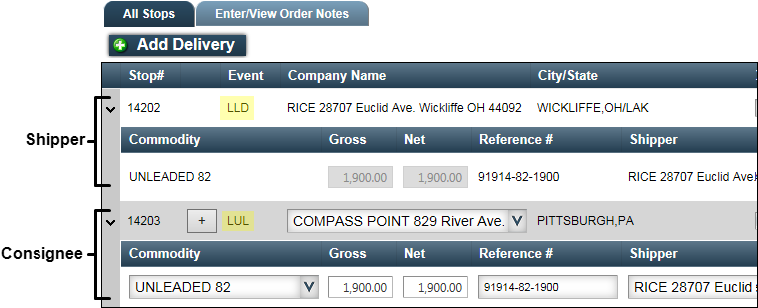
On the All Stops tab, current commodity information appears in the Commodity section at the top of the grid. These fields are read-only. You enter new commodity information in the update area at the bottom of the grid.
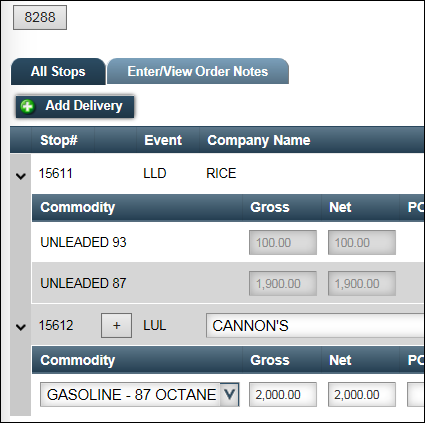
If the commodity on the order is marked as a splash blend, the components are shown in the freight detail for the pickup.

The drop shows the blended commodity that was ordered.
-
If needed, select a different commodity type in the Commodity field at the bottom of the window.
-
If needed, enter the new amounts in the Gross and/or Net fields.
Note: If required by your login, you must specify the commodity’s gross and/or net amount.
-
If needed, enter a reference number for the commodity.
You can enter the reference number, but you cannot specify the reference number type.
Note: If required by your login, you must enter a reference number.
-
If needed, select a new Shipper, Supplier, and/or Account Of location.
-
Click Save Changes.
A message at the top of the page states that your update was successful.
Adding a commodity to the load
To add a commodity to a load, follow these steps.
-
Access the load you want to update.
The All Stops tab displays commodity information for each stop on the load.
-
Do one of the following:
-
If the load has one shipper and one consignee, click the Add Delivery button. This adds a commodity to both the shipper and consignee.
The Add New Delivery window displays information about the load. -
If the load has more than one consignee, click the
 button to add a commodity for a specific consignee.
The Add New Freight window displays information about the load.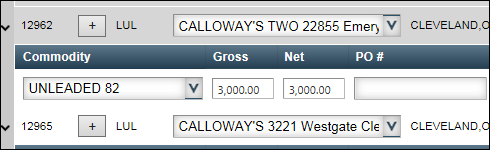
The fields in the Add New Delivery and Add New Freight windows are identical. However, you cannot change the consignee information in the Add New Freight window.
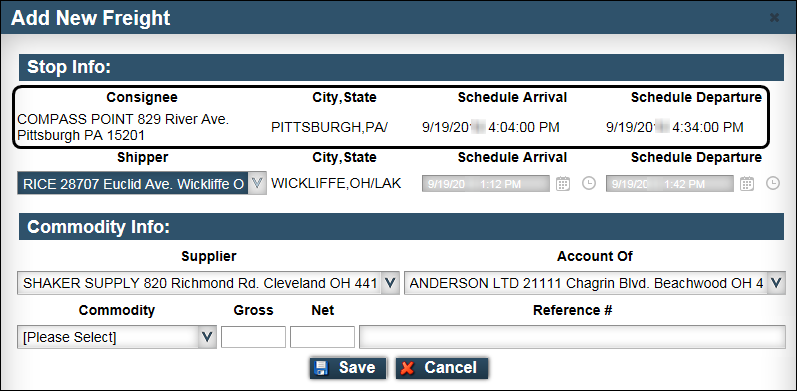
Note: The consignee, shipper, supplier, and Account Of information defaults from the existing commodity.
-
-
In the Stop Info section, complete the information for the Consignee and/or Shipper, if different from the commodity on the order.
-
In the Commodity Info section, complete the information for the Supplier, Account Of, and Commodity fields as needed.
Note: You must enter an amount in both the Gross and Net field. If necessary, you can enter 0.00.
-
Click Save.
Information about the new commodity appears at the bottom of the Commodity sections for the shipper and consignee. -
In the Load Details page, click Save Changes.
A message at the top of the page states that your update was successful
Adding notes to a stop
To add a new note to a load or view stop notes you have already added, follow these steps.
-
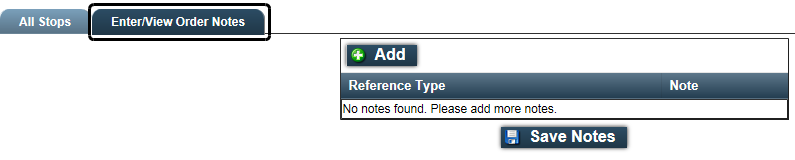
Click the Enter/View Order Notes tab to display the notes grid.
-
To add a new note, click Add.
The Reference Type and Note fields are displayed.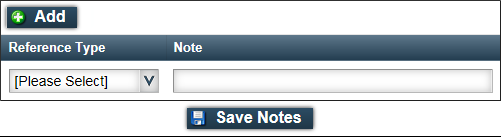
-
In the Reference Type field, select the subject of the note.
-
In the Note field, enter the note text.
-
Click Save Notes.
A message indicates that the note has been saved.
Printing a trip sheet for the load
You can print a trip sheet for a load from the load details page where you access your assigned loads.
To print a trip sheet for a load, follow these steps.
-
At the top of the Load Details page, click View Print Friendly.
The trip sheet opens in a separate window. This illustration shows how a trip sheet might look.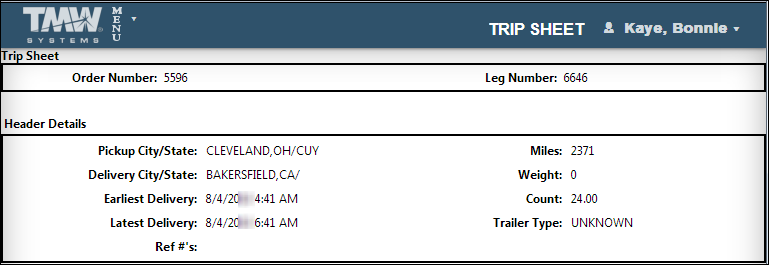
-
Print as you usually do from your browser.