Setting up themes
A theme is a collection of settings that determine the application’s overall appearance and what activities can be performed by particular roles.
A theme’s display settings determine how graphics, colors, fonts, and other details of the website appear. You can customize the appearance of the website to match your company’s branding or other marketing materials.
A theme also controls some grid settings. These settings restrict how users assigned to roles associated with a particular theme can interact with grids. For more information about restricting user interaction with grids, see Preventing users from changing or setting up grids.
Creating your company’s default theme
Trimble Web Products comes preloaded with a default theme named TMW. You will create and customize a new theme that will become your company default.
Your default theme will be viewed by anyone accessing your application’s login page and any user whose role assignments are not connected to a specific theme.
Any new theme is based on the colors, backgrounds, fonts, and other settings used in the default TMW theme. You will need to make the necessary cosmetic changes to reflect your company’s branding. For example, you will need to add your company logo to the main menu that appears in the header of every website page.
To create a new theme, follow these steps.
-
Go to Menu > Admin > Theme > Manage Themes.
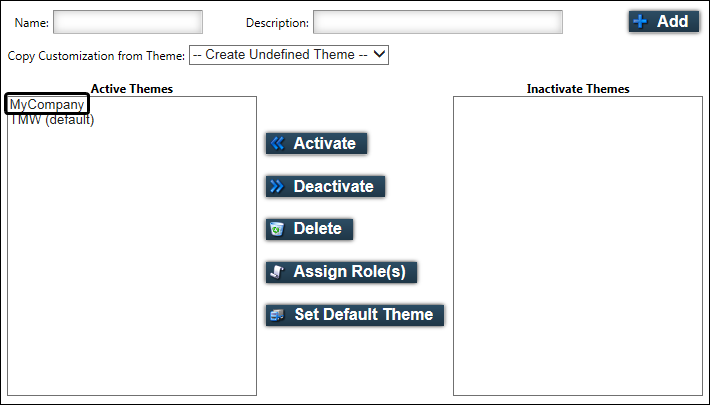
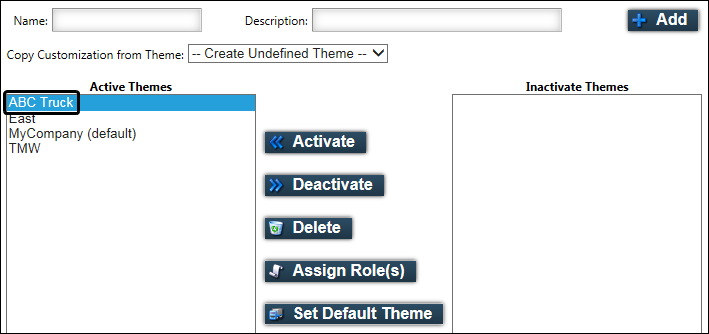
The Manage Themes page opens. -
In the Name field, enter a name for the new theme.
-
In the Description field, you can enter a brief description of the theme.
-
If you want to copy settings from an existing theme, from the Copy Customization from Theme list, select the theme you want to copy.

Note: If you select Create Undefined Theme, you will be creating a theme based on the overall appearance of the default TMW theme. However, no TMW brand graphics appear in an undefined theme. A generic placeholder, such as an X, will appear in place of missing graphics. The placeholder you see will depend on the browser you are using.
This illustration is an example of how the main menu for an undefined theme may appear until you upload the logos you want to use.

-
Click Add.
The System Message window opens and confirms that you successfully activated a new theme. Click Close to exit the window.The new theme appears in the Active Themes list.
-
From the Active Themes list, select the theme you created.
-
Click Set Default Theme.
The theme you selected is designated as the default.Note: Only one active theme can be the default theme. Once selected, it replaces any previous default theme.
The next steps you must take depend on which of the following options apply to you.
-
If the default theme is the only theme your company will use
Your next step is to customize the default theme to suit your company’s needs. The theme will be applied for all users, regardless of the roles to which they are assigned. No additional setup is needed.
-
If you need to tailor themes to fit specific roles
Your next steps are to:
-
Customize the default theme by selecting settings that are common for all members of your company.
-
For any roles that need specialized themes, create new themes by copying the default.
-
Deciding whether a default theme is all you need
At minimum, you need to set up a default theme for your company. However, you have the option to create additional themes. The answer to the following question determines whether multiple themes are needed.
Do any roles require our website to have a cosmetic look or access to grid functionality different from what I have defined as the company default?
If the answer is yes, multiple themes are needed. You must create a theme for each role that requires customization of website appearance or access to grid functionality.
The setup process for each theme option is summarized below.
-
Single theme
Create a single theme for your company and use it as your default. With this method, your site will look the same for all users. The default theme is applied automatically for all users, regardless of their role. -
Multiple themes
If multiple themes are needed because a single configuration is not appropriate for all users, create a default theme with configurations that are common for all users. Then create additional themes by making copies of the default. Change the settings as appropriate for each theme. Assign each theme to the role for which it was designed.
Creating and maintaining themes
You can create a specialized theme for any role that requires the application to have a cosmetic look that is different from the company’s default theme or restrict certain grid configuration functions.
Follow these steps to set up specialized themes.
-
Customize the default theme by selecting formatting and grid configuration settings that are common for all members of your company.
-
For any roles that need specialized themes, create new themes by copying the default.
Designing the cosmetic look of a theme
You can customize a theme’s graphics, colors, fonts, and other appearance settings to match your company’s branding or other marketing materials. You should create a basic theme to serve as the default and then use it as a template to create any additional themes you need for your organization.
To select new colors for your website, you should generate a color scheme. Select a base color and allow the system to generate the rest of the theme’s color settings. You can then adjust individual color settings according to your preferences.
To select a theme to customize and generate a color scheme, follow these steps.
-
Go to Menu > Admin > Theme > Customize Site.
The Customize Site page opens. -
From the Theme Selection list, select the theme you want to customize.
Note: If you want to create a new theme, see Creating and maintaining themes.
-
On the Page Colors tab, in the Base Color field, choose a color upon which to base your color scheme:
-
Enter the HTML color code.
-
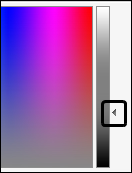
Click
 Pick Color and select a color from the palette.
Note: You may need to drag the arrow on the color bar to a lighter or darker color range before selecting from the palette.
-
-
Click Generate Theme.
The system generates the rest of the theme’s color settings on the Page Color and Control Settings tabs according to the base color you chose.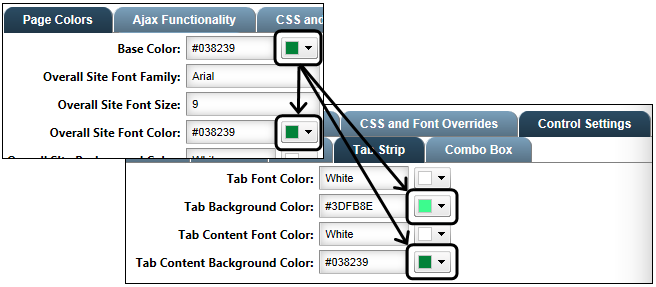
-
On each tab, use the available options to change and preview other items you want to customize.
-
Image Configuration
-
Page Colors
-
Ajax Functionality
-
CSS and Fonts
-
Control Settings
-
-
Click Preview Theme to preview your changes by applying them to the page temporarily.
Notes:
-
While previewing changes to a theme, any user roles assigned to it will not see the changes.
-
If the theme you are modifying is the theme you currently are using, you can move to other pages to preview the theme. Return to the Customize Site page to save the changes or restore the theme to discard the changes.
-
You cannot preview changes to graphic images before you have saved the theme.
-
-
Do one of the following:
-
Click Restore Theme to discard your changes and return to the last saved version of the theme.
-
Click Save Theme to save your changes to the theme.
-
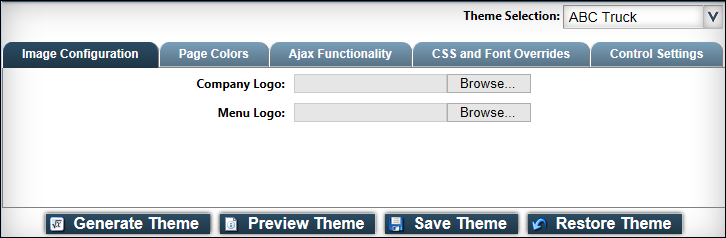
Image Configuration tab
Use the options on this tab to change the company and menu logos that appear in the upper left corner of each website page.
|
Clicking Preview Theme does not allow you to preview changes to graphic images. You must save the theme to review the graphic. Graphics will appear in their original size. If necessary, use a graphics editor to resize and maintain the original proportions of an image. |
If images already exist for the theme:
-
Click Click Here to Review to display the image in a new window.
-
Click Change to replace the image with another image. Click Choose File. In the File name text box, enter the path and file name of the new image.
Note: The original image can be restored by clicking Restore Theme if you have not saved the theme.
-
Click Remove to remove the image. Click Choose File. In the File name text box, enter the path and file name of the new image.
Note: The original image cannot be restored unless you copy and save it to a local drive before you remove it.
Company Logo |
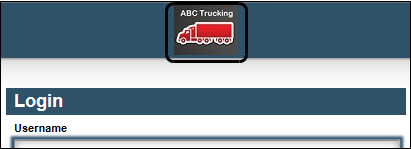
Review, change, or remove the company logo that appears on the login page.
|
Menu Logo |
Review, change, or remove the menu logo in the upper left corner of each website page. This sample shows a menu logo that has been changed.
|
Page Colors tab
Use the font-related options on this tab to customize the font style and size to appear on each page.
Overall Site Font Family |
Enter the name of the font to appear throughout the site. The default font is Arial. |
Overall Site Font Size |
Not functional. |
| Though options for changing colors appear on this tab, to select new colors for your website, you should generate a color scheme. In the Base Color field, select a base color and click Generate Theme to allow the system to generate the rest of the theme’s color settings. The color settings on the Page Color and Control Settings tabs will change according to the base color you chose. You can adjust individual color settings according to your preferences. |
Ajax Functionality tab
Use the options on this tab to manage Ajax functionality. Ajax (Asynchronous JavaScript and XML) functionality indicates that page data is being refreshed by displaying an animated image over the current page. The default animated image is a rotating circle, but you can select another image, such as your company logo.
Override Ajax Image |
Enable this checkbox to override the default Ajax image. |
Override Ajax Image Url |
Enter the path and name of the Ajax image. Note: This image is stored in the application’s image folder. Changing this image is an advanced function. |
Ajax Background Color |
Not functional. |
Ajax Background Transparency (0-1) |
This setting determines the degree of transparency of the page visible when the Ajax image appears. This setting cannot be changed. |
Ajax Image Transparency(0-1) |
This setting determines the degree of transparency of the Ajax image. This setting cannot be changed. |
CSS and Fonts tab
System administrators with knowledge of cascading style sheets and font types can use the advanced options on this tab to override the basic designs of the website.
Control Settings tab
The settings accessible from this tab control many of the colors used throughout the website.
To select new colors for your website, you should generate a color scheme. Select a base color on the Page Colors tab and allow the system to generate the rest of the theme’s color settings. The color settings on the Page Color and Control Settings tabs will change according to the base color you chose. You can adjust individual color settings according to your preferences.
|
When using
|
Copying the default theme to create new themes
If multiple themes are needed because the company default theme is not appropriate for all users, you can create additional themes by making copies of the default. After making a copy of the default theme, you can change settings as appropriate for a new theme. You can copy the default theme and adjust settings as many times as necessary to create all the themes you need.
To copy a default theme to create a new theme, follow these steps.
-
Go to Menu > Admin > Theme > Manage Themes.
The Manage Themes page opens. -
In the Name field, enter the name for the new theme.
-
In the Description field, you can enter a brief description of the theme.
-
From the Copy Customization from Theme list, select a theme upon which to base the new theme.

Note: If you select Create Undefined Theme, you will create a theme based on the overall appearance of the default TMW theme. However, no TMW brand graphics appear in an undefined theme. A generic placeholder, such as an X, will appear in place of missing graphics. The placeholder you see will depend on the browser you are using.
This illustration is an example of how the main menu for an undefined theme may appear until you upload the logos you want to use.
-
Click Add.
The new theme appears in the Active Themes list.
Proceed with creating your new theme by following these steps.
Designating a different theme as the default
Any active theme can be set to serve as the default theme. Your default theme will be viewed by anyone accessing your application’s login page and any user whose role assignments are not connected to a specific theme.
Use this procedure to change the default theme.
-
Go to Menu > Admin > Theme > Manage Themes.
The Manage Themes page opens. -
In the Active Themes list, select the theme you want to set as the default theme.
-
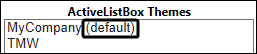
Click Set Default Theme.
The designation of (default) is added after the theme you selected.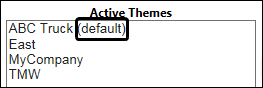
Deactivating a theme
Deactivating a theme allows you to remove it from use without deleting it. You may want to deactivate a theme to restrict access to it temporarily or remove any roles that have been assigned to it. Any role assignments for a theme are removed when it is deactivated. Users whose roles were assigned to a deactivated theme will use the default theme.
| You cannot deactivate the current default theme. |
To deactivate a theme, follow these steps.
-
Go to Menu > Admin > Theme > Manage Themes.
The Manage Themes page opens. -
In the Active Themes list, select the theme you want to deactivate.
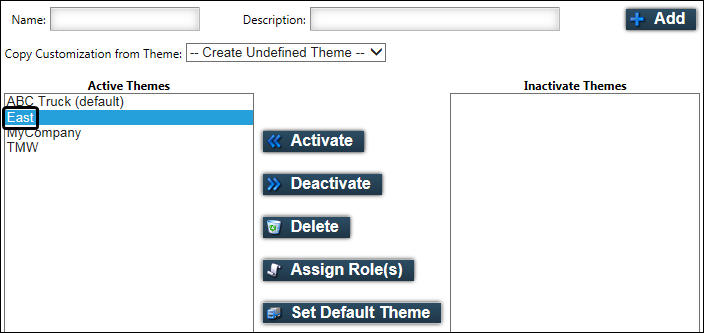
-
Click Deactivate.
The System Message window opens and confirms that you successfully deactivated the theme. Click Close to exit the window.The theme is moved to the Inactivate Themes list.

Reactivating a theme
You can make any deactivated theme available for use again by reactivating it. Any role assignments for a theme were removed when it was deactivated. You will have to reassign any roles to the theme after it is made active again.
To reactivate a theme, follow these steps.
-
Go to Menu > Admin > Theme > Manage Themes.
The Manage Themes page opens. -
In the Inactivate Themes list, select the theme you want to reactivate.
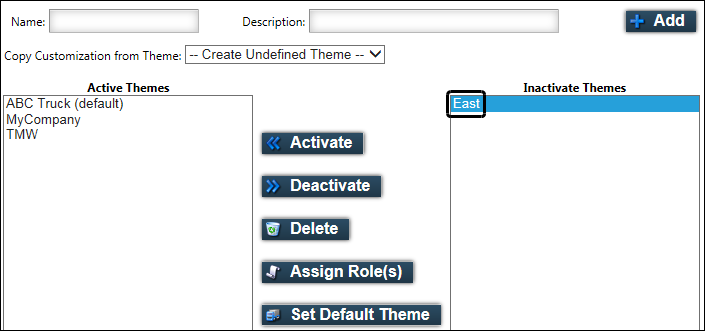
-
Click Activate.
The System Message window opens and confirms that you successfully activated the theme. Click Close to exit the window.The theme is moved to the Active Themes list.

Deleting a theme
Deleting a theme permanently removes it and all of its settings from use. You must deactivate a theme before it can be deleted. You cannot delete the system default TMW theme.
To delete a theme, follow these steps.
-
Go to Menu > Admin > Theme > Manage Themes.
The Manage Themes page opens. -
In the Inactivate Themes list, select the theme you want to delete.
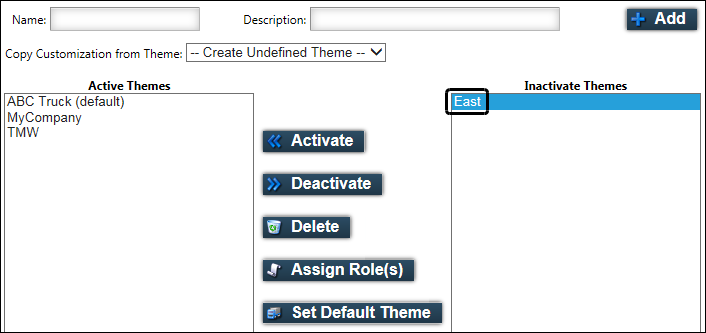
-
Click Delete.
The System Message window opens and confirms that you successfully deleted the theme. Click Close to exit the window.The theme is removed from the Inactivate Themes list.
Assigning roles to a theme
If the company default theme is the only one your company will use, it will be applied automatically for all users. You do not need to assign user roles to the default.
The assignment of roles to themes is required only if you have created additional themes. A role must be assigned to each theme for which it was designed.
To assign user roles to a theme, follow these steps. The theme is applied to the role as soon as you save the role assignment.
-
Go to Menu > Admin > Theme > Manage Themes.
The Manage Themes page opens. -
From the Active Themes list, select the theme to which you want to assign roles.
-
Click Assign Role(s).
A list of roles appears at the bottom of the page.Note: Any roles that already have been assigned to a theme will not appear in this list.
-
Hold CTRL and click on each role that you want to assign to the theme.
-
Click Save Role Assignment.
Removing roles assigned to a theme
You may want to remove roles assigned to a theme in order to assign those roles to a different theme. Roles are removed automatically when you deactivate a theme. You can remove roles from a theme without deactivating it by removing individual role assignments manually.
To remove individual roles that have been assigned to a theme, follow these steps.
-
Go to Menu > Admin > Theme > Manage Themes.
The Manage Themes page opens. -
From the Active Themes list, select the theme for which you want to remove role assignments.
-
Click Assign Role(s).
A list of roles appears at the bottom of the page. Any roles in the list that have been assigned to the selected theme are highlighted. -
Hold CTRL and click on each role assignment you want to remove from the theme.
-
Click Save Role Assignment.