Report Basics
Data Warehouse Explorer is a program that you can use to create dynamic reports that analyze your business activities.
You build a report by selecting Facts (numeric data) and Attributes (data descriptors). You select facts and attributes from the Data Navigator (the list of reporting elements) and then add them to the REPORT PALETTE (the report template).
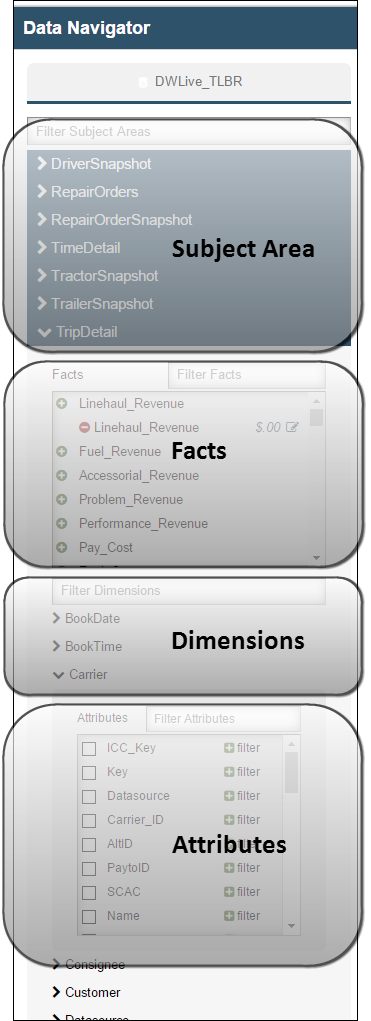
Data Warehouse Explorer sorts the elements in the Data Navigator into these content groups:
-
Subject Areas
Subject Areas are organized collections of Facts. They provide the primary content for a report. -
Facts
Facts are the measurable portion of the data. Facts represent the numeric values in a report. -
Dimensions
Dimensions organize Attributes into functional groups. They are the source for the textual descriptions used to characterize and classify measureable facts in reports. -
Attributes
Attributes are data descriptors. They identify the data type and provide context to the facts in the report.
Data Navigator elements have a hierarchical structure.
-
The Subject Area you choose determines which Facts are available.
-
The Fact you choose determines which Dimensions are available.
-
The Dimension you choose determines which Attributes are available.
Creating a report
To build a basic report, you add Facts and Attributes to the Report Palette.
To create a basic report, follow these steps.
-
Go to Menu > Reveal.Business Reporting > Data Warehouse Explorer.
The Data Warehouse page opens.
-
Click New.
A confirmation message opens, asking if you are sure you want to create a new report. -
Click Yes to close the message.
-
Click
 Data.
Data.
The Data Navigator pane appears. -
In the Data Navigator, select the report elements.
-
In the Subject Areas section, select the subject area you want to use, such as TripDetail.
The types of facts, dimensions, and attributes associated with that subject area are displayed. -
In the Facts section, double-click on a fact, such as Linehaul_Revenue.
The system adds the fact to the REPORT PALETTE section. -
In the Dimensions section, select a dimension, such as Customer.
The system shows the Attributes section for the dimension you selected.Note: Dimensions are not listed in alphabetical order.
-
In the Attributes section, select the check box of the attribute, such as State.
The system adds the attribute to the REPORT PALETTE section.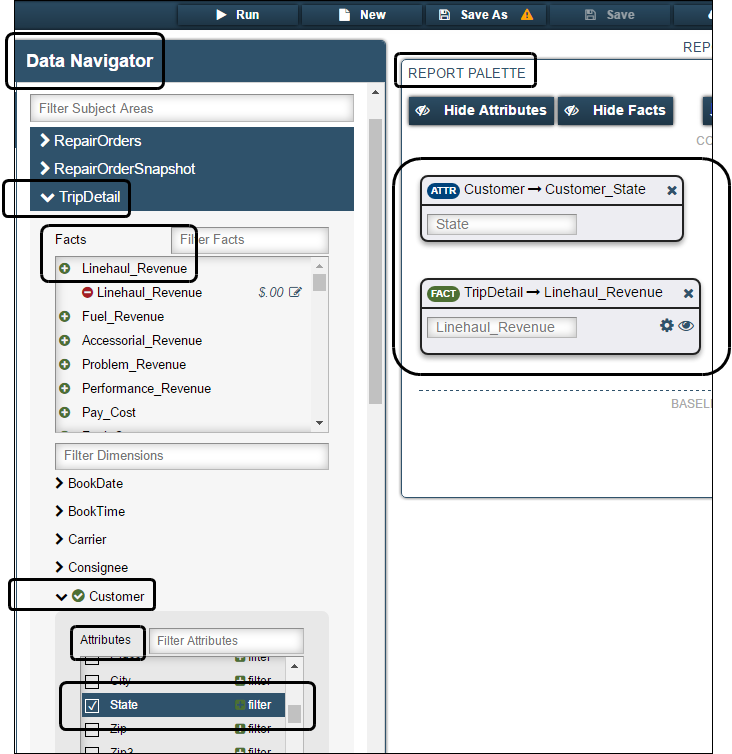
-
-
Click Run.
The Generated Reports section displays the report results.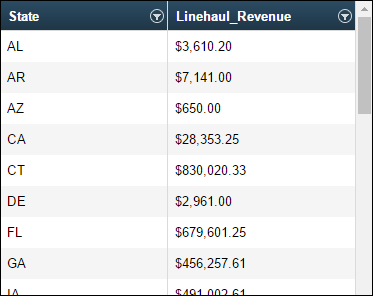
-
Save your new report.
Saving a new report
When you save a report in Data Warehouse Explorer, you are saving the report elements in the REPORT PALETTE as a template for later use.
To save a new report:
-
Create your report.
-
In the header section, click Save As.
The Save Report As window opens.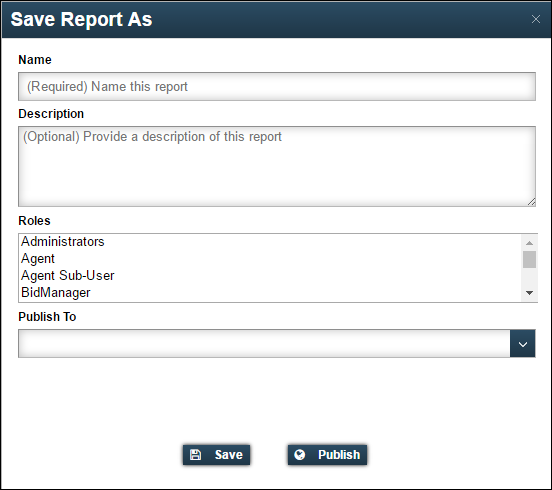
-
Make entries in the following fields:
Required field: *
Field
Definition
Name *
Enter a name for the report.
Description
Enter an optional description for the report.
Roles
Select the role(s) that will have access to this report in both the:
-
Load Report window
-
Report Viewer accessed by a menu option
Notes:
-
If you want to share the report as a menu option, you must select at least one role.
-
System administrators create and assign roles to users.
Publish To
Select the location in the main menu where the report can be viewed.
-
-
Do one of the following:
-
To save your new report, click Save.
-
To save and publish your report, click Publish.
The system saves the report and creates a shared report. You use this option when you want to share the report with other users.
-
To close without saving, click
 Close.
-
Loading a report
You load a report into the REPORT PALETTE to do any of these functions:
-
Run
-
Edit
-
Delete
To load a saved report, follow these steps.
-
Go to Menu > Reveal.Business Reporting > Data Warehouse Explorer.
-
In the page header, click Load.
The Load Report window opens showing a list of available reports.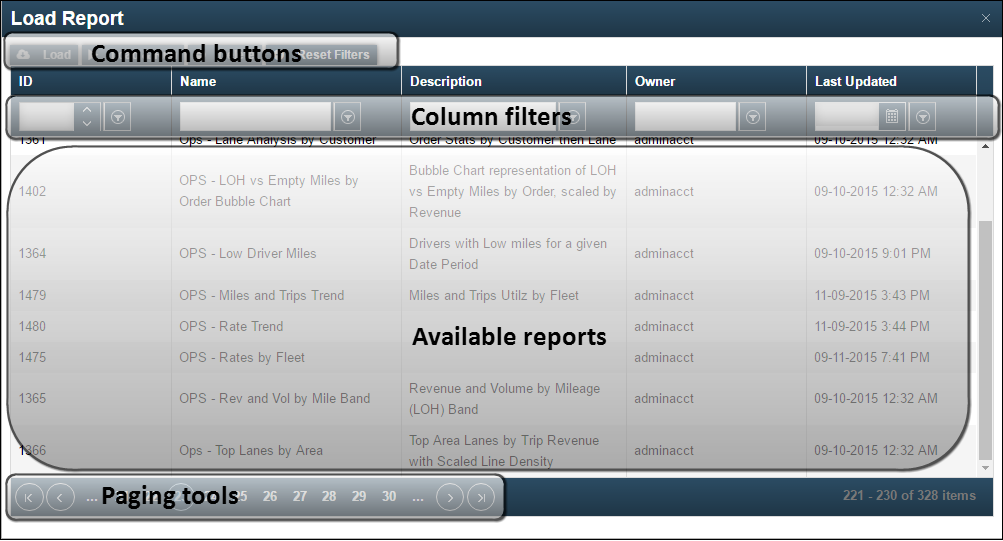
-
You can use the column filters to limit the list of reports retrieved.
-
In the Available Reports section, select the report you want to load.
-
Do one of the following:
-
To load the report and review the Report Palette, click Load.
This opens the report, but it does not run the report. -
To load the Report Palette and generate the report, click Load & Run.
This opens and runs the report. -
To remove a report from the Available Reports section, click Delete.
The delete confirmation window opens. -
To return the Load Report window to its original state, click Reset Filters.
-
Sharing a report
When you share a report, you give users permission to view the results of a report without giving them permission to change the report.
You can share a report by exporting it to Microsoft® Excel® or by publishing a link to it in the main menu.
| Shared reports do not display the Report Palette or the Report Grid. |
Exporting the report to Excel
When you export a report to Excel, you create a static report. A static report is accurate only to the moment you exported it.
| Data Warehouse does not create a read-only Excel file. This means anyone with access to this Excel file has the ability to make changes to the data. |
To export a report to Excel, follow these steps.
-
Go to Menu > Reveal.Business Reporting > Data Warehouse Explorer.
The Data Warehouse page opens.If you are already working on a report, go to Step 3.
-
On the Data Warehouse Explorer page, do one of the following:
-
Load the report you want to share.
-
Create a new report.
-
-
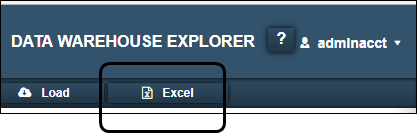
Click Excel.
-
Complete the save/download information for the report required by your browser.
Publishing a report to the main menu
When you publish the report to the main menu, you create a dynamic report. Dynamic reports allow users to view the most up-to-date information. Published reports open in the Data Warehouse Viewer page. This allows users to view the report, but not make changes in the Report Palette section.
To publish a report to the main menu, follow these steps.
-
Go to Menu > Reveal.Business Reporting > Data Warehouse Explorer.
The Data Warehouse page opens.If you are already working on a report, skip to Step 3.
-
On the Data Warehouse Explorer page, do one of the following:
-
Load the report you want to publish.
-
Create a new report.
-
-
At the top of the Data Warehouse page, click Save As.
The Save Report As pop-up window opens.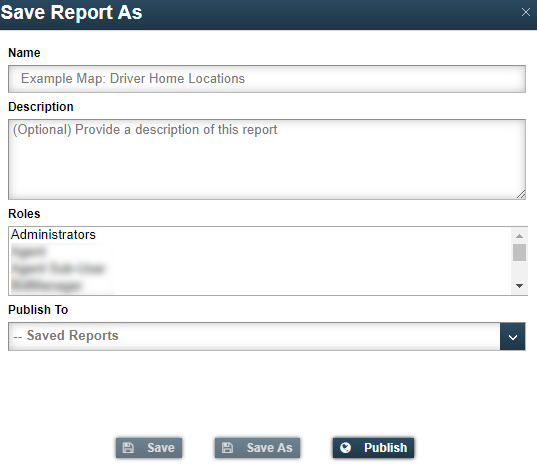
-
In the Roles field, select the role(s) you want to have access to this report.
-
In the Publish to field, select a location for the published report.
Note: By default, shared reports are saved to Menu > Reveal.Business Reporting > Saved Reports.
-
Click Publish.
Data Warehouse Explorer saves and publishes the report.