Managing SQL reports
Trimble Web Products provides a web-based reporting interface that uses SQL statements to develop reports. You can create ad hoc or regularly-generated reports based on information in databases to which you have a connection.
When you set up the report, you assign it to user roles. Only users with those roles can access it. Reports are accessed through Report Viewer, as an individual menu option, or from a hyperlink to the report’s URL.
Defining restriction criteria
Using restrictions, you limit the report to records that meet specific requirements. When you create a report, you can handle restriction criteria in several ways.
Predefining restriction criteria in your SQL query
When designing your report, you can identify restriction criteria when you write the SQL query. Predefining restriction criteria is useful when the report is to show the same data to anyone permitted to view it.
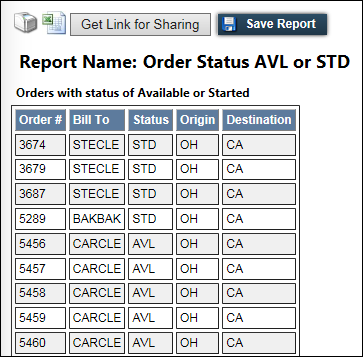
This example shows predefined restriction criteria for:
-
Order Start = within a defined date/time range
-
Order Status = AVL or STD
-
Order Origin State = OH
-
Order Destination State = CA
Predefining restriction criteria using User Profile properties
In addition to predefining restrictions in your SQL queries, you can customize reports for specific users. You can base report restrictions on information in a user’s Trimble Web Products profiles.
For example, you can create a report that restricts the data received by the user according to their company ID in Trimble Web Products. A TMW Web Products user with a company ID of ABC in their user profile sees different data than a user with a company ID of XYZ.
These examples show how the same report, executed by different users, restricted the data according to an ID in the user’s profile.
-
User profile ID #1
This information on the user’s My Profile page shows that this user has an ID of GRECAR.
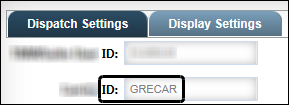
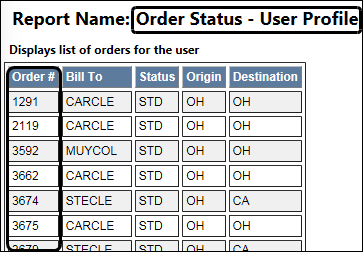
The resulting report, titled Order Report - User Profile, shows a set of order numbers only for the ID GRECAR.
-
User profile ID #2
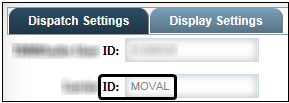
This information on the user’s My Profile page shows that this user has an ID of MOVAL.
The resulting report, titled Order Report - User Profile, shows a set of order numbers only for the ID MOVAL.

Allowing users to set their own restriction criteria
You can allow users to enter restriction criteria before running a report. These restriction fields are available to the user as dropdown lists, list boxes, date fields, and text boxes.
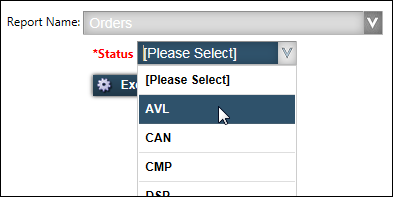
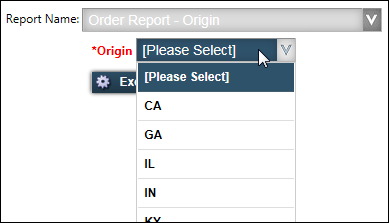
Drop-down list
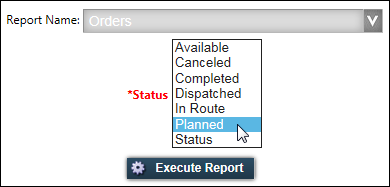
This example shows how a user can select an order status from a dropdown list.
Restriction criteria:
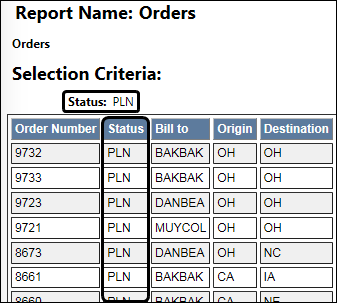
Resulting report:
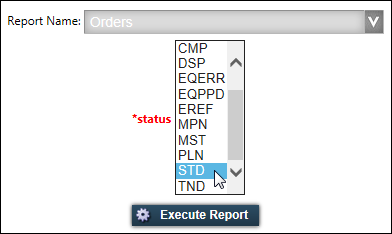
List box
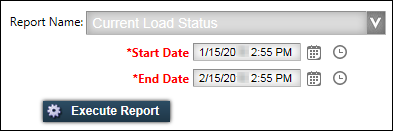
This example shows how a user can select one or more order statuses from a list box.
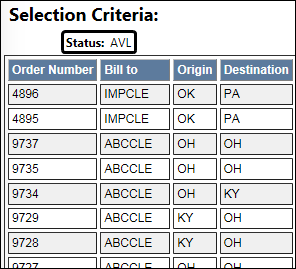
Selection Criteria page:
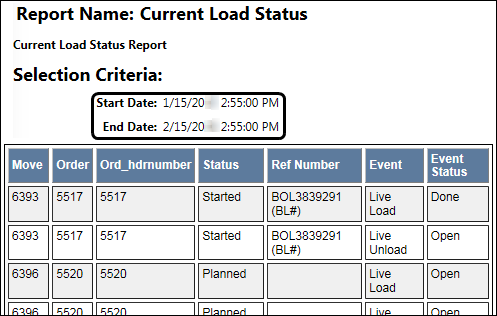
Resulting report:


Creating and updating a SQL report
To create a new SQL web-based report or update an existing report, follow these steps.
-
Go to Menu > Reporting > SQL Reports > Manage Reports.
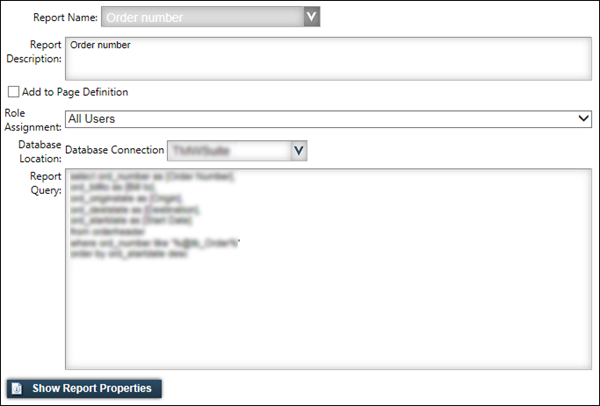
The Manage Reports page opens.If no other reports exist, enter a unique name for the report in the Report Name field.
If other reports exist, and you want to create a new report:
-
Click Add New Report.
A blank report form appears. -
In the Report Name field, enter a unique name for the report.
If you want to update an existing report, select the report you want to change in the Report Name field. The Manage Reports page displays the current settings and SQL query for the selected report.
-
-
In the Report Description field, enter the text you want to appear at the top of the report, below the report title.
-
If you want to add the report to a menu, select Add to Page Definition.
A report can be viewed using Report Viewer or added as a menu option.
-
If you want to be able to add this report as a menu option, select this checkbox.
-
If you want the report to be viewed only by using Report Viewer, clear the checkbox.
-
-
If you want to limit access to this report to specific roles, use the Role Assignment field to make a role selection.
-
From the Database Connection list, select the location of the database to be used as the source for the report.
Note: The list of available database locations is determined by the settings in the connections section of the web.config files for Trimble Web Products and Web Services. All connections preceded with "Report_" are shown in the Database Connection dropdown list. For more information on these settings, refer to the Trimble Web Products Installation Guide.
-
Define the Report Query in SQL.
You can include any of the following types of controls to define a variable.Notes:
-
Variables must start with one of the strings listed below and may need to be enclosed in single quotation marks.
-
Variables are not case-sensitive.
-
If you want the label (name) for the input field to contain blank spaces, use underscores in the name. For example, @dt_Date_From produces the label Date From for the input field.
-
-
If you want, change the report colors and fonts.
-
Save the report.
-
New report
Click Create.
A message appears confirming the report was successfully created.The new report is added to the list of available reports.
Note: The successful creation of a report does not guarantee the report will generate without error.
-
Existing report
Click Update.
A message appears confirming the report was successfully updated.Note: The successful update of a report does not guarantee the report will generate without error.
-
-
If you entered lookups for variables, proceed to Defining SQL report variables.
Control types
For each type, replace name with your desired value.
@dd_name
Description |
Use a dropdown list to allow users to select one variable from the restriction set. name represents the label you want to use for the dropdown box. |
Report query |
Include a
|
Example |
|
@lb_name
Description |
Use the list box to allow users to select one or more variables from the restriction set. If you choose to allow multiple selections, a comma-separated list of values will replace that variable in the SQL query. |
Report query |
Include a
To allow the selection of multiple variables:
|
Example |
Single variable: Multiple variables:
|
@tb_name
Description |
Use the free-form text box to allow users to restrict the data returned by entering characters they want to match. You can allow the use of a wildcard (%) or identify the variable in the SQL as starts with, ends with, or contains. |
Report query |
Include a To include the use of a wildcard in the SQL, enclose the variable reference with percent signs. To allow the user to supply the wildcard in the text box, do not enclose the variable reference with percent signs. |
Example |
Wildcard included by you: Wildcard added by the user:
|
Changing SQL report colors and fonts
You can customize the appearance of a report by changing background colors, fonts, and font properties.
To customize a SQL report, follow these steps.
-
Go to Menu > Reporting > SQL Reports > Manage Reports.
The Manage Reports page opens. -
From the Report Name field, select the report you want to change.
The Manage Reports page opens with the current settings and SQL query for the report you selected. -
Click Show Report Properties.
The page expands to display the report properties.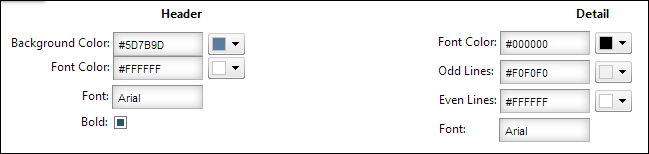
-
Determine the component of the report you want to change.
-
Header
This example shows the changes.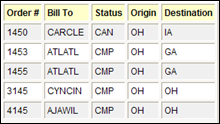
-
Detail
This example shows the background color of the odd rows within the body of the report changed and the font changed to Calibri.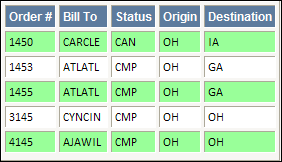
-
-
To change the color of a report component, do one of the following:
-
Enter the HTML color code.
-
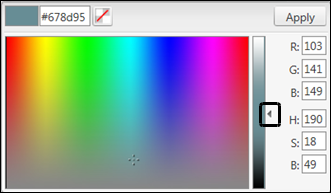
Click
 Pick Color and select a color from the palette.
Note: You may need to drag the arrow on the color bar up to a lighter color range before selecting from the palette.
-
-
Change the text font.
-
In the field of the item to change, enter the name of the font.
Notes:
-
You should select a standard font for web browsers, such as:
-
Arial
-
Helvetica
-
Courier New
-
Lucida Console
-
Lucida Sans Unicode
-
Tahoma
-
Times New Roman
-
Trebuchet MS
-
-
If the person running the report does not have the chosen font installed, the browser will display the next closest font.
-
-
Select or clear the Bold checkbox, if available.
-
-
Click Hide Report Properties to collapse the Properties portion of the window.
-
Click Update.
A message confirms the report was successfully updated.
Defining SQL report variables
Any variables included in the design of a SQL report must be configured.
To define variables for a SQL report, follow these steps.
This procedure does not apply to '@prop_' (User Profile).
|
-
Go to Menu > Reporting > SQL Reports > Manage Report Variables.
The Manage Report Variables page opens. -
From the Reports field, select the report containing the variable you want to configure.
A blank form for the selected report appears. -
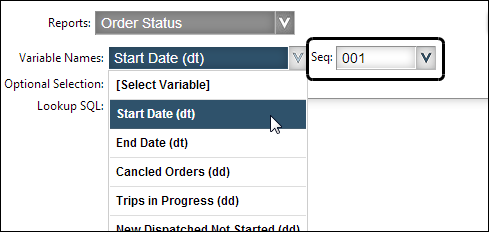
From the Variable Name field, select the variable to configure and its sequence number.
Note: A sequence number is automatically added to each variable in the report to indicate the order of variables on the form. You can change the order in which the variables will be listed by selecting a different sequence number from the Seq field.
-
Specify whether the variable is required or optional.
When the checkbox is:
-
Cleared
The variable field is required. The field name shows in red. It is preceded by an asterisk.Note: Since any variable in the SQL script requires a value to process correctly, all variable fields are required by default.
-
Selected
The variable field is optional.Note: To make a variable optional, your report SQL query must handle the possibility that the user does not select a value.
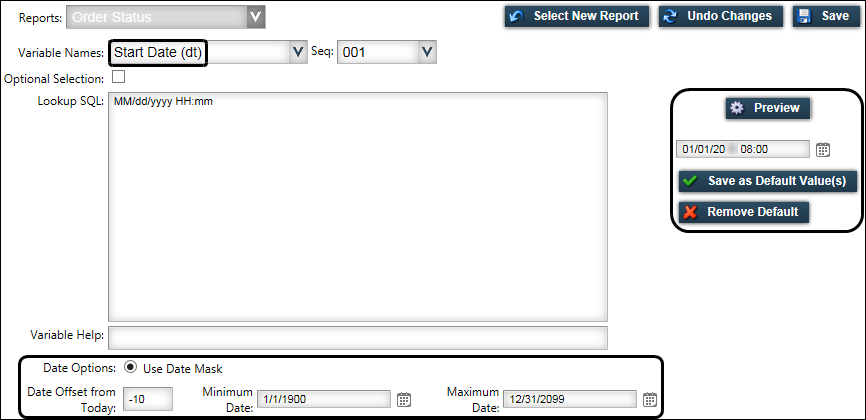
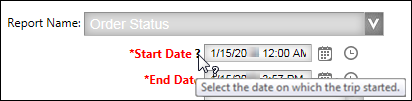
In this example, the Start Date and End Date fields are required. Users must select the variables before the report can be generated.

-
-
Enter the Lookup SQL for the variable.
-
In the Variable Help field, add text to assist the report user.
You can include a brief description of or additional details about the variable to help the user run the report.
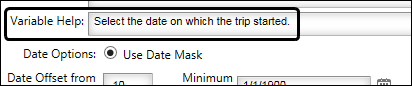
This example shows how your help text will appear in Report Viewer. A question mark is added to the field name. When the user moves the pointer over the mark, the help text appears.
-
Click Save.
-
Repeat Steps 3 through 7 for each variable in the report.
-
To configure variables for a different report, click Select New Report, select another report from the Reports list, and repeat this procedure.
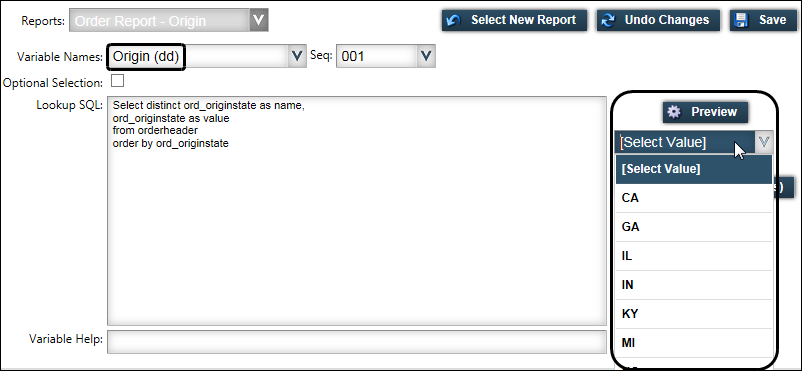
Lookup SQL
@dd - drop down
Report query |
If you included @dd_, as in this example:
|
Lookup SQL |
Write a statement such as the following:
|
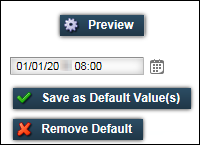
Preview |
|
Additional settings |
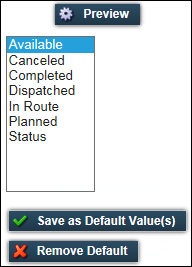
Default values:
|
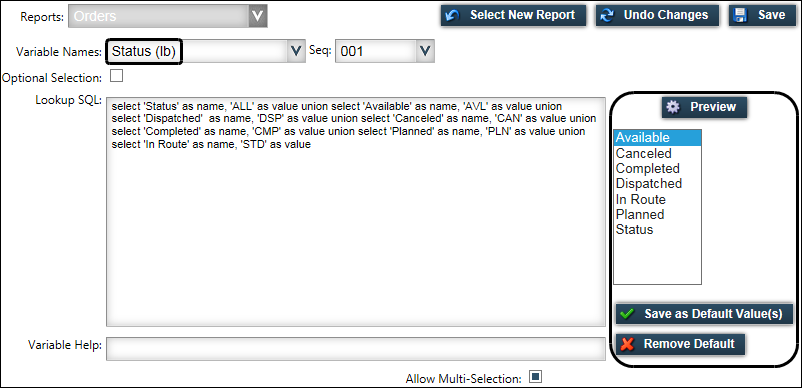
@lb - list box
Report query |
If you included @lb_, as in this example:
|
Lookup SQL |
Write a statement such as the following:
|
Preview |
|
Additional settings |
Allow Multi-Selection field:
|
Default values:
|
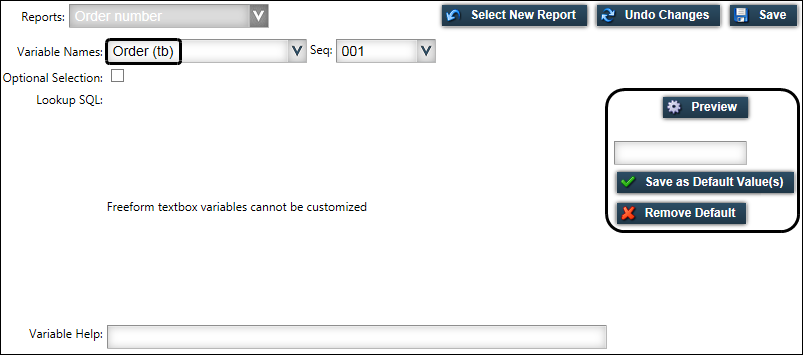
@tb - freeform textbox
Report query |
If you included '@tb_, as in this example:
|
Lookup SQL |
No further SQL is necessary. Freeform text box variables cannot be customized. |
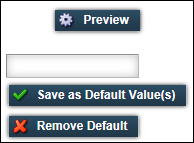
Preview |
|
Additional settings |
Default values:
|
@dt - masked date/time
For the dates @dt_ variable, you can:
-
Change the mask used for them
-
Choose the offset from the current date.
Report query |
If you included @dt_, as in this example:
|
Lookup SQL |
Edit the way you want the date to display, such as:
|
Preview |
|
Date Options |
Use Date Mask as selected. Edit the mask in the Lookup SQL field. |
Date Offset from Today |
Enter the offset number for the default date.
|
Minimum Date and Maximum Date |
These dates prevent a user from running a report with a date range that would return a massive amount of data. These dates also allow you to control how far back in history you want data retrieved. For example, data that is more than one year old is not relevant for this report. |
Additional settings |
Default values:
|