Using a custom report form with the shipment details page
By default, when a user clicks the ![]() Details icon for an order listed in one of the load boards or uses Quick Find Order, the shipment details page displays the order information.
Details icon for an order listed in one of the load boards or uses Quick Find Order, the shipment details page displays the order information.
Your company might create custom SQL reports that retrieve order information. It might also combine those SQL reports into an HTML form. Once the reports are combined into an HTML form, you can use the form to:
| By default, users cannot edit shipments. Allowing users to edit shipments affects how report forms work with the shipment details page. |
Replacing the shipment details page with the HTML form report
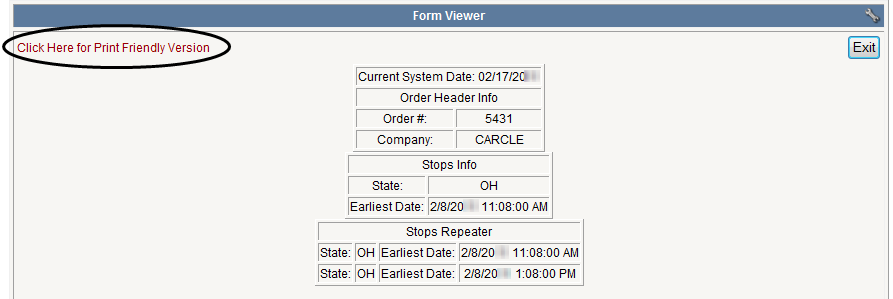
You can set up the application to replace the shipment details page with a custom form report. When a user accesses the order from any load board or uses Quick Find Order, your report opens on the Form Viewer page.
This is an example of a very simple HTML form report. Your form report can be as simple or complex as you need it to be.
When the user clicks the link to print the report, it opens in a separate instance of his/her browser.
|
To replace the shipment details page with a form report, use this procedure.
-
Go to Configuration > Settings Manager.
The Settings Manager page opens. -
From the Role field, select the role you want to customize.
-
On the Modules tab, select Customer in the Module Selection field.
-
Click these tabs: Application Settings > Shipment Tracking and Reports > Shipment Tracking - 3.
-
Verify that neither the Tendered nor the Available option is selected in the Allow Edit of these Statuses section.
When an option is selected, it is highlighted in blue.
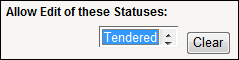
If needed, click Clear to remove selections.
-
Click the Global tab.
-
In the Optional Shipment Detail Selection section, click the Replace Shipment Detail radio button.

-
In the Form to use list, select the form that you want to replace the shipment details page.
Note: The Form to use list is not accessible when the Disabled radio button is selected.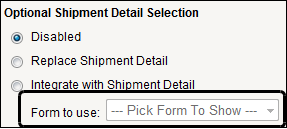
-
Click
 Save.
Save.If you do not want to save, click
 Revert instead. The application undoes any unsaved changes and reverts to the last saved settings.
Supplementing the shipment details page with the HTML form
When you supplement the shipment details page with the report form, the ![]() Shipment Detail Report icon is shown in the upper right of the shipment details page.
Shipment Detail Report icon is shown in the upper right of the shipment details page.

If you allow users to edit shipments, whether the icon is available depends on the editing option you have set.
| If users can edit these shipments | Icon is available when accessing the order from | Icon is not available when |
|---|---|---|
Tendered only |
|
|
Active only |
|
|
Tendered and Active |
|
|
To supplement the shipment details page with a form report, use this procedure.
-
Go to Configuration > Settings Manager.
The Settings Manager page opens. -
From the Role field, select the role you want to customize.
-
On the Modules tab, select Customer in the Module Selection field.
-
Click these tabs: Application Settings > Global.
-
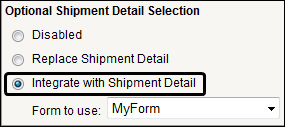
In the Optional Shipment Detail Selection section, click the Integrate with Shipment Detail radio button.
-
In the Form to use drop-down list, select the form you want to make available from the shipment details page.
Note: The Form to use drop-down list is not accessible when the Disabled radio button is selected.
-
Click
Save.
If you do not want to save, click ![]() Revert instead. The application undoes any unsaved changes and reverts to the last saved settings.
Revert instead. The application undoes any unsaved changes and reverts to the last saved settings.