Working with user accounts
The hosting company has set up a user account for you. In turn, you may have been given the ability to set up accounts for other users. These accounts are called sub user accounts. They provide access to a limited number of features.
|
Hosting company administrators: See Creating and deleting user accounts |
Creating user accounts for your company
If you can access the Create User page, you can create a sub user.
| Driver accounts cannot create sub user accounts. If you need to add a driver sub account, contact your Trimble Web Products administrator to create the account for you. |
Go to Menu > Security > Work with Users > Create User.
The Create User page opens.
Complete credential information
In the Create User section, enter information as indicated.
Required field: *
| Field | Definition |
|---|---|
User Name * |
Enter the user’s login ID. |
Password * |
Enter the user’s password. A password is a secret code that the user must enter when they log in to the application. The administrator sets password requirements, such as length and special characters. The user will use this password for their initial access to the application. During their initial login, each user might be prompted to change their password, according to how the administrator has set up the system. Notes:
|
Confirm Password * |
Re-enter the password. The entry you type must match exactly what you entered in the Password field. |
First Name |
Enter the user’s actual first name. |
Last Name |
Enter the user’s actual last name. |
E-mail Address |
Enter the e-mail address you can use to contact the person. |
Complete optional profile details
If you want, enter additional information in the Profile Details section. New users can change this information after they have logged in successfully.
| Field | Definition |
|---|---|
First Name |
Enter the user’s actual first name. |
Last Name |
Enter the user’s actual last name. |
E-mail Address |
Enter the e-mail address you can use to contact the user. |
Culture Override |
This field is available if your administrator allows you to determine the format in which dates, times, numbers, and currency symbols appear. The default value in this field is the global culture option defined for all users of the site. Users you create can change this value in their profile page. Options are:
|
Landing Page Override |
A landing page is the page a user sees immediately after logging in or selecting Landing from the user menu. To select a global landing page, click Update Pages and choose one of the following options:
You can also choose a role-specific landing page after you assign one or more roles to the user. |
Define role assignments
In the Role Assignments section, you can:
-
Assign one or more roles to each user that you create
-
Change an assigned role
-
Remove an assigned role
Each role is authorized and configured to access specific features. When assigning a role to a user, you are authorizing that user to access those features. Because each role provides access to only limited features, you may need to assign multiple roles to a user.
This section contains two lists:
| Field | Definition |
|---|---|
Available Roles |
Lists the roles for which you have authorization to assign, but have not been assigned to the user |
Assigned Roles |
Lists the roles that have been assigned to the user |
In the Available Roles list, hold CTRL and click on each role that you want to assign. Then click the ![]() button. The selected roles move to the Assigned Roles list.
button. The selected roles move to the Assigned Roles list.
Select an optional role-specific landing page
If you want, after assigning a role or roles, you can select a role-specific landing page.
-
In the Optional - Profile Details section, click Update Pages.
-
Select a landing page.
Add application-specific information for each user
Continue making selections on the remaining tabs according to the application(s) being used.
Customers
| Field | Definition |
|---|---|
TMWSuite ID |
Your Board User ID, i.e., an identifier that associates your user login with one or more eStat mobile boards (views) This ID is completed automatically and displayed for you. |
User Description |
The description, if any, that was entered for the user account under which the sub user account was created |
Commodity Prefix |
Not applicable to sub users |
Process Tendered Shipments |
Not applicable to sub users |
Allow user to change the Order-By Company |
Not applicable to sub users |
Parent Companies Search/Parent Companies |
If your administrator has defined one or more parent companies in your profile, they appear in the Parent Companies list. The sub users you create inherit these companies and any associated child companies. Note: The sub users you create also inherit your profile companies and associate companies. |
Carriers
| Field | Definition |
|---|---|
TMWSuite ID |
The TMWSuite user ID, used to associate the accounts to the same set of views designed for your mobile load boards. The ID automatically defaults to your own for you. |
Default Carrier ID |
Your default carrier ID automatically appears for you. |
Carrier List |
Hosting companies sometimes associate multiple carrier IDs with a CarrierHub user. If this is the case for you, the name of each of the carrier IDs associated with your login appears in this field. |
Agents
| Field | Definition |
|---|---|
User Type |
A read-only field displaying the type inherited from the existing user. |
User ID |
A read-only field displaying the dispatch User ID inherited from the existing user. |
Data Warehouse
You assign row filters to new users when you want to limit access to specific data in Data Warehouse Explorer.
| Field | Definition |
|---|---|
Available Filters |
Displays a list of available row filters Select the filter or filters you want to assign to the new user and click the Right arrow. Note: You create new row filters by creating a table-value-function in SQL. Contact your Support representative for more information on these filters. |
Assigned Filters |
Displays any filters assigned to the new user To remove a filter from a user, select the filter or filters and click the Left arrow. |
Create the user account
Click Create User in the upper right of the page.
A message indicates that the new user account was created successfully.
| If not saved correctly, information regarding incomplete or missing field information appears. Correct the error and click Create User again. |
If you want to create another user account, click Continue.
Notify sub users
After you have created sub users and assigned them roles, you must give each sub user their user name and password.
They must also know the following:
-
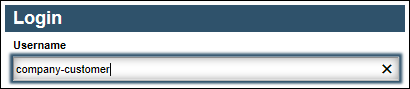
In the Username field of the Login page, they must enter your user name, followed by a hyphen, and then their assigned user name.
They can enter either uppercase or lowercase letters, but not spaces between characters.
-
In the Password field, they must enter the password as initially assigned to them.
The password is case-sensitive: each letter that is uppercase or lowercase must always be entered that way when a user enters their password. For security reasons, when they enter a password, it appears as a series of dots.
-
To avoid having to enter a user name the next time they log in, they can select the Remember My Username checkbox by clicking in the box.
Note: To use this feature, the user must have cookies enabled in their browser.
-
After they log in, they must complete a User Registration by entering their mailing address and telephone number, reading and accepting the Terms and Conditions, possibly changing their password, and setting up security questions that will be used to verify their identity if they forget their password.
Reviewing and managing user accounts
Use these procedures to review and manage a user account. You can change any of the settings for a user, including the user’s name, e-mail address, or active status.
View and filter the list of user accounts
Use this procedure to display a list of user accounts. You can control the number of users that appear by searching, selecting a specific role, or excluding the display of sub users.
-
Go to Menu > Security > Work with Users > Review Users.
The Review Users page opens. -
Use the filters to limit the number of users that appear in the list.
Follow these steps when the list is too long to scroll quickly to the user profile you want to review. Each filter limits the number of items that appear in the list.
-
Enter any restrictions according to the following:
-
Search for
Enter all or a portion of the text in this field that you want to locate in any of the fields in the user’s profile.
-
Select User Role
Select a role from this list to find users assigned to a particular role.
-
Exclude Sub Users
-
Select this checkbox to exclude sub user accounts.
-
Clear this checkbox to include sub user accounts.
Note: The user name for each sub user consists of two parts separated by a hyphen. In this format, the user name to which the sub user was added is first, with the sub user’s assigned name second. For example, jsmith-jdoe is the complete user name for sub user jdoe, whose account was added to the user account for jsmith.
-
-
Show All Users
Select this checkbox to include deactivated user accounts.
-
-
Click Search.
-
To return to the complete list of users, click Reset.
-
Once you locate the user name you want, you can manage the user record by doing any of the following:
Change a user’s role assignment
A role gives the user access to the appropriate pages. To add, change, or remove assigned roles to a user account, follow these steps:
-
Go to Menu > Security > Work with Users > Review Users.
The Review Users page opens. -
Locate the account that you want to modify.
-
Next to the user name of the account you want to modify, click Modify.
The user’s detail appears on the Create User page.
In the Role Assignments section are two lists:
Field Definition Available Roles
Lists the roles for which you have authorization to assign, but have not been assigned to the user
Assigned Roles
Lists the roles that have been assigned to the user
-
Select the role and use the
 and
and  buttons to assign or unassign the roles for the user account.
 -
Click Update to save the information.
If you decide not to make the change after all, click Cancel instead.
Temporarily deactivate a user account
An inactive profile will remain in the application so that you can return it to an active status later.
| When you deactivate a user, all sub users created by that user will also be deactivated. If you want the sub users to remain active, another active user must create a new account for each. |
To prevent a person temporarily from using Trimble Web Products, follow these steps.
-
Go to Menu > Security > Work with Users > Review Users.
The Review Users page opens. -
Locate the account that you want to modify.
-
Next to the user name of the account you want to modify, click Modify.
The user’s detail appears in the Create User page. -
Click De-Activate.
The De-Activate button changes to Activate. -
To save the change, click Update.
If you decide not to make the change after all, click Cancel instead.
On the Review Users page, the deactivated user can be identified by the cleared checkbox in the Active column. The Show All Users checkbox must be selected for deactivated users to appear in the list.
Reactivate a user account
If a user’s account has an inactive status, they cannot use Trimble Web Products. To enable them to use the Web Products again, you must reset the user account to an active status.
-
Go to Menu > Security > Work with Users > Review Users.
The Review Users page opens. -
Select the Show All Users checkbox for deactivated users to appear in the list.
-
Locate the account that you want to modify.
Note: A deactivated user can be identified by the cleared checkbox in the Active column. -
Next to the user name of the account you want to reactivate, click Modify.
The user’s detail appears on the Create User page. -
Click Activate.
The Activate button changes to De-Activate.
On the Review Users page, the activated user can be identified by the enabled checkbox in the Active column.
Change a user password
Use this procedure to change a password when a user is locked out of the application because of unsuccessful login attempts or if a user forgets their password but did not complete the personal security questions section of the User Profile page that activates the Forgot Password functionality.
-
Go to Menu > Security > Work with Users > Review Users.
The Review Users page opens. -
Locate the account that you want to modify.
-
Next to the user name of the account you want to modify, click Modify.
The user’s detail appears on the Create User page. -
In the Password field, enter a new password.
-
The administrator sets password requirements, such as length and special characters.
-
A password is case-sensitive. Each letter that is uppercase or lowercase must always be entered that way when a user enters their password.
-
For security reasons, when you enter a password, it appears as a series of dots.
-
-
In the Confirm Password field, re-enter the new password.
-
Click Update.
If you decide not to make the change, click Cancel. -
Inform the user of the new password and suggest that they change it to a password of their choice.
Delete a user account
Use the following steps to remove a user account permanently. The deletion of a primary user increases the number of available license seats. The deletion of a sub user does not.
Do not delete a user account unless you know that you want to remove the account permanently from the system. In most cases, you will want to deactivate the user account. You cannot delete your own user account.
|
This action is immediate and permanent. You cannot recover a user record once it has been deleted. |
-
Go to Menu > Security > Work with Users > Review Users.
The Review Users page opens. -
Locate the account that you want to modify.
-
Next to the user name of the account you want to delete, click Modify.
The user’s detail appears on the Create User page. -
Click Delete.
If you decide that you do not want to delete the user or sub user, click Cancel. -
In the confirmation prompt, click OK.
The Review Users page opens with an updated list of users.