Installing components on the web services server
Trimble Transportation recommends using the following two-server configuration for installations:
-
On the web services server, install:
-
Trimble web services
-
Imaging services
-
Fuel services (if using the Fuel pages in eStat® and/or CarrierHub®)
-
Data Warehouse services (if using)
-
TripAlert Map services (if using)
-
-
On the web applications (DMZ) server, install:
-
Licensing services
-
Web Products framework services
-
Trimble Web applications
-
Add-on modules (if using)
-
TMW SSRS Report Library (if using)
-
Freight Order (if using)
-
|
This table lists the components you can install on the web services server.
| Type of component | Component |
|---|---|
Services |
|
Windows Applications (as needed) |
Freight Order - Control Tower, Freight Order - Manifest |
To install components on the web server, follow the steps listed in these sections. Follow the sections in order from top to bottom.
Begin the installation
-
Go to the location where you saved the Trimble Web Products installer (*.EXE).
-
Right-click on the .EXE file and select Run as administrator.
The installer home page opens.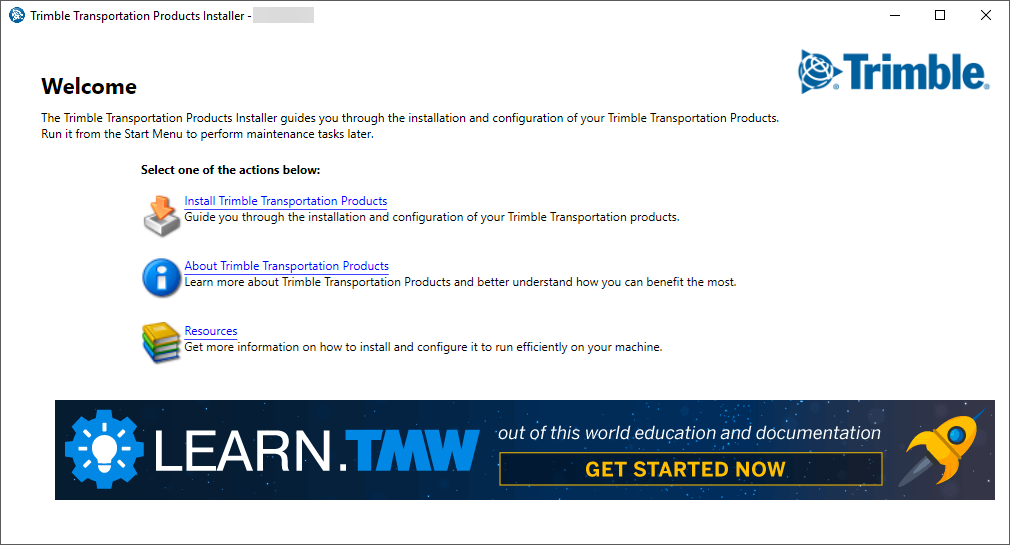
-
Click Install Trimble Transportation Products.
The License Information window opens.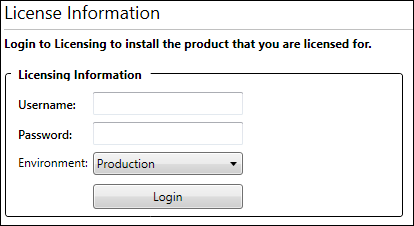
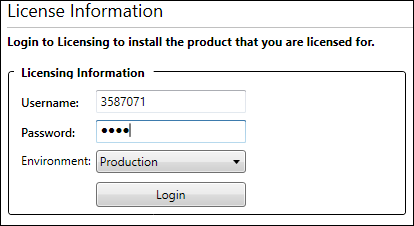
-
Enter your Client Center information and the type of environment you are creating.
-
In the Environment field, select the environment needed.
Options are:
-
Development
-
Test
-
QA
-
Production
-
-
Click Login.
If the information entered is incorrect, the window redisplays with red fields. Reenter the information and try again. If you are still unable to log in, contact Support.If the information is correct, two lists of items display.
-
The Modules Found section lists the number and names of modules included in the installer.
-
The Dispatch Systems Found section lists the number and names of Trimble Transportation dispatch systems with which you can use Trimble Web Products.
An icon is displayed next to each item. The type of icon differs depending on your licenses and existing instances.
+
Icon Definition 
You do not have a valid license for the module or system.

You have a valid license for the module or system. You can install related components for the environment you selected.

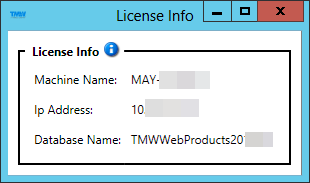
You have a valid license for the module, however, the environment type selected is used in a different installation of the application. another configuration is using it in the same environment. You can proceed with the installation. However, doing so reallocates the license to the new environment.

Click this icon to open the License Info window. It displays information about the configuration that is using the module in the environment you selected.
-
-
Click Next.
The Installation Type window opens.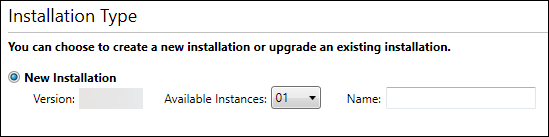
-
Follow the steps listed in "Specifying the installation type,".
Specifying the installation type
This procedure describes a first-time installation of a single instance of Trimble Web Products. For information on installing additional instances, see Adding another instance of Trimble Web Products. For information on modifying existing instances, see Modifying, upgrading, or removing an existing Trimble Web Products instance.
To specify the installation type:
-
If needed, select New Installation radio button.
-
Leave the Available Instances field value at 01.
-
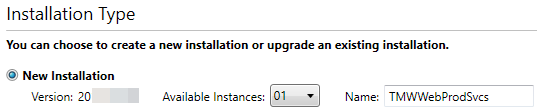
In the Name field, enter the name of this instance.
The installer uses this name to identify the instance.
Note: Write down the name of this instance because you will enter it again when installing components on the web applications server.
-
When you have finished entering the name, press TAB.
The Next button is enabled. -
Click Next.
The Products window opens.
-
Follow the steps listed in "Specifying the products to install," below.
Specifying the products to install
-
In the Available Products section, select WebProducts.
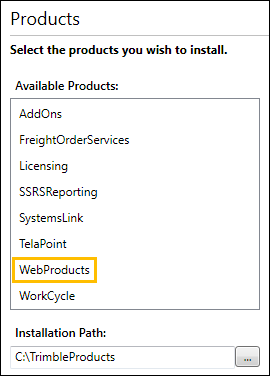
Note: If you are installing Freight Order components, select FreightOrderServices.
-
In the Installation Path, specify the installation location.
The default value is C:\TrimbleProducts.
To change this value, click
 Browse. In the window that opens, you can create a new folder location or select an existing location.
 -
Click Next.
The Setup window opens. -
Follow the steps listed in "Specifying the options to install," below.
Specifying the options to install
-
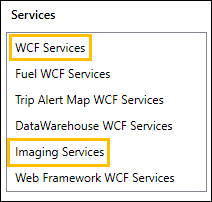
In the Services field, select these required options:
-
WCF Services
-
Imaging Services
-
-
If needed, select the following options:
-
If using Fuel components, select Fuel WCF Services.
-
If using Trip Alert, select Trip Alert Map WCF Services.
-
If using Data Warehouse, select DataWarehouse WCF Services.
-
-
If you are using Freight Order components, select the options shown in this illustration.
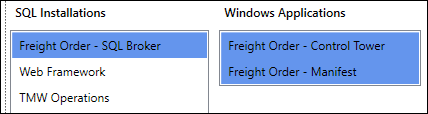
-
Click Next.
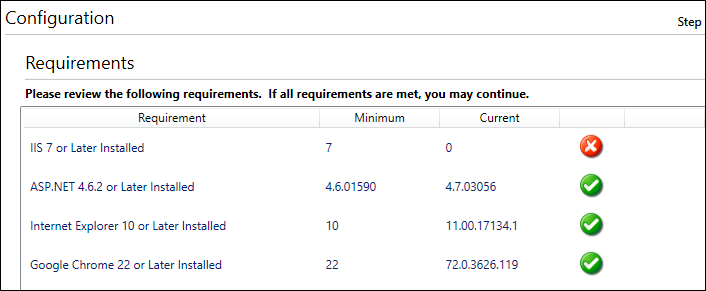
The Check Requirements window opens.This illustration shows an installation with missing requirements.
-
For each requirement that is met, a
confirmation icon is displayed. -
For each requirement that is not met, an
error icon and Install button are displayed.To install the missing requirement, click Install and follow the on-screen instructions.
Notes:
-
If one or both browser requirements are not met, but all other requirements are met, you can proceed with the installation.
-
You cannot proceed with the installation if one or both of the following are true:
-
The IIS and/or ASP.NET requirement is not met
-
The SQL server requirement is not met and you are installing a version of Trimble Web Products that is earlier than 2017.3
-
-
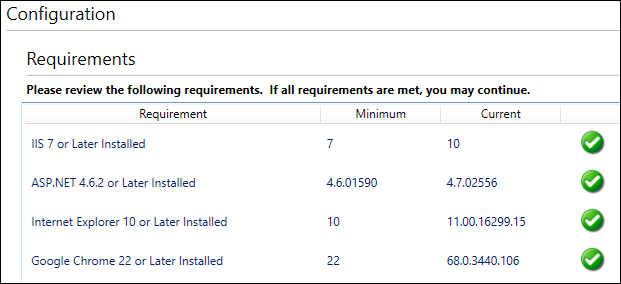
This illustration shows an installation with no errors.
+
-
-
Click Next.
The IIS Configuration window opens.
-
Follow the steps listed in "Specifying IIS settings for services," below.
Specifying IIS settings for services
-
Make entries in the following fields for each service that you are installing.
Field Definition Web Site
The root-level web site in IIS Manager defaults to Default Web Site.
If needed, select the name of your web site from the drop-down field.
Virtual Directory Name
The virtual directory receives queries and directs each query to the appropriate data source.
The default name for the services virtual directory appears in the field. If you want, enter another name for the virtual directory.
Is SSL?
First available in Trimble Web Products 2018.2
Select this option if the service is using Secure Socket Layer (SSL).
Ext. Host
First available in Trimble Web Products 2018.2
Select this option if the URL for the service will be called externally.
Application Pool Name
In IIS 7.0 and later, you group your web applications and services by assigning each to an application pool. Applications that call similar processes could be in the same application pool.
The default name for the application pool appears in the field. If you want, enter another name for the application pool.
Note: If you are using imaging services, you must install them in a unique application pool.
Site URL
The default name for the framework web services virtual directory is FrameworkWcfService. If you want, enter another name for the virtual directory. Ensure you provide the physical URL for the Framework Services if changing the default.
Notes:
-
Trimble Transportation recommends that you install the Framework web services on the web applications server.
-
Make a note of the information in this field. You will enter it again when you install the framework web services.
-
-
Click Next.
The SQL Setup window opens.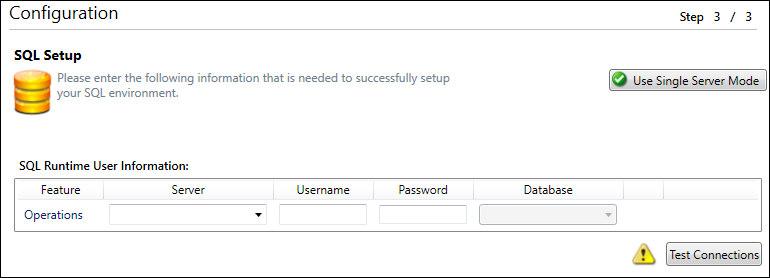
-
Follow the steps listed in "Specifying database locations," below.
Specifying database locations
Depending on your installation and licensing, you will be prompted for one of the following:
-
TMW Operations database
-
Fuel Dispatch database
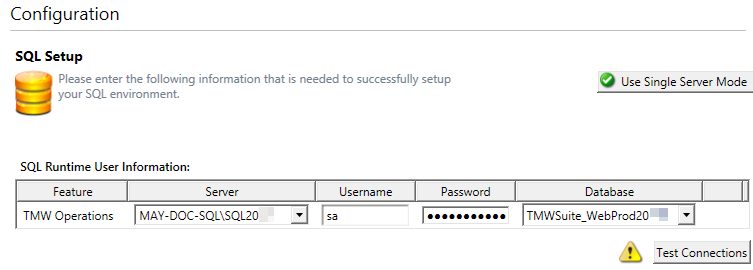
-
In the Server field, enter or select your server (for example, MAY-DOC-SQL\SQL).
-
In the Username field, enter the server’s admin user ID.
-
In the Password field, enter the admin’s password.
-
In the Database field, select the TMWSuite database.
Note: If you are using Freight Order components, specify the location of the database to be used by this instance.
-
Click Test Connections.
-
If the information is correct, a
 confirmation icon is displayed.
 -
If it is incorrect, an
error icon is displayed and the fields that are in error are highlighted in red. Correct the information in the fields and repeat this step.
-
-
Click Next.
-
If you are using Freight Order components, the Freight Order Services Setup window opens. Follow the steps listed in Setting up Freight Order Services.
-
If you are not using Freight Order components, the Installation Review window opens. Follow the steps listed in Completing the installation.
-
Setting up Freight Order Services
First available in Trimble Web Products 2018.3
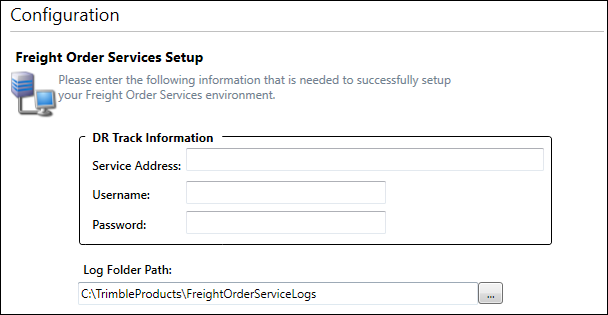
-
In the Service Address field, enter the Freight Order environment’s URL.
-
In the Username field, enter a valid user name.
Note: The user must have system administrator privileges for the server.
-
In the Password field, enter that user’s password.
The default value is C:\TrimbleProducts\FreightOrderServiceLogs.
To change this value, click
Browse. In the window that opens, you can create a new folder location or select an existing location. -
Click Next.
The Installation Review window opens.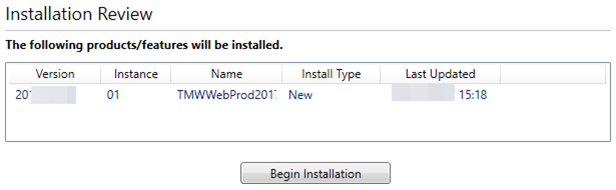
-
Follow the steps listed in "Completing the installation," below.
Completing the installation
-
In the Installation Review window, verify that the information you have provided is correct.
-
Click Begin Installation.
When the installation is complete, the Installation Complete window opens.
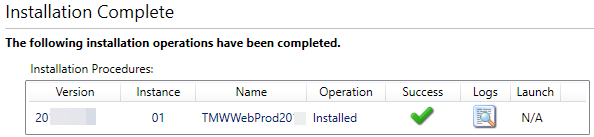
The icon in the Success field indicates whether the installation is successful.
Icon Definition 
The installation was not successful.
Contact your Support representative. Be prepared to provide a copy the log file, which will reside on the machine’s desktop. You can view the file by clicking
 Open Log. This will display the file in a text editor.
The installation was successful but one or more post-installation processes failed. Position your cursor over the icon to view a ToolTip describing the issue.
Contact your Support representative. Be prepared to provide the information in the ToolTip as well as a copy of the log file.

The installation was successful.
Click Finish to close the installer.
Setting up logging on the Web Framework services
After installing Trimble Web Products, you can set up logging to a file for the Web Framework WCF services.
-
Go to the install directory for Trimble Web Products.
-
Open the folder containing the Web Framework WCF services.
By default, this folder is named after your Trimble Web Products installation and ends with "FrameworkWCFServices." -
Open the Web.config.file in a text editor.
-
Enter the following configuration lines directly beneath the <configuration> tag at the top of the file.
<configSections>
<section name="nlog" type="NLog.Config.ConfigSectionHandler, NLog"/>
</configSections>
<nlog xmlns="http://www.nlog-project.org/schemas/NLog.xsd" xmlns:xsi="http://www.w3.org/2001/XMLSchema-instance">
<targets>
<target name="default" xsi:type="File"
fileName="c:/temp/logs/${shortdate}.log"
archiveFileName="c:/temp/logs/archives/app-log.{#}.txt"
archiveEvery="Day"
archiveNumbering="Rolling"
maxArchiveFiles="7" />
</targets>
<rules>
<logger name="*" writeTo="default" />
</rules>
</nlog>