Updating load information
When updating load information, you can:
If the company hosting the Trimble Web Products website has allowed it, you can also:
Loads can be selected for updating from the Assigned Loads page, where you select a load from a list of trips, or the Direct Load Updates page, where you enter an order or trip number to access data for a specific load.
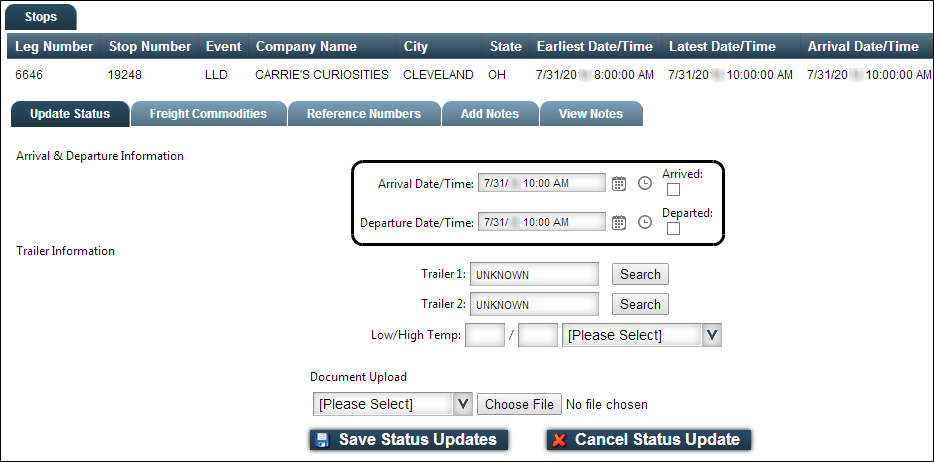
Recording arrivals and departures
You can update stop information by:
-
Recording the date/time of the arrival and/or departure
-
Marking the arrival and/or departure as completed
To update stop information, follow these steps.
-
Do one of the following to access the load you want to update.
-
On the same line as the stop on the Load Details page, click
 Update Status.
The Update Status pane appears.
-
If needed, you can change the date and enter the time the arrival/departure was completed.
The arrival and departure dates default to those recorded on the load.
-
Select the Arrived or Departed check box for the arrival or departure to mark it as completed.
-
Click Save Status Updates.
The top of the page displays a confirmation that your update was successful. If your login is set up to have the update generate a check call and update the hosting company’s dispatch system directly, another message confirms that the check call was successfully generated.

Recording the trailer used on a load
If your load assignment requires you to hook or drop a loaded trailer, the company hosting the website may require you to enter the ID of the trailer.
If your login allows you to record the trailer used on a load, follow these steps.
-
Do one of the following to access the load you want to update.
-
On the same line as the stop on the Load Details page, click
Update Status.
The Update Status pane appears.
-
Record the ID(s) of the trailer(s) used on the load.
Do one of the following:
-
If you know the trailer ID, enter it in the appropriate field.
-
View a list of trailer IDs.
-
Click Search.
The Trailer Search window appears.
-
Do one of the following:
-
To retrieve a list of all trailers in the hosting company’s dispatch system, leave the field blank.
-
If you know the first few characters of the trailer ID, enter them in the Trailer Search field.
-
-
Click Search.
The list of trailers with IDs starting with those characters is shown. -
Find the correct trailer in the list and click Select. The ID will be displayed in the field.
-
-
-
Click Save Status Updates.
The top of the page displays a confirmation that your update was successful.If your login is set up to have the update generate a check call and the trailer ID you enter is invalid, the top of the page displays an error message.

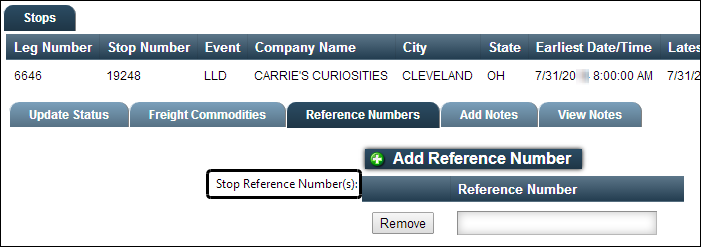
Adding stop reference numbers
If your login allows it, you can add reference numbers to the stops.
You can view stop reference numbers by clicking ![]() Reference Numbers on the same line as the stop.
Reference Numbers on the same line as the stop.
![]()
To add reference numbers to a stop on a load, follow these steps.
-
Do one of the following to access the load you want to update.
-
On the same line as the stop, on the Load Details page, click
Update Status.
The Update Status pane appears. -
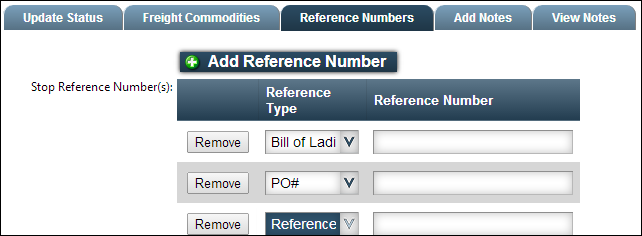
Click the Reference Numbers tab.
The field display on the tab depends on how your CarrierHub login is set up.In this example, you can enter a reference number, but not specify a reference number type.

In this example, you can select a reference number type and enter a reference number.
In this example, you can enter reference numbers for multiple reference number types.
-
Select a reference number type (if available) and enter the reference number.
-
To add another number, do the following:
-
Click Add Reference Number.
Another text box is shown. -
Select the reference number type (if available) and enter the new reference number.
-
-
When you are finished adding numbers, click the Update Status tab.
-
Click Save Status Updates.
A message at the top of the page states that your update was successful.
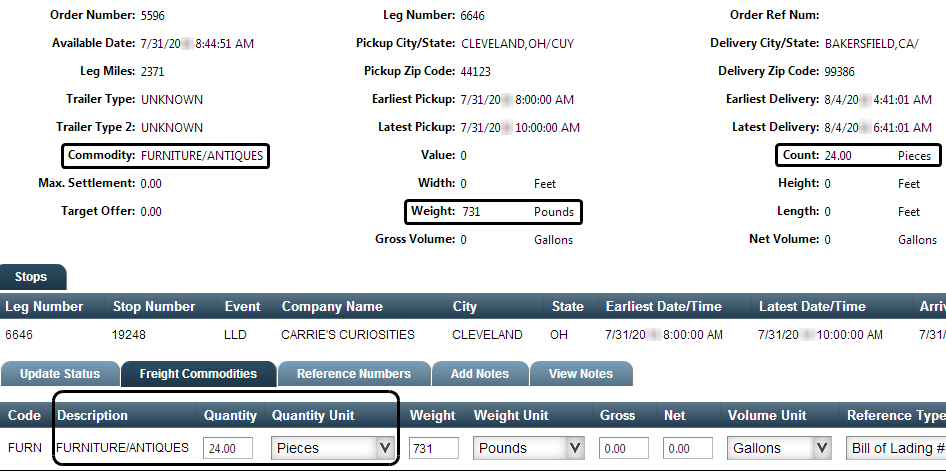
Updating commodity information
If necessary, you can change the weight or unit of measure for a commodity. If your login is set up for entering commodity reference numbers, you can enter reference numbers for the commodity on a stop.
To update commodity information, follow these steps.
-
Do one of the following to access the load that you want to update.
-
On the same line as the stop, on the Load Details page, click
Update Status.
The Update Status pane appears. -
Click the Freight Commodities tab.

-
To change the ordered commodity weight or quantity, enter the new information in the fields.
This sample shows an ordered weight of 731 pounds, and a count of 24 pieces.
-
If your login allows, you can enter a reference number for the commodity in the Ref Number field.

-
Click the Update Status tab, then click Save Status Updates.
Adding notes to a stop
To add a new note to a stop or view stop notes you have already added, follow these steps.
| To view all carrier-related notes associated with the order, see Viewing notes for a load. |
-
Do one of the following to access the load.
-
On the same line as the stop, on the Load Details page, click
Update Status.
The Update Status pane appears. -
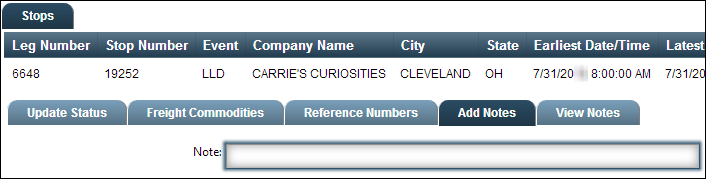
To add a new note, do the following:
-
Click the Add Notes tab.
-
Enter the note for the trip.
-
Click the Update Status tab, then click Save Status Updates.
A message at the top of the page states that your update was successful.
-
-
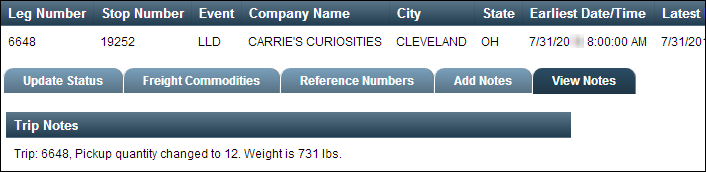
If you want to see notes you have already added on the trip, do the following:
-
On the same line as the stop on the Load Details page, click
Update Status. -
Click the View Notes tab.
Note: If your login allows, you can also view your note, with any other carrier-related notes associated with the order, by clicking View Order Notes on the Load Details page.

-
Uploading paperwork for the load
If your login allows it, you can upload paperwork for a load. Paperwork can be uploaded on the load details page you access when you are viewing your assigned loads.
| When uploading paperwork, Trimble Web Products supports files in the TIFF format. You cannot upload files in the PDF format. |
To upload paperwork for the load as a whole, follow these steps.
-
Access the list of your assigned loads, and select the load you for which you are uploading paperwork.
-
Click View Details.
The load is displayed on the Load Details page. -
At the top of the Load Details page, click Upload Documents.
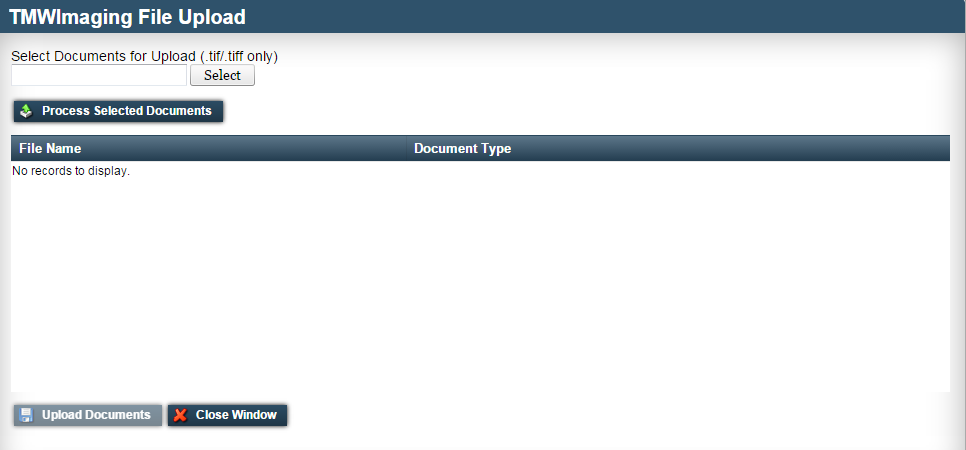
Depending on the hosting company’s imaging system, one of the following will happen:-
The File Upload window opens
-
Click Select to find the paperwork file you want to upload.
The file name appears above the Select field.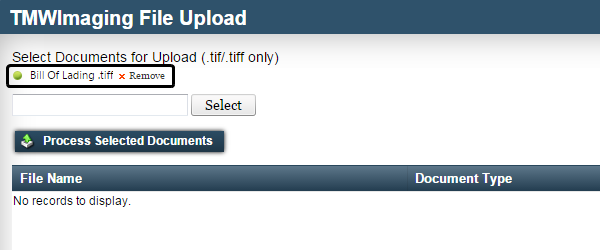
-
To process the paperwork file, click Process Selected Documents.
The file appears in the File Name column.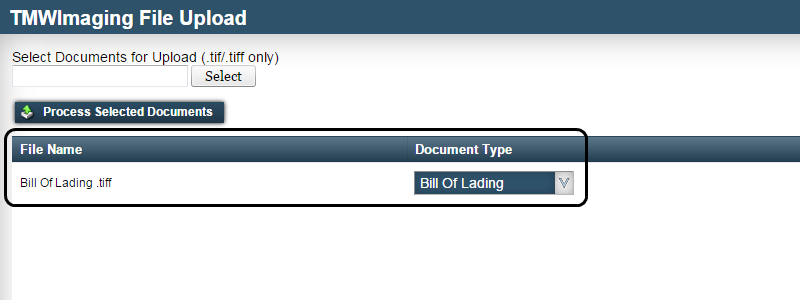
-
In the Document Type field, select a paperwork category.
Note: The document type is required. -
Click Upload Documents at the bottom of the window.
The top of the page displays a confirmation that the document was successfully uploaded to a batch. -
Click Close Window to return to the Load Details page.
-
-
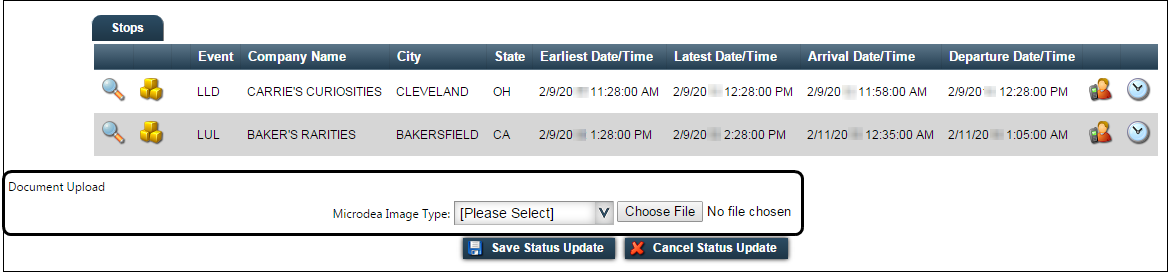
The Document Upload pane appears at the bottom of the page
-
In the Microdea Image Type field, select the image type you want to upload.
-
To find and display the image file name in the Document Upload pane, click Choose File.
The file name appears next to the Choose File button. -
Click Save Status Update.
The top of the page displays a confirmation that your upload was successful.
-
-
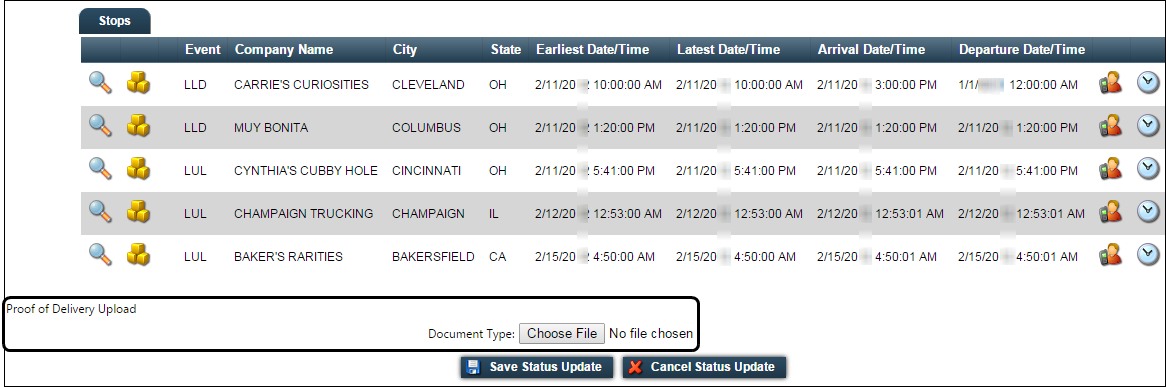
The Proof of Delivery Upload pane appears
-
To find and display the image file name in the Proof of Delivery Upload pane, click Choose File.
The file name appears next to the Choose File button. -
Click Save Status Update.
The top of the page displays a confirmation that your upload was successful.
-
-
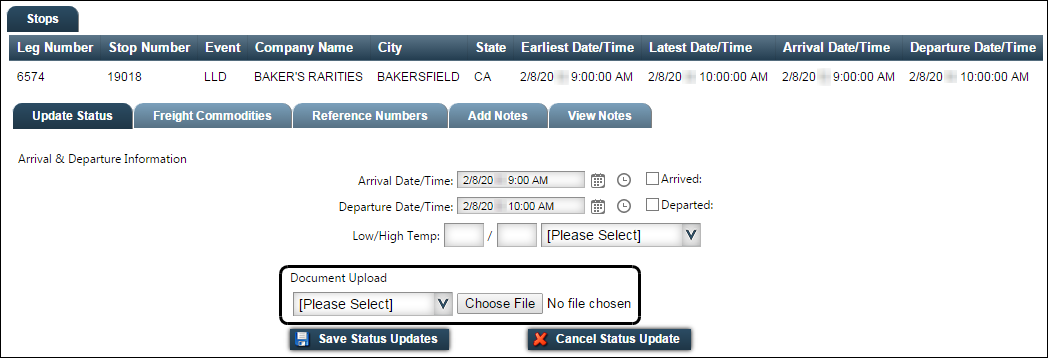
Uploading paperwork for the stop
If your login allows it, you can upload paperwork for a load. Paperwork can be uploaded on the load details page you access when you are viewing your assigned loads.
You can upload paperwork associated with a stop on a load, such as a Proof of Delivery document or detention document.
To upload paperwork for a stop, follow these steps.
-
Do one of the following to access the load for which you want to upload paperwork.
-
On the same line as the stop, click
Update Status.The Stops pane appears.
Depending on the hosting company’s imaging system, you must do one of the following:
-
Click Upload Documents at the top of the page
The File Upload window is displayed.
-
Click Select to find the paperwork file you want to upload.
The file name appears above the Select field. -
To process the paperwork file, click Process Selected Documents.
The file appears in the File Name column. -
In the Document Type field, select a paperwork category.
-
Click Upload Documents at the bottom of the window.
A message at the top of the window indicates that the document was successfully uploaded to a batch. If necessary, make a note of the batch number. -
Click Close Window to return to the Stops pane.
-
-
Go to the Document Upload section at the bottom of the Update Status tab.
-
To find the image file and display the file name in the Document Upload pane, click Choose File.
The file name appears next to the Choose File button. -
Click Save Status Updates.
The top of the page displays a confirmation that the trip was updated successfully.
-
-
| If the Load Details page does not include the Upload Documents button or Document Upload section, the hosting company is using an imaging system that does not support uploading documents for an individual stop. |
Recording a check call
If your login allows it, you can enter a check call to submit a position report to the company hosting the website. Check call position reports allow the hosting company to know the current location of the equipment performing the load.
Position report check calls can be entered on the Load Details and Direct Load Updates pages.
To submit a position report, follow these steps.
-
Do one of the following to access the load for which you want to record a position report.
-
Access the Load Details of the assigned load.
-
Access the Direct Load Updates page of the assigned load.
-
-
At the top of the update page, click Check Call Entry.
The Check Call Entry pane appears at the bottom of the page.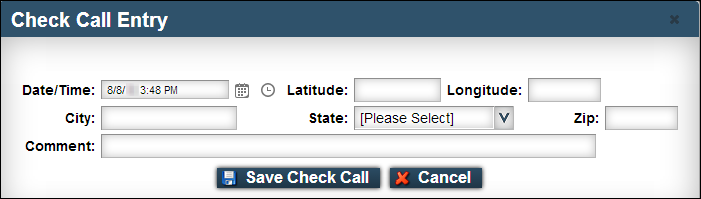
-
In the Check Call Entry pane, enter the city and state at minimum.
-
Click Save Check Call.
The top of the page displays confirmation that your check call has been recorded.