Scheduling reports
Report Scheduler can be selected to install as part of the Trimble Web Products by the application MSI. When installed, it is added as a task within the Windows Task Scheduler on the application server. No matter what schedule you assign to a report within Trimble Web Products, it will not generate until the Report Scheduler task is next scheduled to run or you manually trigger it.
You can create schedules to run SQL and SSRS reports daily, weekly, and monthly at a specific time. You can also have them e-mailed to a list of recipients.
-
SQL reports are sent as the body of the e-mail
-
SSRS reports are sent as an attached PDF
Managing the Report Scheduler
When Report Scheduler runs depends on how it was set up at the time the application was installed. If not changed, the default schedule runs daily, beginning at 8:30 AM, and then every three hours thereafter.
| The actual default setup for the task runs the reports every 5 minutes. The recommended setup is to have the reports run every 180 minutes. |
-
You can edit when Report Scheduler runs in Windows Task Scheduler.
-
You can manually trigger the Report Scheduler to run.
To access Report Scheduler, follow these steps.
-
Go to Windows Task Scheduler on the application server.
-
In the navigation pane, click Task Scheduler Library.
A list of tasks appears in the top middle pane. -
Do one of the following:
-
Edit the default schedule
-
Double-click ReportScheduler to open its properties.
-
On the Triggers tab, click Edit.
-
Change the schedule and click OK.
-
Click OK to close the Properties window.
-
-
Trigger Report Scheduler manually
Right-click on ReportScheduler and select Run.
-
-
Close the Task Scheduler window.
Identifying reports you can schedule
Before you can schedule a SQL report or an SSRS report, you must make it available to the Manage Report Schedules page.
Making a SQL report available for scheduling
You can schedule a SQL report after you save it as a Favorite.
-
On the Report Viewer page, select and view the report you want to schedule.
Making an SSRS report available for scheduling
SSRS reports that you would like to be available for scheduling must be saved in the User Reports directory.
To save an SSRS report as a user report, follow these steps.
-
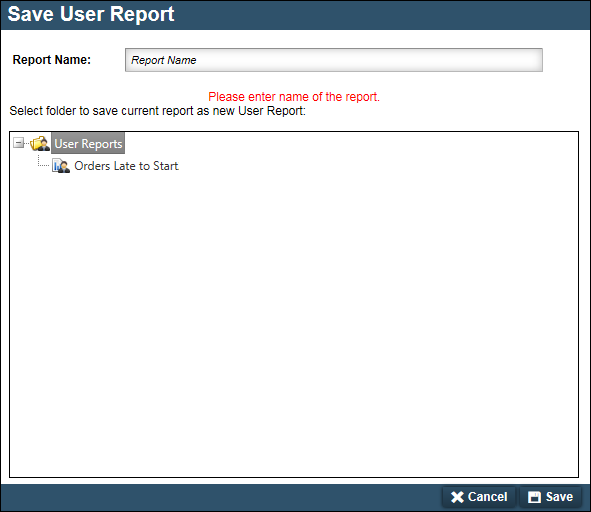
While viewing the report you want to save on the SSRS Report Viewer page, click Save.

The Save User Report pop-up window opens.
-
Enter a name for the report.
-
Click Save.
The Save User Report pop-up window closes. A message confirms the report was saved.
Scheduling a report
For a report to be added to the Report Scheduler queue, you have to create a schedule for the report in the Trimble Web Products application. To create and manage report schedules, follow these steps.
-
Go to Menu > Reporting SQL Reports > Manage Report Schedules.
The Manage Report Schedules page opens.
-
Click New.
The setup page opens.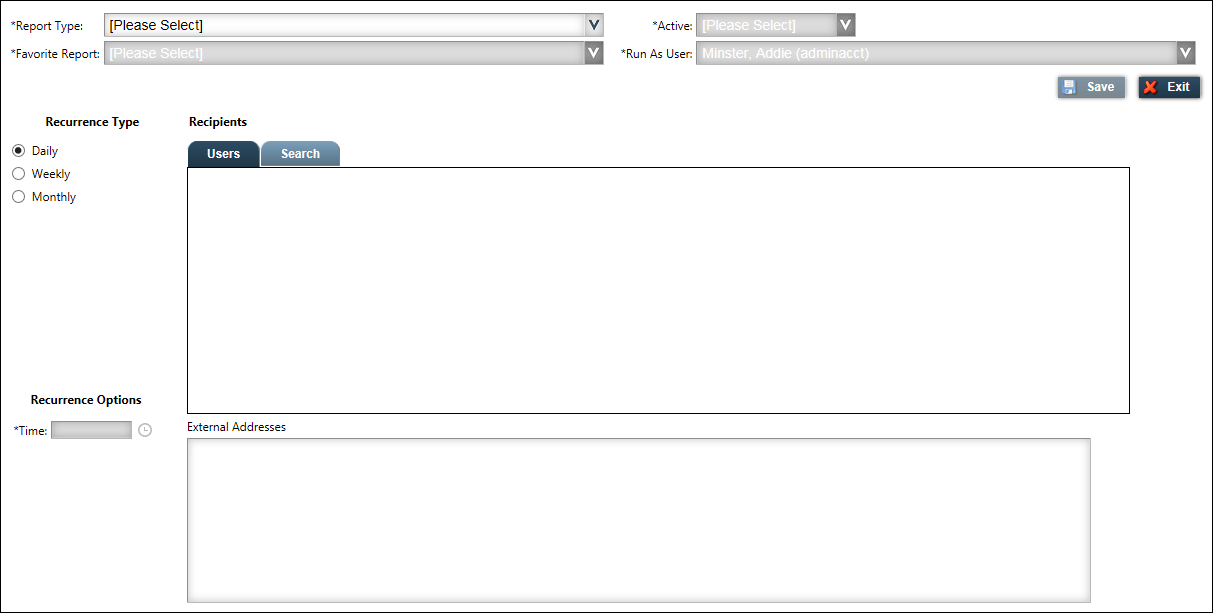
-
In the Report Type field, select SQL or SSRS.
The Active and Run As User fields automatically populate.Note: Yes must be selected in the Active field for it to run the next time Report Scheduler runs. You can select No if you want to suspend running the report temporarily.
-
In the Run As User field, select the ID under which the report should be run.
Note: Some reports require user-related data. As an administrator, you can identify the user ID that will provide the needed data.
-
From the Favorite Report list, select the report you want to schedule.
-
For SQL reports, you must have saved the report as a favorite.
-
For SSRS reports, you must have saved the report as a user report.
-
-
In the Recurrence Type and Recurrence Options sections, specify when the report should run.
Note: Different fields display, based on your Recurrence Type.
-
Daily
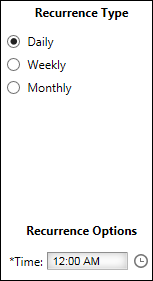
To run the report every day at a specific time:
-
Select the Daily radio button.
-
Click
 Time, and select a time; for example, 12:00 AM (midnight).
-
-
Weekly
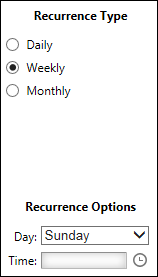
To run the report every week, on a specific day, and at a specific time:
-
Select the Weekly radio button.
-
Use the dropdown list to select the Day of the week.
The default is Sunday. -
Click
Time, and select a time; for example, 12:00 AM (midnight).
-
-
Monthly
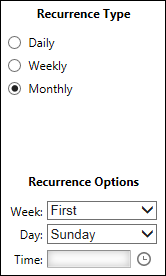
To run the report monthly, during a specific week, on a specific day, and at a specific time:
-
Select the Monthly radio button.
-
Use the dropdown list to select the Week in the month: First, Second, Third, Fourth, Last.
Note: When you select Last, the report will run the last week of the month, whether it is week four or five.
-
Use the dropdown list to select the Day of the week. The default is Sunday.
-
Click
Time, and select a time; for example, 12:00 AM (midnight).
-
-
-
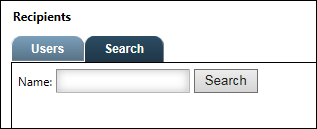
Select the users to receive the report.
Note: The system uses the e-mail addresses in the user profile. There is no limit to the number of recipients to which a report can be sent.
-
On the Search tab, display a list of users:
-
To display all the users to whom you have access, leave the Name field blank.
-
To restrict the list of users, enter the user name or a few characters of the name.
-
-
Click Search.
-
For each user who will receive the report, click Add.
The name is removed from the Search tab and moved to the Users tab. -
When you are finished selecting user names, return to the Users tab.
-
To remove a selected user, click Remove.
-
-
To add a recipient not listed as one of your users, in the External Addresses section, type the user’s e-mail address.
Notes:
-
The recipient must be able to read e-mail in HTML format.
-
Separate multiple addresses with a comma.
-
-
To save all scheduling entries for a report, click Save.
A confirmation message and the report scheduling information appears on the initial page.
Column Definition Icons
 Edit schedule data
 Delete a scheduled report
 Immediately run a report
 Activate/De-active report schedule status
Report Name
Name of the scheduled report
Schedule
When and at what time the report is to run
Run As
ID of the user specified for the report to run as, if the report requires user-related data
Next Run Date/Time
Date/time the report is next scheduled to run
Last Run Date/Time
Date/time the report was last run
Note: When a report is first scheduled, the entry defaults to 1/1/1900, 12:00 AM. When the report runs, the entry changes to the date/time it was last run.
Last Run Message
Message from the last run action
Examples:
-
Immediate Run Scheduled
-
New Report Scheduled
-
Report
-
Report Schedule Adjusted
-
-
Repeat all steps to schedule additional reports.
Managing report schedules
After creating the necessary report schedules, you can manage them by doing any of the following on the Manage Report Schedules page:
Running a report between scheduled times
You can run a report before its next scheduled time. This option is helpful when you need the information right away or to test a newly scheduled report.
On the same line as the report, click ![]() Run.
Run.
A confirmation message appears.
The report will run the next time the Report Scheduler task is triggered from the Windows Task Scheduler.
| The Last Run Message column is updated to Immediate Run Scheduled, and the Next Run Date/Time shows the current date and time that you requested the report. After the report runs, the message is updated, and the report is scheduled to next run at its normally scheduled date/time. |
Modifying schedules
You can change the scheduled date/time and the users on the list.
-
On the same line as the report, click
Edit.
The report’s run schedule appears.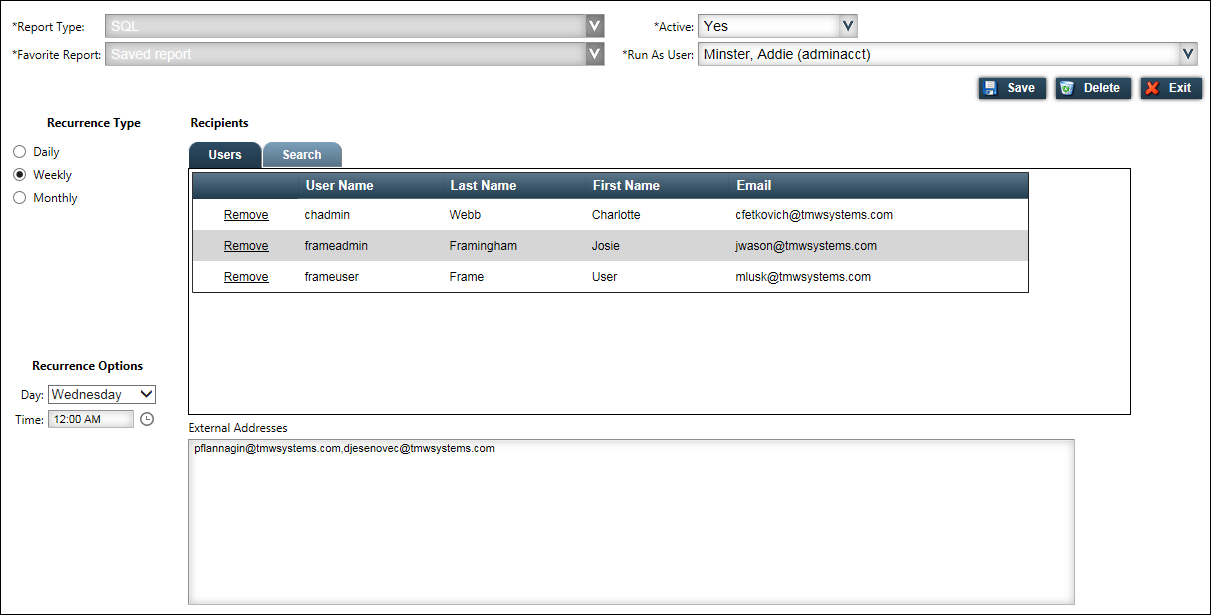
-
Make the changes.
Note: All data can be changed.
-
Click Save.
A confirmation message appears.
De-activating a report schedule
When you de-activate a report schedule, the scheduling data is kept, but the report will not run until it is re-activated. You can de-activate a report schedule two ways.
-
From the scheduled reports list:
-
On the same line as the report, click
De-activate.
A confirmation message appears. -
Click OK.
The report is de-activated, and its De-activate flag turns red. -
If you click
Edit to view the schedule’s setup page, the Active field is set to No.
-
-
From the schedule’s setup page :
-
On the same line as the report, click
Edit. -
When the schedule setup page opens, select No in the Active field.

-
The report’s Active flag on the scheduled reports list turns red.
-
|
When a report schedule is de-activated, you can still use |
Activating a report schedule
You can activate a report schedule two ways.
-
From the scheduled reports list:
-
On the same line as the report, click image:Shared:WebProducts:Admin-042d-ReportSchedules/image18.pngActivate.
A confirmation message appears. -
Click OK.
The report is re-activated, and the Active flag turns green. If you click Edit and view the schedule’s setup page, the Active field is set to Yes.
-
-
From the schedule’s setup page:
-
On the same line as the report, click
Edit. -
When the schedule’s setup data appears, select Yes in the Active field.
The Activate flag on the scheduled reports list page turns green.
-
Deleting a report schedule
You can delete a report schedule two ways.
-
From the scheduled reports list:
-
On the same line as the report, click Delete.
A confirmation message appears. -
Click OK.
The report is deleted from the scheduled reports list.
-
-
From the schedule’s setup page:
-
On the same line as the report, click
Edit. -
When the schedule’s setup page opens, click
Delete.
The report is removed from the scheduled reports list.
-