Applying conditional formatting to data grids
You can use conditional formatting to customize how certain rows or cells in data grids appear. You can assign cell or row colors and font characteristics to data that meet special criteria. Conditional formatting allows you to call attention to important information visually. These visual cues may help users see and interpret information more quickly.
Conditional formats are saved to a grid’s configuration. The conditional formats you define will be in effect each time the grid is accessed with that grid configuration.
Creating a simple conditional format
You can use a simple conditional formatting to customize how certain rows or cells in data grids appear. You can assign cell or row colors or font characteristics to data that meet special criteria.
A simple conditional format has one or more expressions. These expressions are used as the criteria for applying the format you define. Use the logical operators AND, OR, NOT AND, or NOT OR that join expressions to define the condition further.
For example, you may want to highlight rows on the Carrier Available Loads grid when the following conditions are met:
-
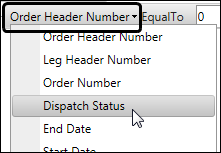
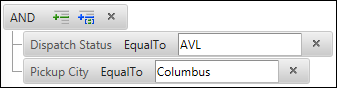
Dispatch Status = AVL and
-
Pickup City = Columbus
To create a simple conditional format for a grid configuration, follow these steps:
-
Go to the grid to which you want to apply conditional formatting.
-
Click Configure.
Note: If the Configure button does not appear on the page, you may not have permission to configure grids. -
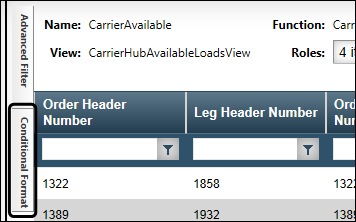
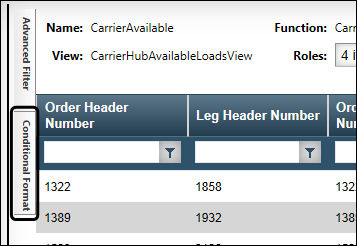
Click the Conditional Format tab.
The Conditional Format pane opens.Notes:
-
The Conditional Format pane is docked by default, until you collapse it by clicking
 Undock.
 -
If the Conditional Format tab does not appear on the Grid Configuration page, you may not have permission to add conditional formatting to a grid.
-
-
Click Add Format.
The Conditional Format pop-up window opens. -
Complete the fields to format how data that meets the condition you set will appear.

Field Definition Name
Enter a name for the conditional format.
Format Type
Select the part of the grid to which the format should apply.
-
Row
Apply the format to the entire row containing data that meets the condition. -
Cell
Apply the format only to the cell containing the data that meets the condition.
Cell
Select the column containing the cell to which the format should apply.
Note: This field is available only when you select Cell in the Format Type field.
Background Color
Select the color to highlight the row or cell that meets the condition.
-
Enter the HTML color code.
-
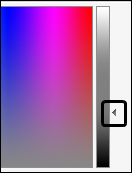
Click
 Pick Color and select a color from the palette.
Note: You may need to drag the arrow on the color bar to a lighter or darker color range before selecting from the palette.
Fore Color
Select the font color for the data that meets the condition.
-
Enter the HTML color code.
-
Click
Pick Color and select a color from the palette.Note: You may need to drag the arrow on the color bar to a lighter or darker color range before selecting from the palette.
Bold
Select for the data that meets the condition to appear in bold.
Italics
Select for the data that meets the condition to appear in italics.
-
-
Add a new expression.
-
Click
 Add Expression to add a line for a new expression.
-
Click the column list to select the column upon which to base the condition.
-
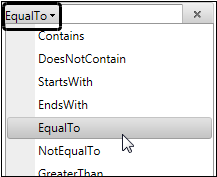
Click the operator list to select an arithmetic operator.
-
In the text box, enter the value that will trigger the condition.

-
Repeat this process to add additional expressions.
-
-
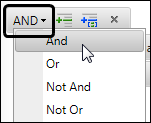
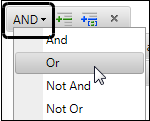
If you have created multiple expressions, you can change the logical operator that combines them.
-
Click AND above the list of expressions to display the list of logical operators.
-
Select a logical operator.
-
-
Click Return to close the Conditional Format pop-up window and return to the Conditional Format pane.
-
Click
Undock to collapse the Conditional Format pane. -
Save the conditional formatting to a grid configuration.
-
If you are modifying an existing grid configuration you did not create, save it with a new name.
-
Click Save As.
The Save Grid Setup pop-up window opens.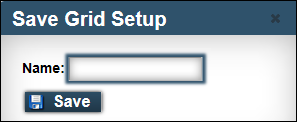
-
Enter a name for the new grid configuration and click Save.
A message confirms the new grid configuration was saved successfully.
-
-
If you are saving changes to a grid configuration you created, click Save.
A message confirms the grid configuration was saved successfully.
-
Creating a complex conditional format
You can use conditional formatting to customize how certain rows or cells in data grids appear. You can assign cell colors or font characteristics to data that meet special criteria.
A simple conditional format has one or more expressions that are used as the criteria for applying the format you define. You can create a complex conditional format by adding a group to an expression. Use the logical operators AND, OR, NOT AND, or NOT OR that join expressions to define the condition further.
For example, you may want to highlight grid rows on the Carrier Available Loads grid when certain conditions are met: The Dispatch Status is AVL and the Pickup City is Columbus or Cleveland.
To add a group to a conditional format, follow these steps:
-
Go to the grid to which you want to apply conditional formatting.
-
Click Configure.
Note: If the Configure button does not appear on the page, you may not have permission to configure grids. -
Click the Conditional Format tab.
The Conditional Format pane opens.Notes:
-
The Conditional Format pane is docked by default, until you collapse it by clicking
Undock. -
If the Conditional Format tab does not appear on the Grid Configuration page, you may not have permission to add conditional formatting to a grid.
-
-
Click Add Format.
The Conditional Format pop-up window opens. -
Complete the fields to format how data that meets the condition you set will appear.
Field Definition Name
Enter a name for the conditional format.
Format Type
Select the part of the grid to which the format should apply.
-
Row
Apply the format to the entire row containing data that meets the condition. -
Cell
Apply the format only to the cell containing the data that meets the condition.
Cell
Select the column containing the cell to which the format should apply.
Note: This field is available only when you select Cell in the Format Type field.
Background Color
Select the color to highlight the row or cell that meets the condition.
-
Enter the HTML color code.
-
Click
Pick Color and select a color from the palette.Note: You may need to drag the arrow on the color bar to a lighter or darker color range before selecting from the palette
 .
.Fore Color
Select the font color for the data that meets the condition.
-
Enter the HTML color code.
-
Click
Pick Color and select a color from the palette.Note: You may need to drag the arrow on the color bar to a lighter or darker color range before selecting from the palette.
Bold
Select for the data that meets the condition to appear in bold.
Italics
Select for the data that meets the condition to appear in italics.
-
-
Add a new expression.
-
Click
Add Expression to add a line for a new expression. -
Click the column list to select the column upon which to base the condition.
-
Click the operator list to select an arithmetic operator.
-
In the text box, enter the value that will trigger the condition.
-
-
Click
 Add Group to add a line for the group.
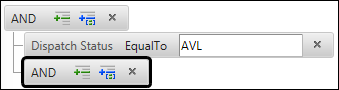
-
Add expressions to the group, as you did in Step 6.
-
If you want, change the logical operator that combines the expressions in the group.
-
Click AND above the list of expressions to display the list of logical operators.
-
Select a logical operator.
-
-
Click Return to close the Conditional Format pop-up window and return to the Conditional Format pane.
-
Click
Undock to collapse the Conditional Format pane. -
Save the conditional formatting to a grid configuration.
-
If you are modifying an existing grid configuration you did not create, save it with a new name.
-
Click Save As.
The Save Grid Setup pop-up window opens. -
Enter a name for the new grid configuration and click Save.
A message confirms the new grid configuration was saved successfully.
-
-
If you are saving changes to a grid configuration you created, click Save.
A message confirms the grid configuration was saved successfully.
-
Modifying a conditional format
You can modify any existing conditional formatting that has been saved to a grid configuration.
To modify a conditional format, follow these steps:
-
Go to the grid that contains the conditional format you want to modify.
-
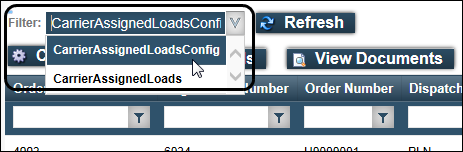
In the Filter list, select the grid configuration to which the conditional format was saved.
-
Click Configure.
Note: If the Configure button does not appear on the page, you may not have permission to configure grids. -
Click the Conditional Format tab.
The Conditional Format pane opens.Notes:
-
The Conditional Format pane is docked by default, until you collapse it by clicking
Undock. -
If the Conditional Format tab does not appear on the Grid Configuration page, you may not have permission to add conditional formatting to a grid.
-
-
For the conditional format you want to modify, click
 Modify.
The format opens in the Conditional Format pop-up window. -
Modify the conditional format as appropriate.
For definitions of conditional formatting options, see Creating a simple conditional format or Creating a complex conditional format. -
Click Return to close the Conditional Format pop-up window and return to the Conditional Format pane.
-
Click
Undock to collapse the Conditional Format pane. -
Save the conditional formatting to a grid configuration.
-
If you are modifying an existing grid configuration you did not create, save it with a new name.
-
Click Save As.
The Save Grid Setup pop-up window opens. -
Enter a name for the new grid configuration and click Save.
A message confirms the new grid configuration was saved successfully.
-
-
If you are saving changes to a grid configuration you created, click Save.
A message confirms the grid configuration was saved successfully.
-
Deleting a conditional format
You can delete conditional formatting you no longer want to apply to a grid.
To delete a conditional format, follow these steps:
-
Go to the grid that contains the conditional format you want to delete.
-
In the Filter list, select the grid configuration to which the conditional format was saved.
-
Click Configure.
Note: If the Configure button does not appear on the page, you may not have permission to configure grids. -
Click the Conditional Format tab.
The Conditional Format pane opens.Notes:
-
The Conditional Format pane is docked by default, until you collapse it by clicking
Undock. -
If the Conditional Format tab does not appear on the Grid Configuration page, you may not have permission to add conditional formatting to a grid.
-
-
For the conditional format you want to delete, click
 Delete.
The conditional format is removed from the Conditional Format pane. -
Click Return to close the Conditional Format pop-up window and return to the Conditional Format pane.
-
Click
Undock to collapse the Conditional Format pane. -
Save your changes to a grid configuration.
-
If you are modifying an existing grid configuration you did not create, save it with a new name.
-
Click Save As.
The Save Grid Setup pop-up window opens. -
Enter a name for the new grid configuration and click Save.
A message confirms the new grid configuration was saved successfully.
-
-
If you are saving changes to a grid configuration you created, click Save.
A message confirms the grid configuration was saved successfully.
-