Integrating with the EBE imaging service
-
To set up Trimble Web Products to work with the EBE Imaging service, you must identify it as your imaging service vendor and provide connection information.
-
Go to Menu > Configuration > Imaging Settings.
The Imaging Settings page appears. -
In the leftmost drop-down list, select the module for which you want to define imaging settings. You can select Carrier or Customer.
-
In the rightmost drop-down list, select EBE.
The Imaging Settings page refreshes to show the fields for the EBE imaging service.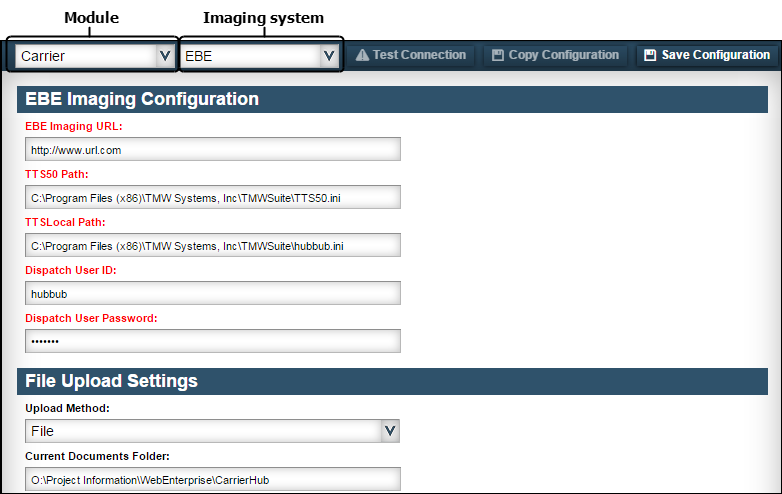
-
In the EBE Imaging Configuration section, make the required entries about your EBE imaging service. All fields are required.
Field Definition EBE Imaging URL
Complete web address of the imaging web service
TTS50 Path
Location of the TTS50 file used by the imaging web service
Note: If the Trimble Web Products web services and the imaging web service are installed on the same server, they may share the same TTS50 file. If they are installed on different servers, each must have its own instance of the TTS50 file.
TTSLocal Path
Location of the TTSLocal file used by the imaging web service
Note: If the Trimble Web Products web services and the imaging web service are installed on the same server, they may share the same TTSLocal file. If they are installed on different servers, each must have its own instance of the TTSLocal file.
Dispatch User ID
User login ID for the TMWSuite database
Dispatch User Password
Password associated with the specified TMWSuite user ID
-
In the File Upload Settings section, specify an upload method.
Note: Currently, you can allow users to upload files from a directory on a computer or server.
-
Click Save Configuration in the upper right corner of the page.
If the settings are correct, a message appears indicating that your settings were saved.
If one or more settings is incorrect, a message appears advising you to check your settings. Make corrections and click Save Configuration to retest your entries.
-
To test the connection with the information entered, click Test Connection.
If the connection works, a message appears indicating that the test was successful.
| Your company defines the types of documents available for viewing in the Paperwork label in System Administration. The label’s Description and Abbr fields should match the document names and abbreviations used by your imaging provider. |