Reviewing and updating your assigned loads
The Assigned Loads Board displays a list of the loads assigned to you. From this page, you can view load details and update load information.
The Select Multiple Loads page allows you to update information for multiple assigned loads simultaneously. You can update the:
-
Reference number associated with each load
-
Tractor(s), trailer(s), and driver(s)
-
Arrival and departure times for the trip’s origin and destination locations
Looking up a list of your assigned loads
You can review the loads assigned to you in the Assigned Loads page. Loads display on this page from the time they are first assigned through their completion.
To look up your assigned loads, follow these steps.
-
Go to Menu > Carrier > Assigned Loads.
The Assigned Loads page opens.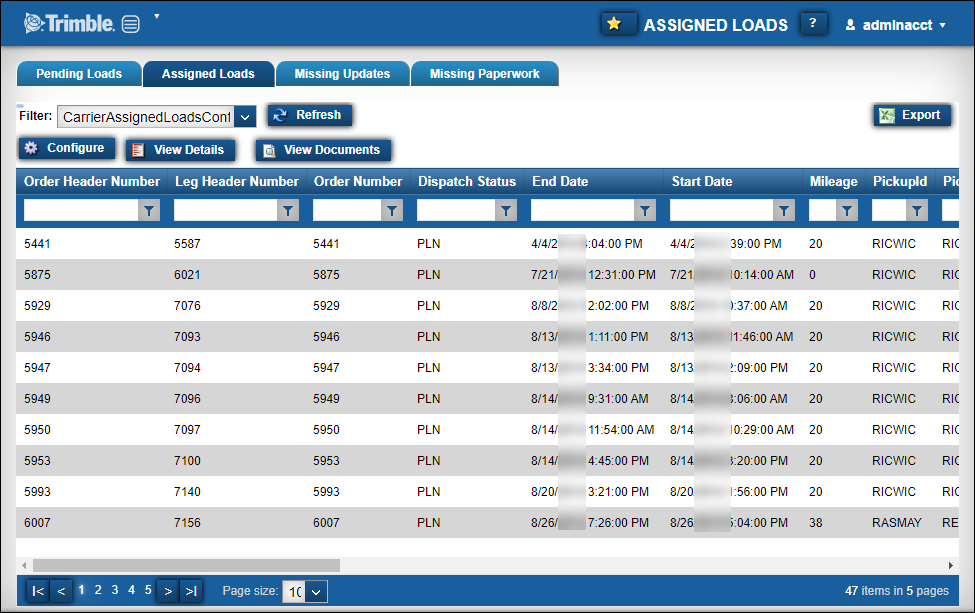
Notes:
-
Loads that are listed and the actions you can take are restricted by the setup associated with your Trimble Web Products login. Your page may differ from the illustration.
-
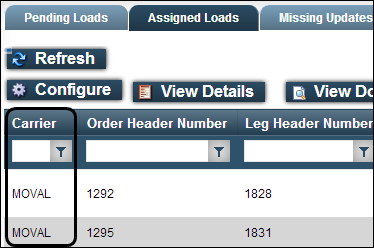
The hosting company may have associated your login with multiple carrier IDs. If your login is associated with multiple carrier IDs, loads assigned to all of the carriers associated with your login are displayed. The Carrier column indicates which carrier is assigned to each load. By default, the column is on the far right of the grid. You can move it so that it is viewable whenever you access the Assigned Loads page. For details on moving columns or grouping by columns, see Changing the data display on grids.
-
-
If needed, click the Assigned Loads tab.
-
If multiple views have been set up for your Trimble Web Products login, select a different view from the Filter drop-down list, as needed.
A view is a set of restrictions that the hosting company defines to specify which loads you see when you view trips. These views are linked to your login by the hosting company. -
To see all assigned loads, use the paging bar.
-
If you want, manipulate the data grid.
-
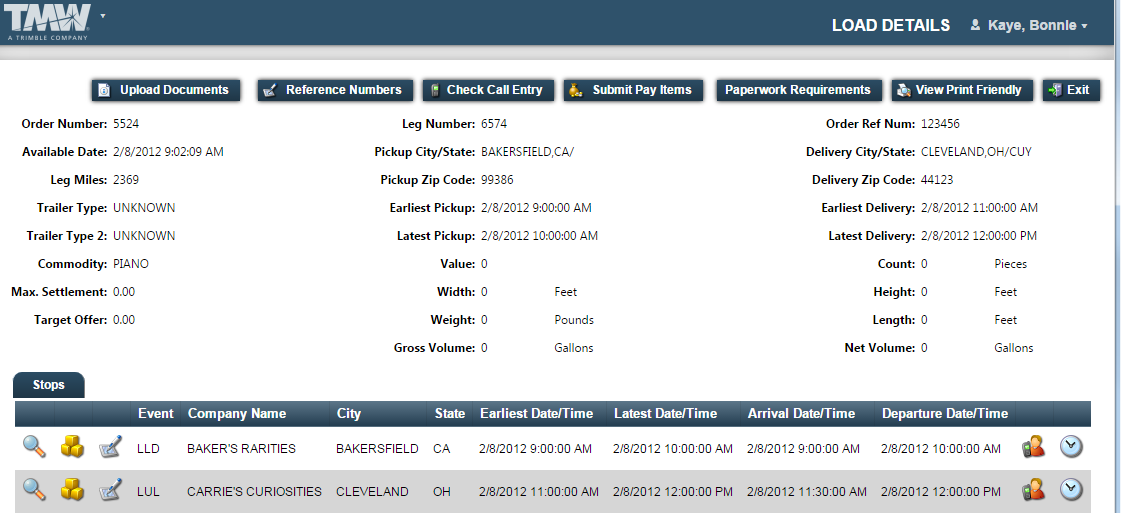
To view information about a load, click on the load in the grid and click View Details.
Load information is shown on the Load Details page.The top pane of the page shows load header details. The bottom pane of the page shows stop details.
-
If you want, do any of the following:
-
To return to the list of assigned loads, click Exit.
Looking up a specific assigned load
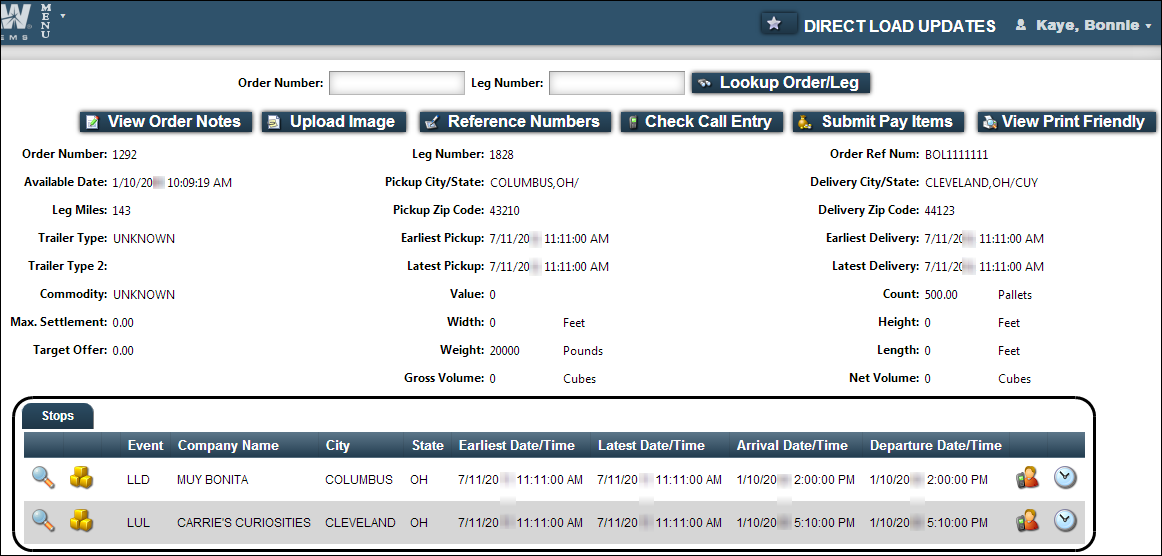
The Direct Load Updates page allows you to retrieve the detail for a particular order.
To look up a load, follow these steps.
-
Go to Menu > Carrier > Direct Load Updates.
The Direct Load Updates page opens.
-
Do one of the following:
-
In the Order Number field, enter the order number for the load.
This correlates to the value in the Order Number field in the Assigned Loads page. -
In the Leg Number field, enter the trip segment number.
This correlates to the value in the Leg Header Number field in the Assigned Loads page.
-
-
Click Lookup Order/Leg.
The Direct Load Updates page expands to display the order search pane and stop information.The actions you can take are restricted by the setup associated with your Trimble Web Products login. Your options may differ from the illustration.
Using the Direct Load Updates page, you can:
-
To look up another order, enter the Order Number or Leg Number at the top of the page and click Lookup Order/Leg.

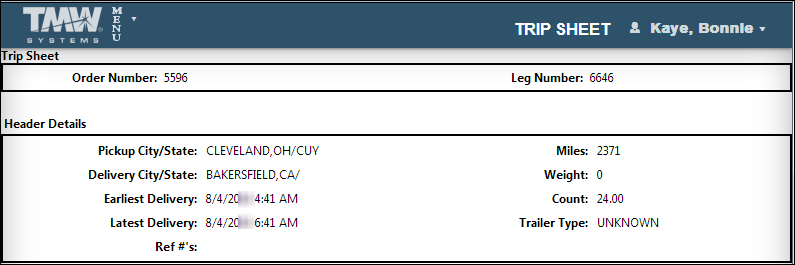
Printing a trip sheet
If your login allows you to print trip sheets, you can do so on the load details page you access when you are viewing available loads, viewing your assigned loads, or viewing your completed loads.
To print a trip sheet for a load, follow these steps.
-
From any of these pages, you can select a load and click View Details:
-
At the top of the Load Details page, click View Print Friendly.
The trip sheet opens in a separate window.This illustration shows how a trip sheet might look.
-
Print as you usually do from your browser.