Managing surveys
Use the survey feature to keep in touch with what your personnel think of company activities, benefits, the products they are using, and the like. It also allows you to:
-
Categorize surveys so that they can be distributed according to user role
-
Compose your surveys
-
Manage the activation of a survey, copy a survey, and delete a survey
-
View survey results and display specific survey responses
Managing survey types
Organizing surveys into types (or categories) allows you to restrict their distribution based on user roles. For example, you might have a survey type called Public, which is visible to all users regardless of role. You might also have a survey type called Drivers, which is visible to administrators and drivers, but not to their families and friends.
Adding a survey type
-
Go to Menu > Admin > Surveys > Manage Survey Types.
The Manage Survey Types page opens. -
In the text box, enter the name of the new survey type.
-
Click Add.
The type is added to the Active Survey Types list.
Restricting viewing rights to surveys
Use this procedure to restrict the viewing rights for surveys assigned to a selected type.
-
Go to Menu > Admin > Surveys > Manage Survey Types.
-
Under Active Survey Types, select the survey type that you want to restrict.
-
Click Role(s).
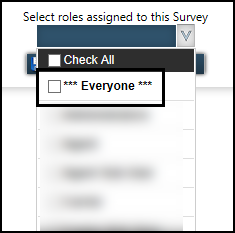
The page expands to include the Select roles assigned to this Survey field. -
Click in the Select roles assigned to this Survey field to expand the list.
-
Click in the checkbox next to each role that can access the surveys belonging to the survey type.
Note: To make the survey type available to anyone logged into the web site, select the *Everyone* role.
-
Click away from the list.
The field shows a count of the roles selected.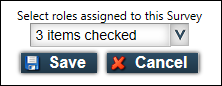
-
Click Save.
Deactivating a survey type
When you deactivate a survey type, any surveys linked to that type can no longer be accessed by the roles assigned to that type.
-
Go to Menu > Admin > Surveys > Manage Survey Types.
-
Under Active Survey Types, select the survey type that you want to make inactive.
-
Click Deactivate.
The type is moved to the Deactivated Survey Types list.
Reactivating an inactive survey type
Use this procedure to activate a survey type that has been deactivated.
-
Go to Menu > Admin > Surveys > Manage Survey Types.
-
Under Deactivated Survey Types, select the survey type that you want to activate.
-
Click Activate.
The type is moved to the Active Survey Types list.
Deleting a survey type
You cannot delete a survey type that is active or has surveys associated with it. You can view information about surveys through Menu > Admin > Surveys > Manage Surveys.
-
Go to Menu > Admin > Surveys > Manage Survey Types.
-
Under Deactivated Survey Types, select the survey type that you want to delete.
-
Click Delete.
Creating a survey
Use this procedure to create a survey in Trimble Web Products to which users can respond.
-
Go to Menu > Admin > Surveys > Create Survey.
-
Complete the survey identification information.

Required field: *
Field Definition Survey Type
From the list, select the survey category to which the survey belongs.
Publish
Date on which the survey will be available to the associated roles.
Notes:
-
Defaults to the current date.
-
Until you are ready to make the survey available to users, you may want to select a date in the future. To change the publish date to make it available to users, see Maintaining surveys.
Expires
Date on which the survey will no longer be viewable.
Notes:
-
Defaults to 30 days after the current system date.
-
Until you are ready to make the survey available to users, you may want to select a date in the past. To change the publish date to make it available to users, see Maintaining surveys.
Questions Per Page
From the list, select the number of questions that should appear on each page of the survey.
Note: The field defaults to five questions per page.
Title *
Headline or main title for the survey.
Summary *
A brief description of the survey. You can include such information as the purpose, who is requesting the feedback, and a due date. The description appears immediately after the survey title.
-
-
Click Create.
The page redraws to show a question area and a preview area.
-
In the Question field, type the text of the first question.
-
From the Type list, select the appropriate question format.
Freeform Comments
For questions that require the user to type opinions and ideas.
Most Preferred
For questions that require only one response. A radio button will appear before each response.
All That Apply
For questions that allow the user to select multiple answers. A checkbox will appear before each response.
The page expands to include the response configuration appropriate for the format type.
-
Configure the response according to the type.
-
Freeform Comments

Height
From the list, select the minimum number of lines that should appear in the text box. If the person taking the survey enters more text than fits in the specified number of lines, scroll bars will appear.
Reset
Click Reset to change the question type. The Question text remains.
-
Most Preferred

Response
Enter the text of the first response selection.
Reset
Click Reset to change the type of question. The Question text remains.
-
All That Apply

Response
Enter the text of the first response selection.
Reset
Click Reset to change the type of question. The Question text remains.
-
-
If you want to add another response option, click Add Response.
A new response row appears. For each additional survey question, repeat Steps 4 through 6. -
When you are finished adding questions, click Save.
A survey preview is shown. -
Click Save to return to the Review Survey Results page.
After you save the survey and leave the create mode, you can access the survey for more editing.
Maintaining surveys
From the Manage Surveys page, you can locate and display a survey, and then change the expiration date, modify the survey questions and responses, change the question order, or delete the survey from storage.
Locating a survey to manage
Use this procedure to display a list of surveys to manage.
-
Go to Menu > Admin > Surveys > Review Survey Results.
The Review Survey Results page opens. -
Verify that View Surveys is selected.
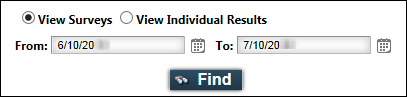
-
In the From and To calendars, select the date range within which you want to search for surveys.
Note: The From date defaults to 30 days prior to today’s date.
-
Click Find.
A list of surveys created within the date range is displayed.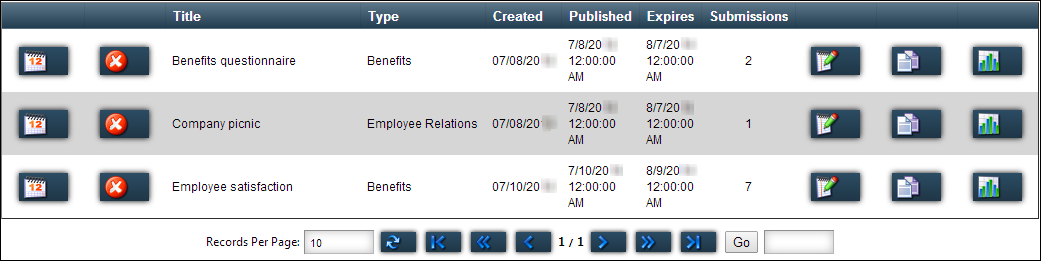
Note: If multiple pages exist, use the paging bar.
 Set Dates
Select the date when the survey expires.
 Delete
Remove the survey from the system. This deletion is permanent.
Title
The name of the survey as entered during creation.
Type
The survey type as assigned during creation.
Created
The date the survey was created.
Published
The date the survey is available to the users to complete.
To save a survey before it is complete, set the Activation Date to a date in the future or the Deactivation Date to a date in the past. When you save the survey, it will not be available to any users until you are ready to post it. When the survey is complete, you can change the dates.
Expires
The date the survey expires and will no longer be available to the users to complete.
Submissions
The number of users who have submitted their survey responses to date.
 Edit
EditModify the survey.
 Copy
CopyMake a copy of the survey, to use it as a template for another survey.
 Show Results
View the results of surveys taken.
-
Continue with any of the following procedures.
Changing a survey’s publication or expiration date
Use this procedure to change a survey’s expiration (or deactivation) date, or to shorten or lengthen the period of time it will be available to users. When a survey is created, its expiration date is automatically set to 30 days after the creation date. The survey will be automatically removed from view on the expiration date.
-
In the Review Survey Results page, locate the survey.
-
On the same line as the survey item, click
Set Expiration.
The page displays the activation and deactivation dates in a text box.
-
Enter or select a new Published or Expiration date.
-
Click
 Update Dates.
If you decide not to change the dates, click Cancel.
Deleting a survey
Use this procedure to remove surveys that have passed their deactivation date or completed surveys that you no longer want to store.
| This is a permanent action. No confirmation window opens. |
-
In the Review Survey Results page, locate the survey you want to delete.
-
On the same line as the survey item, click
 Delete.
Copying a survey
Use this procedure to copy a survey for a similar purpose, rather than re-enter all the same questions and answers.
-
In the Review Survey Results page, locate the survey you want to copy.
-
On the same line as the survey item, click
Copy.
An editing page opens.
-
In the Survey Title text box, change the title as appropriate.
-
In the Survey Type list, select the appropriate survey category.
-
Click Copy.
The copied survey appears in the Review Survey Results page. -
Modify the copied survey as appropriate.
Viewing survey results
Use this procedure to view the current results of a survey.
-
In the Manage Surveys page, locate the survey whose results you want to view.
-
On the same line as the survey item, click
 Show Results.
The Survey Results page opens.Note: If the
icon is disabled, no surveys have been submitted.For each question type, the following information is displayed:
Freeform Comments
A read-only text box. Individual comments can be seen through the Manage Surveys, View Individual Results option.

Most Preferred
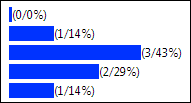
Each response includes:
-
Survey meter bar graph
-
Number of responses
-
Percent of total responses
All That Apply
Each response includes:
-
Survey meter bar graph
-
Number of responses

-
-
When finished viewing, click Return to Manage Surveys.
Viewing individual survey results
Use this procedure to review an individual survey’s responses.
-
Go to Menu > Admin > Surveys > Manage Surveys.
The Manage Surveys page opens. -
Select View Individual Results.
The page expands to include filters for locating specific results.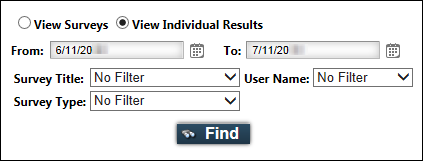
-
In the From and To lists, enter or select the date range within which results occurred.
For more information about selecting dates, see Selecting a date and time.Note: The date range defaults to 30 days prior to today’s date.
-
Click Find.
A list of all individual surveys created within the date range is displayed. -
If the list is too long, use the filters.
Follow these steps when the list is too long to quickly scroll to the survey you want to review. A filter limits the number of items shown.
-
Enter any restrictions according to the following:
-
Survey Title
From the list, select the survey for which you want to view results. -
User Name
From the list, select the user whose results you want to view. -
Survey Type
From the list, select the survey type for which you want to view results.
-
-
Click Find.
-
-
Go to the survey.
Note: If multiple pages exist, use the paging bar to move through the pages.
-
On the same line as the survey, click
Show Results.
The Survey Results page displays the survey meter and the responses of the selected user.The user’s selections are in bold font.
For each question type, the following information appears:
Freeform Comments
User’s response appears.

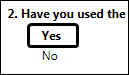
Most Preferred
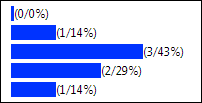
Each response includes:
-
Survey meter bar graph
-
Number of responses
-
Percent of total responses
All That Apply
Each response includes:
-
Survey meter bar graph
-
Number of responses
-
-
When finished viewing, click Return to Manage Surveys.