Creating enhanced menus
First available in Trimble Web Products 2015.1
You can customize all of the application menus to meet your company’s needs. You can:
-
Rename any menu
-
Reorder the appearance of menus and items
-
Move an item from one menu to another
-
Group items in a sub menu
Also, you can create menus specific to user roles. Doing so provides you with more control over what commands users see. The enhanced menu appears as a header menu.
You create menus on the Menu Maintenance page.
| Do not delete the Home menu item from the menu. |
The page has two sections.
You use the left side to:
-
Build the menu structure
-
Delete, save, and import menus

You use the right side to:
-
Name the menus and the items they contain
-
Identify pages associated with the items
-
Assign the menus items to user roles
 ]ifdef::tmtfm[
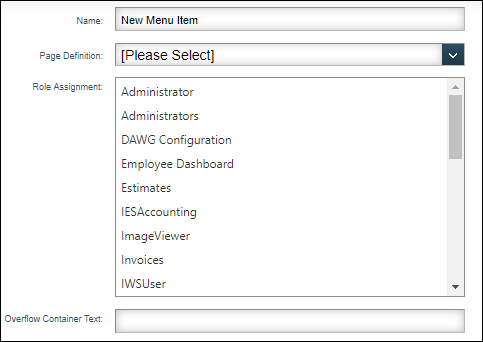
|
Creating menus
When you create enhanced menus, you add the menus you want users to see. You also add the items you want to access from those menus.
To create menus and add menu items to them, follow these steps.
-
Go to Menu > Configuration > Menu Maintenance.
The Menu Maintenance page opens. -
Choose from the following options:
-
To add a new item at the menu level, click Add Root.
-
To add a new item within a menu, click Add Below.
Note: If you are setting up your menu for the first time, clicking Add Below will add a menu item to the Home menu.
-
-
If you want to add a new menu item at the same level in a particular location, click on a menu or menu item, and then click Add Same Level.
-
Click Save.
A message appears at the top of the page, stating your settings were saved successfully.
Naming a menu or menu item
Based on your company needs, you can assign new names to menus and menu items.
To change the name on an enhanced menu or menu item, follow these steps.
-
Go to Menu > Configuration > Menu Maintenance.
The Menu Maintenance page opens. -
Click on an enhanced menu or menu item.
-
In the Name field, enter a new name.
-
Click Save.
A message appears at the top of the page, stating your settings were saved successfully.
Assigning a page to a menu or menu item
You can choose to assign any page listed in the Page Definition field’s dropdown list to a menu or menu item.
To assign a page, follow these steps.
-
Go to Menu > Configuration > Menu Maintenance.
The Menu Maintenance page opens. -
Click on a menu or menu item.
-
Select the page you want to associate with the menu or menu item from the Page Definition field’s dropdown list.
-
Click Save.
A message appears at the top of the page, stating your settings were saved successfully.
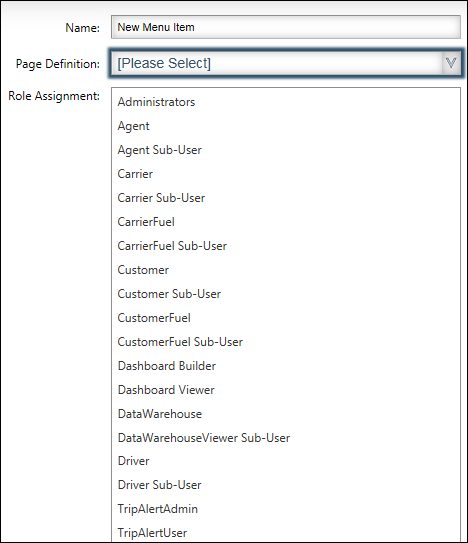
Assigning roles to a menu or menu item
For menus or menu items to be visible to users, you must assign roles to them.
To assign one or multiple roles to each menu or menu item, follow these steps.
-
Go to Menu > Configuration > Menu Maintenance.
The Menu Maintenance page opens. -
Click on a menu or menu item.
-
Select one or more role(s) from the Role Assignment list:
-
To select one role, click the role.
-
To select multiple roles, press and hold CTRL as you select the roles.
-
To select a range of roles, press and hold SHIFT as you select the first and last role in the range.
-
-
Click Save.
A message appears at the top of the page, stating your settings were saved successfully.
Activating enhanced menus
Once you have designed enhanced menus, you must allow users to see them. To do this, you use the Show Enhanced Menu item option.
To enable users to see enhanced menus, follow these steps.
-
Go to Menu > Configuration > Settings Manager.
The Settings Manager page opens. -
Verify [Global Settings] is the value in the Role field.
You must be in Global Settings mode to edit this setting. -
Click these tabs: General > Core > Misc Info.
-
In the Misc Info 2 section, select the Show Enhanced Menu checkbox.
-
Click Save.
A message appears at the top of the page, stating your settings were saved successfully.
Deleting menus and menu items
To delete menus and menu items, follow these steps.
-
Go to Menu > Configuration > Menu Maintenance.
The Menu Maintenance page opens. -
Click on a menu item you want to remove.
Note: You must delete pages individually. -
Click Delete Selected.
The system removes the menu item. -
Click Save.
A message appears at the top of the page, stating your settings were saved successfully.
Importing menus and menu items
You can choose to import the existing administration menu to use as a template.
To import the existing administration menu, follow these steps.
-
Go to Menu > Configuration > Menu Maintenance.
The Menu Maintenance page opens. -
Click Import.
The system displays a message stating, "Existing menu will be lost. Are you sure you want to import menu?"-
Click OK to remove the existing menu in the Menu Maintenance window and import the main menu.
-
Click Cancel to keep the existing menu and cancel the import.
-
-
Click Save.
A message appears at the top of the page, stating your settings were saved successfully.