Adding and removing fields
Adding fields to a window
Use this procedure to add fields and field labels to a window.
-
Go to the window or tab where you want to add the new item.
-
Right-click in the approximate location for the new item.
A shortcut menu is shown.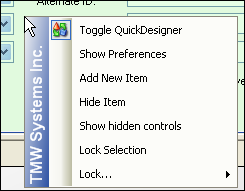
-
Click Add New Item.
After a brief pause, the Add New Item window opens, which contains objects appropriate for the window you are modifying. -
On the Standard tab, make the appropriate selections in each area of the window.
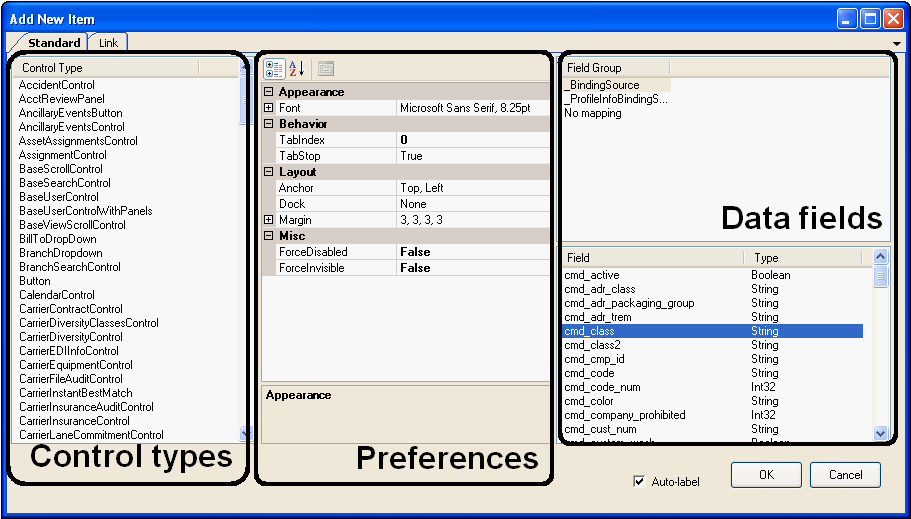
Control types
The left pane of the window lists all the control types that are available.
The Control Type you select determines whether the preferences and data field panes of the window open.
Preferences
If the selected control type requires more information, a preferences pane opens. For more information on field preferences, see Changing font properties or preferences.
Data field
If the selected Control Type allows the option of associating (or binding) the item to a specific field in a data table, this pane opens. Control types that allow this include Checkbox, Label, and TextBox.
You can select:
-
A defined group of data tables from which to associate (or bind) to the new item.
-
No mapping for control types, such as Label, you do not want to connect to a database field.
If you selected a Field Group, the lower right section of the window displays fields that are contained within that group.
Select the field that you want, and that is appropriate for the window you are customizing.
-
-
Verify the Auto-label checkbox is selected. This will cause the system to automatically add the field name when it adds the field itself.
Note: If you clear the Auto-label box, you can add the field name at a later time.
-
Click OK.
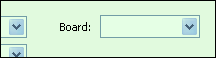
The newly added field is placed on the window.This sample shows that the car_board field and Board field name were added to the window.
-
If you want, apply security to the new field.
-
Toggle out of QuickDesigner mode to view the changes you have made.
Removing a field that you added manually
There may be times when you have added a field manually to a window, and then decide you no longer want it there. You can remove it completely to reduce clutter. The field no longer shows on the window where you placed it, either in data entry mode or in QuickDesigner mode. You can always re-add it later if you want. See Adding fields to a window.
| If a field is part of the factory layout, you cannot remove it from QuickDesigner mode. However, you can hide the item. See Applying security to fields. |
A field usually consists of the field itself and its corresponding name (or label.) Use this procedure to remove a field and its label.
-
Right-click on the field item to be removed.
A shortcut menu is shown.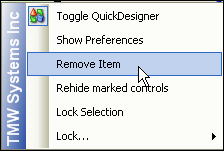
-
Select Remove Item.
The item is immediately removed from the window. -
Repeat Steps 2 and 3 for the field name.
-
Toggle out of QuickDesigner mode to view the change you made.
Note: If you toggle back into QuickDesigner mode, you will see that the item is no longer part of the layout.