Changing the status of multiple trips
As you process a trip through the system, the dispatch status may change several times. The Mass Status Change function allows you to change the status of multiple trips at the same time.
All trips in Dispatch are assigned one of the following statuses.
-
Available
-
Planned
-
Multi Planned
Note: The Mass Status Change feature does not support status changes for multi-planned trips. -
Dispatched
-
Started
Note: The Mass Status Change feature in TMW Operations does not support status changes for started trips.
| Whether you see trips with all of these statuses in the Available Trips grid is determined by the configuration of the view you are using. For more information, see Understanding board views. |
The mass status change feature allows you to make these status changes:
-
Planned to Dispatched
-
Dispatched back to Planned
-
Planned to Completed
-
Dispatch to Completed
-
Available to Cancelled
-
Planned to Cancelled
-
Dispatched to Cancelled
To update the status for one or more trips, follow these steps:
-
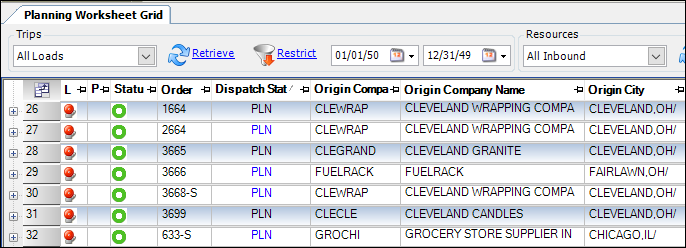
In the Planning Worksheet’s Available Trips grid, highlight the trips you want to include in the mass status change.
Note: To update multiple trips, you press and hold the SHIFT or CTRL key while making your selections.
-
Hold the SHIFT key to highlight trips in adjacent lines.
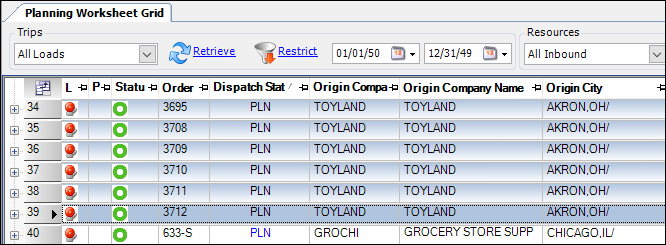
-
Hold the CTRL key to highlight trips that are not adjacent to one another.
-
-
Go to Edit > Mass Status Change.
The system displays the selected trips in the Mass Status Change window. -
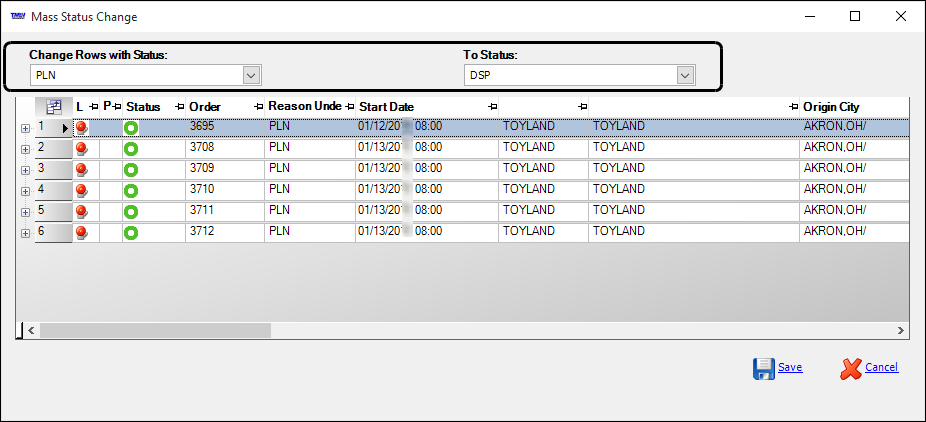
In the Change Rows with Status field, select the current status of the trips.
The options are Available, Dispatched, and Planned.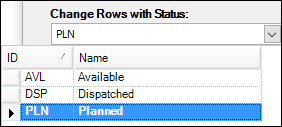
-
In the To Status field, select the new status.
The options are Cancelled, Completed, Dispatched, and Planned.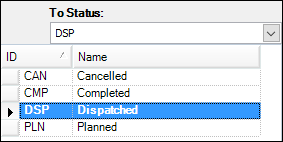
-
Verify that the status fields show the appropriate entries.
-
Click Save.
The system processes the trips, updating their statuses and automatically closing the Mass Status Change window. In the Available Trips grid, each trip displays the new status.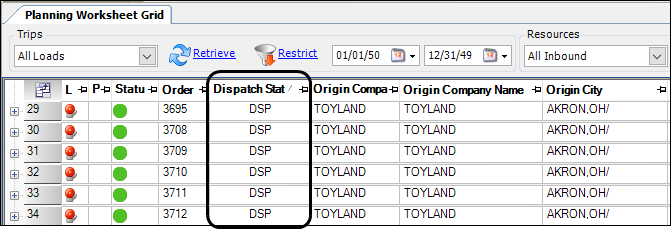
Requiring a reason for cancellations
By default, when you change the trip status to Cancelled, you can save the Mass Change Status window without indicating who requested the cancellations and why. However, your company may want you to provide this information.
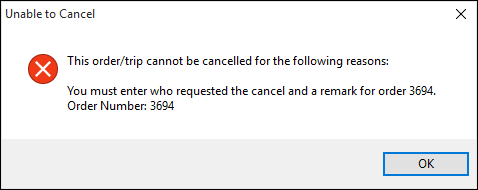
When [Misc]CancelLogEntryRequired=Yes in your TTS50, the Mass Status Change window displays the Cancel Remark and Cancel Requested By fields. When you change the trip status to Cancelled, you must make an entry in both fields.
If you leave either field blank, the following message displays for each trip that appears in the Mass Status Change grid.
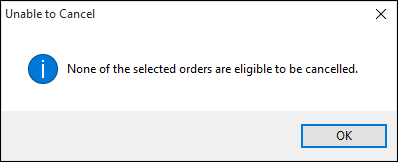
After you click OK for each order, another message indicates that no orders can be cancelled. Click OK to close the message and return to the Mass Status Change window.
To continue with the cancellation process:
-
Enter the appropriate information in the Cancel Remark and Cancel Requested By fields (maximum of 256 characters).
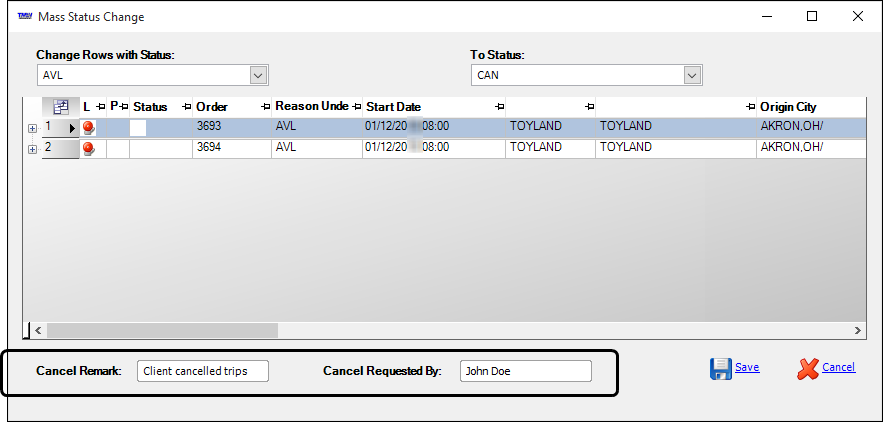
Note: The information you provide in the Cancel Remark and Cancel Requested By fields applies to each order selected for the mass status change. To enter a different remark or name for a trip, enter it separately. Do not select it for a mass status change.
-
Click Save to retain the status changes.
-
To verify the status of a cancelled trip, look up the trip’s order in the Trip Folder and view the Status field entry.
