Using the label file to customize fields
Your company has its own language and terms that it uses to categorize different areas of its business (e.g., revenue types, stop events, data records or tractor types). TMW Operations lets you keep these terms by allowing you to edit the display names, or labels, for certain user-defined fields.
The system uses two types of labels.
Labels associated with the label file
TMW Operations comes with a predefined set of labels that are stored in a database table. This collection of labels is called the label file.
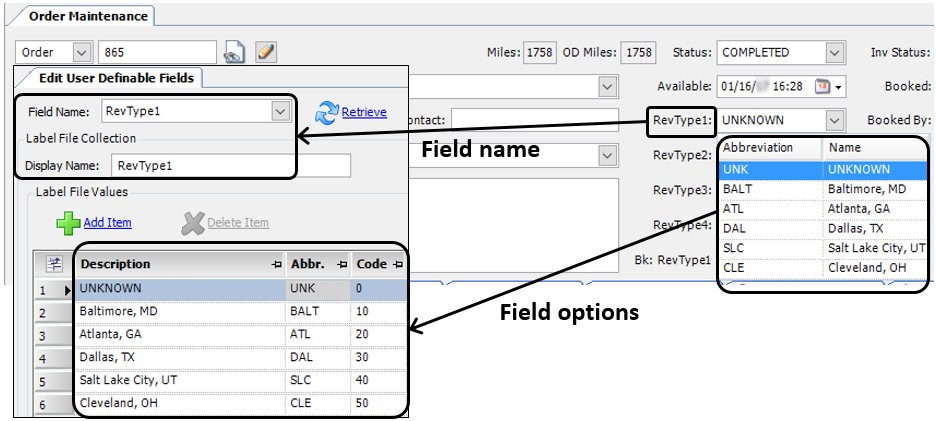
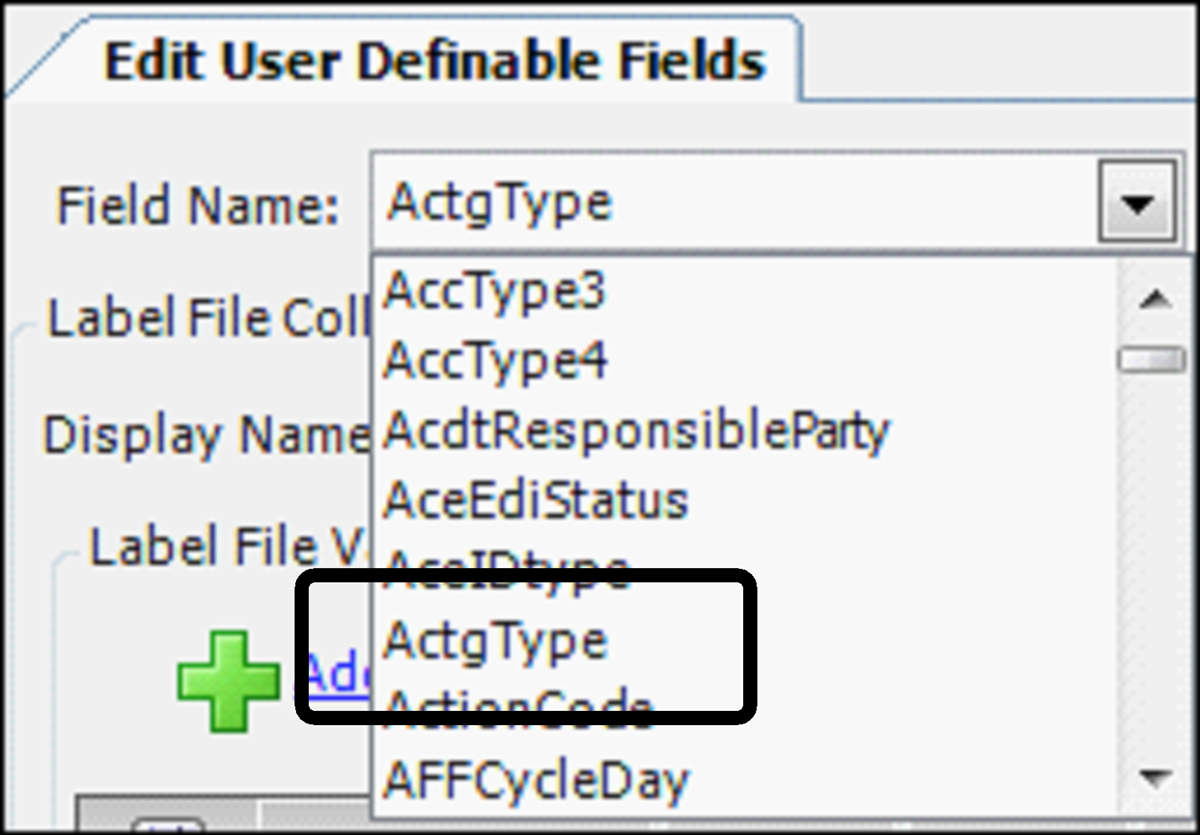
These labels are associated with fields that display drop-down lists of options, such as RevType1, Status or ActgType. For these fields, you can edit:
-
The field name
-
Options included in the drop-down list
To edit these labels, use the Edit User Definable Fields window.
Labels not associated with the label file
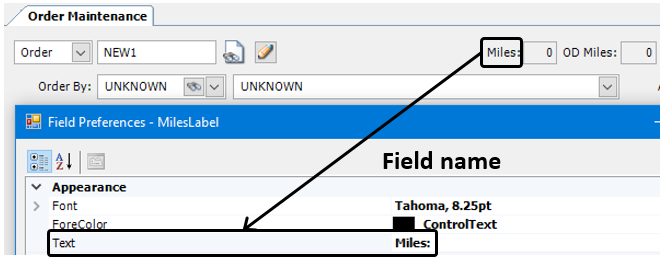
Other labels in TMW Operations are not included in the label file. These labels can be associated with drop-down lists, display fields, or input fields, such as Miles, Order By, or ContactMiles, Order By, or ContactName, Source Type, or Batch Number. For these fields, you can edit the field name only. To edit, you use the QuickDesigner feature. For details, see Changing a label’s text.
Determining the label type
Depending on the type of label, you edit it in the Edit User Definable Fields window or with QuickDesigner. If you are unsure about what type of label you are editing, follow these steps.
-
Right-click on the object with the label you want to edit. For example, if you want to edit a field’s label, right-click on the field.
-
Select Show Preferences.
The Field Preferences window opens. -
Locate the TMW Required Properties section.
-
If it is not visible, this object’s label is not associated with the label file. You edit the label in QuickDesigner.
-
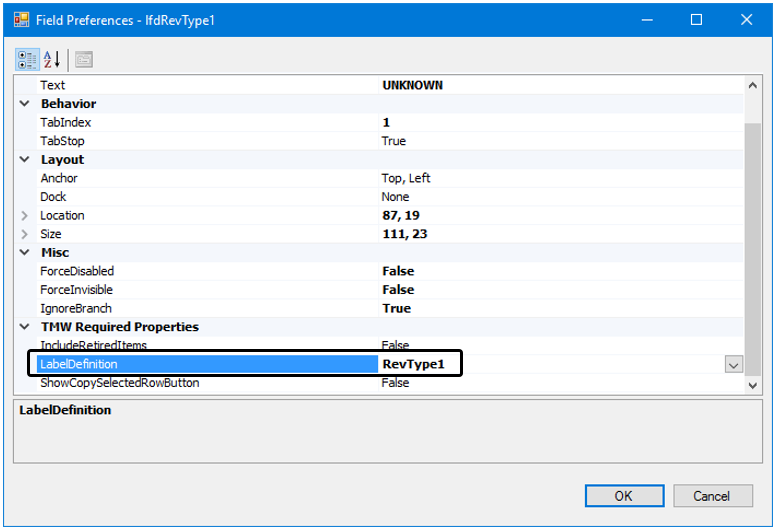
If it is visible, look for the LabelDefinition property. If it is not visible, this object’s label is not associated with the label file. You edit the label in QuickDesigner.
-
If the LabelDefinition property has a value in it, this object’s label is associated with the label file. You edit the label in the Edit User Definable Fields window.
The RevType1 field is associated with the label file.
-
Trimble Recommends:
-
To maintain consistency throughout the system, use the label file to edit labels whenever possible.
-
Each label has at least one system code option. You cannot delete system code options. Doing so may cause serious performance issues. If a label contains system code options that are not applicable to how your company does business, you can edit the option’s description or retire it.
Layout of the Edit User Definable Fields window
The Edit User Definable Fields window allows you to edit labels associated with the label file. You can do the following:
-
Add new user-defined label options
-
Sort label options
-
Edit existing label options
-
Retire or delete label options
-
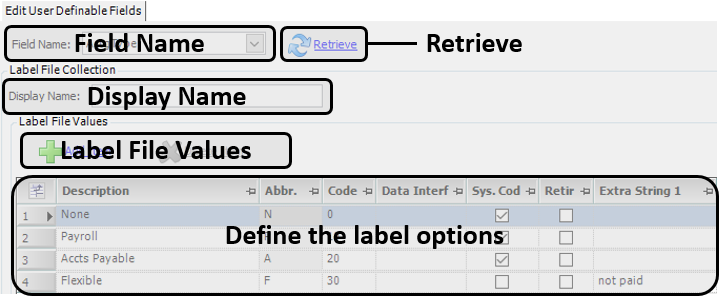
The Field Name field lists the system’s default name for the label. These names are hard-coded and cannot be changed. You use this list to select a label for editing.
-
The Retrieve button loads data for the selected label.
-
The Display Name field is the name the system displays for the label. You can change this field to match your company’s terminology.
-
The Label File Values section allows users to:
-
Add labels options
-
Delete label options
-
-
You define the label options in the grid section.
Accessing labels associated with the label file
To access labels in the label file, follow these steps:
-
Go to Tools > Tools Maintenance > Edit User Definable Fields.
The Edit User Definable Fields window opens.Note: When you open this window, the Field Name field displays the first label in the file.
-
In the Field Name field, select the label you want to edit.
-
Click Retrieve.
The label data is displayed.
Adding a new user-defined label option
To add new options to a user-defined label, follow these steps:
-
Access the label you want to edit.
-
Click Add Item.
A new row is added to the bottom of the Label File Values grid.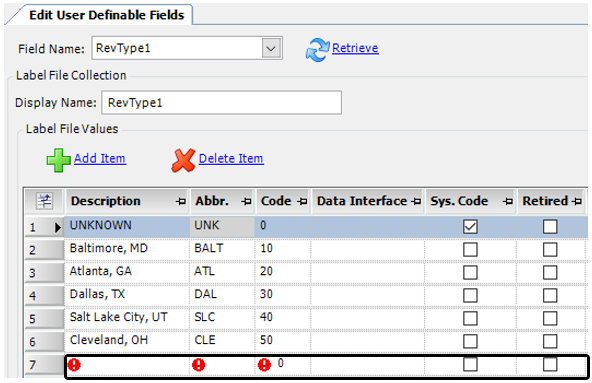
-
Make the appropriate entries to these fields:
Field Definition Description
Enter a description (up to 20 characters) for the new option.
Abbr.
Enter an abbreviation (up to 6 characters) for the option.
Code
Enter a sequential number. The system uses the number in this field to determine the sort order in the label’s drop-down list.
Note: Trimble recommends skipping numbers between options to allow room for future additions. For details, see Determining the user-defined label sort order.
Data Interface
If the option is associated with an electronic data interface, such as EDI, enter its code. If it does not have a code, or is not associated with a data interface, leave this field blank.
Sys. Code
A check mark in this field indicates that this item is essential to system integrity and performance. Do not edit these label options.
Retired
A check mark in this field indicates this user-defined option is no longer available in the drop-down list.
Note: Trimble recommends that you retire unused options rather than delete them.
-
Click
 Save.
Save.Note: You must close and reopen TMW Operations for the changes to take effect.
Determining the user-defined label sort order
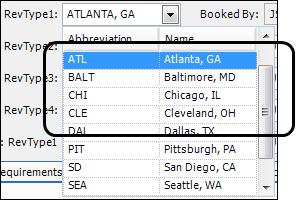
The number you assign to the label options in the Code field determines the order in which the options display in drop-down lists. Labels with a lower code number display higher on the list.
In this example, Atlanta, GA has a code of 10, and Baltimore, MD has a code of 20.
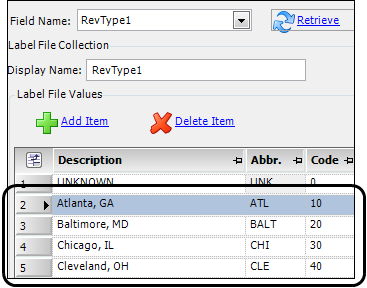
Since Baltimore has a higher number, it displays under Atlanta in the RevType1 drop-down list.
Editing a user-defined label option
To edit user-defined label options, follow these steps:
-
Access the label you want to edit.
-
Enter the required changes.

-
Click
Save.Note: You must close and reopen TMW Operations for the changes to take effect.
Retiring or deleting a user-defined label option
If you have user-defined label options that become obsolete, you can retire or delete them.
-
Retiring a user-defined label option removes it from the available selections in the drop-down list, but does not remove it from the database.
-
Deleting a user-defined label option removes it from the database.
|
Retiring a user-defined label option
To retire a user-defined label option, follow these steps:
-
Access the label you want to edit.
-
Select the Retired checkbox next to the option you want to retire.
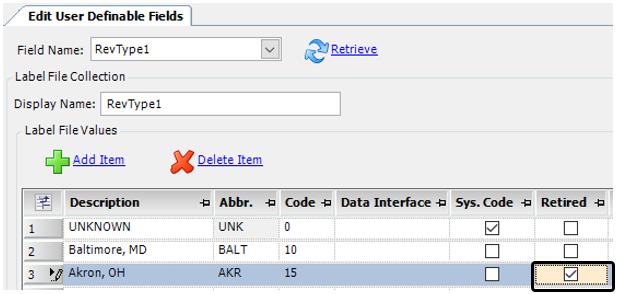
-
Click
Save.Note: You must close and reopen TMW Operations for the changes to take effect.
Deleting a user-defined label option
To delete a user-defined label option, follow these steps:
-
Access the label you want to edit.
-
Select the label option you want to delete.

-
Click Delete Item.
The label option is removed from the database.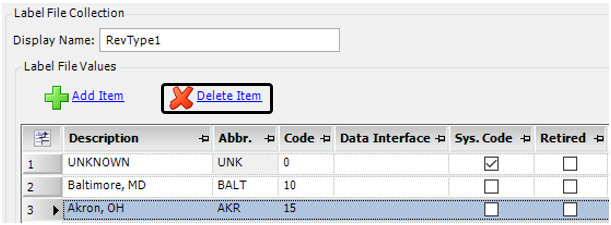
-
Click
Save.Note: You must close and reopen TMW Operations for the changes to take effect.