Working with fuel cards
Resources use fuel cards to purchase fuel, obtain cash advances, and perform other fuel-related transactions permitted by your data vendor. Any driver or tractor ID can have one or more fuel cards associated with it.
In TMW Operations, you can:
-
Import fuel card records
-
Assign a fuel card to one or more different resources
-
Change the status of a card
-
Define rules that send trip and/or resource data to the vendor in real time
| To work with fuel cards, you must be logged in with a TMWSuite ID that has a security card assigned to it. |
Importing fuel cards
You can import records for existing fuel cards directly into TMW Operations if you are logged in with a TMWSuite ID that has a security card assigned to it.
To import fuel card records, follow these steps.
-
Do one of the following:
-
Go to Operations > Fuel Maintenance > Fuel Card Import.
-
In the Card Maintenance window, click Launch Card Import.
The Import Fuel Cards window opens.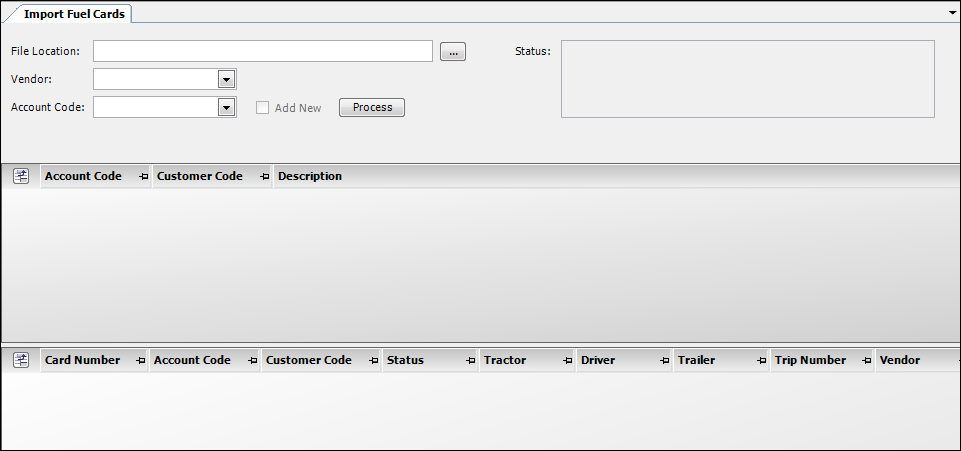
-
-
Click the browse button to the right of the File Location field.
-
In the window that opens, select a file and click Open.
In the Import Fuel Cards window, the File Location field displays the location and name of the file you selected. -
In the Vendor field, select the data vendor.
-
In the Account Code field, select the account code that will be associated with the fuel card records.
-
Click Process.
If successful, fuel card records appear in the grid. The number of processed records appears in the Status field.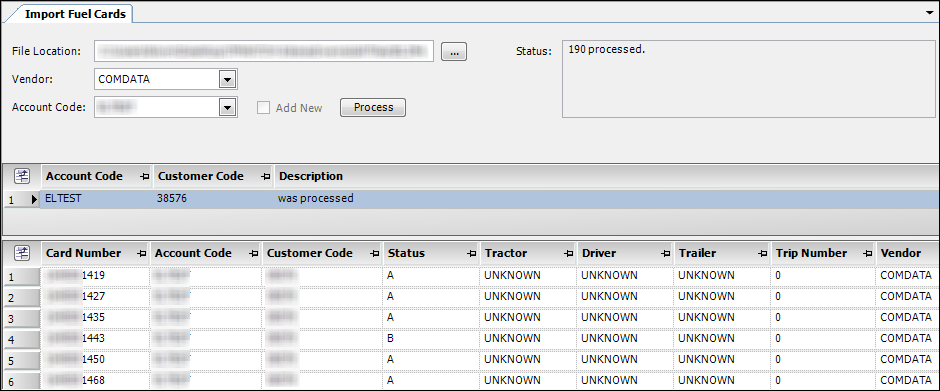
Working with fuel cards in Card Maintenance
Once you have imported fuel card records, you can view and modify information for individual cards using the Card Maintenance window. In this window, you can:
-
Change the status of a card (for example, you can activate, deactivate, or block a card)
-
Define a Personal Identification Number (PIN) for a card
-
Assign a card to a driver, tractor, trailer, carrier, or third-party company
| To work with fuel cards, you must be logged in with a TMWSuite ID that has a security card assigned to it. |
To display and modify card data, follow these steps.
-
Go to Operations > Fuel Maintenance > Card Maintenance.
The Card Maintenance window opens. The tab area of the window contains two unnamed fields. You use the left field to select the entity type associated with a card. You use the right field to enter the ID of a specific entity for which you want to view card information.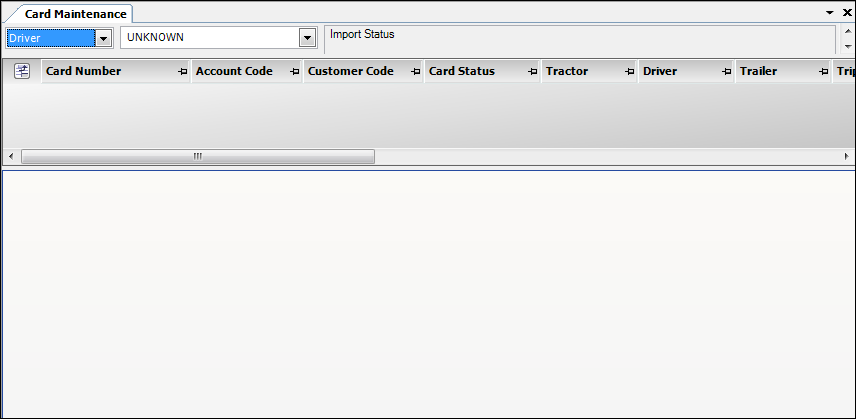
-
In the left field, select the type. Options are:
-
Driver
Driver ID -
Tractor
Tractor ID -
Trailer
Trailer ID -
Carrier
Carrier ID -
Card #
Card number -
Third Party
Third party ID -
Account #
Account code -
Customer #
Customer code
-
-
In the right field, select or enter the ID.
Notes:
-
If you select an entity type that has a TMWSuite ID, the default field value is UNKNOWN. Leaving this entry in the right field returns a list of all cards that have UNKNOWN in that field.
-
When you select Card # in the left field, you can retrieve information for all cards by leaving the right field blank.
-
When you select Account # or Customer # in the left field, you cannot leave the right field blank.
-
-
Click
 Open or press ENTER.
The grid displays all cards that are associated with the search item you selected. Clicking on a row in the grid displays information about that card in the TMW tab.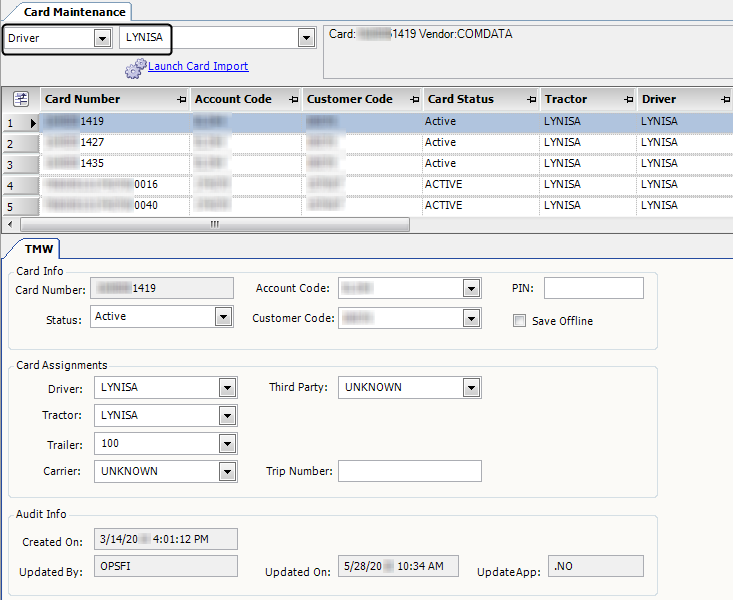
Field Definition Card Number
Card number
This field is read-only.
Account Code
Account code associated with the card number
PIN
Personal identification number (PIN) associated with the card number
Status
Status of the card
Note: The values in this field differ depending on the vendor associated with the card number.
Customer Code
Customer code associated with the account code and card number
Save Offline
When you select this checkbox, the vendor will no longer receive interactive updates on the card.
Driver
ID of the driver associated with the card number
Third Party
ID of the third party associated with the card number
Tractor
ID of the tractor associated with the card number
Trailer
ID of the trailer associated with the card number
Carrier
ID of the carrier associated with the card number
Trip Number
ID of the most recent trip segment performed by the driver or tractor associated with the card number
Created On
Date the fuel card record was created
This field is read-only.
Updated By
TMWSuite ID of the user who last updated the fuel card record
This field is read-only.
Updated On
Date the fuel card record was last updated
This field is read-only.
UpdateApp
Last application that updated the card information
This field is read-only.
-
To modify data for a specific card, follow these steps:
-
Select the card in the grid.
-
Make changes in the fields as needed.
-
Click
 Save.
Save.
-
Creating card overrides
You can limit a driver’s use of a card for:
-
Fuel locations
-
Miles traveled
-
Amount of product purchased in a specified period
Typically, you do this to prevent theft. However, there may be times when you need to override these limits. If your company uses TCH as its electronic data provider, you can apply overrides as needed. For products and locations, you can allow up to nine override usages.
The fields you use to create overrides are in the Overrides section on the TCH tab’s General sub tab.
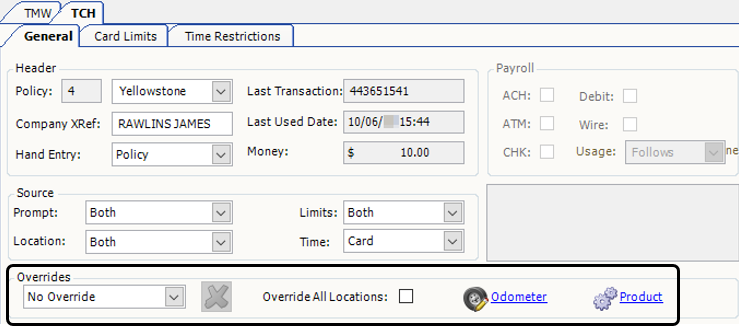
These fields are available only if the card’s status is Active.
If the card is already in override mode, the Override All Locations checkbox is unavailable and you cannot make changes to TCH data. A message appears in the field below the Payroll section: "The currently selected card is in override mode. Please remove the current override before making any changes."
To access the fields, follow these steps.
-
Go to Operations > Fuel Maintenance > Card Maintenance.
The Card Maintenance window opens. -
In the first field, select the entity type on which to search.
-
In the second field, select or enter the ID.
-
Press ENTER.
The grid displays all cards that are associated with the search item you selected. -
Click on the card you want to modify.
-
Select the TCH tab. The General sub tab appears by default.
Creating a location override
Typically, a driver can use a card at a limited number of fuel locations. If the card is not already in override mode, you can override this limit, allowing a driver to use the card at any location. Follow these steps.
-
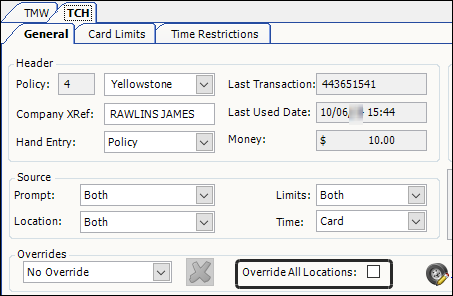
On the General sub tab, select Override All Locations.
-
In the field to the left of the Override All Locations checkbox, select the number of override usages. You can allow up to nine override usages.
-
Click
Save.
A message appears, indicating that the card is in override mode. While the card is in override mode, you cannot make changes to the TCH card data. Clicking Remove Override removes all overrides and allows you to make changes to the data.
Creating an odometer override
To create an override based on a tractor’s mileage reading, follow these steps.
-
On the General sub tab, click Odometer.
The Odometer Override window opens. If a tractor has been assigned to the card, its ID appears in the Tractor ID field automatically.
-
If needed, enter a new or different tractor ID.
-
In the Odometer field, enter the meter value that the system will check against the value entered by the driver at the pump. It must be a number between 1 and 9999999.
-
In the Type field, select the type of meter the tractor is using to track mileage. Options are:
-
Odometer
-
Hubdometer
-
-
Click Submit.
A message appears, stating that the override mileage update was successful. -
Click OK in the message to close the Odometer Override window.
Creating a product override
You can create an override for one or more product card limits if all of the following are true:
-
The value in the Limits field is Card or Both.
-
Products have been defined for the card.
-
The card is not currently in override mode.
To create an override for one or more products, follow these steps.
-
On the General sub tab, click Product.
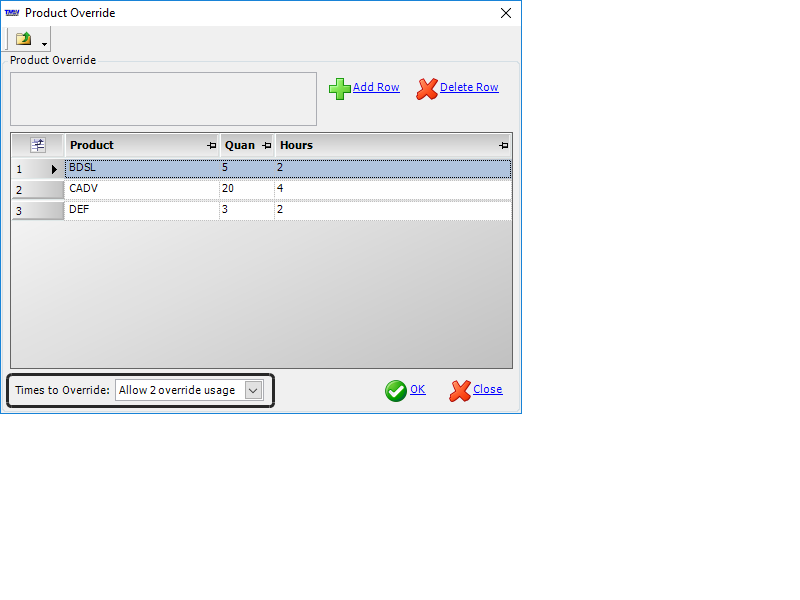
The Product Override window opens. -
Click Add Row.
A new row appears in the grid. -
In the Product field, enter the product code for which the override will apply.
Notes:
-
The Card Limits tab lists products for which limits have been defined.
-
Product codes are defined in the Fuel Products window. For details, see Working with fuel product codes.
-
-
In the Quantity field, enter the product volume or transaction dollar amount allowed over the preset card limit.
Note: The Hours field is not used.
-
Repeat Steps 2-4 for each product you want to add. You can enter an individual product only once. If you want to delete a row, select it in the grid and click Delete Row.
-
In the Times to Override field, select the number of override usages. You can allow up to nine override usages. In this illustration, two override usages are allowed for each of three products.
-
Click OK to close the Product Override window.
A message appears, indicating that the card is in override mode. The number of usages you specified appears in the field to the left. Once all overrides are used, product limits return to their preset values.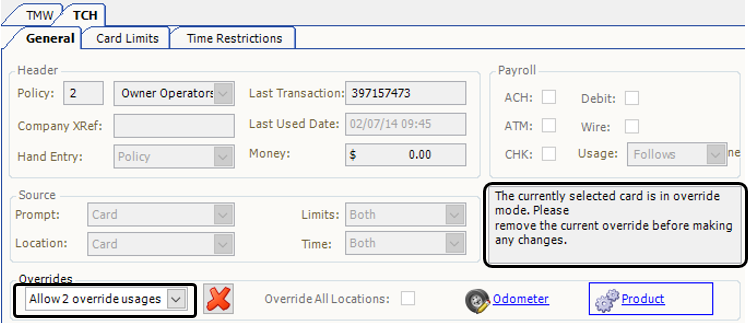
While the card is in override mode, you cannot make changes to the TCH card data. Clicking
Remove Override removes all overrides and allows you to make changes to the data.
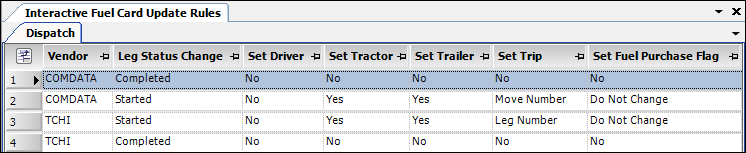
Defining fuel card update rules
The Interactive Fuel Card Update Rules feature allows you to create rules that define the types of fuel card updates sent to your vendor when the status of a trip segment changes.
For example, suppose you want to prevent a driver from using a fuel card when a trip segment is completed. You can create a rule that automatically tells the vendor to block the card when the dispatch status changes to Completed.
You can also create rules that send resource-specific information. For example, you can send the ID of the driver, tractor, and/or trailer associated with a started trip. You can require drivers to enter validation information before they can use a fuel card at a pump.
| To create and edit fuel card rules, you must be logged in with a TMWSuite ID that has a security card assigned to it. |
To create and edit rules, follow these steps.
-
Go to Operations > Fuel Maintenance > Interactive Fuel Card Update Rules.
The Interactive Fuel Card Update Rules window opens.Required field: *
Vendor * Data vendor associated with the rule Leg Status Change *
Trip segment status that triggers the rule
Options are:
-
Planned
-
Dispatched
-
Started
-
Completed
Set Driver
Determines how to handle driver information when the trip segment status changes
Options are:
-
Yes
Send information to the vendor -
No
Do not send information to the vendor -
Clear
Clear any preexisting information
Set Tractor
Determines how to handle tractor information when the trip segment status changes
Options are:
-
Yes
Send information to the vendor -
No
Do not send information to the vendor -
Clear
Clear any preexisting information
Set Trailer
Determines how to handle trailer information when the trip segment status changes
Options are:
-
Yes
Send information to the vendor -
No
Do not send information to the vendor -
Clear
Clear any preexisting information
Set Trip
Determines how and whether to handle trip-specific information when the trip segment status changes
Options are:
-
Leg Number
Send the trip segment number to the vendor -
Move Number
Send the move number to the vendor -
Order Number
Send the order number to the vendor -
Order Header Number
Send the order header number to the vendor -
No
Do not send any trip-specific information to the vendor -
Clear
Clear any existing information
Set Fuel Purchase Flag
Determines whether the card holder can purchase fuel and fuel-related products when the trip segment status changes
Options are:
-
Yes
The card holder can use the card for fuel purchases -
No
The card holder cannot use the card for fuel purchases -
Do Not Change
Do not change the previous flag set for the card
Set Advance Flag
Determines whether the card holder can receive cash advances when the trip segment status changes
Options are:
-
Yes
The card holder can receive cash advances -
No
The card holder cannot receive cash advances -
Do Not Change
Do not change the previous flag set for the card
Set Card Status
The card status that takes effect when the rule is triggered
Options are:
-
Do Not Change
-
Active
-
Blocked
-
Delete
-
Inactive
-
Lost
-
Clear
Note: Consult your vendor for more information on how it interprets these statuses.
FuelPurchaseMode
Custom field
FuelPurchaseLimit
LogicCustom field
SetPendingAdvance
Custom field
-
-
Do any of the following:
-
Add a new rule
-
Click
 Add.
Add.
A new row appears in the grid. -
Enter field information.
-
-
Delete a rule
-
Select the row containing the rule you want to delete.
-
Click
 Delete Item.
The row is removed from the grid.
-
-
-
When you have completed all edits, click
Save.