Applying conditional formatting
Using conditional formatting, you can customize how cells display data in TMW Operations data grids. You can even assign a grid characteristic (such as a color) to cells that contain data elements that meet special criteria. Conditional formatting allows you to call attention to important information. These visual alerts speed up users' ability to make decisions, thereby enabling them to use the grids to perform tasks more efficiently.
There are four types of conditions:
-
Operator conditions
Use an Operator condition to change the appearance of a cell based on the information in that cell. -
Formula conditions
Use a Formula condition to change the appearance of a cell based on the information in another column. -
True conditions
Use a True condition to apply your cell formatting changes to every cell in a column. -
Condition Groups
Use a Condition Group to change the appearance of a cell based on more than one condition. The component conditions, joined by "AND" or "OR," can be the Operator, True, or Formula type. If you are using TMW Operations version 17.10 or later, you can nest Condition Groups within Condition Groups.
| You must retrieve data before applying conditional formatting to a column. |
The following videos demonstrate how to use this functionality in TMW Operations version 17.10 and later. Similar examples are described in Examples of conditional formatting.
![]() See it in action: Highlighting specific entries in a column
See it in action: Highlighting specific entries in a column
![]() See it in action: Color-coding column data
See it in action: Color-coding column data
Overview of the conditional formatting windows
While applying conditional formatting, you will use these windows.
Add Condition/Appearance Mappings
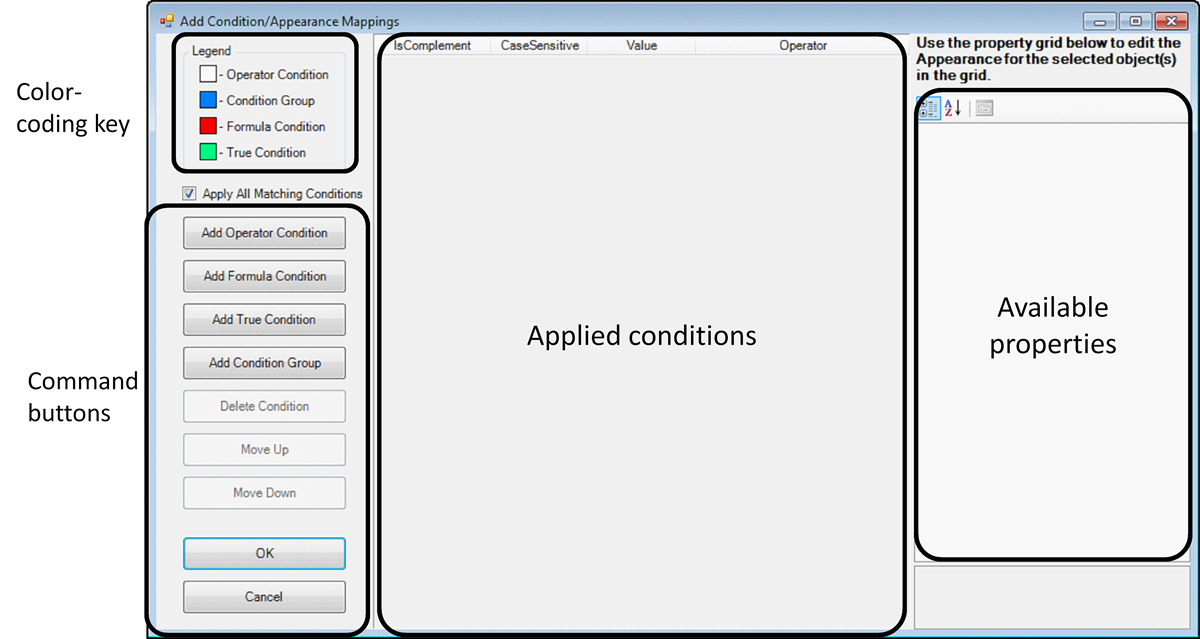
The Add Condition/Appearance Mappings window is the starting point for all conditional formatting.
If you are using a version of TMW Operations that was released prior to 17.10, the window appears as shown in this illustration.
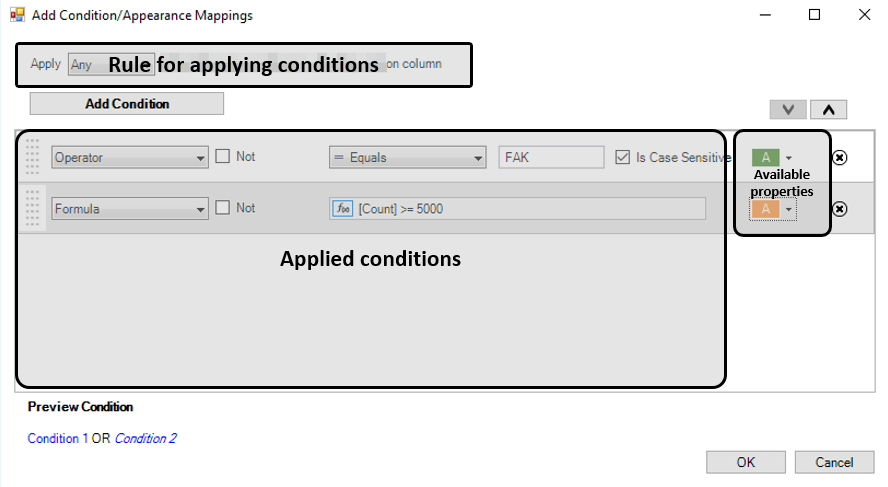
If you are using TMW Operations version 17.10 or later, the window appears as shown in this illustration.
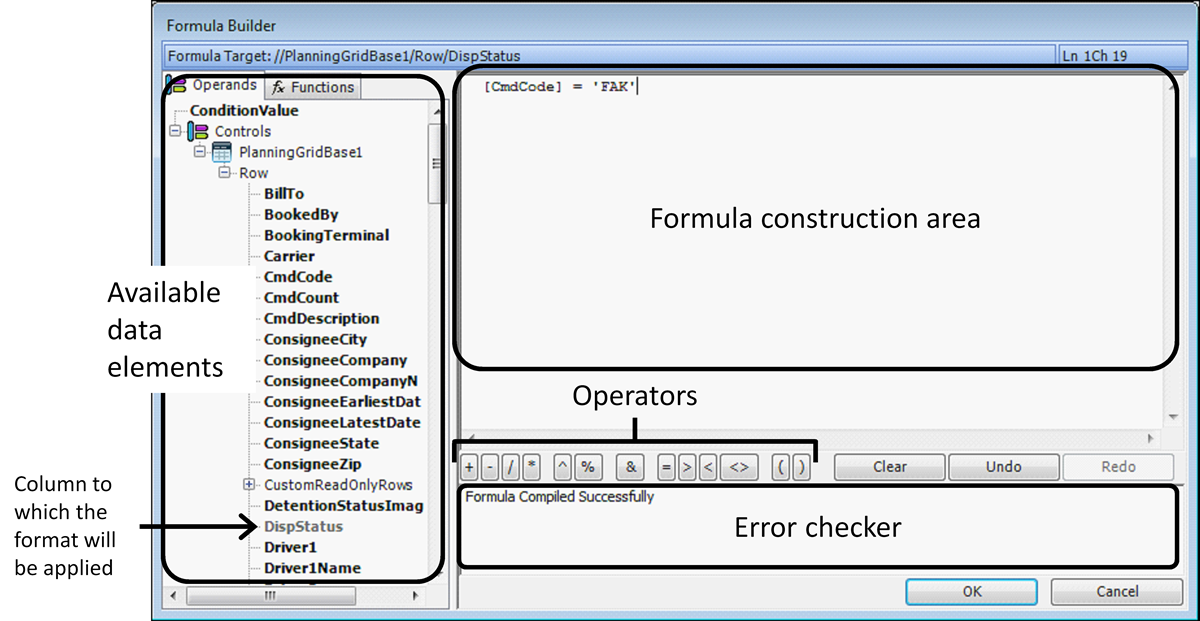
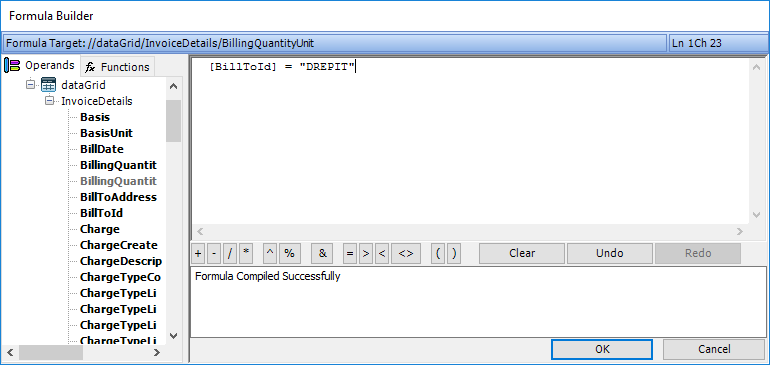
Formula Builder
The Formula Builder opens when you select
Add Formula Condition or
![]() Formula Builder.
Formula Builder.
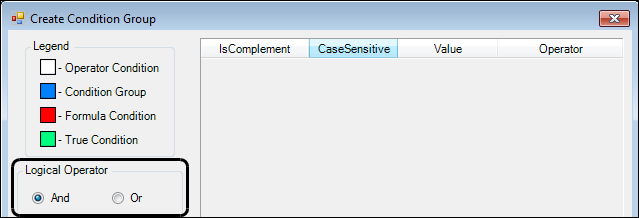
Create Condition Group
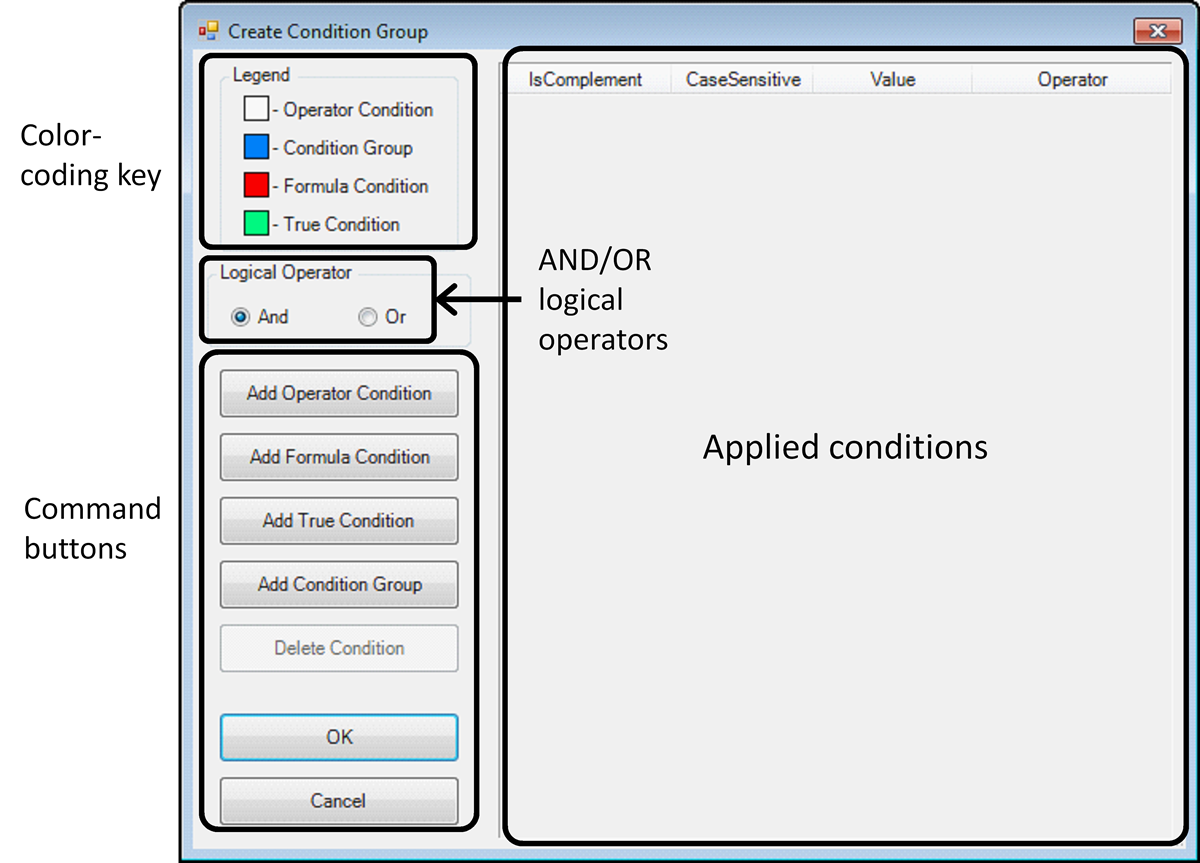
If you are using a version of TMW Operations that was released prior to 17.10, the Create Condition Group window opens when you select Add Condition Group.
If you are using TMW Operations version 17.10 or later, you create Condition Groups in the Add Condition/Appearance Mappings window.
Adding conditional formatting
To apply conditional formatting to a column of data, follow the steps that correspond to the software version you are using.
Adding conditional formatting in TMW Operations prior to version 17.10
To apply conditional formatting to a column of data, follow these steps.
-
Right-click in the column heading to apply the conditional format.
A shortcut menu opens. -
Select Conditional Format.
The Add Condition/Appearance Mappings window opens. -
In the left panel, beneath the Legend, select the Add button that corresponds to the type of condition you want.
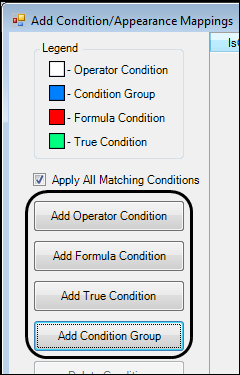
-
Add Operator Condition
Click this button to add one or more "OR" conditions based on an arithmetic operator (such as equal to, greater than, or less than) or on a true condition.The system adds a blank row for the condition in the center of the window.
Show me

-
Add Formula Condition
Click this button to format one column based on a condition in another column.The Formula Builder window opens. Add the formulas you want, and then click OK.

-
Add True Condition
Click this button to format all items in the column, regardless of the contents.The system adds a blank row for the true condition in the center of the window. It is shaded in green as the Legend indicates. You can add other types of condition rows to this column.

-
Add Condition Group
Click this button to add two or more "AND" or "OR" conditions. They can be operator, true, or formula type.The Create Condition Group window opens. It is similar to the Add Condition/Appearance Mappings, with the addition of a Logical Operator section, where you can select "AND" or "OR."
Add the conditions you want, and then click OK.
-
-
Add the appropriate appearances, according to the condition type.
-
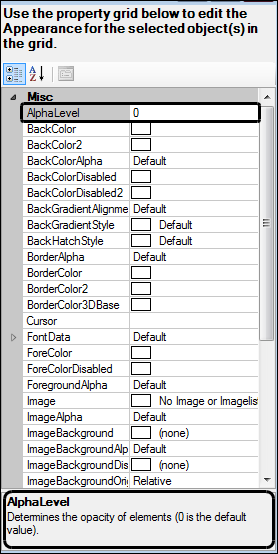
In the right-hand panel, or format pane, scroll through and select the feature that you want to apply when the conditions are met.
-
Click a feature in the list. A description of the feature appears at the bottom of the list.
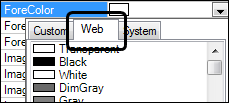
Note: When selecting colors, it might be important to maintain consistency from one computer to the next. If this is the case, it is recommended that you select colors from the Web palette, rather than the System palette.
-
-
Click OK.
Adding conditional formatting in TMW Operations version 17.10 and later
To apply conditional formatting to a column of data, follow these steps.
-
Right-click in the column heading to apply the conditional format.
A shortcut menu opens. -
Select Conditional Format.
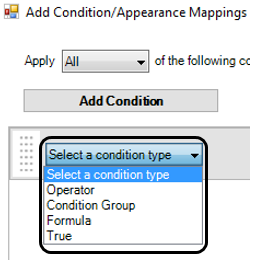
The Add Condition/Appearance Mappings window opens. A single condition row appears in the grid by default. -
In the Select a condition type field for the condition row, select the condition type you want.
-
Operator
Select Operator to add a condition based on an arithmetic operator (such as equal to, greater than, or less than) or on a true condition.
-
Formula
Select Formula to format one column based on a condition in another column. You can enter the formula in the field provided, or you can click Formula Builder to open the Formula Builder window and build your formula there.
-
True
Select True to format all items in the column, regardless of the contents.
-
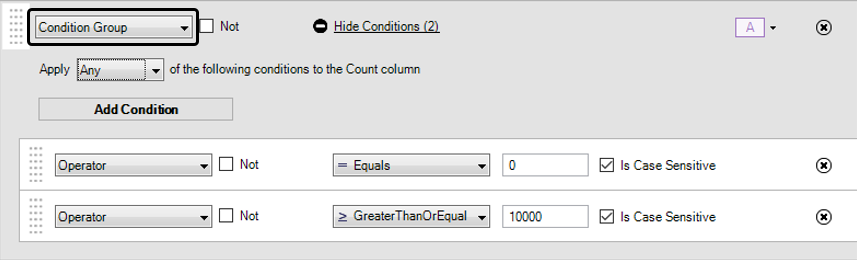
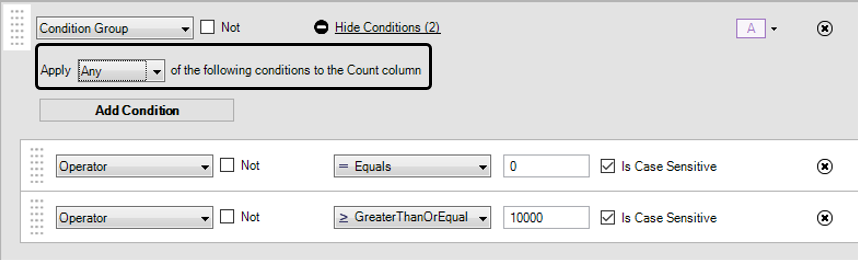
Condition Group
Select Condition Group to add two or more conditions for a particular style change. Each condition in a group can be Operator, Formula, True, or Condition Group type.To create an "AND" condition group in which all of the conditions in the group must be met, select All in the Apply field.
To create an "OR" condition group in which any of the conditions in the group can be met, select Any in the Apply field.
-
-
Click
 Styles to display a list of styles.
-
Select the style that will determine how column information will appear in the grid when your condition or conditions are met. Do one of the following:
-
To select an existing style, click on the style icon.
-
To select a style used recently, click on a style icon in the Recent section.
-
To create a new style, follow these steps:
-
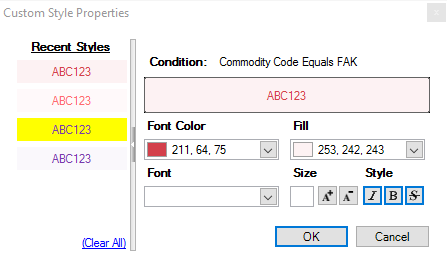
Click Custom Style. The Custom Style Properties window opens.
-
Recently-created styles appear in the Recent Styles section. To work with one of these styles, select it in the list.
-
Enter style properties in the fields provided.
Field Description Font Color
Fill
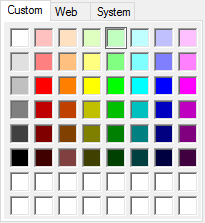
RGB values corresponding to the color of the font text or fill area. You can enter values in the fields or select from these color palettes:
Custom
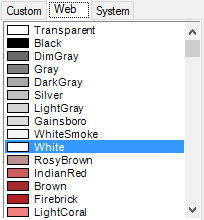
Web
System
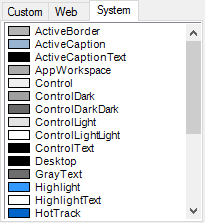
Note: When selecting colors, it might be important to maintain consistency from one computer to the next. If this is the case, it is recommended that you select colors from the Web color palette, rather than the System palette.
Font
Text font. You can choose from any of the fonts installed on your computer.
Size
Font size. You can choose from any of the font sizes installed on your computer.
Style
Font style. Options are:
 Italic
 Bold
Bold Strikethrough
-
-
-
Click OK.
The Styles button changes to reflect the edits made. -
To add another condition, click Add Condition and repeat Steps 3-6.
-
Once you have added all your conditions, decide how the system will apply them to the column by selecting a value in the Apply field.
-
If you want all conditions applied ("AND"), select All.
-
If you want any of the conditions applied ("OR"), select Any.

-
-
Click OK.
Adding an icon to a condition
First available in TMW Operations: 2021.3
You can add an icon to an existing conditional format. An icon can provide a quick, easy-to-understand cue that a particular condition is met.
| You can only add a conditional icon to a column that already has a conditional format applied. |
-
Open the grid that contains the column you want to format.
-
If the column you want to add the icon to does not have a conditional format applied already, add one now.
Note: You can add icons only to columns that already have a conditional format applied. -
Right-click the header of the column to which you want to add an icon.
-
Select Conditional Format Appearance.
The Grid Conditional Formatting Appearance Customizer window opens. -
Select the Image row.
-
Click the ellipses icon at the far right of the row.
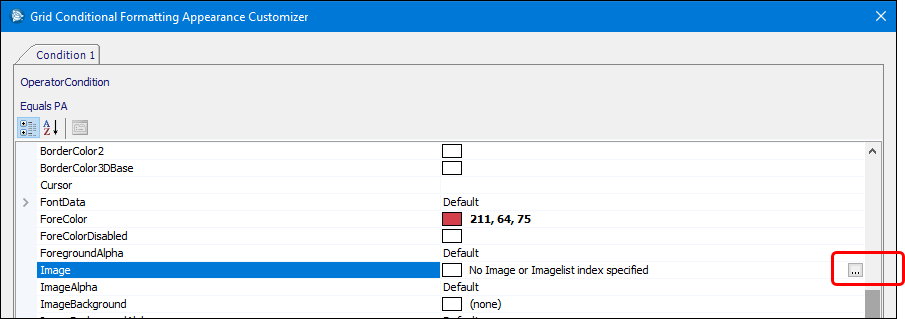
The Appearance Image Editor window opens. -
Click the ellipses icon next to the right of Select From File/Resource…
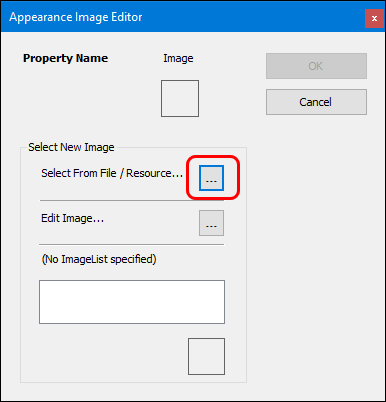
The Open window opens. -
Select the image file.
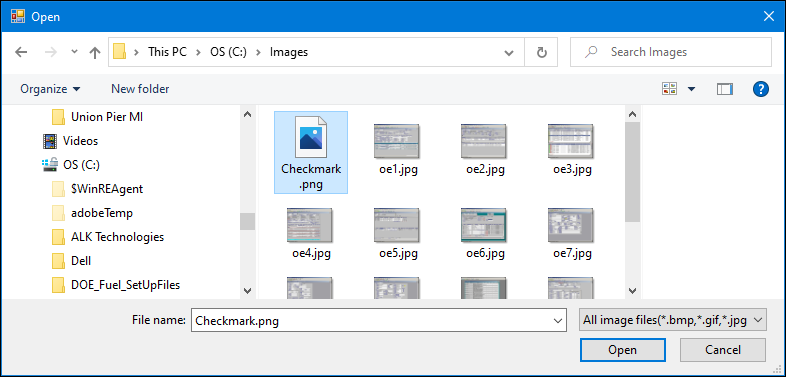
-
Click Open.
-
Click OK in the Appearance Image Editor window.
If the rendered size of the image file exceeds 10 KB, a message displays. It reads, "Image render size of the selected file cannot exceed 10KB."
Click OK and repeat Steps 7-10, selecting an image that is less than 10 KB in size.
-
Click OK in the Grid Conditional Formatting Appearance Customizer window.
The icon appears in the grid.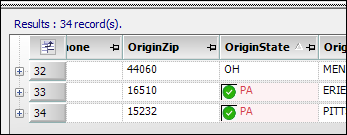
-
Save the layout if you want to use this conditional formatting in future sessions.
Deleting an icon from a condition
There are two ways you can delete a conditional format icon.
-
To delete the icon and the condition to which it is attached:
-
To delete the icon and retain the condition to which it is attached:
-
Right-click the header of the column from which you want to remove an icon.
-
Select Conditional Format Appearance.
The Grid Conditional Formatting Appearance Customizer window opens. -
On the Image row, select Bitmap.
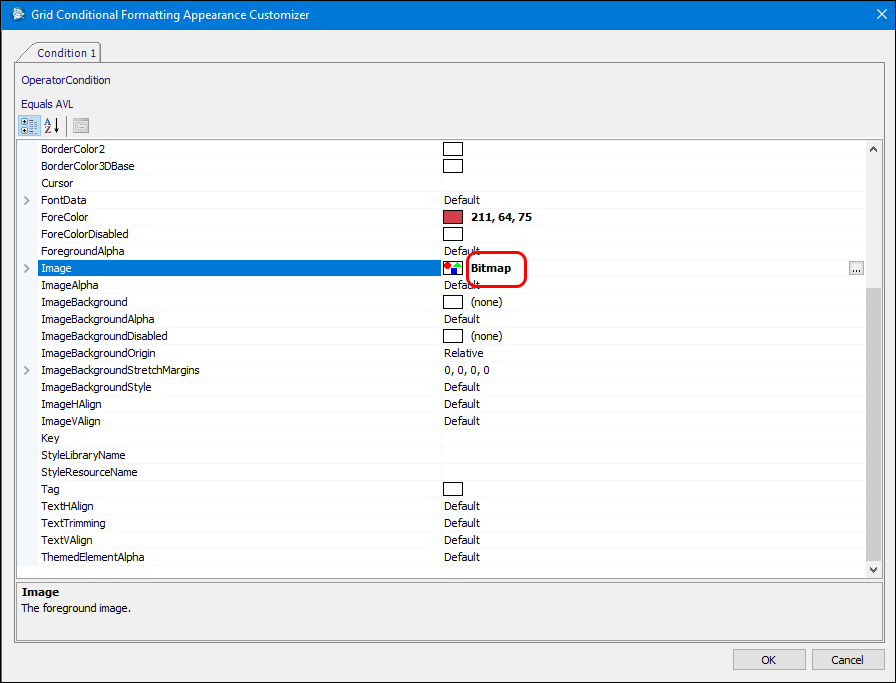
-
Press the DELETE key.
The system removes the image reference.
-
Click OK.
The icon is removed from the grid. -
Save the layout.
-
Editing a condition
To add or change a condition or its formatting features, follow the steps that correspond to the software version you are using.
Editing a condition in TMW Operations prior to version 17.10
To edit a condition, follow these steps.
-
Right-click in the column heading.
A shortcut menu opens. -
Select Conditional Format.
The Add Condition/Appearance Mappings dialog box opens. -
Make your changes as appropriate.
-
Operator condition
**Make changes right on the window.
-
Formula condition
Click Edit Formula Condition, and make changes in the Formula Builder window.
-
True condition
Click True Condition, and make changes in the Property Grid. -
Condition group
Click Edit Condition Group, and make changes in the Condition Group window.
-
-
If multiple conditions exist, you can rearrange the order by clicking the Move Up and Move Down buttons.
-
Click OK.
Editing a condition in TMW Operations version 17.10 and later
For Operator and True conditions, you can make changes directly in the window. This is true regardless of whether the condition exists in a Condition Group.
For Formula conditions, you can make changes directly in the window or click ![]() Formula Builder to make changes in the Formula Builder window. This is true regardless of whether the condition exists in a Condition Group.
Formula Builder to make changes in the Formula Builder window. This is true regardless of whether the condition exists in a Condition Group.
For all conditions, including Condition Groups, you can change a style by following these steps.
-
Click
Styles. -
Do one of the following:
-
Select a new predefined style by clicking on its style icon.
-
Select a recently used style by clicking on it in the Recent section.
-
If you used a predefined style and you want to create a custom style, click Custom Style and make changes on the Custom Style Properties window.
-
If you used a custom style and want to edit it, click Edit and make changes on the Custom Style Properties window.
-
If you used a custom style and want to replace it with the most recently used style in the Recent section, click Remove.
-
-
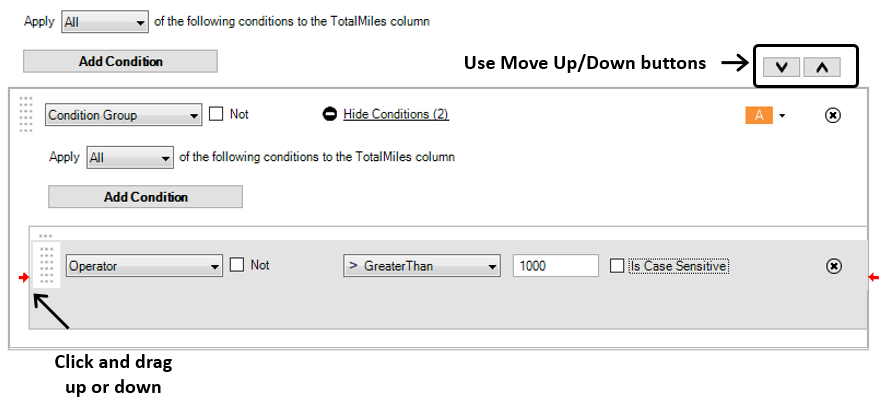
If multiple conditions exist, you can rearrange the order by doing either of the following:
-
Click the Move Up and Move Down buttons.
-
Click on the area to the left of a condition and drag it to where you want it. Red arrows appear on either side of the condition as you drag it.
-
-
Click OK.
Deleting a condition
To delete a condition from a column’s format, follow these steps.
-
Right-click in the column heading.
A shortcut menu is shown. -
Select Conditional Format.
The Add Condition/Appearance Mappings dialog box is shown. -
Delete the condition.
-
In TMW Operations prior to version 17.10:
-
Select the condition row to remove.
A black arrowhead appears to the left of the selected row.
-
Click Delete Condition.
-
-
In TMW Operations version 17.10 and later: In the row containing the condition you want to delete, click
 Delete Condition.
-
-
If you want to remove all conditional formatting from the column, select and delete each row, one at a time.
-
Click OK.