Setting up a tank maintenance profile for a company
First available in TMW Operations 2019.2
Use the Tank Maintenance window to record information about a customer’s fuel storage tanks. You can also use this window to modify the customer’s default tank information and delivery location.
The company for which you are setting up a tank maintenance profile must already have a company profile, company inventory profile, and fuel tank model profile.
For details on setting up each of these profiles, see:
-
Company File Maintenance in the TMWSuite File Maintenance online help
-
Guide: TMW Fuel Management Module | Chapter: Installing and setting up the TMW Fuel Management model | Section: Creating profiles used by Fuel Management
To set up a tank maintenance profile:
-
Go to Tools > Tank Inventory > Tank Maintenance.
A blank Tank Maintenance window opens: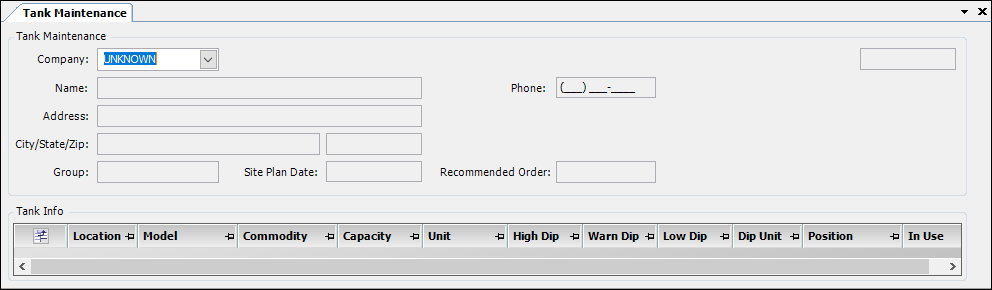
-
In the Company field, enter the ID of a company for which you want to set up fuel storage tanks.
The upper half of the window displays information recorded in this profile and in Company File Maintenance.Note: This example of the Tank Maintenance window displays data for one tank in the Tank Info section. A new Tank Maintenance window contains no tank information.
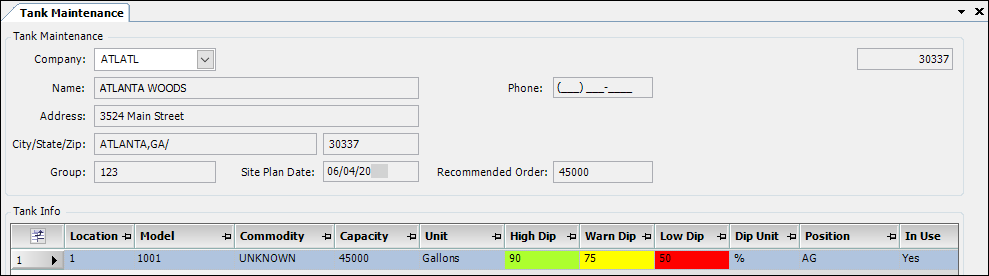
All fields are read-only.
Field Definition Name
Name of the company whose ID is displayed in the Company field
Address (two lines)
Two fields show the address of the company identified in the Company field
Phone
Phone number of the company identified in the Company field
Group
Group to which the company is assigned
Site Plan Date
Date when the customer delivery location was planned, that is, when the customer’s tanks were last reviewed and tank and company profiles were set up for the company.
Recommend Order
Specifies the minimum amount of fuel that should be delivered to the customer in one shipment. The units are understood to be the volume unit of measurement normally used by the customer.
Note: As of 2019.2, the Company Inventory Profile window in the TMWSuite File Maintenance application populates this field.
-
In the Tank Info section, record information about each tank installed at the delivery location. Click Add
 to add a tank to the Tank Info grid.
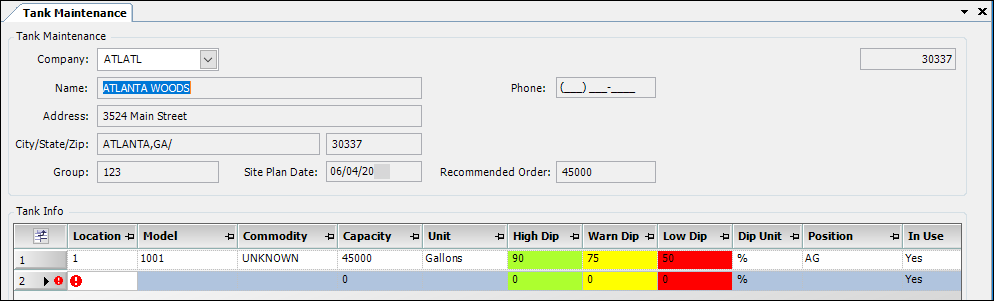
-
Make entries in the following fields.
Required field: *
Read-only field: §
Notes:
-
Avoid leaving empty fields.
-
Editing a field that contains default data loaded from the tank’s Model Maintenance window to reflect tank information at the site is permissible. Adjustments will not alter the default data in the Model Maintenance window.
Field Definition Location *
Assign a unique identifier to the tank at a customer delivery location. Enter up to 10 alphanumeric characters.
Model
Select the model name of the tank from the drop-down.
Note: The options are those tank names previously created in the Model Maintenance window.
Commodity
Select the commodity stored in the tank from the drop-down list. Your selection should match what is recorded in the customer delivery location.
Note: The options are the commodity IDs previously created in Commodity Profile.
Capacity
The default maximum capacity specified in the tank’s profile in the Model Maintenance window
To edit the field, enter a whole number up to 2147483647.
Unit
The default capacity units specified in the tank’s profile in the Model Maintenance window
To edit the field, select the needed capacity units from the drop-down list.
Note: Your company defines the options in the VolumeUnits label.
High Dip
The level at which the tank is considered to be full
Enter the level as a percentage, using a whole number, up to a maximum of 99.
Notes:
-
To reduce the chance of leakage, tanks are normally not filled to 100% capacity. For example, a tank may be considered "full" when it is loaded to 90% capacity.
-
The entry should also be greater than the Warn threshold level.
Warn Dip
The tank level below which the tank should be replenished
Enter the level as a percentage, using a whole number that is lower than the value recorded in the High field.
Low Dip
The tank level below which the tank can be considered critically low
Enter the level as a percentage, using a whole number, between zero (0) and the percentage recorded in the Warn field
Dip Unit §
The unit used to quantify the High, Warn, and Low threshold levels
The default unit is percent (%) and should not be changed.
Position
The position of the tank as installed at the delivery location
The drop-down list offers the option selected for this tank (Above Ground or Under Ground) on the Model Maintenance window.
Notes:
-
To change the Position option, go to the Model Maintenance window and retrieve the appropriate tank listing.
-
As of 2019.2, the Model Maintenance window in the TMWSuite File Maintenance application populates this field.
In Use
Specifies whether the tank is in active use
Select Yes or No as applicable.
Note: There must be at least one tank in active use for a delivery location. Otherwise, that location will not appear among the companies in other fuel-related management windows where orders are created.
-
-
Click Save.
Deleting a tank from a tank maintenance profile
To delete a tank from an existing tank maintenance profile:
-
Go to Tools > Tank Inventory > Tank Maintenance.
A blank Tank Maintenance window opens. -
In the Company field, enter the ID of a company whose profile you want to open.
The window displays company and tank information.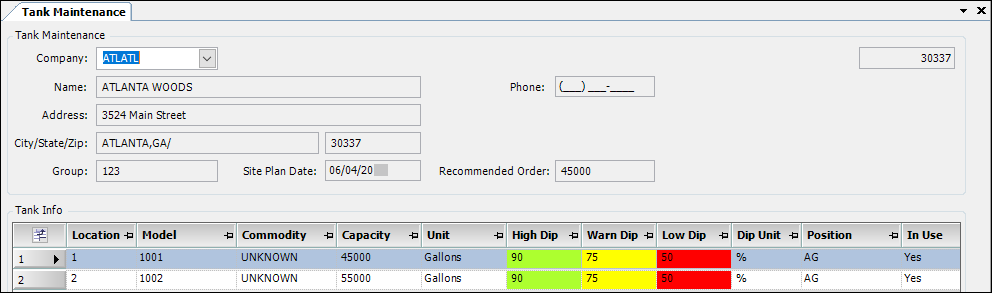
-
Highlight the row you want to delete by clicking on it.

-
Click Delete
 .
.