Customizing the look and behavior of the Planning Worksheet
The Planning Worksheet displays trip information in a data grid consisting of multiple columns. You can customize the Planning Worksheet in several ways. For example, you can:
In addition, TMW Operations allows you to make multiple data grid modifications to the Planning Worksheet, including the following:
Changing the Planning Worksheet grid orientation
By default, the Available Trips and Available Resources grids display in a horizontal position. If you want, you can change the default orientation to vertical using the [Dispatch]PlannerScreenMode setting in your TTS50.
While in the Planning Worksheet you can change the orientation from the default. The system will not save your selection. When you close and reopen the window, the grids return to the default setting position.
-
From the Planning Worksheet, go to View > Screen Orientation.
-
Select one of the following:
-
Horizontal
The grids appear on the top and bottom.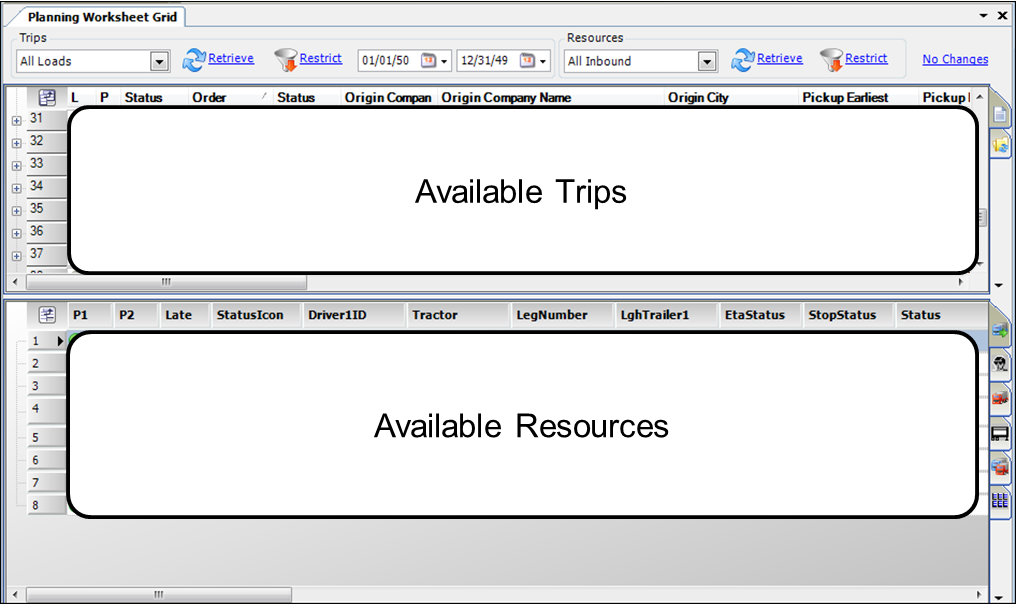
-
Vertical
The grids appear side-by-side.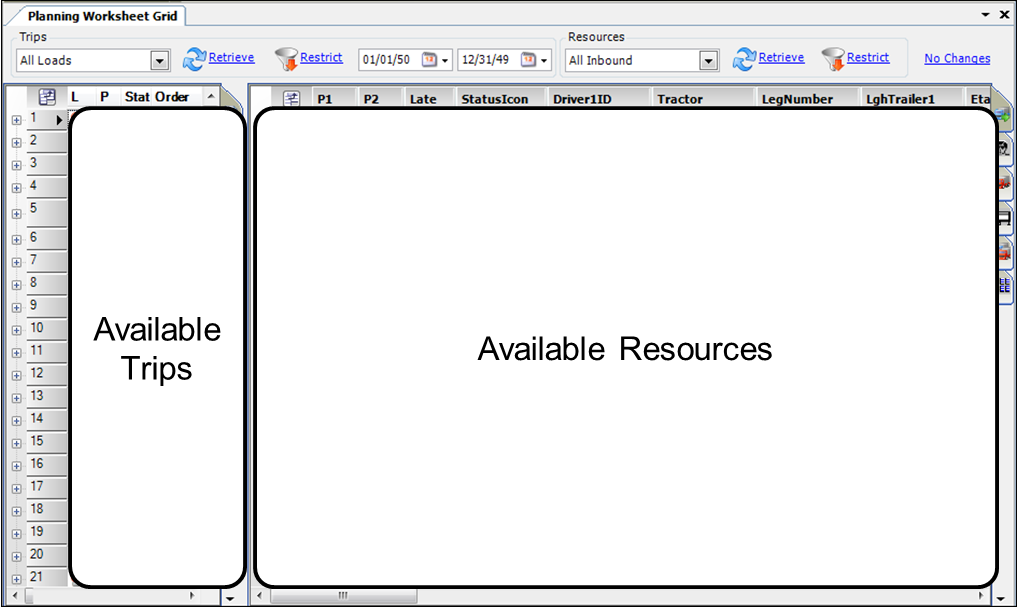
-
| If you change and save a grid layout using a vertical display, the layout is also available in a horizontal display and vice versa. |
Specifying default asset types for drag-and-drop assignments
When dragging and dropping between the Trips grid and Inbound grid, you can specify whether to have the system default to assigning the driver and tractor associated with the driver’s profile or the tractor’s profile.
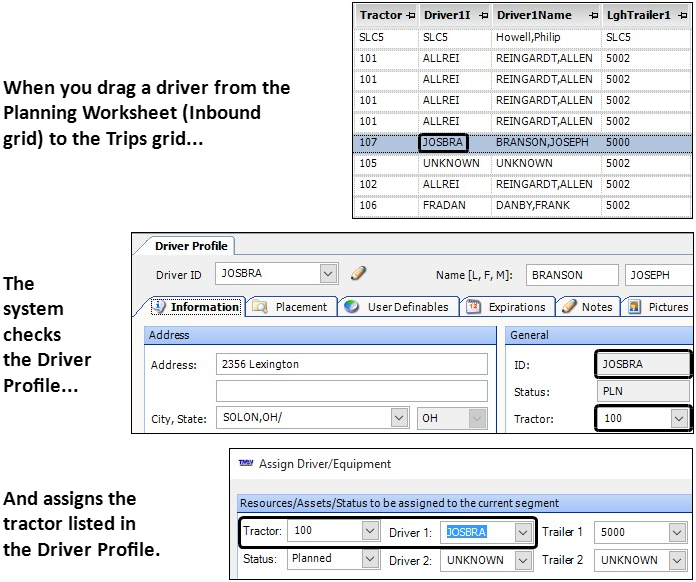
Assigning the driver with the drag-and-drop feature
By default, if you drag a completed order listed in the Inbound grid to the Trips grid, the Assign Driver/Equipment window opens. The system will default to assigning the driver on the order, along with the tractor listed on the driver’s profile.
The system follows these steps:
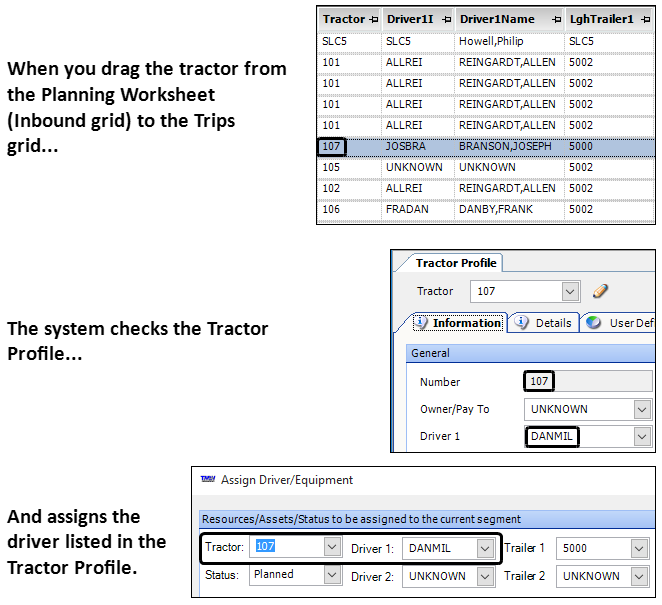
Assigning the tractor with the drag-and-drop feature
You can choose to have the system default to the driver and tractor listed on the tractor’s profile by setting [Asset Assignment]PreserveTractorDefaults=Y in your TTS50. When you drag a completed order listed in the Inbound grid to the Trips grid, the Assign Driver/Equipment window opens with the driver and tractor assets listed on the tractor’s profile.
The system follows these steps:
Validating trip reassignments
First available in: TMW Operations 2020.3
From when you open or refresh the Planning Worksheet to when you assign assets to a load, asset assignments listed on that load may change. You can use the PWCheckForStaleDataOnAssign General Info Table setting to have the system look for changes. If it finds any, it alerts you. Starting with V.2020.4, you can also use the setting to control what the system does when it finds changes.
For example, you have the Planning Worksheet open. Another user saves a change to a load’s assets in Order Maintenance, Trip Folder, or the Planning Worksheet. When you set String1 of this setting to Y, a validation message appears if you attempt to overwrite saved assets.
If you have String2 set to N, it states, "No asset assignment changes will be made. Refresh the board to see current assignments." Click OK to close the message. Your changes are discarded. The original assets remain on the order.
If you have String2 set to Y, it states, "Assets have changed since your screen was refreshed. The recently changed assets are: XXXX: XXXX Do you want to proceed?"
If you want to:
-
Keep the assigned asset(s), click No.
The saved assets remain on the trip.
Note: The No button is selected by default. -
Overwrite the assigned asset(s), click Yes.
The Assign Driver/Equipment window opens. You can then validate the assets you assigned.