Requiring reasons for empty moves
An empty move is a trip segment that allows you to relocate assets to different locations, such as moving a tractor after maintenance, or moving a trailer from a terminal to a pickup stop. By default, TMW Operations does not require a reason when you dispatch an empty move. However, you can set up the system to require reasons when dispatching empty moves.
Setting up empty move reasons
If you are setting up your system to require reasons for empty moves, you must add label options to the EmptyMoveReason label. For details, see Using the label file to customize fields.
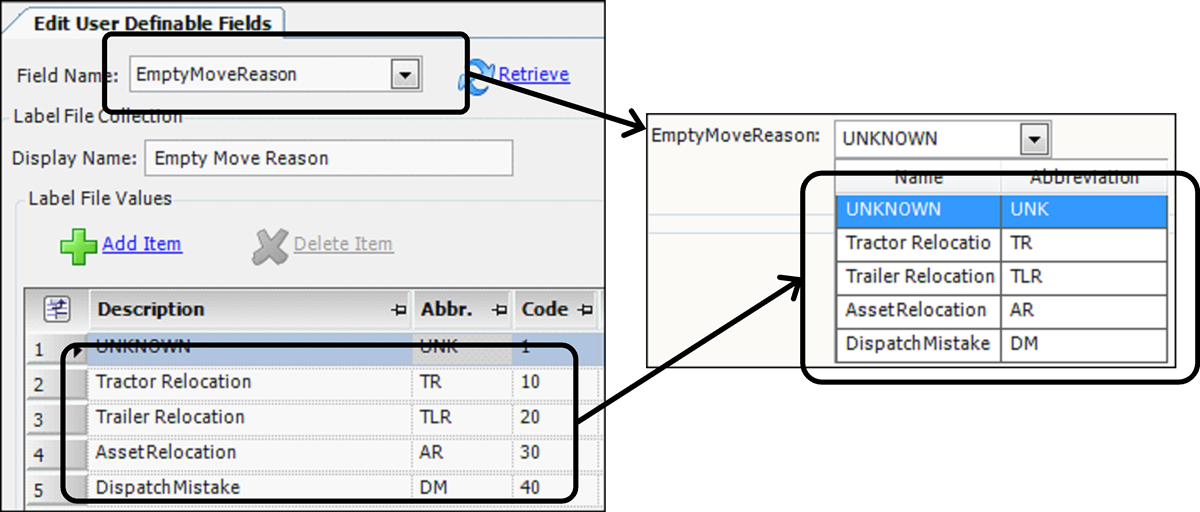
| Do not edit or retire the system code row UNKNOWN (UNK). |
Setting up the Dispatch Empty Move window
By default, when you use the Operations > Dispatch Empty Move command to create an empty move, the system does not require you to record a reason. To configure the system to require a reason, you must:
-
Set
[Dispatch]RequireReasonForEmptyMove=Yin your TTS50 -
Add a field to the Assign Driver/Equipment window that enables a user to record a reason
Requiring a reason for empty moves
The [Dispatch]RequireReasonForEmptyMove INI setting allows you to set up the system to require a reason for creating empty moves when using the Operations > Dispatch Empty Move command.
When you use the Edit > Cancel Trip command to cancel a Started trip, the system automatically creates an empty move to return the truck. If you have [Dispatch]RequireReasonForEmptyMove=Y in your TTS50, you will be required to record a reason for that empty move before saving the cancellation. See Setting up the Cancel Trip/Order window for setup information.
|
Setting up the Assign Driver/Equipment window
To set up the Assign Driver/Equipment window, follow these steps:
-
Go to Operations > Dispatch Empty Move.
The Assign Driver/Equipment window opens.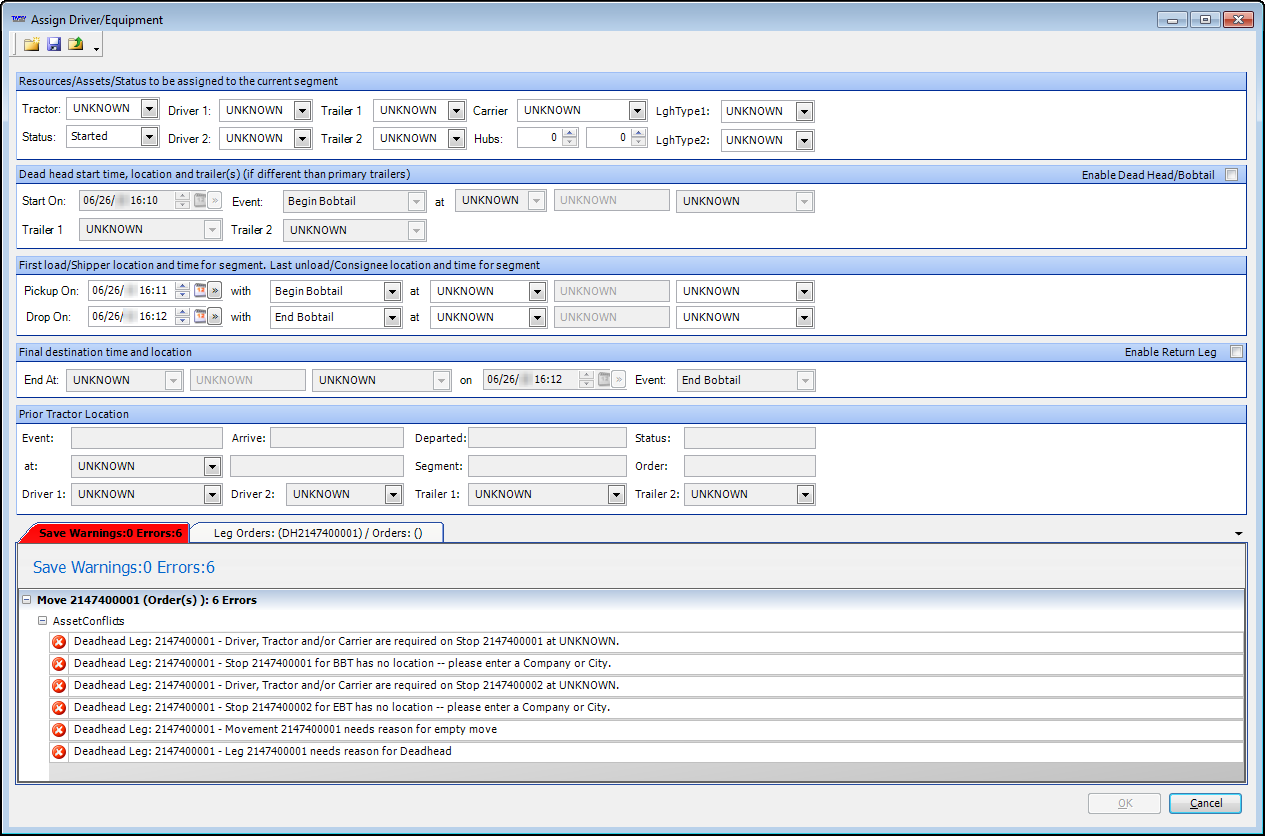
-
Right-click in the body of the window and select Toggle QuickDesigner.
For details, see Toggling in and out of QuickDesigner mode. -
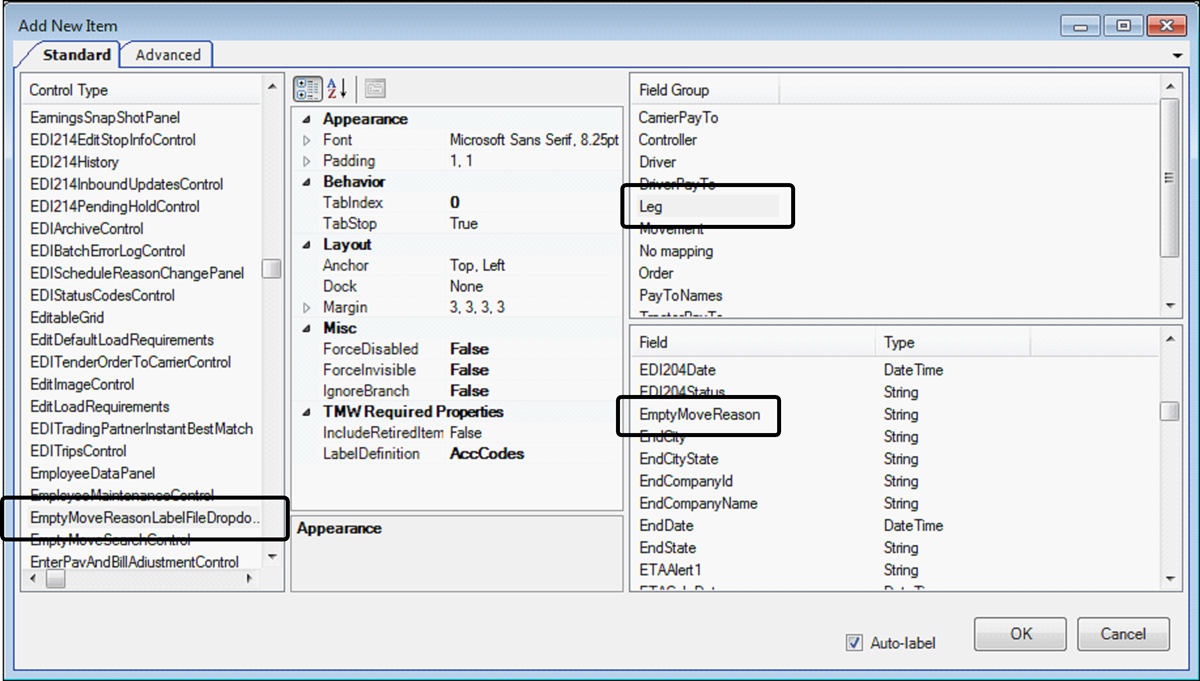
Right-click in the area where you want to add the field and select Add New Item.
The Add New Item window opens.
-
Select the following:
Control Type
EmptyMoveReasonLabelFileDropdown
Field Group
_routingOptionsBindingSource
Field
LegEmptyMoveReason

-
Verify the Auto-label checkbox is selected.
-
Click OK.
The field and the associated LegEmptyMoveReason label are placed on the window. -
Position the label and field. For details, see Moving items.

Note: For details on how to rename the label, see Changing a label’s text.
-
Toggle out of QuickDesigner:
-
Right-click anywhere in the window.
-
From the shortcut menu, click Toggle QuickDesigner.
-
-
Save the layout as the default. For details, see Saving a new window layout.
Setting up the Split Trip windows
By default, when you use the Edit > Split Trip commands to create an empty move, the system does not require you to record a reason. To configure the system to require a reason, you must:
-
Set
[Dispatch]RequireReasonForDeadHead=Yin your TTS50 -
Add a field to the Split Trip windows that enables a user to record a reason
Requiring a reason for a deadhead
The [Dispatch]RequireReasonForDeadHead INI setting allows you to set up the system to require a reason for creating empty moves when using the Edit > Split Trip commands.
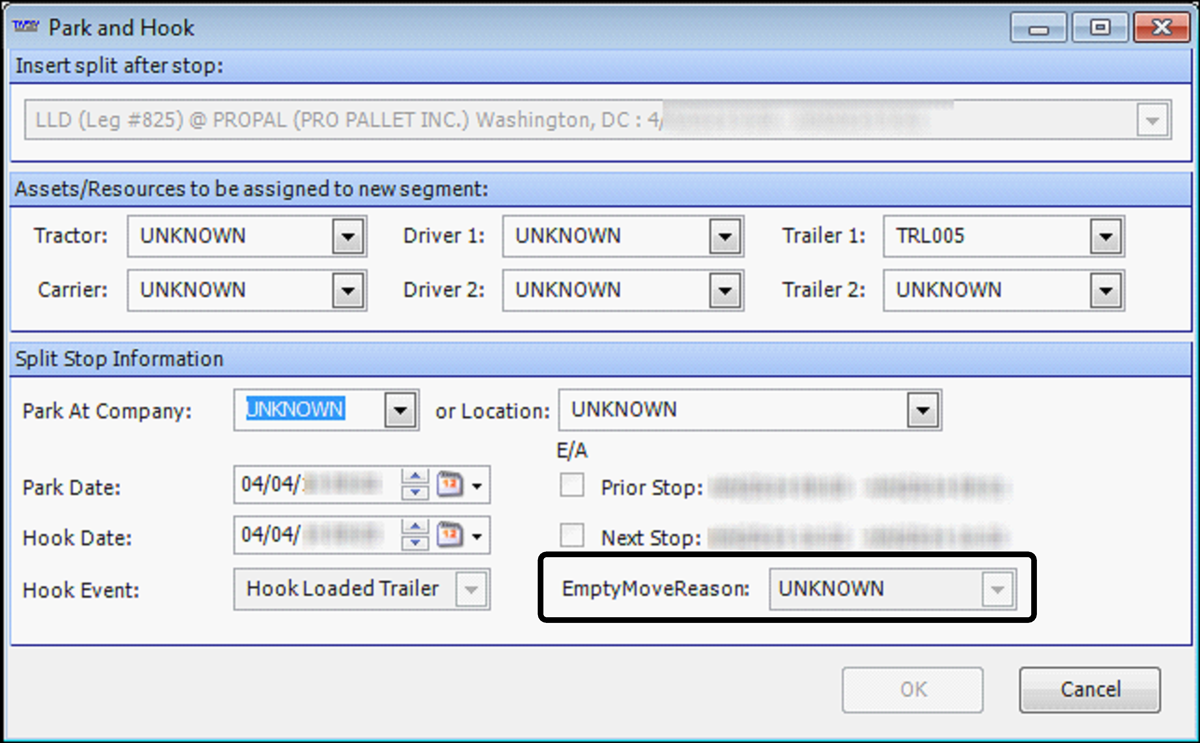
Adding the EmptyMoveReason field in the Split Trip windows
When you edit a Split Trip window layout, the change carries over to all Split Trip windows.
To set up the Split Trip windows, follow these steps:
-
Go to Operations > Trip Folder.
The Trip Folder opens. -
Retrieve a trip.
-
Select one of the Split Trip commands.
For this example, Edit > Split Trip > Begin Empty was selected.
The Begin Empty window opens.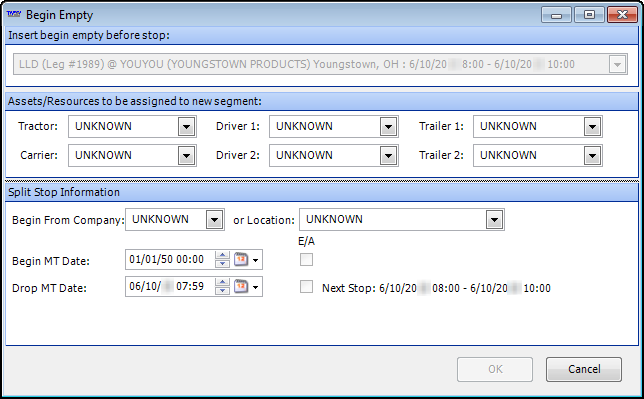
-
Right-click in the body of the window and select Toggle QuickDesigner.
For details, see Toggling in and out of QuickDesigner mode. -
Right-click in the area where you want to add the field and select Add New Item.
The Add New Item window opens. -
Select the following:
Control Type
EmptyMoveReasonLabelFileDropdown
Field Group
_SplitTripBindingSource
Field
EmptyMoveReason

-
Verify the Auto-label checkbox is selected.
-
Click OK.
The field and the associated EmptyMoveReason label are placed on the window. -
Position the label and field. For details, see Moving items.
Note: For details on how to rename the label, see Changing a label’s text.
-
Toggle out of QuickDesigner:
-
Right-click anywhere in the window.
-
From the shortcut menu, click Toggle QuickDesigner.
-
-
Save the layout as the default. For details, see Saving a new window layout.
Setting up the Cancel Trip/Order window
If you start a trip and then cancel it, the system dispatches an empty move to bring the driver and equipment back. By default, when you use the Edit > Cancel Trip command to cancel an order, the system does not require you to record a reason to dispatch an empty move. If you set [Dispatch]RequireReasonForEmptyMove=Y in your TTS50, you will need to add the empty move reason field to the Cancel Trip/Order window.
For more information on empty move reasons and setting up the EmptyMoveReason label, see Requiring reasons for empty moves and Setting up empty move reasons.
|
To set up the Cancel Trip/Order window, follow these steps:
-
Do one of the following:
-
Open a trip in the Trip Folder.
-
Select a trip in the Planning Worksheet.
-
-
Go to Edit > Cancel Trip.
The Cancel Trip/Order window opens.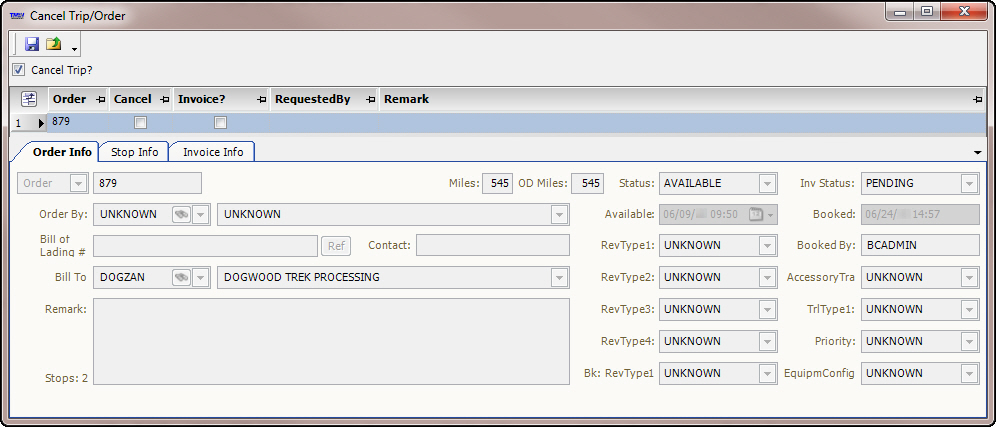
-
Right-click in the body of the window and select Toggle QuickDesigner.
For details, see Toggling in and out of QuickDesigner mode. -
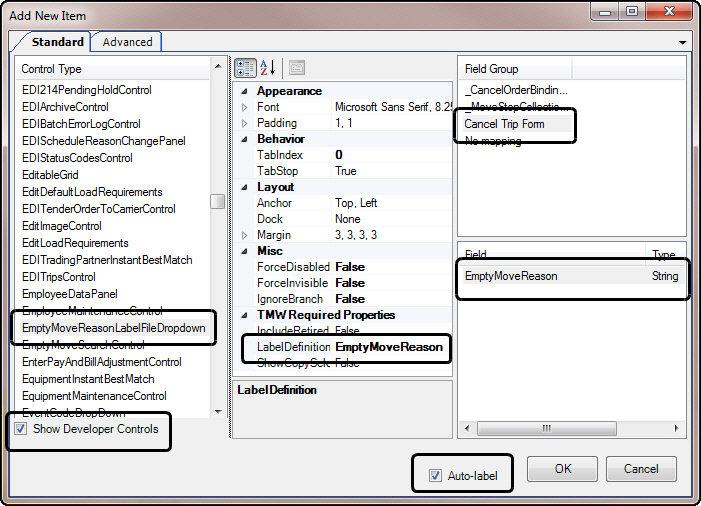
Right-click in the area where you want to add the field and select Add New Item.
The Add New Item window opens. -
Select the Show Developer Controls checkbox.
-
Select the following:
Control Type
EmptyMoveReasonLabelFileDropdown
LabelDefinition
EmptyMoveReason
Field Group
Cancel Trip Form
Field
EmptyMoveReason
-
Verify the Auto-label checkbox is selected.
-
Click OK.
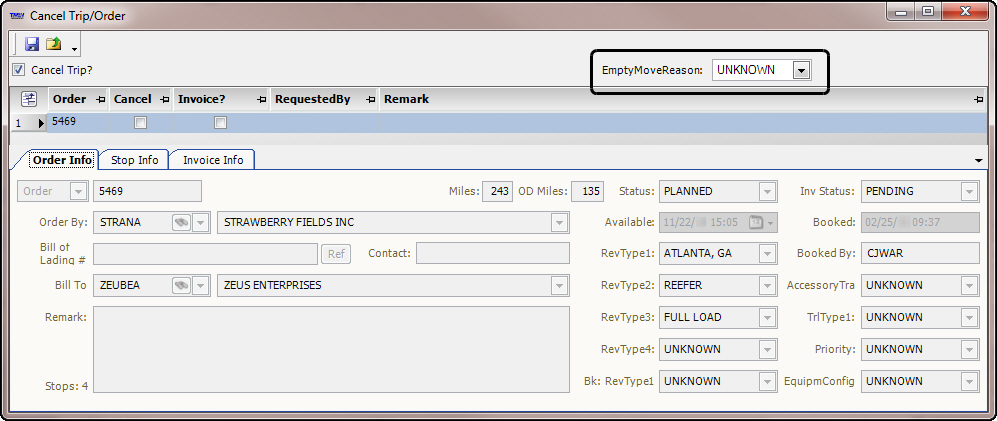
The field and the associated EmptyMoveReason label are placed on the window. -
Position the label and field. For details, see Moving items.
Note: For details on how to rename the label, see Changing a label’s text.
-
Right-click anywhere in the window and select Toggle QuickDesigner.
-
Save the layout as the default. For details, see Saving a new window layout.
Setting up the Trip Folder
By default, TMW Operations does not require reasons when dispatching empty moves. If you have set up your system to require a reason when dispatching empty moves, you can set up the Trip Folder to display those reasons.
To set up the Trip Folder, follow these steps:
-
Go to Operations > Trip Folder.
The Trip Folder opens. -
Right-click in the body of the window and select Toggle QuickDesigner.
For details, see Toggling in and out of QuickDesigner mode. -
Right-click in the area where you want to add the field and select Add New Item.
The Add New Item window opens. -
Select the following:
Control Type
EmptyMoveReasonLabelFileDropdown
Field Group
Leg
Field
EmptyMoveReason
-
Verify the Auto-label checkbox is selected.
-
Click OK.
The field and the associated EmptyMoveReason label are placed on the window. -
Position the label and field. For details, see Moving items.
Note: The label and drop-down list are grayed out until you load an empty trip segment.

-
Toggle out of QuickDesigner:
-
Right-click anywhere in the window.
-
From the shortcut menu, click Toggle QuickDesigner.
-
-
Save the layout as the default. For details, see Saving a new window layout.
Tracking reasons when dispatching empty moves
By default, TMW Operations does not require a reason to dispatch an empty move when you use the Dispatch Empty Move command, Cancel Trip command, or any of the Split Trip commands. However, you can set up the system to require reasons when dispatching empty moves.
Tracking reasons when dispatching an empty move
To track reasons when dispatching an empty move, follow these steps:
-
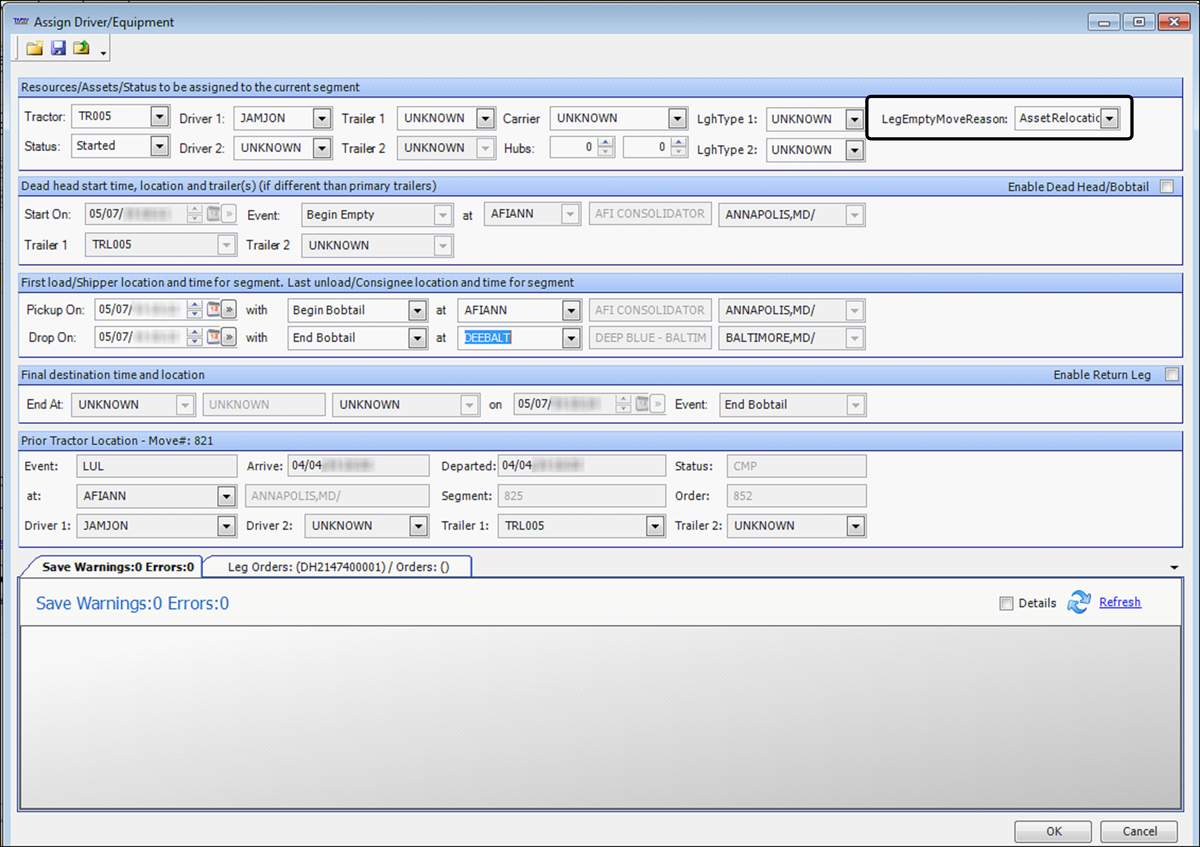
Go to Operations > Dispatch Empty Move.
The Assign Driver/Equipment window opens.
Note: With the TTS50 setting enabled, the window displays an error message stating a reason is required to save the empty move.
-
Set up the empty move. For details, see Dispatching an empty move.
-
Select a reason for the empty move in the LegEmptyMoveReasons field.
-
Click OK.
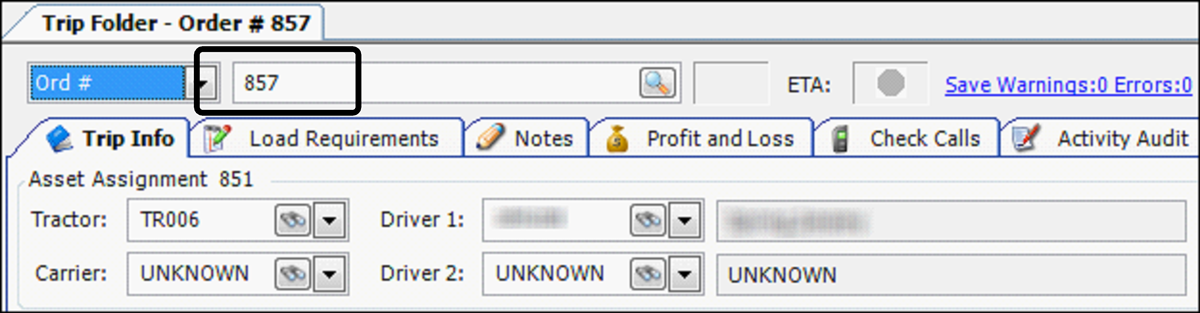
The Trip Folder opens and displays the selected reason for the empty trip.
Tracking reasons when using Split Trip commands
To track reasons when using the split trip commands, follow these steps:
-
In the Trip Folder, retrieve the trip you want to split.
-
Select one of the Split Trip commands.
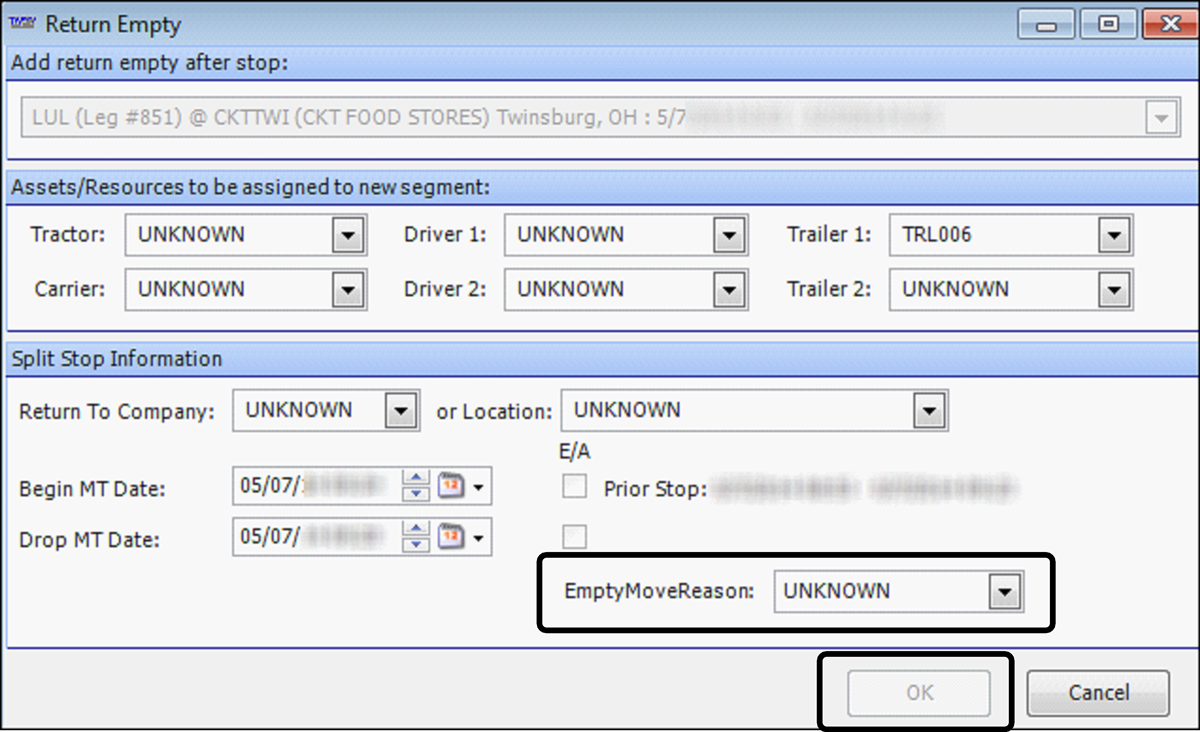
For this example, Edit > Split Trip > Return Empty was selected.
The Return Empty window opens.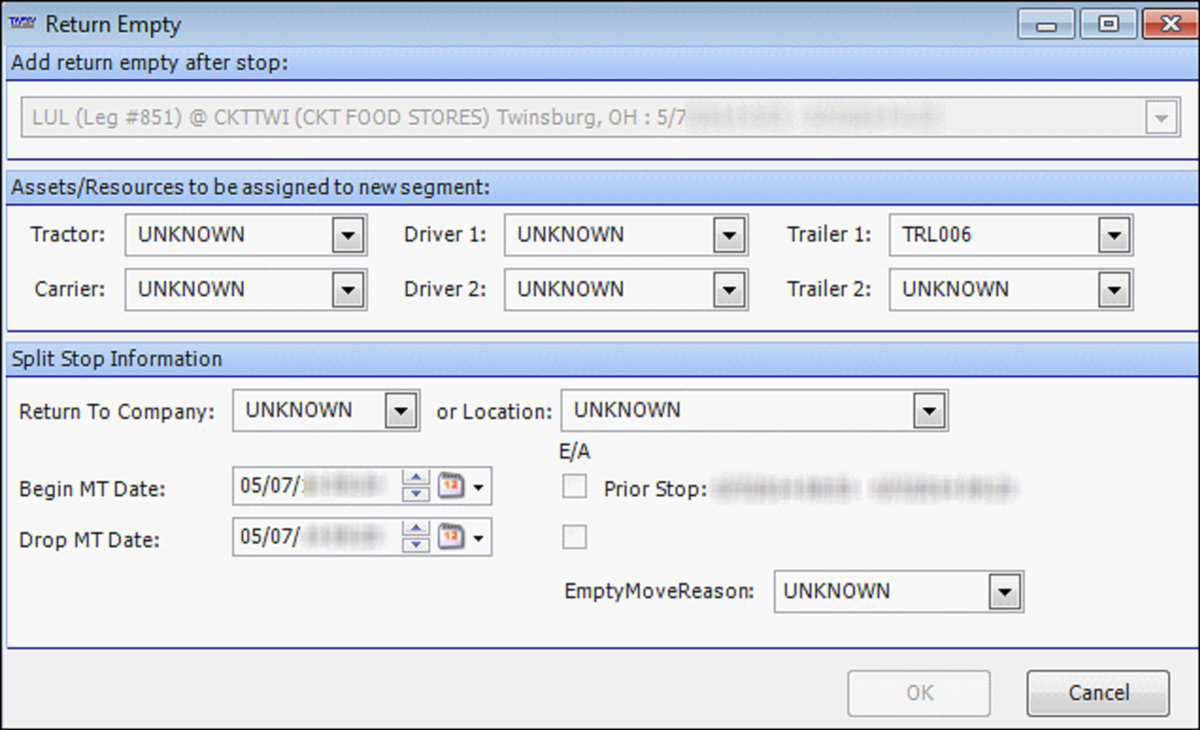
-
Set up the return empty move. For more details, see Using the Return Empty command.
-
Select a reason for the empty move in the EmptyMoveReason field.
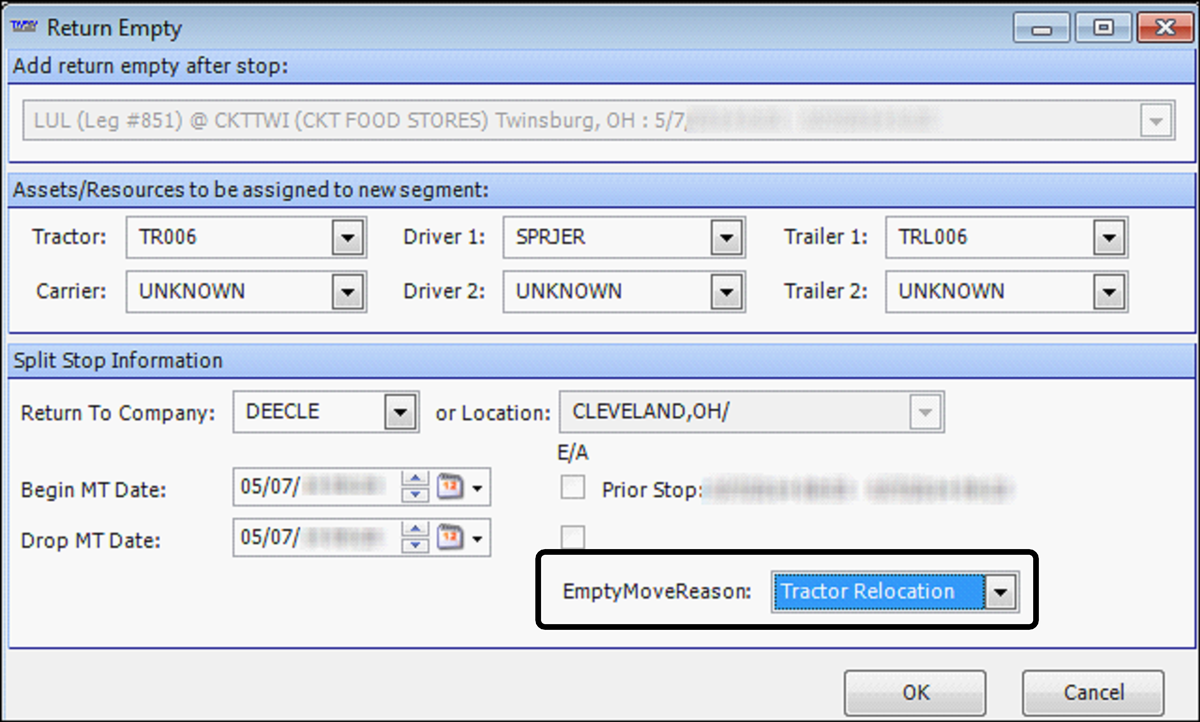
Note: With the TTS50 setting enabled, you will not be able to save the split trip until you select a reason from the EmptyMoveReason drop-down list.
-
Click OK.
The Trip Folder opens.
The label and field list are grayed out until you select a split trip row in the Stops grid.