Using data grids
The system frequently displays data in the form of a spreadsheet-like grid. In TMW Operations there are two types of grids:
Data entry grids
In some data entry windows, users make entries in fields that are arranged in columns. Each line of data in the grid represents a detail that belongs to the record the user is viewing or updating.

You can configure the display in any of the following ways.
Record retrieval grids
Other grids are used only for record retrieval. You cannot use them to enter data.
For example, the Scroll Orders window consists of a grid that lists orders.

You can configure the display in any of the following ways.
Changes you make to the display remain in effect only until you close the window. To keep them, save the modified layout.
Choosing a data grid layout
As a user of TMW Operations, you were assigned one or more specific data grid layouts to use. A data grid’s layout includes:
-
The order and width of the columns
-
Any grouping or filtering applied to the data
-
Any conditional formatting applied to the data
Determining your current data grid layout
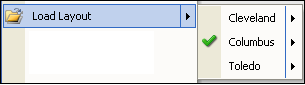
To determine which layout is your current layout and which other layouts are available to you, right-click anywhere in the body of the window, and select Load Layout.
A list of available layouts appears to the right. The layout with the green check is your current layout.
Loading a different layout
It is not necessary to recreate a layout each time you want to use a specific layout for a data grid. If you previously saved the layout, then it can be reloaded at a later point in time.
To load a different layout, follow these steps.
-
Right-click in the grid.
A shortcut menu opens. -
Select Load Layout.
One or more data grid layouts will be listed. -
Select the name of the appropriate layout.
The Require Retrieval message appears. It states, "Layout change will require data retrieval. Continue?"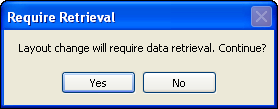
-
To retrieve the data, click Yes.
The window returns to the data grid. The data is now arranged according to the selected layout.
Note: If you decide not to change the layout, click No instead.
Loading a saved grid layout from a file
To load a grid layout that you or someone else saved as a file for your use, follow these steps.
-
Right-click in the grid.
A shortcut menu opens. -
Select Load Grid Layout from File.
The Import Layout window opens. -
Go to the file location.
-
Select the .SDL file.
-
Click Open.
The imported grid layout is applied.
Setting a default layout
When the data is first retrieved, it is filtered and displayed based on the default layout. If you consistently use a specific layout, you can set it as the default layout.
| If the layout was designed and saved for a group of users to which you belong, setting it as the default layout may negatively affect other users in the group. |
There are two ways to set a layout as the default. You can set it when saving a new layout or you can use the data grid’s shortcut menu. The latter option is helpful if you decide at a later point to specify, or change, the default layout.
To set a default layout, follow these steps.
-
Right-click in the grid.
A shortcut menu opens. -
Select Load Layout.
-
Select the name of the appropriate data grid layout, and then select Set to Default.

The default layout is now set and the data grid is displayed.
Resetting the grid layout to the factory default
To return to the factory default layout at any time, follow these steps.
| You might not have access to the Reset Layout option. If not, you can only load a previously assigned or saved layout. |
-
Right-click anywhere in the body of the window or grid.
A shortcut menu opens. -
Select Reset Layout.
The Layout reset confirmation message appears. It states, "Are you sure you want to reset layout?"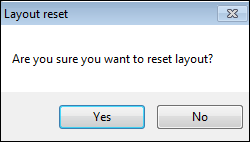
-
Click Yes.
The data grid layout returns to the factory default layout.
Note: If you decide not to reset the layout, click No instead.
Finding a record
To search through the data to locate records that match specific criteria, follow these steps.
-
Right-click in a column heading.
A shortcut menu opens.Note: You can also use the shortcut key CTRL+F.
-
Select Find.
The Find dialog box opens.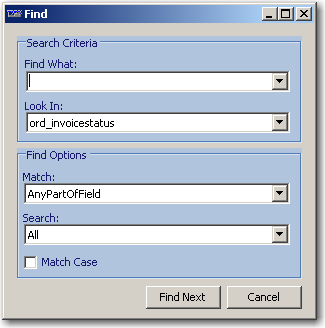
-
Complete the form.
Field Definition Find What
Enter the text for which you are looking.
Look In
Identify whether you want to look through the current column or all columns.
Match
Select one of the following:
-
AnyPartOfField
-
WholeField
-
StartOfField
Search
Identify the direction you want to search through the list.
-
Down
-
Up
Match Case
Select this checkbox to locate records that match the case you entered in the Find What text box.
-
-
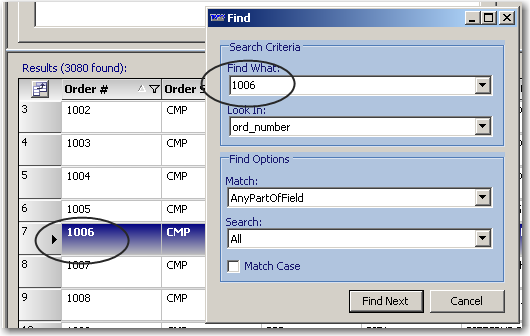
Click Find Next.
-
If a matching record is found, the first row matching the criteria is highlighted.
-
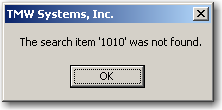
If no matching records are found, a message appears. Click OK, and revise your criteria.
-
-
If applicable, continue to click Find Next until you find the matching record.
-
To close the Find dialog box, click Cancel.
Sorting data in a grid
You can sort the entries by one or more columns, and in ascending or descending order.
Sorting entries by one column
You can easily sort the rows according to the entries in a particular column.
-
Click the column heading.
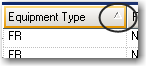
The arrow indicates the list is sorted alphabetically by Equipment Type from A-Z.
-
Click again to reverse the sort order.

The arrow indicates the list is sorted alphabetically by Equipment Type from Z-A.
Sorting entries by multiple columns
You can sub sort the rows according to the entries in other columns.
-
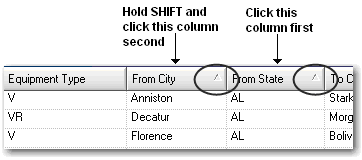
Hold SHIFT and click to sub sort on other columns.
You can sub sort on as many columns as are appropriate. -
Hold SHIFT and click again to reverse the sort order on a particular column.
This sample represents data that is sorted by From State, and then sub sorted by From City.