Accessing the Extra Information feature
First available in TMW Operations, V.2022.2
The Extra Information feature allows you to set up new windows in which custom information can be recorded. You can create multiple tabs in each window and each tab can contain multiple user-defined fields. In TMW Operations, you use QuickDesigner to add a hyperlink that accesses the Extra Information window. You can add the hyperlink to multiple windows in TMW Operations, such as the Company Profile, Trip Folder, and Order Entry.
|
Set up to use the Extra Information window
To use this feature, you must:
-
Have TMWSuite system administrator rights
-
Be using TMWSuite V.2022.2 or later
Note: The tts_extrainfo.exe executable file gives access to the Extra Information window. It is downloaded with TMWSuite 2022.2.
To add the Extra Information window hyperlink to a window:
-
Open the window to which you want to add the hyperlink.
-
Right-click the window and select Toggle QuickDesigner.
-
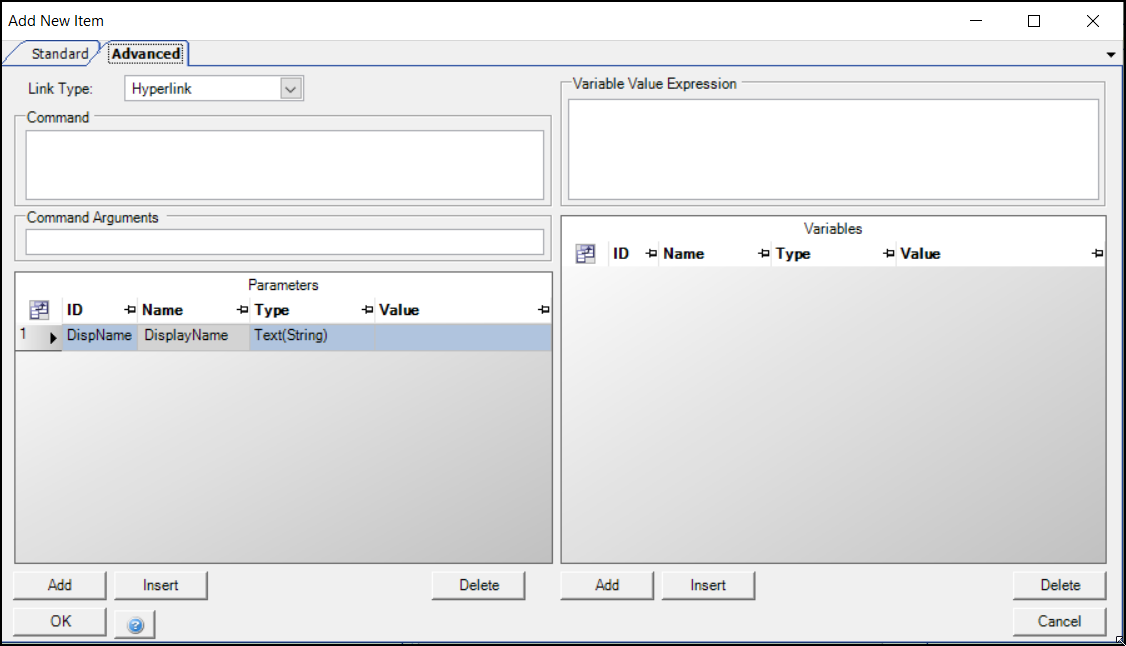
Right-click in the area you want to add the hyperlink and select Add New Item.
The Add New Item window opens.
-
Select the Advanced tab.
-
In the Link Type field, select Hyperlink.
-
In the Command field, enter the path to the tts_extrainfo.exe executable file. You must enclose the path in single quotation marks.
For example, 'C:\TMWDocumentationTesting\TMWSuitePullBuild0458\tts_extrainfo.exe' -
Make appropriate entries in the Command Arguments field and in the Parameters section. The values for each type of Extra Information window are listed in the following chart.
-
Command Arguments
-
Enter the appropriate command argument from the chart.
-
-
Parameters
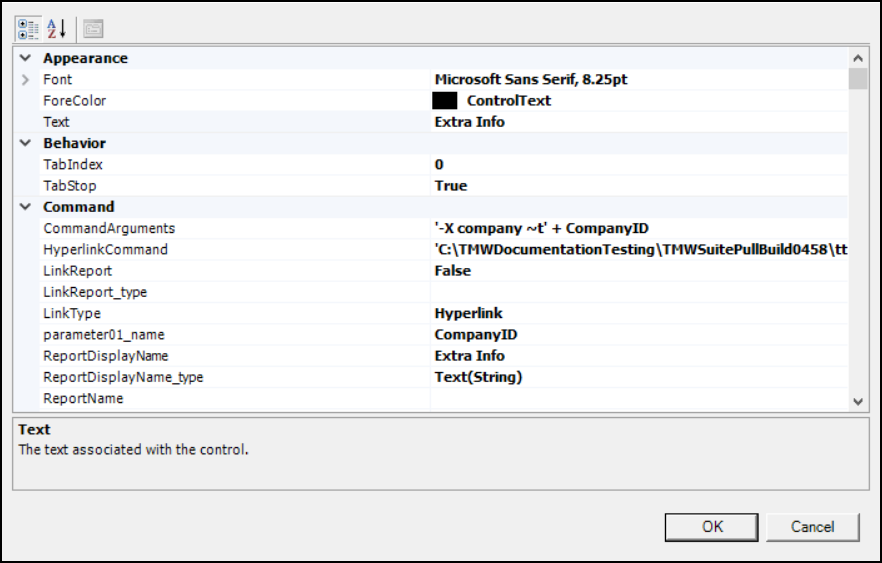
You use two rows to record parameter data.-
In the Value field of the first row (the existing row), record a title for the hyperlink.
This is the name the user will see for the hyperlink in the user interface.
Notes:-
If you don’t enter a value, the system will title the hyperlink as Link.
-
Leave the default value for the other fields. These values should be:
ID Name Type Value DispName
DisplayName
Text(String)
User-defined name of the hyperlink, such as Extra Info
-
-
Click the Add button to enter a second row in the Parameters section.
-
Enter the appropriate values into the ID, Name, Type, and Value fields from the chart.
Note: In the Trip Folder, you can link to multiple options. This requires different sources as listed in the table.
-
-
| Window | Command Arguments | ID | Name | Type | Value |
|---|---|---|---|---|---|
Company |
'-X company ~t' + CompanyID |
1 |
CompanyID |
Bind(String) |
bindingSource.cmp_id |
Driver |
'-X driver ~t' + DriverID |
1 |
DriverID |
Bind(String) |
bindingSource.mpp_id |
Tractor |
'-X tractor ~t' + TractorID |
1 |
TractorID |
Bind(String) |
bindingSource.trc_number |
Trailer |
'-X trailer ~t' + TrailerID |
1 |
TrailerID |
Bind(String) |
bindingSource.trl_id |
Carrier |
'-X carrier ~t' + CarrierID |
1 |
CarrierID |
Bind(String) |
bindingSource.car_id |
Third Party |
'-X thirdparty ~t' + ThirdPartyID |
1 |
ThirdPartyID |
Bind(String) |
bindingSource.tpr_id |
Pay To |
'-X payto ~t' + PayToID |
1 |
PayToID |
Bind(String) |
bindingSource.pto_id |
Branch |
'-X branch ~t' + BranchID |
1 |
BranchID |
Bind(String) |
bindingSource.brn_id |
City |
'-X city ~t' + CityName |
1 |
CityName |
Bind(String) |
bindingSource.cty_name |
Commodity |
'-X commodity ~t' + CommodityID |
1 |
CommodityID |
Bind(String) |
bindingSource.cmd_name |
Order Entry |
'-X ord ~t' + Order |
1 |
Order |
Bind(String) |
_BindingSource.ord_hdrnumber |
Trip Folder |
'-X ord ~t' + Order |
1 |
Order |
Bind(String) |
Order.ord_hdrnumber |
Trip Folder |
'-X driver ~t' + DriverID |
1 |
DriverID |
Bind(String) |
Driver.mpp_id |
Trip Folder |
'-X tractor ~t' + TractorID |
1 |
TractorID |
Bind(String) |
Tractor.trc_number |
This illustration shows the data recorded to add a hyperlink to the Company Profile:
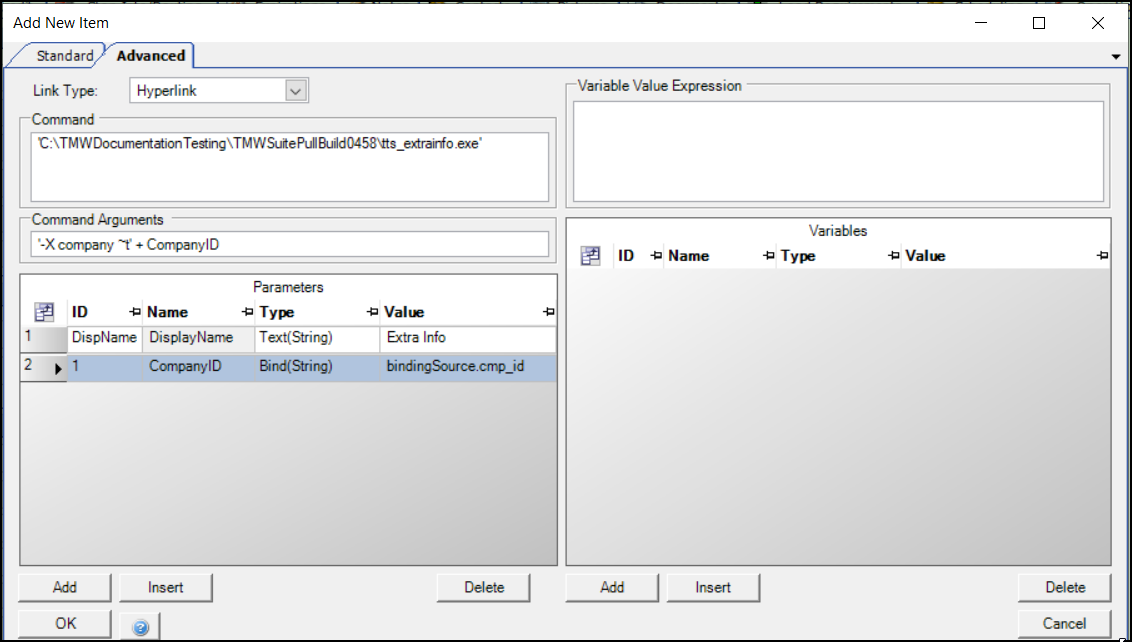
-
Click the OK button.
The Add New Item window closes. The hyperlink will display in the selected spot. -
Right-click and select Toggle QuickDesigner.
QuickDesigner is now turned off. -
Right-click the screen again.
The Edit menu displays. -
Select Save Layout to Database.
-
Now, you can click the hyperlink to access the Extra Information window.
Note: If you have[Misc]GlobalLogon=Noset in your TTS50, you will be prompted to login. -
See the Extra Information guide for details on setting up and using the Extra Information feature.