Controlling the tabbing sequence
Tabbing sequence is the path that the cursor takes as you press the TAB key to move the cursor from field to field. The system default for the tabbing sequence on a window may not suit your needs, especially if you have moved items or hidden some from view.
|
Changing the tabbing order
Each field of the window is identified with a tabbing sequence number. You cannot see the sequence numbers by default. To view and modify them, you must use the Tab Mode feature. It allows you to set a starting number, and then click in the new sequence to add the next sequential number.
Use this procedure to modify the tabbing sequence of all fields on a window.
-
Maximize the window.
-
Right-click in the body of the window you want to change.
A shortcut menu is shown.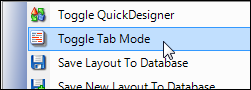
-
Click Toggle Tab Mode.
To indicate that the Tab Mode is active, all the tab-enabled controls are highlighted in light yellow.
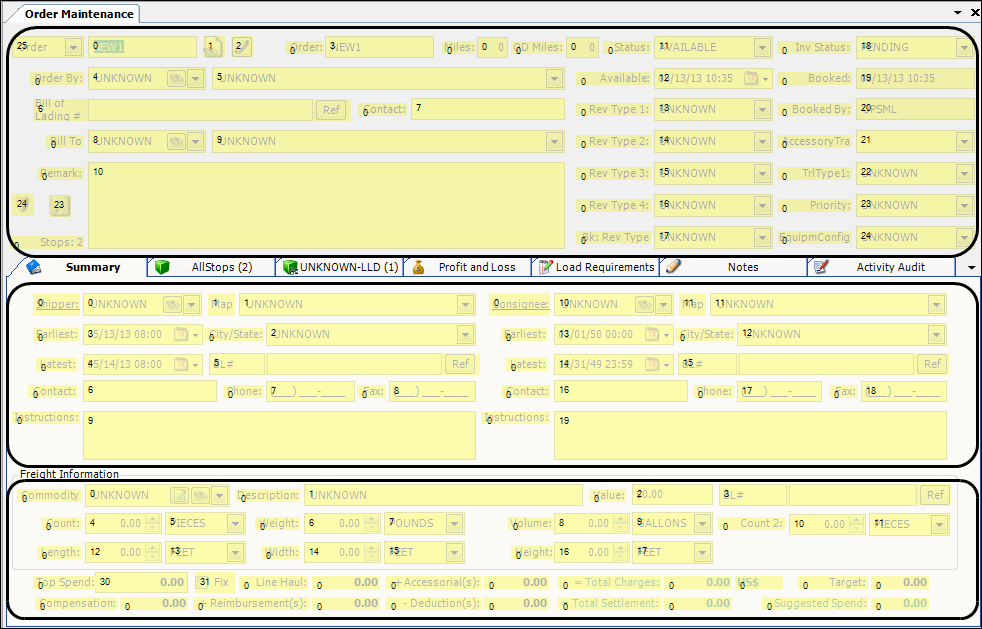
Magnified section:
Notes:
-
Each panel of the window has its own sequence. Do not jump from one panel to another during sequencing.
-
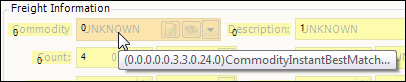
The panels are separately sequenced within their parents, and this continues all the way to the base form. You can see this entire numbering scheme for any item by hovering over the item in tab mode.
-
If you used QuickDesigner to hide fields or controls, they will also be hidden in Tab Mode.
-
-
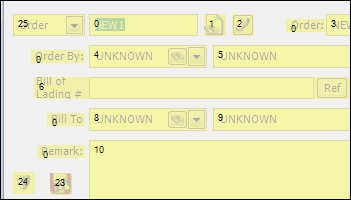
To initiate the sequencing process click on a field or control.
Note: The background color of the field turns light orange.
-
If you want to manually change a number, do the following:
-
Double-click on the number.

-
Change the number.
-
Double-click again on the number to bring the control to incrementing mode.
-
-
Continue to click on each field in the new sequence order.
Note: The background color of each changed field turns light orange.
The numbers automatically increase according to the following.
-
If the existing number is less than the next new sequence number, it will change to the next new sequence number.
Example:
-
You begin a sequence with 7.
-
The next field for your sequence already contains a number 4 (<8).
-
When you click on that field, the sequence number will change to 8.
-
-
If the existing number is greater than the next new sequence number, it will not change the number. The sequencing will then continue from that number.
Example:
-
You begin a sequence with 7.
-
The next field for your sequence already contains a number 12 (>8).
-
When you click on that field, the sequence number will not change.
-
The next sequence number will be 13.
-
-
-
If you are reordering the fields and controls in a complex form, you could easily miss items. You might realize this only after clicking other items. Going back to the missed item would put it after all the items you had clicked in the interim. Instead, restart the sequencing process on the item that was just before the missed control. You will only have to re-sequence the controls after that.
If you want to stop the sequencing process you have done thus far, and begin the sequencing process again, do the following:
-
Right-click on a light orange field.
-
Select Restart tab mode.

The background of all re-sequenced fields is changed back to light yellow.
-
Repeat Steps 4 and 5.
-
-
When you are finished, toggle out of Tab Mode.
Note: Any unclicked items will be left wherever they were in the tab sequence.
Assigning a keyboard shortcut to a field
Use this procedure to provide quick keyboard access to a particular field.
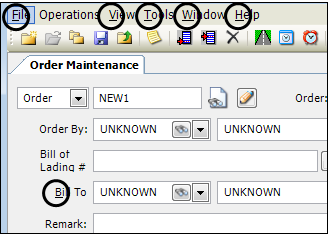
In this example, the Bill To field will be assigned the keyboard shortcut of ALT+B.
-
Click Toggle Tab Mode.
-
Locate the label for the field.

Note the following sequence number. This is the field where you want the cursor to actually be located. In this case, the Bill To field is 8.
-
Double-click on the label.
-
Change the label’s sequence number to the same number assigned to the field, and then click on the next two numbers in the sequence.

Note: Even though the number 10 is already assigned to the next field, the cursor will travel a left-to-right path from the first item with the number to the next item with the same number.
-
Toggle out of Tab Mode.
-
Toggle into QuickDesigner.
-
Right-click in the label to modify, and select Show Preferences.
-
In the Text property, add an ampersand (&) before the letter that will be the shortcut key.

-
Click OK.
-
Toggle out of QuickDesigner.
The label now includes an underlined letter.

When you press ALT the keyboard shortcut letters become underlined.
Press the letter associated with option you want. The cursor jumps to the field.

Removing a field from the tabbing order
Use this procedure to remove a field from the tabbing sequence, which causes the field to be skipped when the user presses TAB while moving from field to field.
-
Toggle into QuickDesigner.
-
Right-click in the field to modify.
A shortcut menu is shown.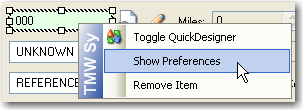
-
Select Show Preferences.
The Field Preferences window opens.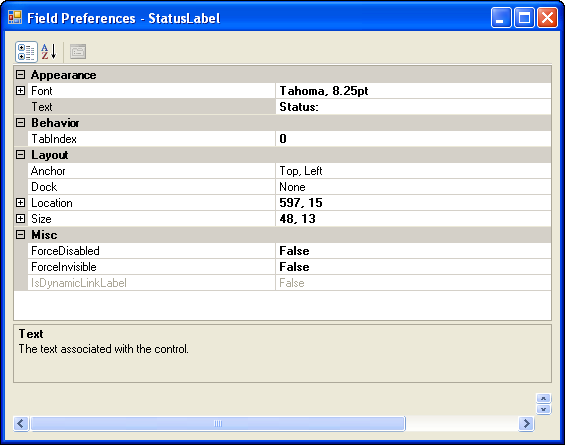
-
Under the Behavior category, change the TabStop property to False.
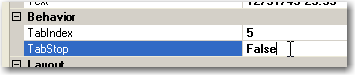
Note: You can also change the field’s individual tabbing sequence number by entering a new TabIndex number. However, this action does not re-index the other fields in the window. The system does not warn you if another field has the same tabbing sequence number.
-
Click OK.
-
Toggle out of QuickDesigner.