Basic order entry
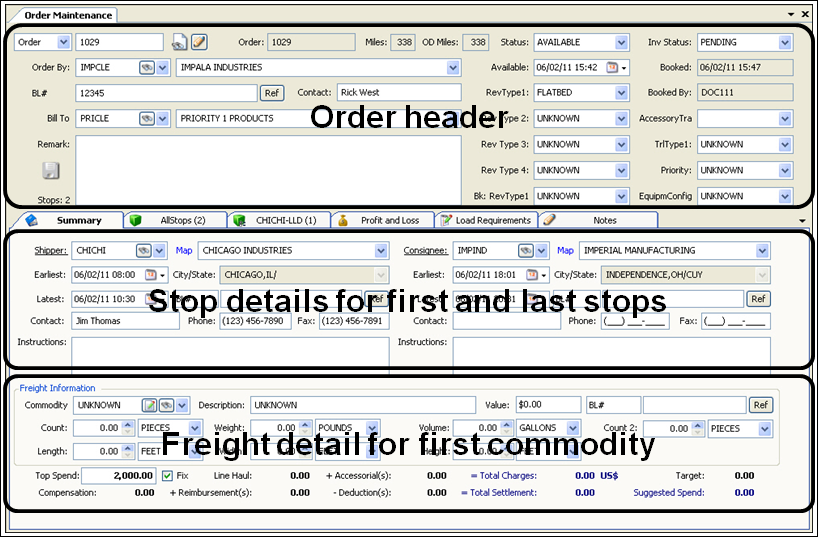
An order is a record of the pickups and deliveries a customer wants made at particular locations on specific dates and times. Orders are created on the Order Maintenance window. When you first access the window, you see the order header at the top of the window, and stop and freight information is shown on the Summary tab.
To create an order, at minimum you typically would enter this information:
| Data | Where it is entered | Required? |
|---|---|---|
Bill To ID |
Order header |
No |
Shipper ID |
Stop details (Summary tab) |
Yes |
Earliest/latest dates and times for first pickup |
Stop details (Summary tab) |
Yes |
Consignee ID |
Stop details (Summary tab) |
Yes |
Earliest/latest dates and times for final drop |
Stop details (Summary tab) |
Yes |
Commodity ID |
Freight detail |
No |
The following steps explain how to create a simple order using the data listed above.
| You also can enter stop and freight information on the All Stops tab and the Stop Detail tab. However, initial order entry occurs on the Summary tab. |
-
Go to Operations > Order Entry.
The Order Maintenance window opens.Note: For information on the layout of the Order Maintenance window, see Introduction to Order Maintenance.
-
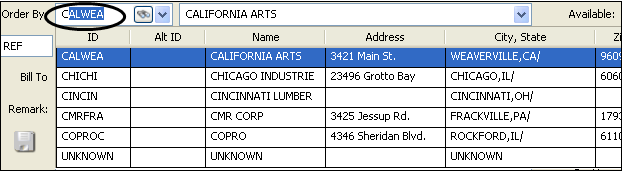
In the Bill To field in the order header, enter the ID of the customer that will be billed for the order.
There are two ways to record a company ID.
-
Instant best match
-
Type the first letter of the company ID. The system displays a drop-down list of companies that match your entry.
-
Click the desired company.
-
-
Scroll window
-
Click
 View Scroll, which is to the right of the company ID field.
 -
Right-click in the company ID field and select View Scroll.
-
The system displays the Company Scroll window. It has four tabs, each of which you can use to enter search criteria.
+
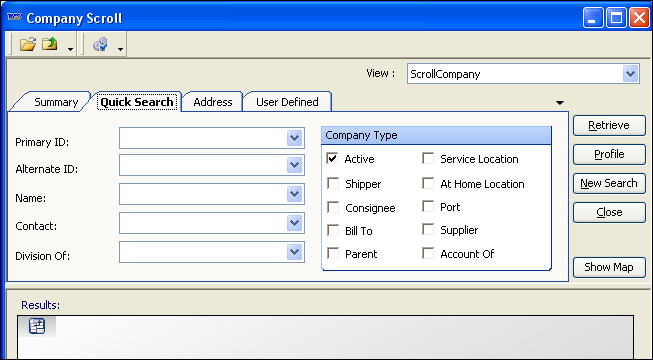
+ After you enter restrictions, click the Retrieve button. The system displays a list of matching records in the lower half of the window. To select a company, double-click on it. The system closes the Company Scroll window and inserts the ID of the selected company in the company ID field.
-
-
Enter shipper and consignee information in the upper section of the Summary tab.
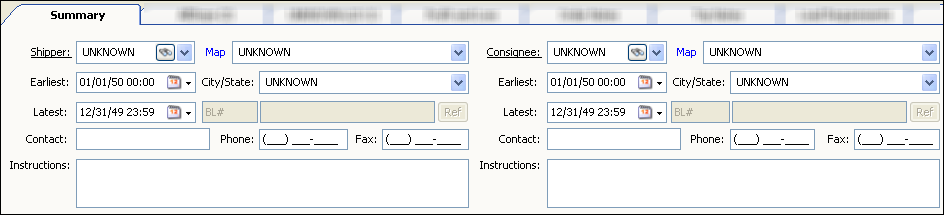
Required entries for the shipper:
Shipper
ID of the company where the first stop on the order will occur.
Earliest/Latest
Dates/times that identify the window of time during which the customer expects the pickup to occur.
Required entries for the consignee:
Consignee
ID of the company where the last stop on the order will occur.
Earliest/Latest
Dates/times that identify the window of time during which the customer expects the final drop to occur.
Notes:
-
For ways that you can enter company IDs, see Step 2.
-
For information on the other fields on the Summary tab, see Definitions for stop related fields.
-
-
In the Commodity field in the Freight Information section at the bottom of the Summary tab, enter the ID of the commodity to be transported.

There are two ways to enter a commodity ID.
-
Instant best match
-
Type the first letter of the commodity ID. The system displays a drop-down list of commodities that match your entry. If needed, continue to enter letters until you see the commodity you want in the list.
-
Click the desired commodity.
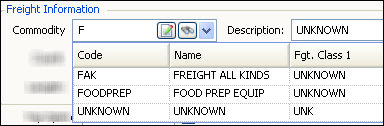
-
-
Scroll window
Do either of the following:
-
Click
View Scroll, which is the second button to the right of the Commodity field. -
Right-click in the Commodity field and select View Scroll.
-
The system displays the Commodity Scroll window. On the Quick Search tab, you can enter search criteria.
+
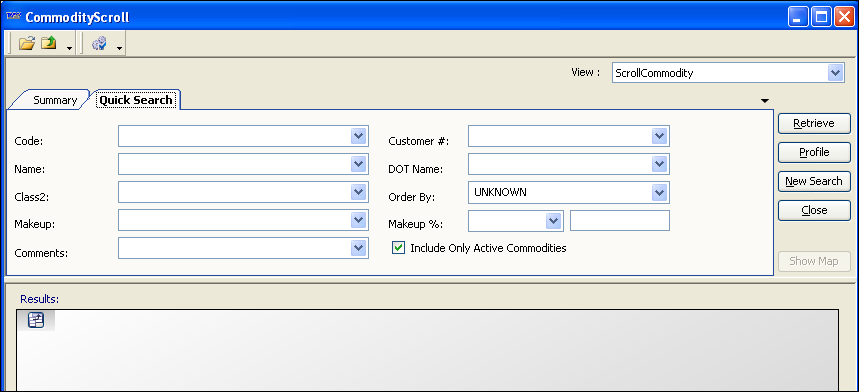
+ After you enter restrictions, click the Retrieve button. The system displays a list of matching records in the lower half of the window. To select a commodity, double-click on it. The system closes the Commodity Scroll window and inserts the ID of the selected commodity in the Commodity field.
-
-
To save the order, do any of the following:
-
Click
 Save.
Save. -
Press CTRL+S.
-
Click
 Save to the left of the Remark field in the order header.
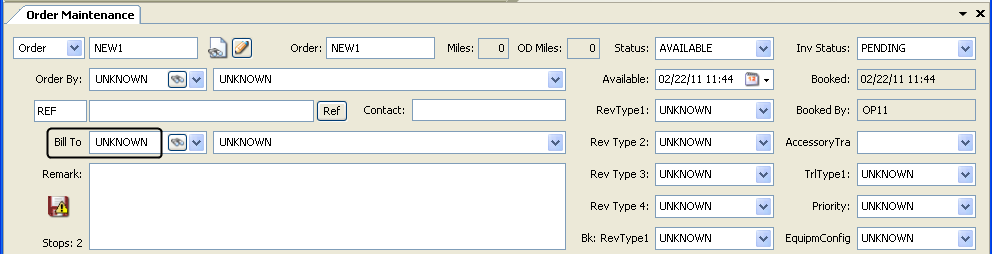
Note: Before you record entries for the order, the Save button is gray . The gray color means that there is nothing to save. A yellow color means unsaved entries exist.
-
If there is no problem with the order
Before the save, the system displays NEW1 in the Order fields:

After the save, if you:
-
Did not enter an order ID manually, NEW1 is replaced by the system-generated order number:

-
Recorded an order ID manually, NEW1 is replaced by the ID you entered.

Note: This applies only to Master orders. See Creating master orders.
If there is a problem with the order
The Save button to the left of the Remark field turns yellow to signify that your entries have not yet been saved. If the system detects a problem with any entry, the button will turn red and will show a yellow exclamation mark ![]() . If you attempt to save anyway, the system will display the Save Warnings window, which lists problems.
. If you attempt to save anyway, the system will display the Save Warnings window, which lists problems.
| The types of warnings and errors you might encounter depend on your system configuration. For a list of common problems and their causes, see Common warnings and errors. |
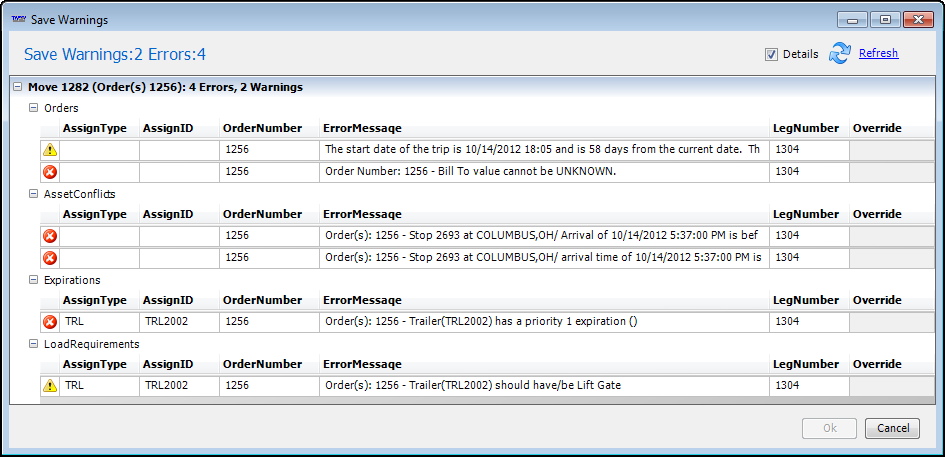
The severity of a problem determines whether you can save the order:
![]() A red circle with a white X means that the problem is critical. You must fix it before you continue with the save.
A red circle with a white X means that the problem is critical. You must fix it before you continue with the save.
![]() A yellow triangle with a black exclamation mark is a warning that a possible issue exists. You do not have to fix it to save the order.
A yellow triangle with a black exclamation mark is a warning that a possible issue exists. You do not have to fix it to save the order.