Creating a Bill To-specific override
Your company may have TMW Operations set up to prevent saving an order for a Bill To that fails a credit check. There may be times when a Bill To fails a credit check but you want to allow its orders to be saved anyway. For example, you know that you have received payment for existing orders but the payment has not been posted to your accounting system. You can create a credit override for the Bill To.
You set an override for a date range. You can allow a certain number of orders to be saved, or you can set a credit extension dollar amount. Once the end date of the override passes, it expires. This happens even if the number of orders allowed was not created or the dollar amount was not reached.
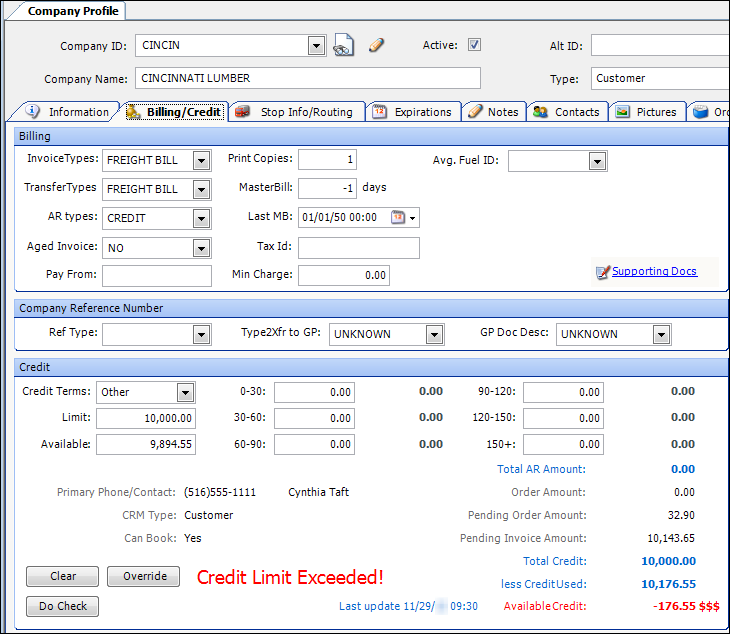
You set up a credit override in the Bill To’s profile, on the Billing/Credit tab.
|
Clicking the Override button opens the Credit Override window. You use this window to set up an override for a Bill To, and to track how it is being used.
Entering a dollar amount override
You can set up an override that is for a specific dollar amount. The override is in effect for the date range you specify. Only a TMW Operations system administrator can set up a credit override.
-
Go to Tools > Profile > Company Profile.
-
Enter the Bill To’s ID in the Company ID field and press TAB.
The company’s profile appears in the window. -
Click the Billing/Credit tab.
-
In the Credit section, click Override.
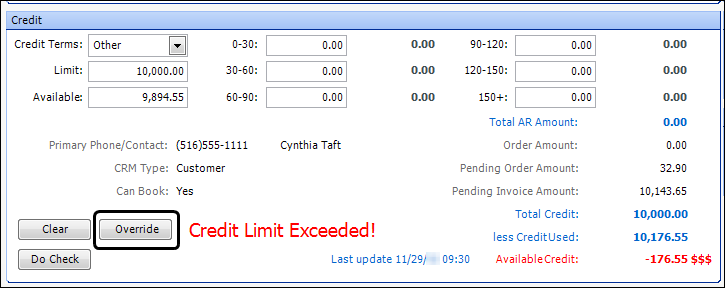
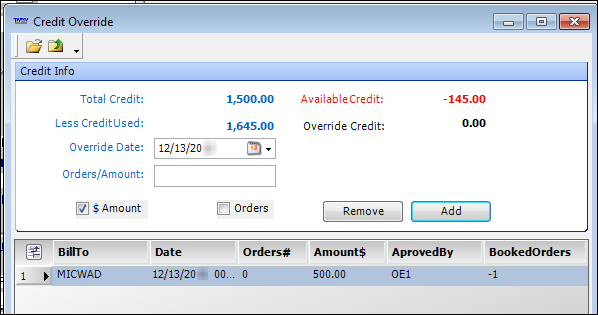
The Credit Override window opens.
-
The $ Amount checkbox is selected by default.
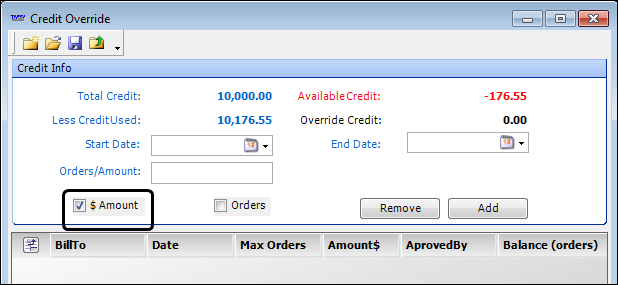
Leave as is.
-
Enter a range of dates for the override period in the Start Date and End Date fields.
Note: You can select a date from a calendar by clicking Calendar.
 -
Enter the extended credit amount in the Orders/Amount field.
-
Click Add.
The Logon Window opens. -
Enter your user ID and password in the appropriate fields.
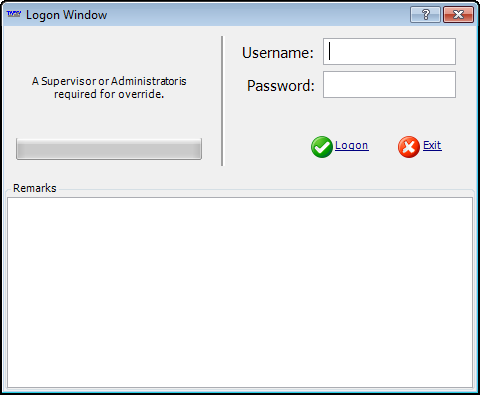
Note: If any information you enter is incorrect, for example, you enter a non-system administrator user ID, a message appears stating this. Click Retry to close the message and return to the Logon Window.
-
Enter the reason for the override in the Remarks field.
Note: You must make an entry in the field. If you do not, the Logon Window closes and an error message appears, stating, "Please add Remarks/Override reason."
-
Click Retry to close the message.
-
Click Add to reopen the Logon window.
-
Enter your user ID and password again.
-
Make your entry in the Remarks field.
-
-
Click Logon.
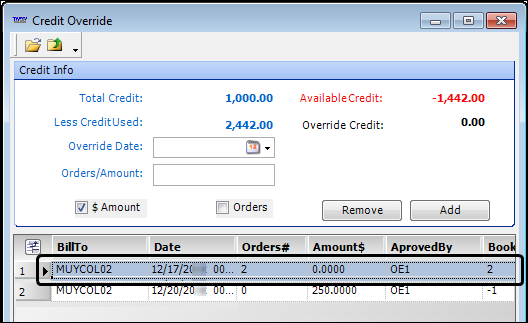
The override details appear in the grid at the bottom of the window.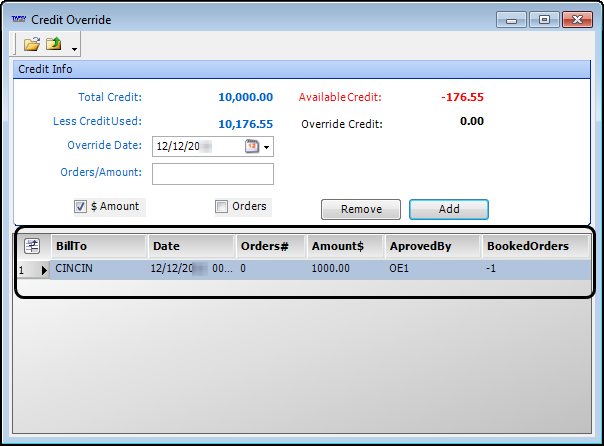
Note: You can view a history of credit overrides issued to the Bill To in this grid.
-
Click
 Close.
 -
Save the company’s profile.
Note: If you do not save the company’s profile, the override is not saved.
Entering an order quantity override
You can set up an override that allows a specific number of orders to be saved. The override is in effect for the date range you specify. Only a TMW Operations system administrator can set up a credit override.
-
Go to Tools > Profile > Company Profile.
-
Enter the Bill To’s ID in the Company ID field and press TAB.
The company’s profile appears in the window. -
Click the Billing/Credit tab.
-
In the Credit section, click Override.
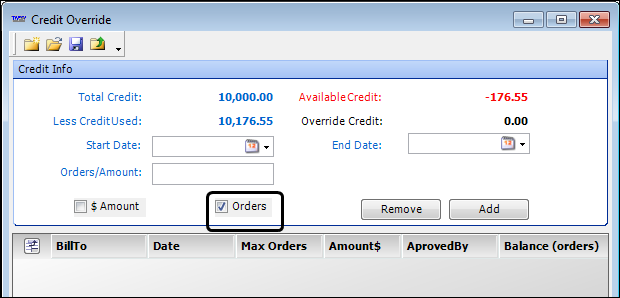
The Credit Override window opens.
-
Select the Orders checkbox.
-
Enter a range of dates for the override period in the Start Date and End Date fields.
Note: You can select a date from a calendar by clicking Calendar. -
Enter the number of orders allowed in the Orders/Amount field.
-
Click Add.
The Logon Window opens. -
Enter your user ID and password in the appropriate fields.
Note: If any information you enter is incorrect, for example, you enter a non-system administrator user ID, a message appears stating this. Click Retry to close the message and return to the Logon Window.
-
Enter the reason for the override in the Remarks field.
Note: You must make an entry in the field. If you do not the Logon Window closes and an error message appears, stating, "Please add Remarks/Override reason."
-
Click Retry to close the message.
-
Click Add to reopen the Logon window.
-
Enter your user ID and password again.
-
Make your entry in the Remarks field.
-
-
Click Logon.
The override details appear in the grid at the bottom of the window.Note: You can view a history of credit overrides issued to the Bill To in this grid.
-
Click
Close. -
Save the company’s profile.
Note: If you do not save the company’s profile, the override is not saved.
Deleting a credit override
If you find that you have entered a credit override in error, you can remove it.
-
Go to Tools > Profile > Company Profile.
-
Enter the Bill To’s ID in the Company ID field and press TAB.
The company’s profile appears in the window. -
Click the Billing/Credit tab.
-
In the Credit section, click Override.
The Credit Override window opens.
Note: If there are multiple overrides, the first one is selected in the grid at the bottom of the window.
-
Select the override you want to remove.
-
Click Remove.
The Logon Window opens. -
Enter your user ID and password in the appropriate fields.
Note: If any information you enter is incorrect, for example, you enter a non-system administrator user ID, a message appears stating this. Click Retry to close the message and return to the Logon Window.
-
Click
Login.
The override is removed from the list. -
Save the company’s profile.
Note: If you do not save the company’s profile, the override is not deleted.