Sorting and filtering trips and resources
The Planning Worksheet provides the following methods of sorting and filtering data to assist you when matching resources to trips:
-
Sorting resources closest to trip.
-
Sorting trips closest to resource.
-
Viewing and filtering load requirements for trips.
-
Viewing and filtering resources by accessories or qualifications.
-
Matching trips to qualified resources.
-
Finding closest tractor.
|
When working with these sorting and filtering features, keep in mind that:
-
The Available Trips grid typically lists outbound trip segments that have not yet begun. Trips are listed according to their origin points.
-
By default, the Inbound grid lists resources according to tractor ID and the inbound trip segments to which they were assigned most recently. Typically, the grid shows trips that are in progress or completed. Trips are listed according to their destinations so you can see where and when resources are (or will be) available.
Note: In addition to tractor and trip segment information, the Inbound grid displays data for the drivers and/or trailers assigned to the trip segment.
Sorting power closest to a trip
This feature helps you select resources that are (or soon will be) located near a selected trip. It does this by calculating the distance between the origin of the trip selected in the Planning Worksheet’s Available Trips grid and the destination of each of the tractors listed in the Inbound grid.
|
To sort by distance, the following columns must be visible:
If the columns are not visible, add them using the Field Chooser. If the columns are not in the Field Chooser, contact the system administrator to create a custom SQL view. |
Follow these steps to find the tractors closest to a selected trip:
-
In the Planning Worksheet, do one of the following to refresh the Available Trips and Inbound grid:
-
Click
 Open.
Open. -
Select File > Retrieve All.
-
Press CTRL+R.
-
-
In the Available Trips grid, select the desired trip.
-
Select View > Sort Power to Closest Trip.
-
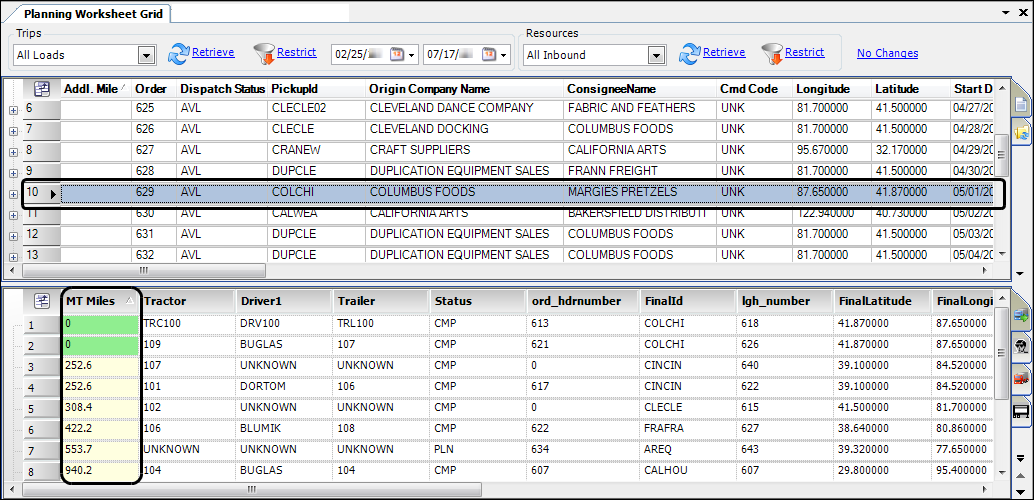
The system sorts the tractors listed in the Inbound grid based on the distance between the selected trip’s origin and the tractor’s destination. The closest tractors display at the top of list.
-
The distance to the pickup location is displayed in the MT Miles column.
Note: A green field in the MT Miles column displays company-to-company mileage. A yellow field displays air miles.
-
-
Click Retrieve in the Resources section at the top of the window to return the Inbound grid to the previous view.
Sorting trips closest to power
Follow these steps to find the available trips close to a tractor’s location.
-
In the Planning Worksheet, do one of the following to refresh the Available Trips and Inbound grids:
-
Click
Open. -
Select File > Retrieve All.
-
Press CTRL+R.
-
-
On the Inbound grid, select the desired tractor.
-
Select View > Sort Trips to Closest Power.
-
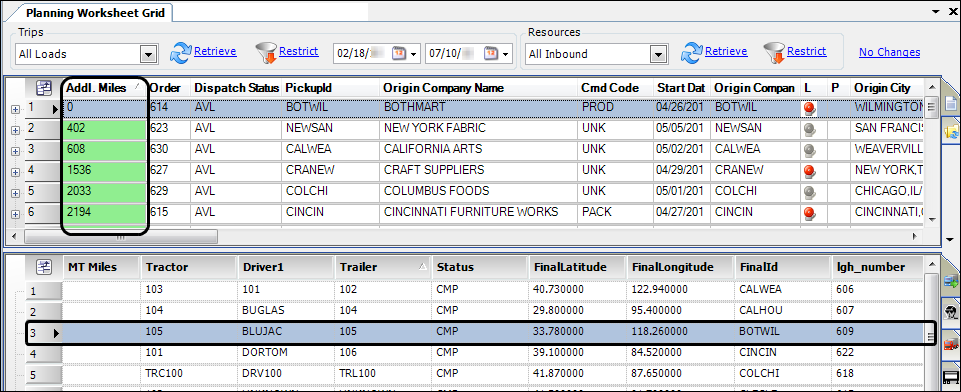
The system sorts the trips listed in the Available Trips grid based on the distance between the selected tractor’s destination and the trip’s origin. The closest trips display at the top of the list.
-
The distance to the pickup location displays in the Addl. Miles column.
Note: A green field in the Addl. Miles column displays company-to-company mileage. A yellow field displays air miles.
-
-
Click Retrieve in the Trips section at the top of the window to return the grid to the previous view.
Finding tractors closest to a location
In the Planning Worksheet, the Find Closest Tractor command allows you search for tractors based on a user-specified location. You enter a city or ZIP Code and search for tractors within a user-defined radius from that location. This feature is especially useful if you need to find a tractor regardless of the location of stop events on a tractor’s trip.
This feature requires you to have latitude and longitude coordinates recorded for your tractors in the following columns in your database’s tractorprofile table:
-
trc_gps_latitude
-
trc_gps_longitude
| The latitude and longitude coordinates must be stored in seconds, and only positive numbers can be used. |
The most common method for obtaining latitude and longitude information is to use TotalMail. The strength of using the Find Closest Tractor command in conjunction with TotalMail is that tractor locations are stored based on where the tractor is rather than where it should be.
There are two commands that search for tractors: the Find Closest Tractor command and the Sort Power Closest to Trip command. The main difference between the two commands is the method they use to determine the tractor’s location.
-
Find Closest Tractor command
Calculates the distance between a user-specified location and the current location of the tractor based on the latitude and longitude data recorded in your database.
-
Sort Power Closest to Trip command
Calculates the distance between the origin of the trip selected in the Planning Worksheet’s Available Trips grid and the destination of each of the tractors listed in the Inbound grid.
For more information, see Sorting power closest to a trip.
Specifying the default search radius
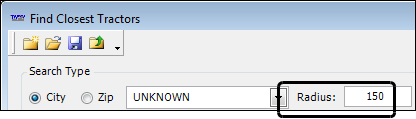
The [.NetOperations]TractorRadiusDefaultSearchDistance INI setting allows you to specify the default search radius that populates in the Radius field in the Find Closest Tractor window.
Using the Find Closest Tractor command
To use the Find Closest Tractor command, follow these steps.
-
Go to Operations > Planning Worksheet.
The Planning Worksheet window opens. -
Go to Edit > Find Closest Tractors.
The Find Closest Tractors window opens.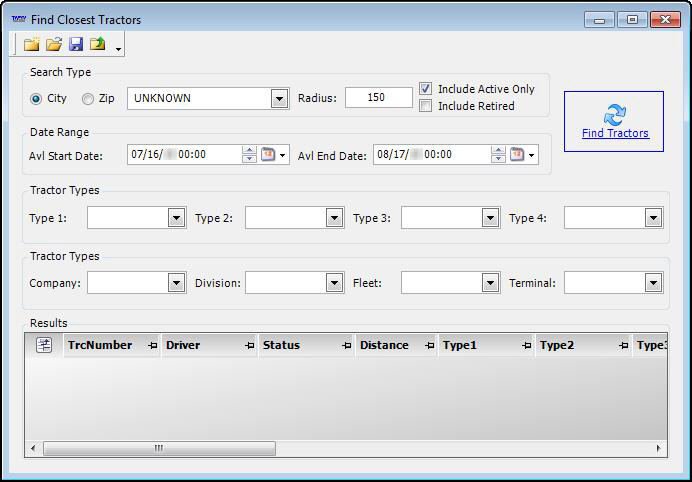
-
Make entries in the appropriate fields.
Note: Each field adds another restriction to the search criteria. For more results, fill in fewer fields.
Field Definition City
Select this option to search in a radius from a city.
Note: Type the city in the field to the right of this option.
Zip
Select this option to search in a radius from a ZIP Code.
Note: Type the ZIP Code in the field to the right of this option.
Radius
The radius to search from the specified city or ZIP Code location.
Note: For more information on setting the default radius in your TTS50, see Specifying the default search radius.
Include Active Only
Not functional
Include Retired
Not functional
Tractor Type 1-4
Restricts the search to tractors assigned to the specified tractor type classifications.
Note: These fields are user-definable. For more information, see Using the label file to customize fields.
Company
Restricts the search to tractors assigned to this classification.
Note: This field is often used to designate a company within a multi-company organization.
Division
Restricts the search to tractors assigned to this division.
Fleet
Restricts the search to tractors assigned to this fleet.
Terminal
Restricts the search to tractors assigned to this terminal.
-
Click
 Find Tractors.
The results appear in the bottom portion of the window.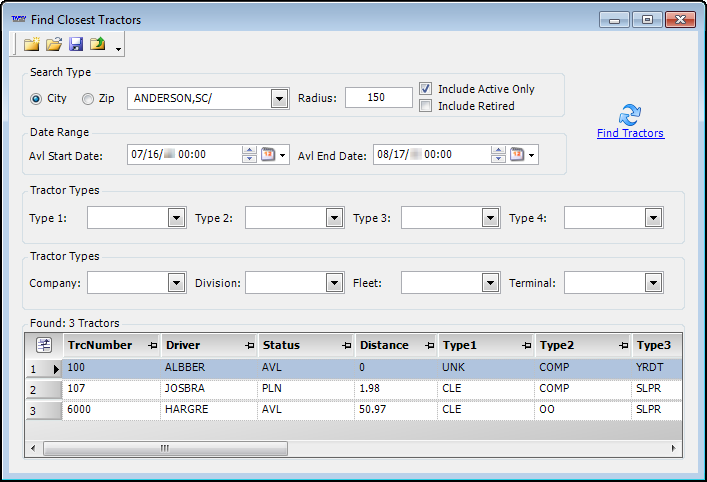
-
When you have finished viewing the results, click
 Close.
Viewing and filtering load requirements
Load requirements specify special criteria that must or should be met when assigning resources (driver, tractor, trailer, or carrier) to an order.
The system provides several methods by which you can view and filter load requirements in the Planning Worksheet.
Viewing load requirements for a single trip
Follow these steps to view load requirements for a trip.
-
In the Planning Worksheet, select a trip from the Available Trips grid.
-
Select View > Other Windows > Load Requirements.
The Load Requirements window opens and displays load requirements attached to the trip.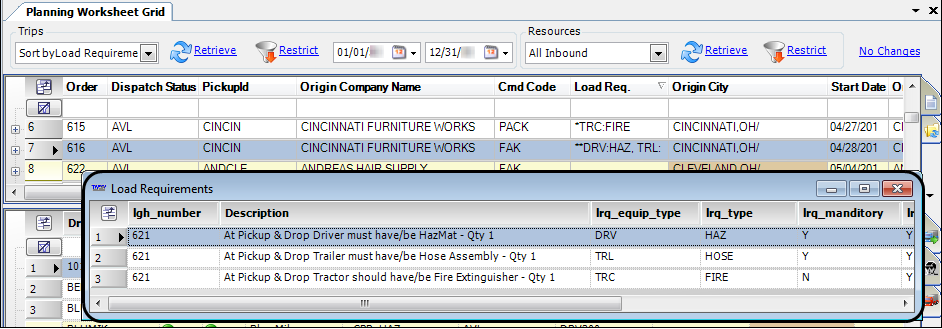
You cannot add or edit load requirements in this window.
|
To use this feature, the Load Req. column in the Available Trips grid must be visible. If the columns are not visible, add them using the Field Chooser. If the columns are not in the Field Chooser, contact the system administrator to create a custom SQL view. |
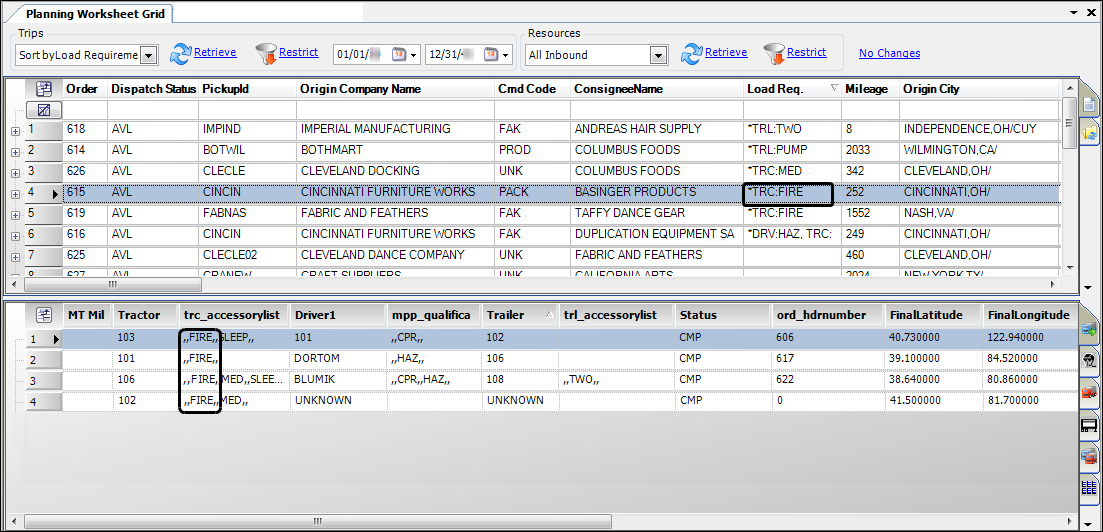
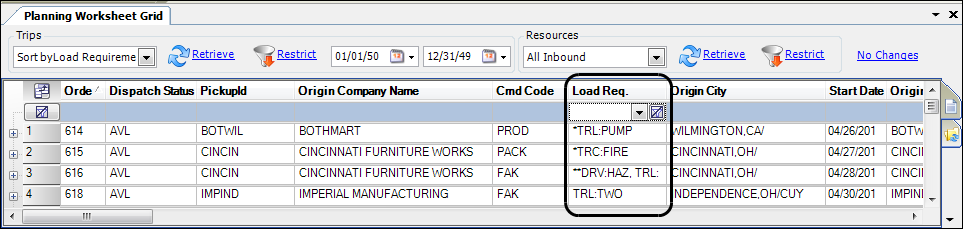
In the Available Trips grid, you can use the Load Req. column to:
-
View load requirements for all displayed trips.
-
Filter displayed trips by the load requirements assigned.
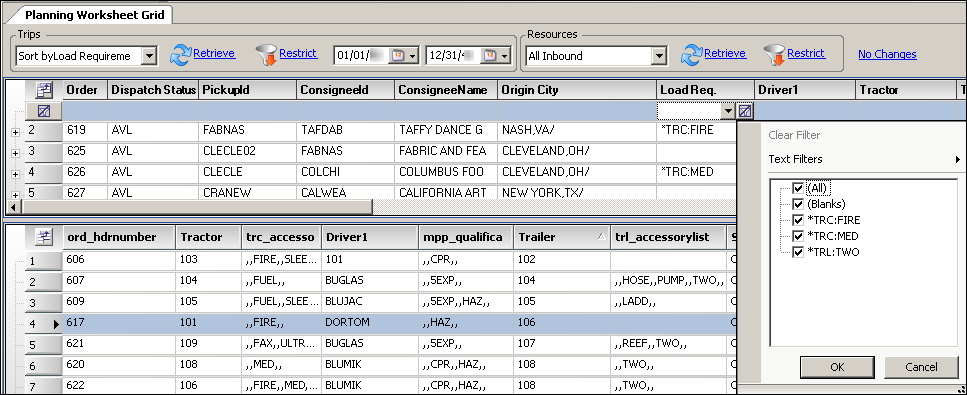
Items in the Load Req. column appear with an abbreviation of the resource type followed by an abbreviation of the accessory/qualification. An asterisk (*) displays in front of the resource for every *must* requirement. Should requirements do not carry an asterisk.

Viewing and filtering load requirements for all trips
Follow these steps to view and/or filter all load requirements for available trips:
-
In the Planning Worksheet, do one of the following to refresh resources in the Available Trips grid.
-
Select File > Retrieve Trips.
-
Click Retrieve to the right of the Trips field.
The grid shows a list of available trips with the attached load requirements displayed in the Load Req. column.
-
-
Right-click anywhere in the grid and select Show Filter Row.
The filter row displays at the top of the grid. -
Click the filter row at the top of the LoadReq. column to view filter options.
-
Do one of the following:
-
Select the checkbox to include an item in the filtered list.
-
Clear the checkbox to remove an item from the filtered list.
-
-
Click OK.
The grid is limited to rows containing the items you selected.
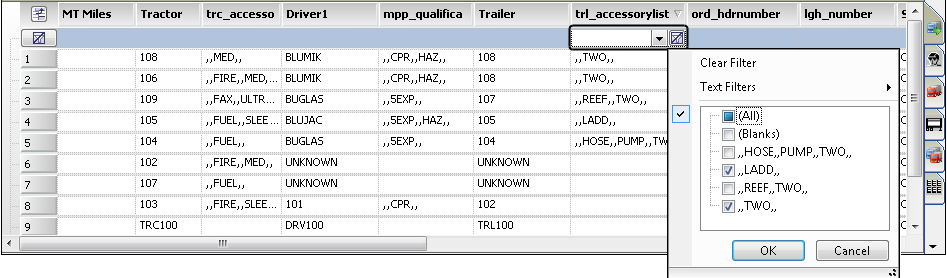
Viewing and filtering resources by accessories or qualifications
|
To use this feature, the following columns must be visible:
If the columns are not visible, add them using the Field Chooser. If the columns are not in the Field Chooser, contact the system administrator to create a custom SQL view. |
Follow these steps to view and/or filter resource accessories and qualifications.
-
To refresh resources on the Inbound tab, do one of the following:
-
Select File > Retrieve Resources.
-
Click Retrieve to the right of the Resources field.
-
-
Right-click anywhere in the grid and select Show Filter Row.
-
Click the filter row at the top of the appropriate column to view and use filter options.
-
Do one of the following:
-
Select the checkbox to include an item in the filtered list.
-
Clear the checkbox to remove an item from the filtered list.
-
-
Click OK.
The grid is limited to rows containing the items you selected.
Filtering resources to qualified power
When a trip has a must requirement attached, the system will prevent you from assigning resources that do not meet that requirement.
The Planning Worksheet allows you to limit the resources displayed on the Inbound tab to ones that meet the must requirements of the trip selected in the Available Trips grid.
Follow these steps to find resources that fulfill a trip’s load requirements.
-
In the Planning Worksheet, do one of the following to refresh the information in the Available Trips and Inbound grids:
-
Click
Open. -
Select File > Retrieve All.
-
-
In the Available Trips grid, select the desired trip.
-
Select View > Filter to Qualified Power.
The tractor/driver/trailer combination that fulfills the most load requirements moves to the top row of the Inbound tab. If additional resources can fulfill one or more of the load requirements, they appear on subsequent lines.
Note: Should requirements are not included when sorting for qualified power.