Assigning a carrier to multiple trip segments
You can assign multiple trip segments for a single carrier. You can also send multiple load confirmations to a carrier by print, fax, or e-mail. Use the Carrier Mass Assignment feature in the Advanced Carrier Selection (ACS) window to complete these tasks.
This feature is designed for use with the Covering board’s Available grid in the Company Planner. This grid contains Available loads that do not have carriers assigned to them yet. However, you can use it with any Company Planner board as long as the Leg Number and Carrier ID columns are included.
Setting up the Carrier Mass Assignment feature
To use this feature, you must set [Brokerage]MassACSAssignment=Y in your TTS50.
Setting up the Company Planner subscription for the ACS window
You must have a Company Planner subscription for the ACS window set up in a grid. If you are currently using the ACS window, your subscription is already set up.
Complete these steps to set up your subscription.
-
Go to Operations > Company Planner Setup.
-
Click
 Expand next to the row for the board you want to use.
 -
Select the row for the Grid cell you want to use.
The view assigned to the grid must have:
-
A Leg Number column
-
A Carrier ID column
-
-
On the Menu Commands tab, add a custom menu command. The system uses this command to open the ACS window. You must include a name for the command in the Name field (for example, ACS).
-
On the Subscriptions tab, add a new subscription with this information:
Field Definition Publisher
The name of the selected Grid cell
Event
CustomMenuCommand
Menu Command
The name of the custom menu command you created in step 4.
Action
AssignCarrierACS
-
Select the subscription row you added and click Add Argument.
-
In the Argument field, enter the database column name (not the display name) of the Leg Number column. This argument must be the first argument listed under the Grid cell.
-
Select the subscription row you added and click Add Argument to add a second argument.
-
In the Argument field, enter the database column name (not the display name) of the Carrier ID column. This argument must be the second argument listed under the Grid cell.
-
Click Save.
For more information on the Company Planner, see Introduction to the Company Planner and Adding subscriptions.
Using the Carrier Mass Assignment feature
Use the selected board and grid to assign multiple trip segments to a carrier.
To be mass-assign compatible, selected trip segments must:
-
Have the same origin and destination
-
Have the same number of stops
-
Have a status of Available
To assign multiple trip segments to a carrier:
-
Go to Operations > Company Planner.
-
Select the board you are using for the Carrier Mass Assignment feature.
-
Select each trip segment you want to assign to the carrier.
-
Right-click on one of the selected trip segments and select ACS.
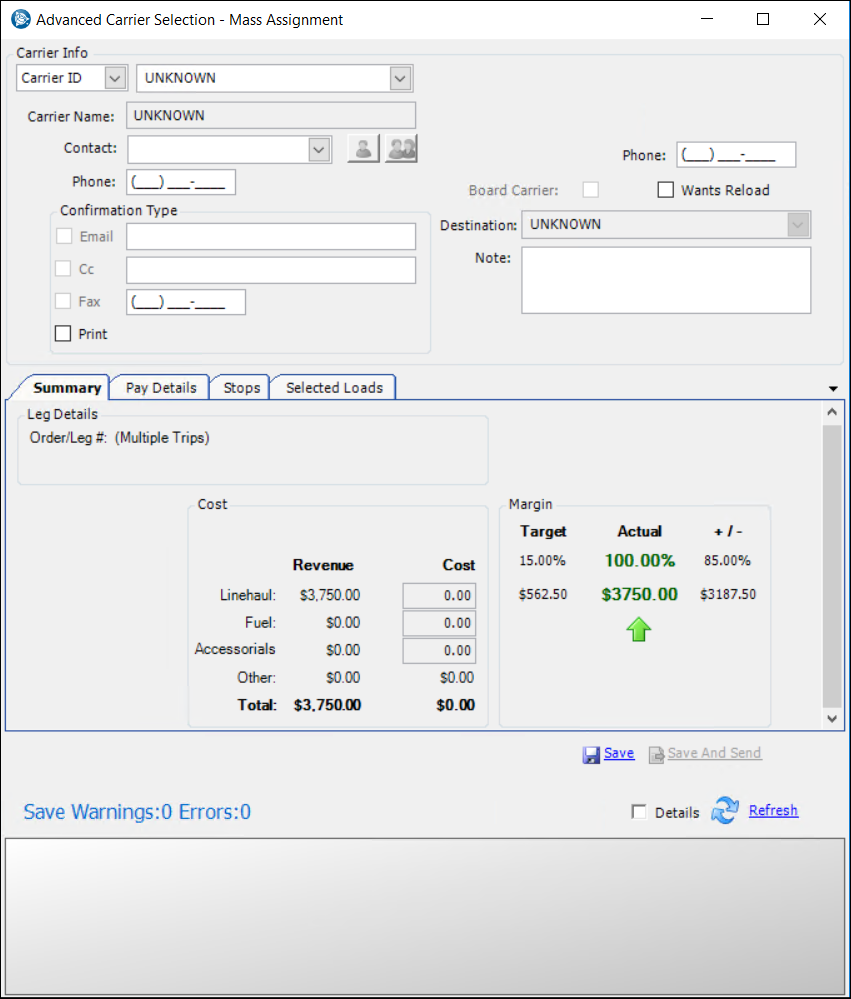
The Advanced Carrier Selection - Mass Assignment window opens.Note that the ACS - Mass Assignment window has fewer fields than the original ACS window. This is because the system saves data included here for all trip segments.
In addition:
-
Details in the Pay Details and Stops tabs are disabled.
-
The Load Confirmation tab is not included.
-
The system does not factor in results from the rating engine, but you can include spot or manual rating.
-
-
Make entries in these fields as needed:
Required field: *
Field Definition Carrier Info (first field) *
The lookup identifier
Verify Carrier ID appears in this field.
Carrier Info (second field) *
Carrier’s ID as recorded in its profile
Contact
Name of the carrier’s primary contact
The
 Brokered Contacts button opens the Brokered Contacts window. It displays a list of secondary contacts and the type of confirmation to send to each recipient (print, fax, or e-mail).
Phone
Phone number for the carrier’s primary contact
Confirmation Type
Additional load confirmations to send by print, fax, or e-mail
Email
Indicates whether to send the load confirmation by e-mail
Note: The system uses the same e-mail template specified for sending individual load confirmations.
Fax
Indicates whether to fax the load confirmation
Print
Indicates whether to print the load confirmation
-
When you select the Print checkbox, the Load Confirmation - Printer Selection message appears.
-
Select the appropriate printer from the drop-down list.
-
Click Proceed.
Notes
Notes for the carrier contact(s)
-
-
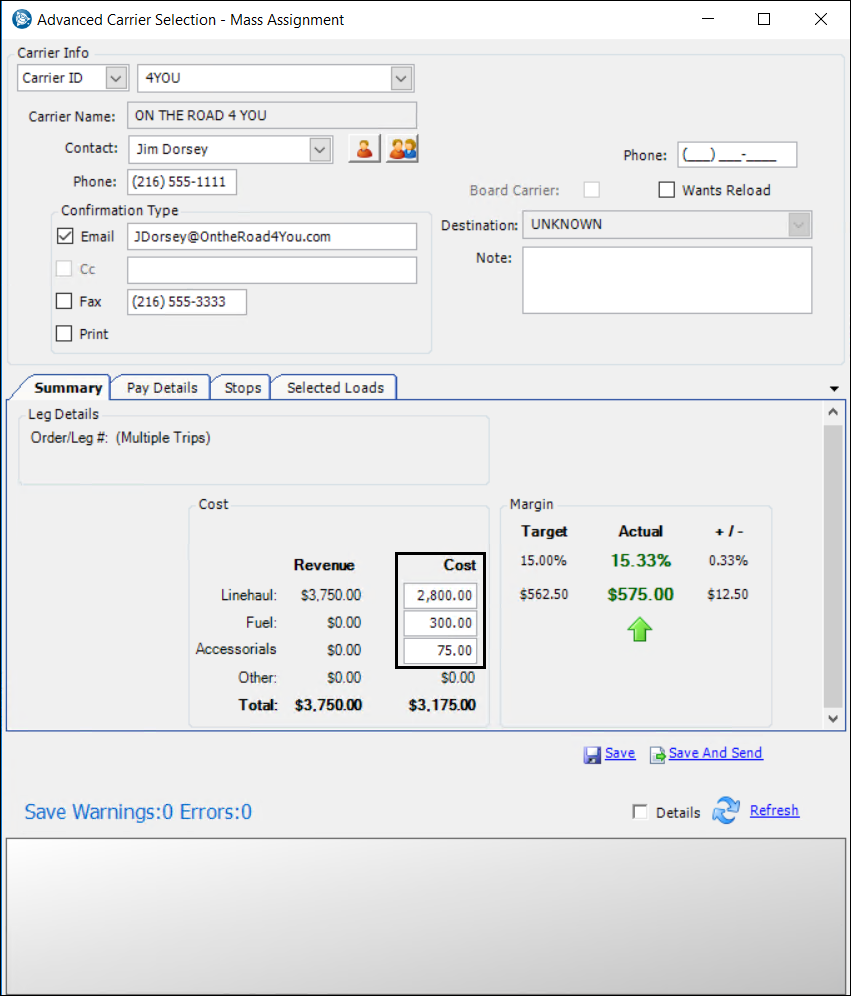
In the Summary tab, adjust amounts in the Cost fields.
-
Do one of the following:
-
Click Save.
The system saves the information to the selected trip segments. Go to the Trip Folder’s Edit > Advanced Carrier Selection window to view and update details for a specific trip segment.
-
Send load confirmations for each of the trip segments.
-
Sending load confirmations
The Selected Loads tab contains details from the Company Planner grid. The tab also retains the same sorting order used in the Company Planner grid.
The Load Conf Sent column lists results for load confirmations sent. For each load confirmation, the system reports a successful transfer or an error message.
-
Click Save and Send.
The system sends the load confirmations using the selected method(s). It reports successful results or error messages in the Load Conf Sent column. -
Review the Load Conf Sent column. If error messages appear, position your cursor over each error. A ToolTip displays error details.
Note: The system attempts to send the remaining load confirmations if one or more of them fails.
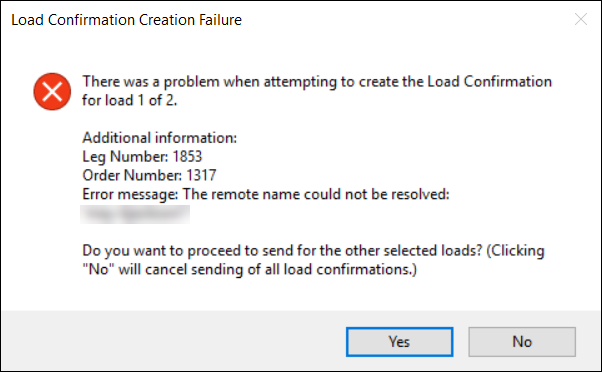
Addressing report server load confirmation errors
The system attempts to create load confirmations for all loads before it attempts to send them. If there is an issue with the report server, a Load Confirmation Creation Failure or timeout error appears. This occurs when the system attempts to create the first load confirmation.
If you want to stop the system before it attempts to create the rest of the load confirmations, click No. Errors for each load confirmation are then listed in the Selected Loads tab.