What are expirations?
Expirations are records of important activities and out-of-service dates for such things as driver vacations and equipment maintenance. Some are designed to notify dispatchers of time periods during which resources are unavailable to be used on trips. Other expirations are used to indicate that resources have a planned activity that does not affect dispatch.
The system will check for resource expirations when you make resource assignments. If the resource has a required expiration in effect, you will not be allowed to plan or start the resource on any trips having times that conflict with it.
To properly set up and use the Expiration feature, you must:
-
Understand the difference between dispatch type expirations and non-dispatch type expirations.
-
Understand how an expiration’s priority affects the dispatching of resources.
-
Be aware of expiration system codes and know how to set up custom expiration options in the label file.
-
Know where to record expirations.
-
Know where expiration indicators are located in the applications.
Expiration types
TMW Operations has two expiration types. As part of the setup process in the label file, each expiration is assigned to one of the two types. The expiration type determines whether an expiration record can be added or modified through the Card Trip Planner or Planning Worksheet. Both expiration types can be added or edited in resource profiles.
-
Non-dispatch type expirations
By default, non-dispatch type expirations can be added or edited only in resource profiles. Such expirations are assigned codes of 199 or less in System Administration.Note: You can allow non-dispatch type expirations to be added or edited outside of profile maintenance by setting the
[Dispatch]OverrideDispExp=Yin your TTS50. -
Dispatch type expirations
Dispatch type expirations are those that can be added and/or edited through the Card Trip Planner or Planning Worksheet.
Both expiration types can be viewed through the Trip Planner or Planning Worksheet, and in File Maintenance.
This illustration shows the DrvExp label, which is accessed in the Edit User Definable Fields window. You assign codes to driver expirations in this label.
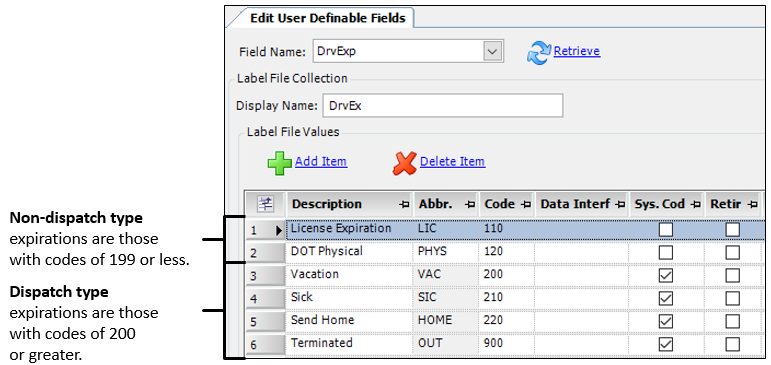
You use the TrcExp, TrlExp, and CarExp labels to set up expiration types for tractor, trailer, and carrier expirations, respectively.
| Codes with the System Code checkbox selected are built into the system and cannot be changed. |
Expiration priorities
When you create expirations for resources, you must assign a priority.
There are two priority levels:
-
Priority 1, also known as Required
Critical expirations are defined as Required in the ExpPriority label. If a resource has a Priority 1 expiration that has not been marked as completed, the system will not allow dispatch of that resource on, or after, the expiration’s effective date. -
Priority 2, also known as Key Date
Expirations that are not critical are assigned a priority of 2. By default, a Priority 2 expiration is defined as Key Date in the ExpPriority label.
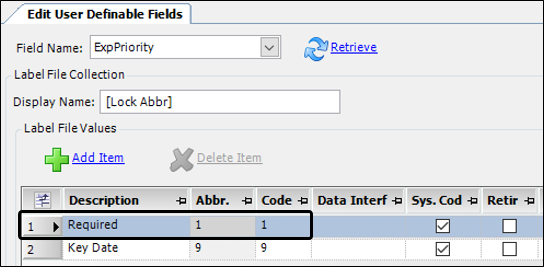
If you need to, you define additional priority values and codes using the ExpPriority label, accessed in the Edit User Definable Fields window. The Required and Key Date options are system codes.
-
Required is the default description for Priority 1. It has a code of 1.
-
Key Date and all other values are Priority 2. They are assigned codes of 2 or higher.
Accessing expirations windows from TMW Operations
There are two windows you can use to add, modify, and delete expirations for resources.
Driver/Asset Expirations window
You can enter or modify an expiration for a resource in the Driver/Asset Expirations window.
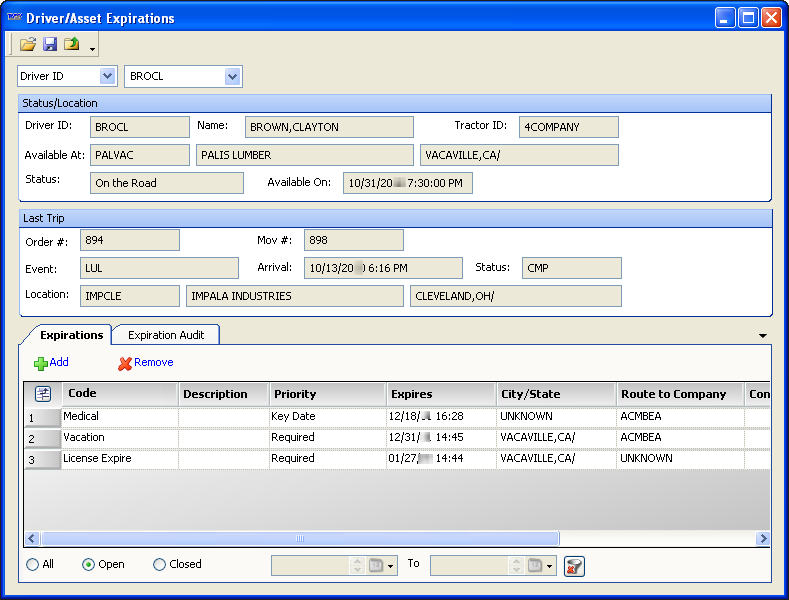
You can also view the resource’s open, closed, or all expirations for a specified date range.
To access the Driver/Equipment Status window select Operations > Driver/Equipment Status and select a sub command:
-
Driver In/Out of Service
-
Tractor In/Out of Service
-
Trailer In/Out of Service
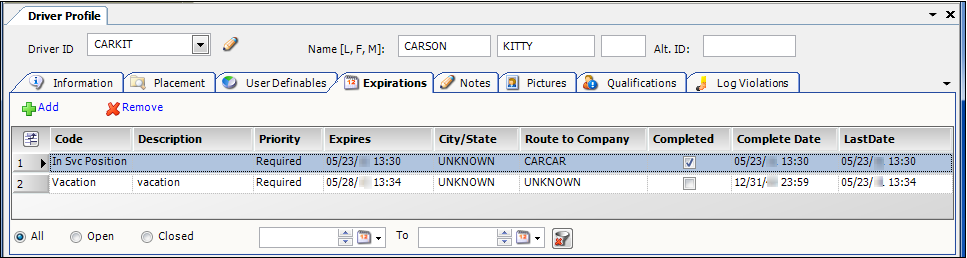
Expirations tab in a resource profile
The Expirations tab is available from any resource profile.
You can enter or modify an expiration for a resource on this tab. You can also view all expirations, or restrict the list to those that are open (active) or closed (completed). In addition, you can limit expirations to those that were/are active within a specified date range.
To access a profile:
-
Select Tools > Profiles and select the asset type.
-
Enter the asset ID in the ID field at the top of the profile tab.
-
Press TAB to open the resource’s profile.
-
Select the Expirations tab.