Copying layouts from one database to another
A system administrator might want to create window (screen) layouts in a test environment before making them available to users. Instead of recreating the layouts in the production database, you can export the layouts from the source (test) database and import them to the target (production) database.
Exporting a window layout
Use this procedure to export a saved window layout from a database, such as one used for testing. The exported layout can then be imported into your production environment.
-
Open TMW Operations with a system administration login.
-
Load the layout you want to export.
-
Right-click anywhere in the body of the window.
A shortcut menu is shown. -
Go to Screen Designer Diagnostics > Export Screen Design.
-
Go to the save location, and enter the filename.
Note: Files are saved with the extension .SDL (for Screen Designer Layout).
-
Click Save.
The saved layout is now available for importing to the target database.
Importing a window layout
Use this procedure to import a Quick Designer layout that you exported from another database.
-
Open TMW Operations with a system administration login.
-
Right-click anywhere in the body of the window.
A shortcut menu is shown. -
Go to Screen Designer Diagnostics > Import Screen Design.
-
Go to the save location, and select the .SDL file to import.
-
Click Open.
The imported window layout is displayed. -
Save the new layout.
-
Click Save New Layout To Database.
The Save Layout window opens.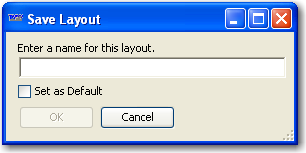
-
Enter the name for the new layout.
-
If you want to make it your default layout, select the checkbox.
-
Click OK.
-
-
Assign the layout to the individuals who will be using it.
Working with Trimble Support to correct an invalid layout
Trimble Support personnel, or highly technical client personnel with the assistance of Trimble Support personnel, would use the Layout Utility window when clients need assistance, such as for debugging invalid layouts.
|
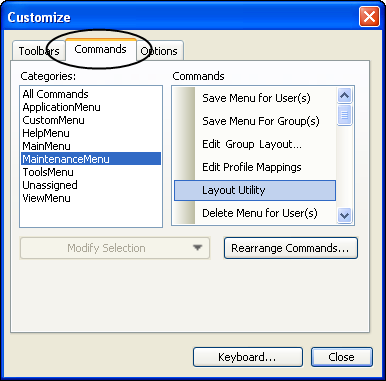
Providing access to the Layout Utility window
The Layout Utility command is not, by default, part of the menu structure. You must add it to a menu, and then assign the menu layout to the individuals who will be copying the layouts from one (source) database to another (target) database.
-
Open TMW Operations with a system administration login.
-
Add the Layout Utility command.
Note: The Layout Utility command is listed in the All Commands and the MaintenanceMenu categories.
-
Assign the menu layout to the individuals who will be using it.
-
Inform the individuals of the menu command location.
Copying window and grid layouts from another database
Use this procedure to copy saved window and grid layouts from one (source) database to another (target) database.
|
-
Open TMW Operations with a login that connects to the target database.
-
Open the Layout Utility.
Note: The utility is commonly located under the Maintenance menu. If your system administrator added the option to a different menu or toolbar, access it from there.
-
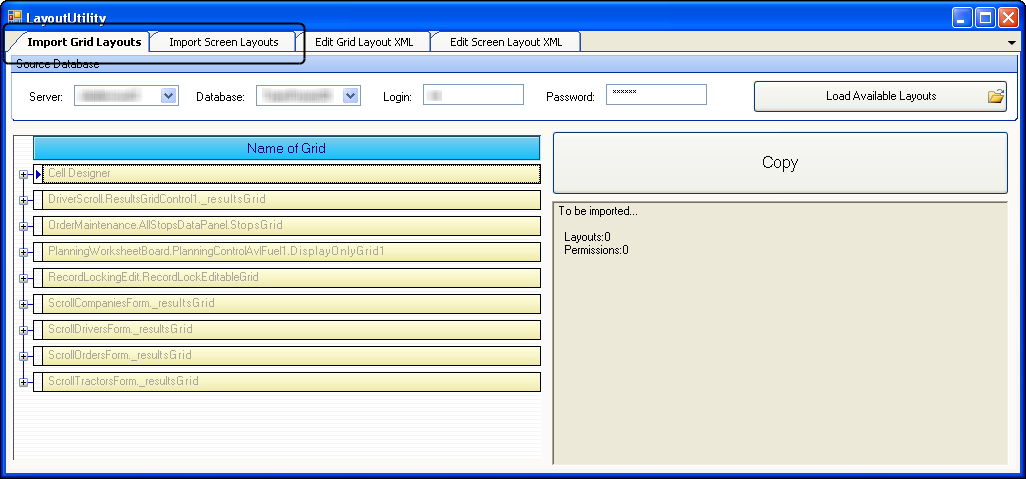
When the Layout Utility window opens, click on one of the following:
-
To copy a grid layout, click on the Import Grid Layouts tab.
-
To copy a window (screen) layout, click on the Import Screen Layouts tab.
-
-
Enter or select the source database connection information.

Field Definition Server
Enter or select the name of the server where the source database resides.
Database
Enter or select the name of the database.
Login
Enter the login that provides a connection to the server.
Password
Enter the password to the server.
-
Click Load Available Layouts.
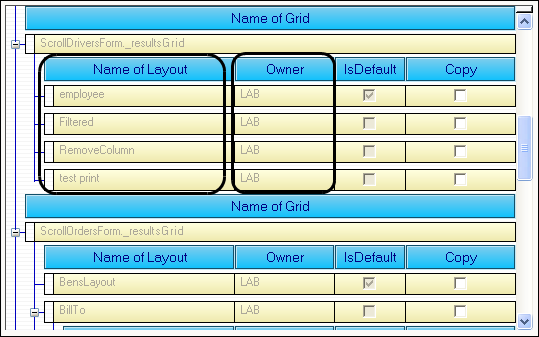
The left pane of the window populates with a list of window or grid names that contain customized layouts.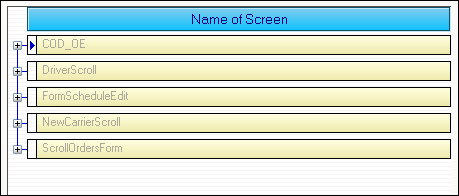
-
Select the appropriate window or grid names.
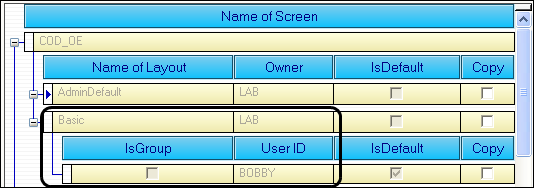
A list of any saved layouts is shown under each name.The name and owner, the user ID who created the layout in the source database, of the layout is listed.
If a user is already assigned to the layout in the source database, you can expand another detail row to display whether the ID is a Group and the User or Group ID assigned to it. In this sample, only user Bobby is assigned to this layout.
Note: If you want to quickly expand all the rows, right-click in the list of windows or grids.
A shortcut menu is shown.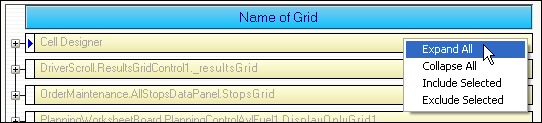
Expand All
Selecting this option will expand all the window or grid rows to display the names of all custom layouts for it.
Collapse All
Selecting this option will collapse all the window or grid rows that are expanded.
-
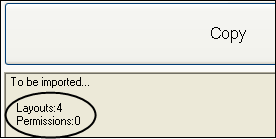
Under Copy, select those layouts that you want to copy.
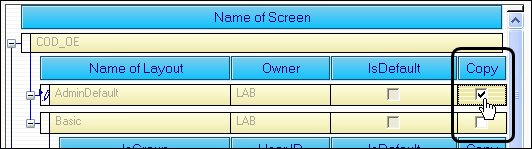
As you select layouts, the right pane of the window displays the number you selected for copying or importing.
Note: If you want to quickly mark multiple layouts for copying, you can use these shortcut menu options:
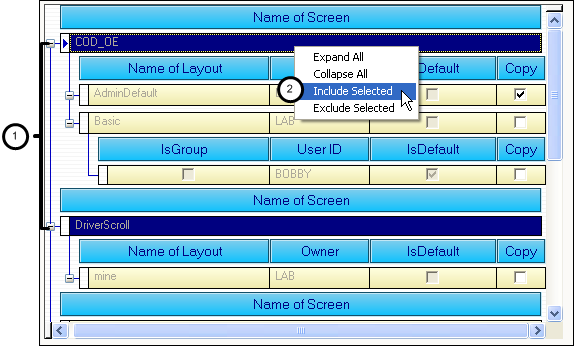
Field Definition Include Selected
To automatically mark for copying all layouts under one or more window or grid names, select the rows, and then choose Include Selected.
The right pane of the Layout Utility window reflects the number of layouts selected.
Exclude Selected
To automatically clear for copying all layouts under one or more window or grid names, select the rows, and then choose Exclude Selected.
The right pane of the Layout Utility window reflects the number of layouts selected.
-
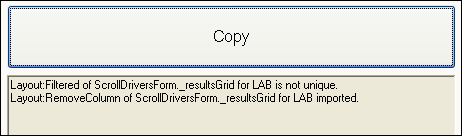
Click Copy.
After a few moments, the right pane of the window displays the results.In this example, the RemoveColumn layout was successfully imported, but the Filtered layout was not. A layout of the same name was found in the target database.
-
Assign the imported layouts to the appropriate users in the target database.