Understanding the Company Planner Setup window
You use the Company Planner Setup window to create Company Planner boards.
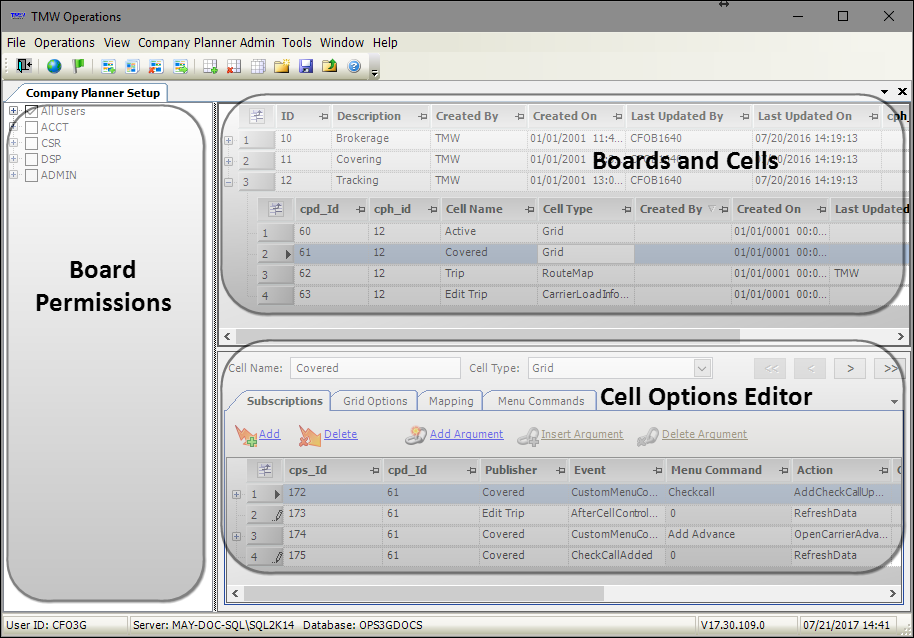
This window contains three panes:
-
Board Permissions
Assign users and/or user groups access to boards. -
Boards and Cells
Lists the available boards. Expanding a board displays its cells.Note: In the example above, Brokerage, Covering, and Tracking are board names. The Tracking board is expanded to show the cells within it.
-
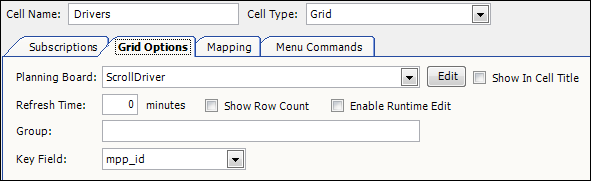
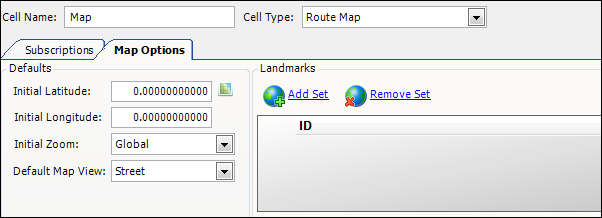
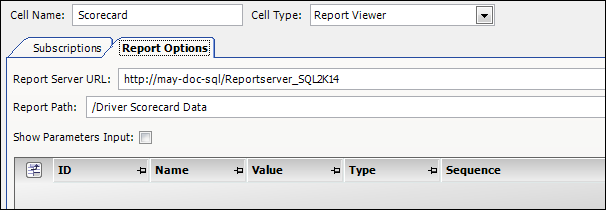
Cell Options Editor
You set cell properties on these tabs. Only tabs with properties relevant to the selected cell type appear.
When you open the Company Planner Setup window, new icons appear in your toolbar. They provide quick access to the commands in the Company Planner Admin menu.
| Icon | Command |
|---|---|
|
Add Board Create a new board |
|
Copy Board Duplicate the selected board |
|
Delete Board Remove the selected board |
|
Export Board Export all SQL data for the selected board Note: Only a SQL Server administrator can use the exported data. |
|
Add Cell Add a cell to the selected board |
|
Delete Cell Remove a cell from the selected board |
|
Copy Cell Duplicate the selected cell |
Visualizing cells before you create them
This illustration shows the Company Planner Setup window and the resulting Company Planner board.
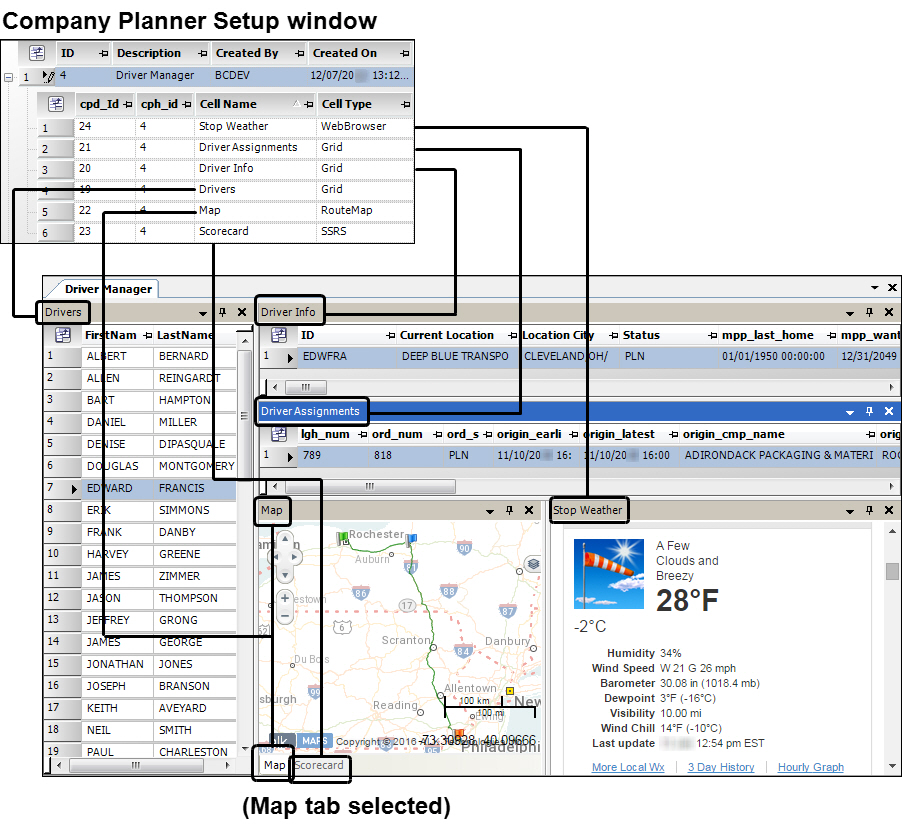
To create this sample board, we used these cell options.
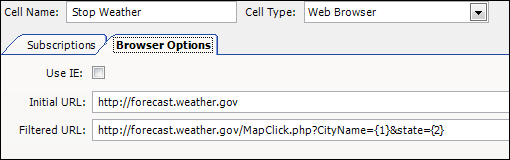
Stop Weather
Driver Assignments

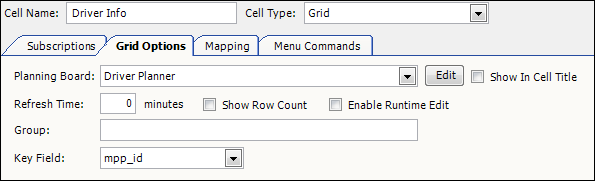
Driver Info
Drivers
Map
Scorecard
|
Driver Info and Driver Assignments are very similar grids. However, they display information based on different board views. Company Planner boards can use existing board views. You do not create them in the Company Planner Setup window. |