Changing a field’s look or position
Use these procedures to move or resize the items on the window, add free-form text, and change the properties or preferences.
Locking and unlocking selections
When working in QuickDesigner mode, you might want to focus on one specific item at a time and not accidently move or resize the other items. Use this procedure to lock an item for moving or resizing.
-
Do one of the following:
-
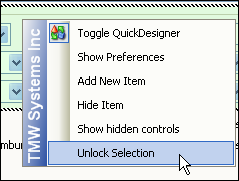
Right-click directly on the Field, Field Name, Group box, or panel to lock, and select Lock Selection.
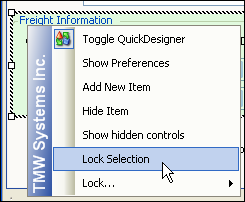
Note that the system highlights the entire area in green.
-
Right-click in a general area of the item you want to lock, and select Lock.
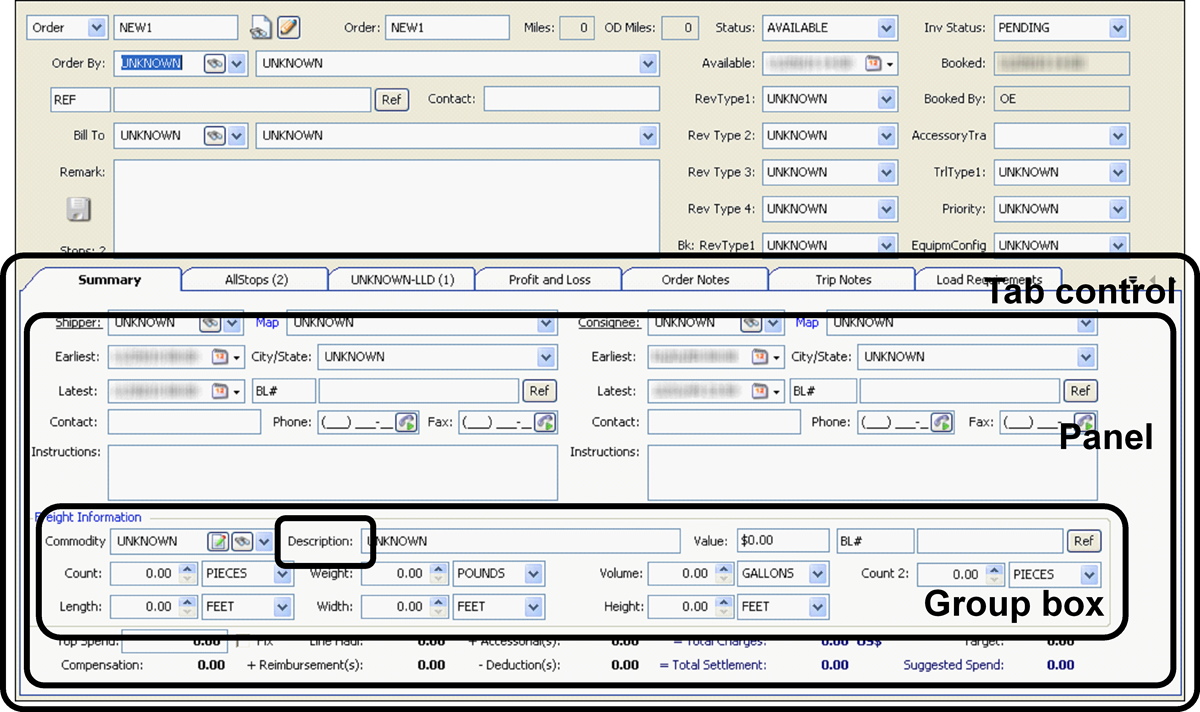
The menu displays the item on which you clicked, and all underlying items.This sample shows the ShipperCompanyNameIBM field, the underlying OrderSummaryPanel, and the OrderTabControl.
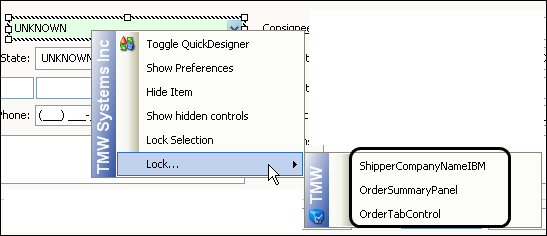
Select the item you want to lock.
Note: When you want to resize an underlying panel, and it contains a panel that is docked as full, you cannot select it by clicking on it with the mouse. You can use this list, which displays all the underlying panels and controls, to select the one you want to resize.
-
-
Move the item to the new location on the window.
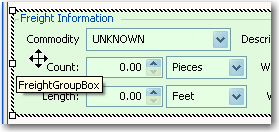
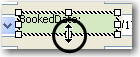
Note: As you move your mouse around the window, only the locked item appears with a green highlight. You can drag it to another location on the window without impacting the other areas of the window.
This illustration shows the mouse pointer over an area of the window that is not locked. You cannot select another item.
-
When you have it positioned, right-click on the item.
-
Select Unlock Selection.
-
Toggle out of QuickDesigner mode to view the change you made.
Moving items
Use this procedure to move an item on a window.
| You might want to fix the position of an object first. |
-
Position your cursor over the item you want to move.
The mouse pointer changes to a Move arrow.
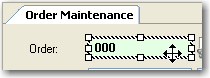
Note: Unless fields are part of a group box, you will need to move each item separately. If you want to move an entire group box, position the cursor over an open area inside the box.
-
Click and drag the item to the desired location.
Grid lines appear to help you align the item with others on the window.

-
Toggle out of QuickDesigner mode to view the changes you have made.
Resizing items
Use this procedure to resize an item on a window. Resizing is useful when you move fields and need to fix overlaps.
| Some items have fixed dimensions that cannot be changed. |
-
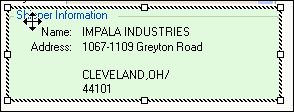
Click on the item you want to resize.
The mouse pointer changes shape according to where you have it positioned on the item’s handles.
-
Click and drag the handle to the desired size.
-
Toggle out of QuickDesigner mode to view the changes you have made.
Adding free-form text
Use this procedure to add text to a window. This is useful if you want to add company-specific information that is to be displayed whenever users access the window.
-
Go to the window or tab where you want to add the text.
-
Right-click in the approximate location for the text.
A shortcut menu is shown. -
Click Add New Item.
After a brief pause, the Add New Item window is shown. -
Under Field Groups, select No Mapping.
-
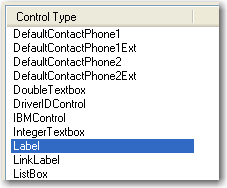
Under Control Type, select Label.
-
Clear the Auto-label checkbox.
-
Click OK.
A label box is added to the window.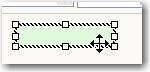
-
Right-click on the newly added item, and select Show Preferences.
-
Enter the text for the label.

-
If you want, set any other font properties.
-
Click OK.
The text item is added to your window.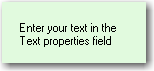
-
Toggle out of QuickDesigner mode to view the changes you have made.
-
After the text is added to the window, you can move or resize it.
Changing a label’s text
Your company has its own language that you use to categorize different areas of your business (for example, revenue classifications, trailer accessories, tractor types). TMW Operations lets you retain the terms your company uses by allowing you to define certain user-defined fields. These user-defined fields are called labels.
There are two types of user-defined labels in TMW Operations.
-
Labels not associated with the label file
These types of labels can be edited using QuickDesigner.
-
Labels associated with the label file
These types of labels are edited in the Edit User Definable Fields window. For details, see Using the label file to customize fields.
Follow these steps to change the label text with QuickDesigner:
-
Right-click in the item you want to modify.
A shortcut menu is shown.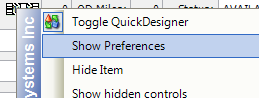
-
Select Show Preferences.
The Field Preferences window opens.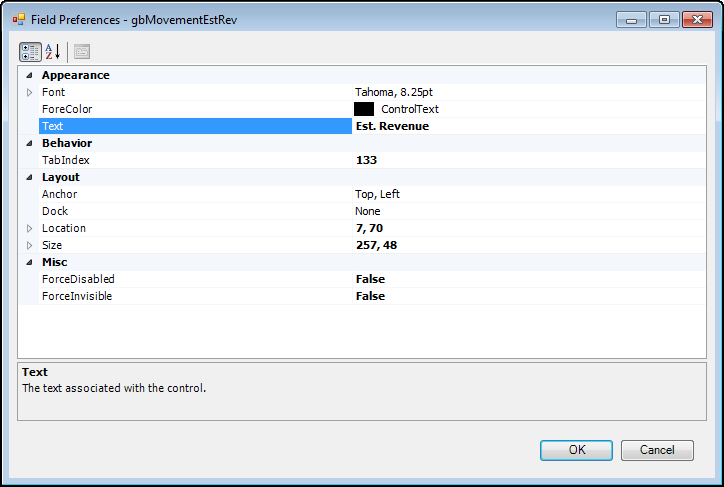
-
In the Appearance section, change the entry in the Text field.

Note: If the Text field is not displayed in the Appearance section, this label is associated with the label file and cannot be edited using QuickDesigner.
-
Click OK.
The text is changed. -
You might need to move or resize the label object to accommodate the text.
-
Toggle out of QuickDesigner mode to view the change you have made.
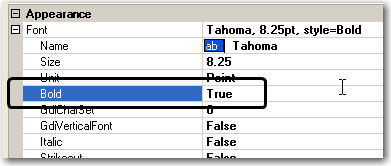
Changing font properties or preferences
Use this procedure to change the font properties for text, such as font name and size, bold, italic, and underline.
-
Right-click in the item you want to modify.
A shortcut menu is shown.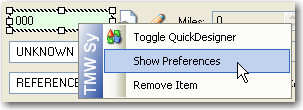
-
Select Show Preferences.
The Field Preferences window is shown.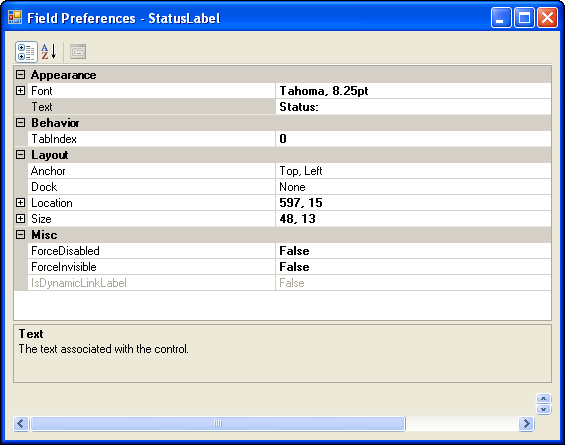
-
Expand the Font category. Click the + icon.
The icon changes to -, and the font properties are shown.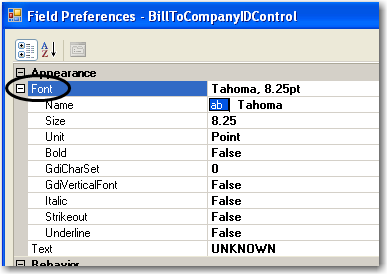
-
Change the properties as appropriate.
This example shows the Bold property is set to True.
-
Click OK.
The property is applied to the text. -
Toggle out of QuickDesigner mode to view the changes you have made.
Fixing the position of an object
Each object on a window is positioned within, and bound to, a container. Examples of objects are: controls, fields, text labels, group boxes, split containers, or panels. Examples of containers are: group boxes, panels, or tab controls.
For example, the Description label is contained within a Group box that is contained within a Panel that is contained within a Tab control.
When a user resizes a window, the objects within the containers will move or not move according to how they were positioned. Several options are available through the Layout section of the object’s Field Preferences window.
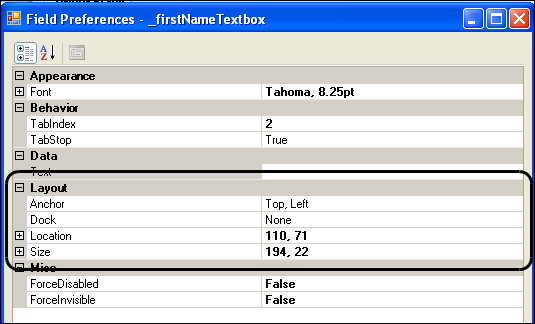
Anchoring
The simplest way to position objects within a container is to use the grid lines. When you drag an object around a window, grid lines appear to help you align the item with others within the container.
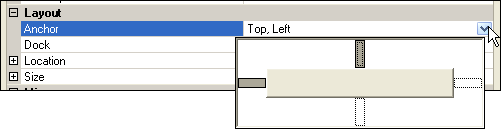
By default, the object is automatically anchored to the top-left location. You can select, top, bottom, left, right, or none. This illustration shows that Top, Left was selected, as the bars of the selection tool appear in a darker shade. Click a selection bar to select or clear it.
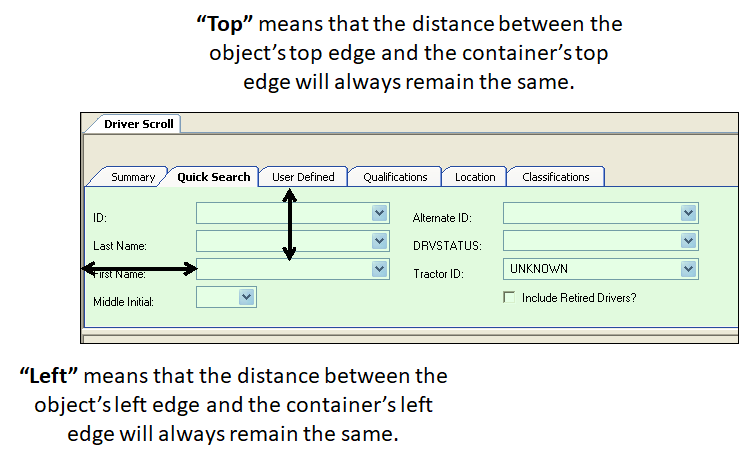
When the user resizes the window, the object will remain in that position.
|
Docking
Docking defines which borders of the control are bound to the container. Docking is ordinarily applied to the containers of fields, such as panels or tab controls, rather than to the individual field objects themselves.
Most frequently, the object is set to fill the space of its container, but you can also select to dock the object to the top, bottom, left, or right. Click a selection bar or area to select it. Click None if you do not want to dock the object.
Panels are usually docked to "fill" another panel or a tab control. This illustration shows that Fill was selected, as the center of the selection tool appears in a darker shade.
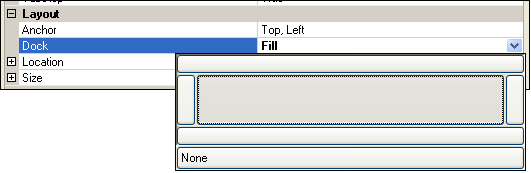
When the user resizes the window, the panel will continue to fill the container’s space.
| If you apply anchoring and docking, the anchoring settings will be ignored over the docking setting. |
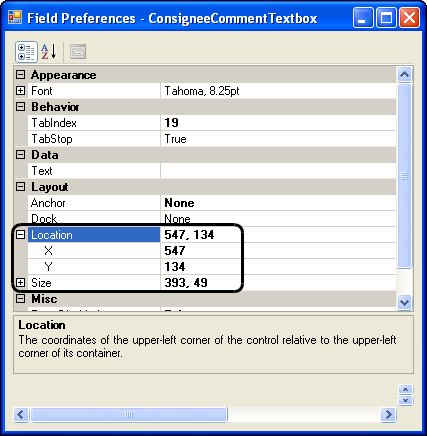
Using XY coordinates
You can also define an object’s position within a container by specifying the XY coordinates of the upper-left corner of the object relative to the upper-left corner of its container.
If X=547 and Y=134, the object is 547 pixels from the left edge of the container and 134 pixels from the top edge of the container.
| If you opt to use the XY coordinates rather than anchoring, and the user resizes the window, the object will not move from those coordinates. This can cause unexpected results, such as the object positioned on top of other anchored objects within the container. |