Restricting access to field options
Field restrictions overview
First available in TMW Operations V. 2022.1
Throughout the system, you can customize the options shown in drop-down lists for user-definable fields. You do this in the Edit User Definable Fields window. By default, all users can see and select these options wherever the field appears.
| You access the Edit User Definable Fields window in the TMWSuite System Administration application. It is also available in the TMW Operations and TMW Back Office modules of TMW.Suite. |
When you use Row Level Security (RLS), a user can create a new record that they cannot access again. This happens because security is based on the fields in a record, not the options that can be selected in the fields. A user could accidentally make an entry in a field that does not match the values set up for them in the Row Level Security Assignment window.
Now, you can extend RLS to restrict access to field options defined in the Edit User Definable Fields window. When you set up restrictions for field options, you determine which options a user can select in fields that have security applied to them.
Restricting field options applies to all users who have field restrictions set in the Row Level Security Assignment window. This includes users identified as a System Administrator in their user profile.
|
Field options restriction is not enforced when:
|
Activating field option restrictions
You turn on field option restrictions in the Row Level Security Setup window.
-
In System Administration, go to Edit > Row Level Security. The Row Level Security Assignment window opens.
-
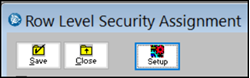
Click Setup to open the Row Level Security Setup window.
-
By default, the first time you access the Row Level Security Setup window in a session, the Administrator Login pop-up window opens. Enter the User id and Password for the database, and then click OK.
Note: The pop-up window can be turned off. To turn it off, you must have
[Misc]UserSysAdminAutoLogin=Yin your TTS50.The Row Level Security Setup window opens.
-
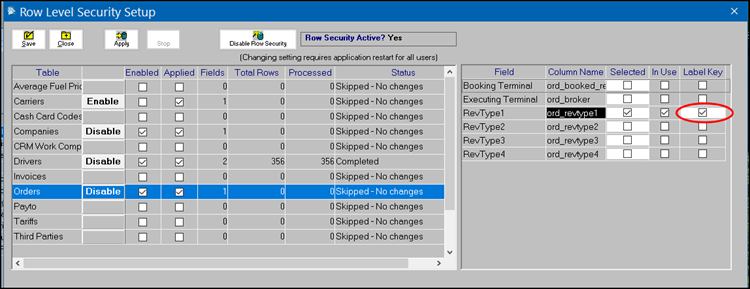
In the Tables grid on the left, click in the row for the table you want to use
The Fields grid shows which fields support applying security. -
In the Fields grid on the right, locate the field in that table that you want to use as the label key.
-
Select the Label Key checkbox for the field.
You can select the checkbox:
-
For only one field. That field must be one you are using for RLS.
-
Only if the field has both the Selected and In Use checkboxes selected.
You select the checkbox for only one of the tables for which you have set up security.
-
-
Click Save.
Note: Once you save, if you decide that you need to use a different field, you can clear the checkbox. A message appears. It identifies the field you had selected and asks you to confirm that you want to make the change. "You currently have labelfile security set for revtype1. If you turn this off, any security set up for this label definition will be deleted. Are you sure you want to do this?"
Do one of the following:
-
To continue, click Yes.
-
To abandon your change, click Cancel.
-
-
Click Close to exit the window.
-
In the Row Level Security Assignment window, click Close.
Setting up field option restrictions
Once the checkbox is selected, you can specify which options users can select in drop-down lists for user-definable fields. You do this in the Row Level Security Labelfile Setup window. You access it from the Edit User Definable Fields window.
You can set label restrictions for these fields:
|
|
|
|
|
|
|
|
|
|
|
|
|
|
|
|
|
|
|
|
|
| You must be a System Administrator in TMWSuite to set up security for labels. |
-
Do one of the following:
-
If you are working in the System Administration application, click
 Labels.
 -
If you are working in TMW Operations or TMW Back Office, go to Tools > Tools Maintenance > Edit User Definable Fields.
-
-
Retrieve the label that you want to apply restrictions to.
-
Click Label Security.
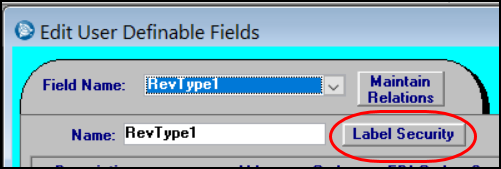
Note: The Label Security button is not available if you have not identified a field as the label key.
The Row Level Security Labelfile Setup window opens.
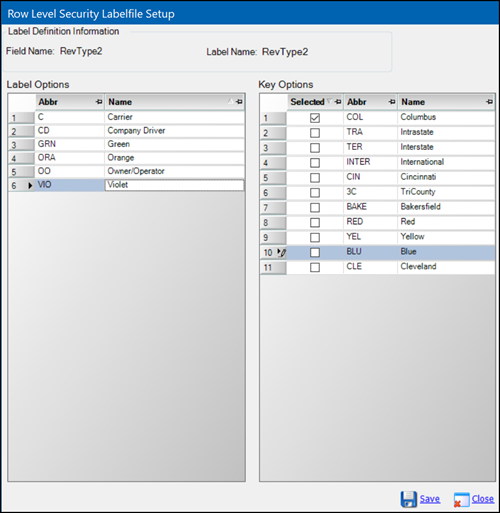
The Label Options grid shows the options that have been entered for the label you retrieved.
The Key Options grid shows the options that have been entered for the field identified as the label key.
-
In the Label Options grid, click in the row of the option you want to assign to the label key option(s).
-
In the Key Options grid, select the checkbox for each option you want to link to the label option you selected in Step 4.
-
Click Save.
-
Users/groups assigned to the value you selected in the Key Options grid will see only the option(s) you selected in the Label Options grid in drop-down lists for restricted fields.
-
Any label option not tied to a value for the label key, such as RevType1, will be available to all users
-
If a user belongs to multiple groups, they will see a union of all the options available to all of their groups.
-
-
Click Close to exit the window.
Repeat the process for each label you want to tie to one of the label key’s values. Any users logged into the applications while you are completing the setup will not see any difference in the options shown in drop-down lists. They will see the results the next time they log into the application.
To illustrate how it works, we set restrictions on the options users can access in the RevType2 field. We tied those restrictions to options in the RevType1 label, which we are using as our label key.
| RevType2 Label Option | Linked to Label Key Options |
|---|---|
UNKNOWN |
|
Carrier |
|
Company Driver |
Intrastate |
Green |
Interstate |
Orange |
Blue and Columbus |
Owner Operator |
Blue |
Violet |
Columbus |
User IAN22 is set up for security on the company table. He has access to records having RevType1 values of Unknown, Blue, and Columbus.
When he creates a new company profile, in the RevType2 drop-down list, he can see:
-
The options that do not have restrictions set:
-
UNKNOWN
-
Carrier
-
-
The options linked to his RevType1 values:
-
Orange
-
Owner/Operator
-
He cannot see the options that are linked to RevType1 values that are not assigned to him:
-
Company Driver
-
Green
