Highlighting specific entries in a column
Instead of formatting all the entries in a column the same way, as you would with a True condition, you might want to highlight only those entries that meet certain criteria. You can highlight specific column entries using a Formula condition, which formats one column based on criteria in another column.
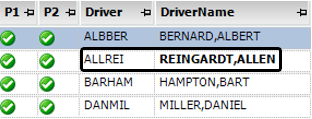
This example illustrates how to spot a particular Driver Name quickly in the Driver tab of the Planning Worksheet’s Available Resources grid. You create an expression that will display that driver’s name in bold font when it equals the Driver ID you specify.
| You must retrieve data before setting conditional formatting for a column. |
TMW Operations prior to version 17.10
-
Retrieve data in the Available Resources grid of the Planning Worksheet.
-
Click the Driver resource tab.
-
Right-click the DriverName column header.
-
From the shortcut menu, select Conditional Format.
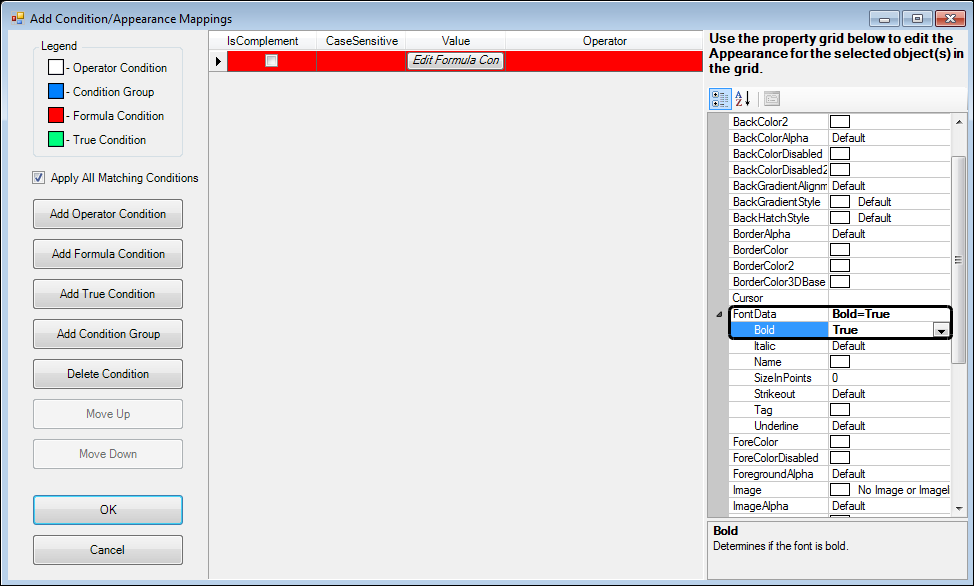
The Add Condition/Appearance Mappings window opens. -
Click Add Formula Condition.

The Formula Builder window opens.
-
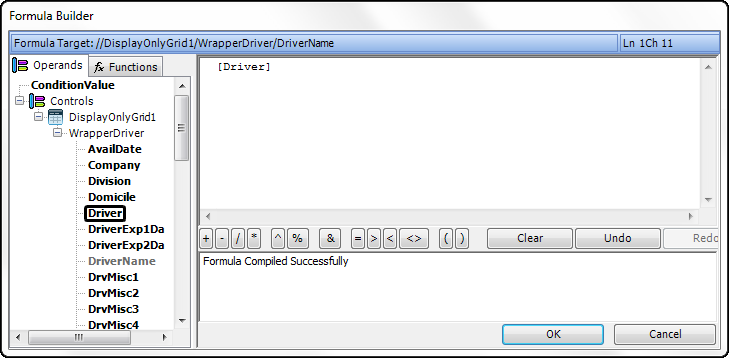
On the Operands tab, go to the appropriate control.
For this example, expand Controls > DisplayOnlyGrid1 > WrapperDriver.
-
Locate and double-click the name of the column that contains the information on which you want to base the condition.
Note: You cannot select the same data column you are formatting.
For this example:
-
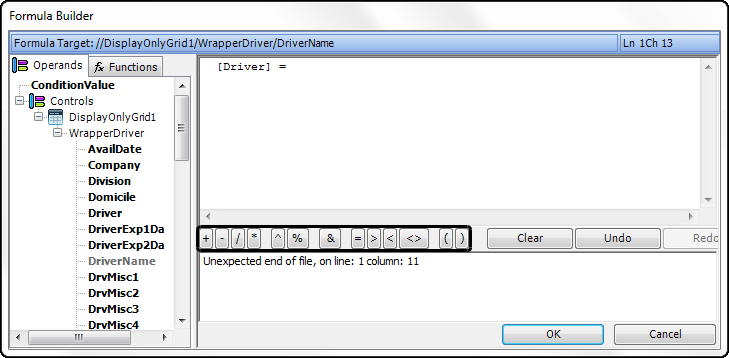
Click the appropriate operator button.

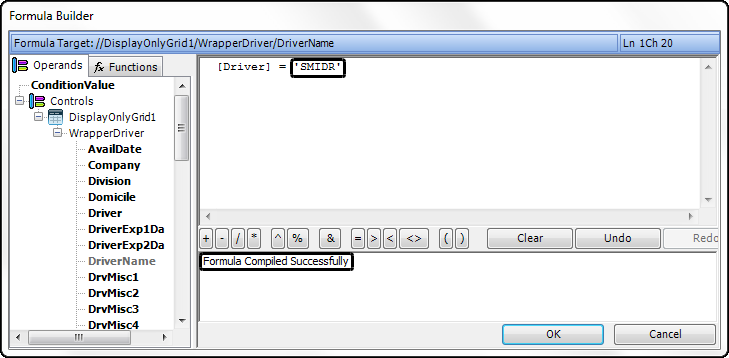
In this example, click the = button. The equals sign is added to the expression.
-
Within single quotation marks, enter the data item you want highlighted.
If the entry is accepted, a message will appear in the lower-right field confirming that the formula compiled successfully.
-
Click OK.
The Formula Builder window closes. -
In the property grid, locate and expand the FontData property.
-
On the same line as Bold, select True.
-
Click OK.
The driver’s name you specified appears in bold font.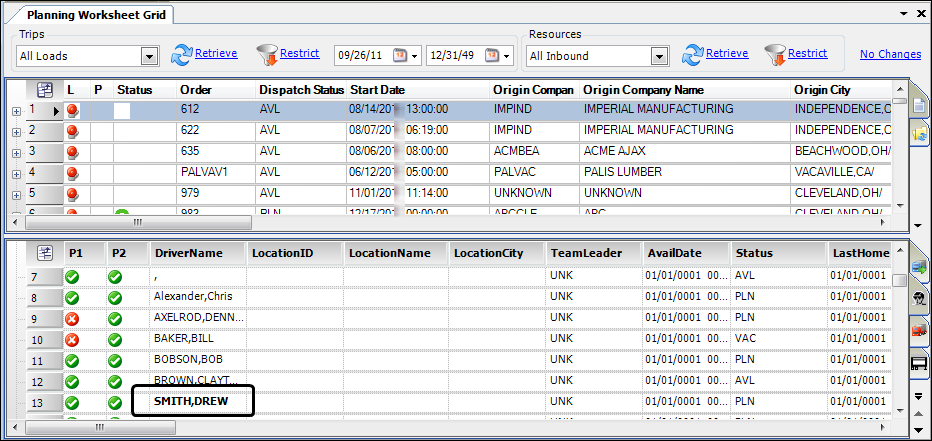
TMW Operations version 17.10 and later
-
In the Planning Worksheet, retrieve data in the Available Resources grid.
-
Click the Driver resource tab.
-
Right-click the DriverName column header.
-
From the shortcut menu, select Conditional Format.
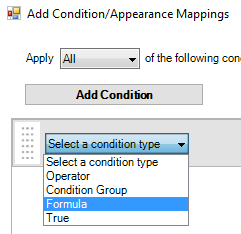
The Add Condition/Appearance Mappings window opens. A single condition row appears in the grid by default. -
In the Select a condition type field, select Formula.
-
Click
 Formula Builder.
The Formula Builder window opens. -
On the Operands tab, go to the appropriate control.
For this example, expand Controls > DisplayOnlyGrid1 > WrapperDriver.
-
Locate and double-click the name of the column that contains the information on which you want to base the condition.
Note: You cannot select the same data column you are formatting.
For this example:
-
The DriverName column is disabled.
-
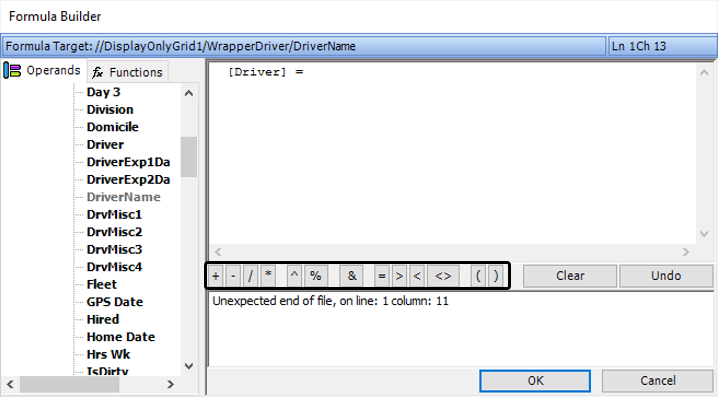
Double-click Driver, which contains the Driver ID.
[Driver] appears in the upper-right field.
-
-
Click the appropriate operator button.

In this example, click the = button. The equals sign is added to the expression.
-
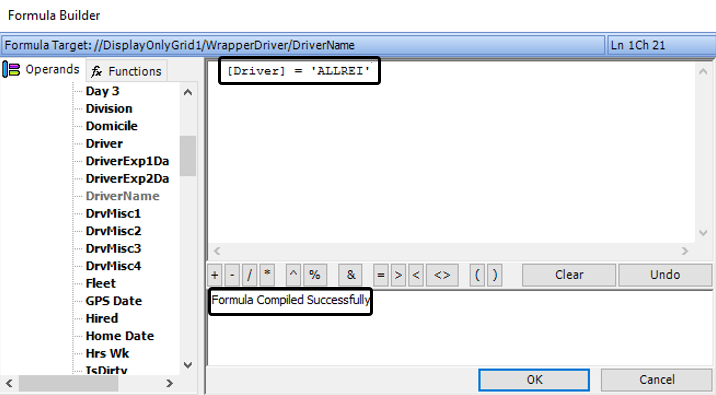
Within single quotation marks, enter the data item you want highlighted.
If the entry is accepted, a message will appear in the lower-right field confirming that the formula compiled successfully.
-
Click OK.
The Formula Builder window closes. -
Click
 Styles.
 -
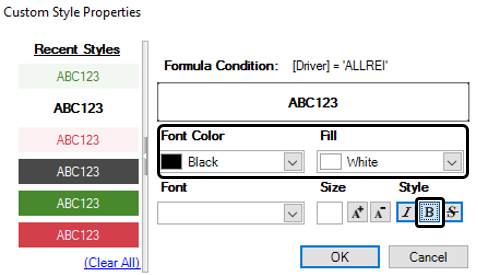
Click Custom Style.
The Custom Style Properties window opens. -
In the Style section, select
 Bold.
Bold. -
In the Font Color field, change the font color to black if it is not already black. You can do this by typing 0, 0, 0 or by following these steps:
-
Click the arrow in the Font Color field.
A drop-down menu opens. -
Click the Web tab.
-
Select Black.
-
-
In the Fill field, change the fill color to white if it is not already white. You can do this by typing 255, 255, 255 or by following these steps:
-
Click the arrow in the Fill field.
A drop-down menu opens. -
Click the Web tab.
-
Select White.
-
-
Click OK.
The Custom Style Properties window closes. -
Click OK on the Add Condition/Appearance Mappings window.
The driver’s name you specified appears in bold.