Using the TotalMail Viewer
You use the TotalMail Viewer to display and resubmit messages. It allows you to work with messages in TMW Operations, without having to open a separate application. Before accessing the TotalMail Viewer, make sure your system is set up properly. For details, see Setting up your system for TotalMail.
TotalMail Viewer overview
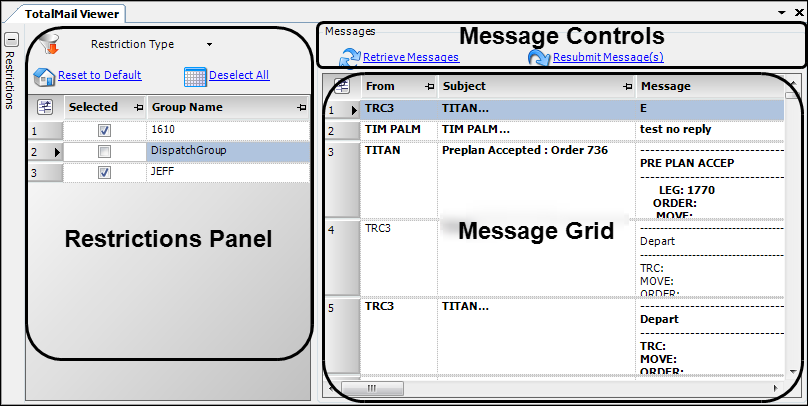
To open the TotalMail Viewer, go to Operations > TotalMail Viewer. There are three main sections in the TotalMail Viewer.
-
Restrictions Panel
This expandable/collapsible panel is on the left side of the window. When you first open the viewer, it is collapsed. When you expand it, the dispatch groups you belong to are selected by default. You can specify search criteria within this panel. -
Message Controls
This section provides two controls:-
After setting the restrictions, click Retrieve Messages. The results of your search appear in the Message grid. You must refresh the grid if you change the restrictions.
-
Click Resubmit Message(s) to resend messages that are selected in the grid.
-
-
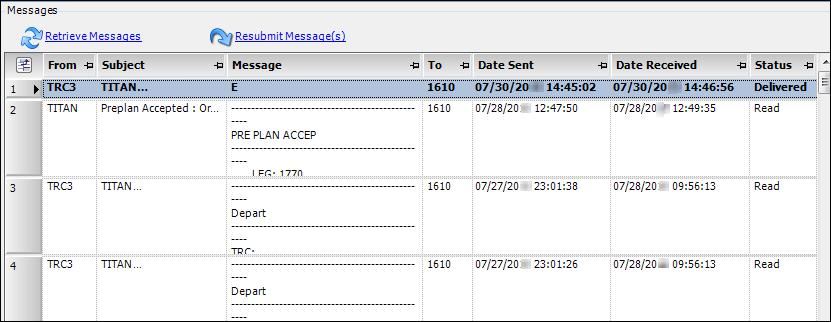
Message Grid
This grid displays the messages retrieved according to your search criteria. Unread messages appear in bold text. This helps you identify which messages have not yet been read. Opening messages will change their status to Read.
Retrieving messages
You must first set restrictions to identify which messages you want to display. There are five restriction types:
-
Groups
Note: Only Dispatch groups are supported. You cannot use Member groups as a restriction.
-
Driver History
-
Tractor History
-
Custom Tractor History
-
Custom Driver History
Each restriction type changes the filtering options available in the Restrictions panel. The Groups restriction type is selected by default.
To retrieve TotalMail messages, follow these steps.
-
Go to Operations > TotalMail Viewer.
The TotalMail Viewer window opens. The Restrictions panel is closed by default. -
Open the Restrictions panel by clicking
 Expand.
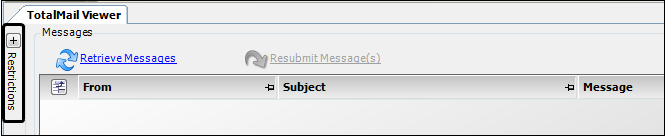
-
Determine how you would like to filter the messages.
Filtering messages by dispatch groups
Filtering messages by dispatch group is the default restriction type when you open the Restrictions panel.
Trimble Recommends:
It is highly recommended that assets are assigned to a dispatch group. The TotalMail Viewer displays messages for dispatch groups, but not for member groups.
For details on setting up dispatch groups, see:
Guide: TotalMail System Administrator | Chapter: Configuring TotalMail | Section: Managing dispatch and member groups in the Groups category
To view TotalMail messages by dispatch group, follow these steps.
-
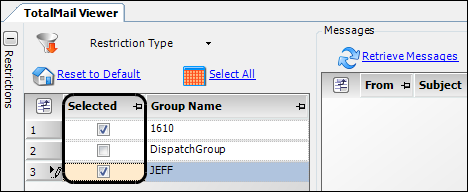
Expand the Restrictions panel.
-
In the Selected column, select checkboxes for one or more dispatch groups.
-
Click Retrieve Messages or press ENTER.
| To undo any restrictions you have set, click Reset to Default. The dispatch groups you belong to are selected. Messages for those groups will be retrieved. |
Filtering messages by tractor
When retrieving messages for tractors, you can filter by a single tractor, multiple tractors, or all tractors within a date range. You can also filter by certain tractor profile fields.
Filtering by a specific tractor
To filter TotalMail messages by a single tractor, follow these steps.
-
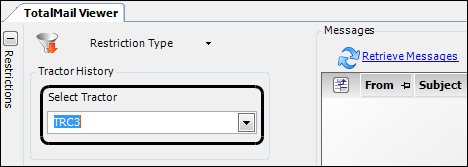
In the Restriction Type drop-down list, select Tractor History.
-
In the Select Tractor field, enter the tractor’s ID.
-
Click Retrieve Messages or press ENTER.
Filtering by multiple tractors
You can retrieve messages for several tractors within a date range.
To retrieve messages, follow these steps.
-
In the Restriction Type drop-down list, select Custom Tractor History.
-
In the Lookup Type drop-down list, select Select Tractors.
-
In the Available field, enter the tractor ID.

-
Click
 Add or press ENTER.
The ID appears in the Selected field.Notes:
-
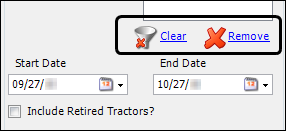
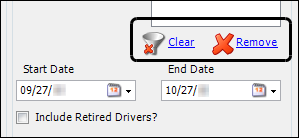
To remove a tractor from the Selected field, select its ID and click Remove or press DELETE.
-
To delete all tractors, click Clear.
-
-
Enter start and end dates for the desired date range.
Notes:
-
The Start Date defaults to 30 days ago. The End Date defaults to today.
-
You can include messages for retired tractors by selecting the Include Retired Tractors? checkbox.
-
-
Click Retrieve Messages.
Filtering by all tractors for a date range
You can retrieve messages for all tractors. The date range determines which messages are retrieved. You can also retrieve messages for retired tractors.
To retrieve messages, follow these steps.
-
In the Restriction Type drop-down list, select Custom Tractor History.
-
In the Lookup Type drop-down list, select All Tractors.
-
Enter start and end dates for the desired date range.
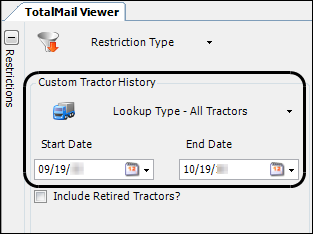
Notes:
-
The Start Date defaults to 30 days ago. The End Date defaults to today.
-
You can include messages for retired tractors by selecting the Include Retired Tractors? checkbox.
-
-
Click Retrieve Messages.
Filtering by tractor profile criteria
You can filter messages based on a tractor’s profile data. Options include the values recorded in these fields:
-
Company
-
Division
-
Fleet
-
Teamleader
-
Terminal
-
TrcType1-4
To retrieve messages based on specific tractor profile criteria, follow these steps.
-
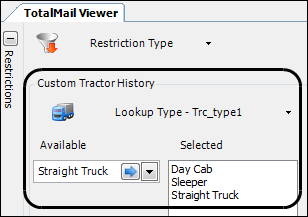
In the Restriction Type drop-down list, select Custom Tractor History.
-
In the Lookup Type drop-down list, select the profile criteria you want to restrict.
-
Select an option using the Available field drop-down list.
-
Click
Add or press ENTER.
The option appears in the Selected field.Notes:
-
To remove an option from the Selected field, select it and click Remove or press DELETE.
-
To delete all options, click Clear.
-
-
Enter start and end dates for the desired date range.
Notes:
-
The Start Date defaults to 30 days ago. The End Date defaults to today.
-
You can include messages for retired tractors by selecting the Include Retired Tractors? checkbox.
-
-
Click Retrieve Messages.
| To apply a default filter to the TotalMail Viewer, see Setting default filters. |
Filtering messages by driver
When retrieving messages for drivers, you can filter by a single driver, multiple drivers, or all drivers within a date range. You can also filter by certain driver profile fields.
Filtering by a specific driver
To filter TotalMail messages by a single tractor, follow these steps.
-
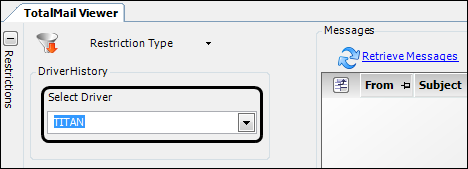
In the Restriction Type drop-down list, select Driver History.
-
In the Select Driver field, enter the driver’s ID.
-
Click Retrieve Messages or press ENTER.
Filtering by multiple drivers
You can retrieve messages for several drivers within a date range.
To retrieve messages, follow these steps.
-
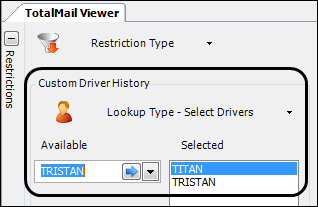
In the Restriction Type drop-down list, select Custom Driver History.
-
In the Lookup Type drop-down list, select Select Drivers.
-
In the Available field, enter the driver ID.
-
Click
Add or press ENTER.
The ID appears in the Selected field.Notes:
-
To remove a driver from the Selected field, select its ID and click Remove or press DELETE.
-
To delete all drivers, click Clear.
-
-
Enter start and end dates for the desired date range.
Notes:
-
The Start Date defaults to 30 days ago. The End Date defaults to today.
-
You can include messages for retired tractors by selecting the Include Retired Drivers? checkbox.
-
-
Click Retrieve Messages.
Filtering by all drivers for a date range
You can retrieve messages for all drivers. The date range determines which messages are retrieved. You can also retrieve messages for retired drivers.
To retrieve messages, follow these steps.
-
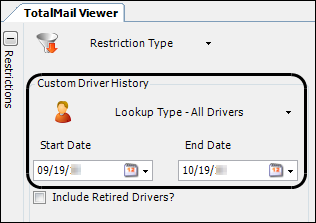
In the Restriction Type drop-down list, select Custom Driver History.
-
In the Lookup Type drop-down list, select All Drivers.
-
Enter start and end dates for the desired date range.
Notes:
-
The Start Date defaults to 30 days ago. The End Date defaults to today.
-
You can include messages for retired tractors by selecting the Include Retired Drivers? checkbox.
-
-
Click Retrieve Messages.
Filtering by driver profile criteria
You can filter messages based on a driver’s profile data. Options include the values recorded in these fields:
-
Company
-
Division
-
Domicile
-
Fleet
-
Teamleader
-
Terminal
-
Driver Type1-4
To retrieve messages based on specific driver profile criteria, follow these steps.
-
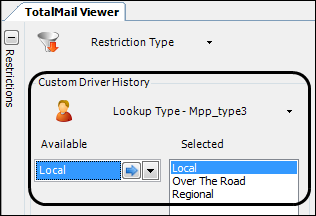
In the Restriction Type drop-down list, select Custom Driver History.
-
In the Lookup Type drop-down list, select the profile criteria you want to restrict.
-
Select an option using the Available field drop-down list.
-
Click
Add or press ENTER.
The option appears in the Selected field.Notes:
-
To remove an option from the Selected field, select it and click Remove or press DELETE.
-
To delete all options, click Clear.
-
-
Enter start and end dates for the desired date range.
Notes:
-
The Start Date defaults to 30 days ago. The End Date defaults to today.
-
You can include messages for retired tractors by selecting the Include Retired Drivers? checkbox.
-
-
Click Retrieve Messages.
| To apply a default filter to the TotalMail Viewer, see Setting default filters. |
Setting default filters
Each time you access the TotalMail Viewer, you can set filters to limit the messages you see. Because there are a lot of filters, selecting them can take some time. To save time, you can use the [.NetOperations]OpsTotalMailViewerDefaultRestriction setting in your TTS50 to set the filters you want to use as the defaults.
Working with messages
Once you have retrieved messages, they appear in the Message grid. It displays two types of messages:
-
Form messages
Messages associated with a vendor form, such as event, arrived, departed, load assignment, load decline, and accept messages. -
Text messages
Messages that are simple text or e-mail messages not associated with a vendor form.
The grid does not show check calls. It does show the nearest large city for some mobile comm. vendors.
Unread messages appear in bold text. To open a message, double-click it. When you close the message, its status changes to Read. Read messages no longer appear in bold text.
Additional commands are available using the shortcut menu. To access them, right-click on a message. The available options are based on the type and status of the message. The options include:
-
Changing the read status of a message
-
Dismissing a message
-
Resubmitting a message
The most commonly used fields are defined in the table below. They are listed alphabetically.
| Field | Definition |
|---|---|
Date Received |
Date and time that the message was received |
Date Sent |
Date and time that the message was sent |
Driver |
Driver associated with the trip at the time the message was sent |
Errors |
Indicates whether there is an error for a message. When it is:
Note: Conditional formatting can be used to turn error messages red. |
From |
Individual who sent the message |
Message |
Preview of the message text Note: The row height determines how much of the message is displayed. By default, five rows are shown. If the message is shorter, the row height contracts. |
Reason Included |
Reason the row was retrieved and included in the grid, based on filter criteria |
Status |
Message status:
|
Subject |
Subject/title of the message |
To |
Message recipient |
Tractor |
Tractor associated with the trip at the time the message was sent |
Trc Last Position |
Tractor’s last known position |
Trc Last Pos. Date/Time |
Date and time of the tractor’s last known position |
Viewing message details
To view detailed information for any message in the grid, double-click it. The message opens in its own Message Preview window.
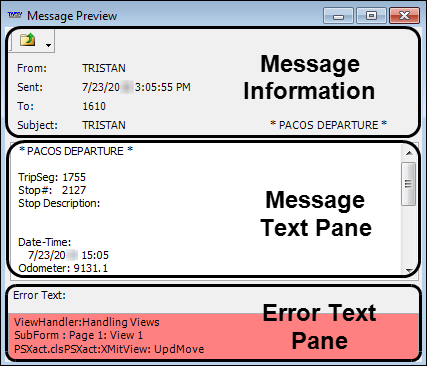
The Message Preview window has three sections.
-
Message Information
Shows the from, to, sent date and time, and subject of the email -
Message Text Pane
Shows the entire message -
Error Text Pane
Shows the message text associated with the error
Opening a message in the Message Preview window changes the status to Read.
| Right-clicking a message in the Message grid and selecting TotalMail > Mark As Read or TotalMail > Mark As Unread from the shortcut menu changes the status of the message to Read or Unread. |
Changing the read status of a message
There are two ways to acknowledge that you have read a message. You can:
-
Double-click the message to open it. Opening a message changes the status to Read.
-
Right-click on the message. In the shortcut menu, go to TotalMail > Mark As Read.
Dismissing a message
You may take ownership of a message and delete it. If the message appears in the inboxes of multiple dispatchers, it is removed. A copy remains in the message history.
To dismiss a message, follow these steps.
-
Right-click the message.
The shortcut menu opens. -
Go to TotalMail > Dismiss.
The message no longer appears in the grid.
| Dismissing a message will remove the message from the grid permanently. Use caution when dismissing a message. No confirmation message appears. Once a message is dismissed, you cannot recover it. |
Resubmitting a message
You can select a message or several messages in the grid and resend them.
To resend messages, follow these steps.
-
Press SHIFT or CTRL while selecting rows.
Selected messages are highlighted. -
Click Resubmit Msg(s).
Notes:
-
You can resubmit a message from the shortcut menu. Right-click the message and go to TotalMail > Resubmit.
-
If you resubmit multiple messages, they are resubmitted in chronological order. The order in which they appear in the grid is ignored.
-