Pay To
Access method:
-
Go to Tools > Scrolls > Pay To Scroll.
-
Press CTRL+SHIFT+P.
-
Place the cursor in a pay to field and press CTRL+ALT+S.
-
Place the cursor in a pay to field, right-click in the field, and select View Scroll.
-
In a pay to field, click
 View Scroll.
The system retrieves records that match all restrictions entered on all sub tabs, not just those restrictions set on the sub tab currently in view.
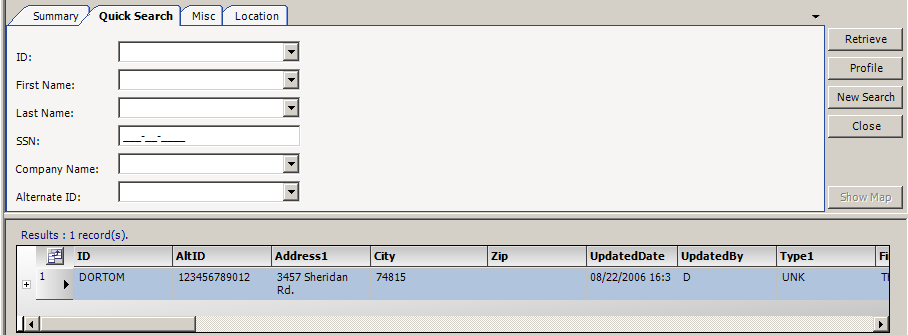
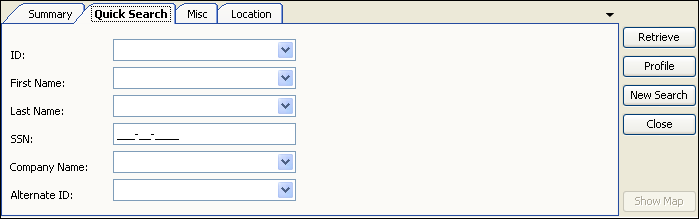
Pay To scroll - Quick Search tab
Use this sub tab to set restrictions based on Pay To ID, name or tax number.
ID |
Pay To ID. |
First Name |
Pay To’s first name (for an owner operator). |
Last Name |
Pay To’s last name (for an owner operator). |
SSN |
Pay To’s tax ID or, for an individual, the Social Security Number. |
Company Name |
Pay To’s company name. |
Alternate ID |
Alternative identification code used to identify the Pay To. This code may represent an ID from another computer system, such as an accounting ID. |
Pay To scroll - Misc tab
Use this sub tab to set restrictions based on free-form comments recorded in user-defined fields.
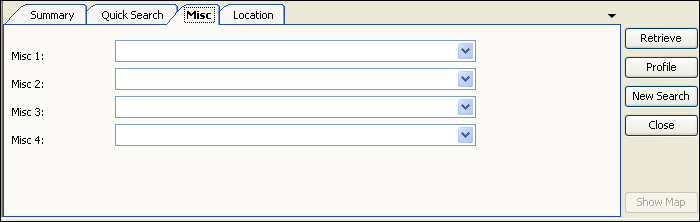
Misc 1-4 |
Comments recorded for the Pay To. Note: Field names are set up in the PayToMisc 1- 4 labels in System Administration. |
Pay To scroll - Location tab
Use this tab to set restrictions based on address and/or phone number.
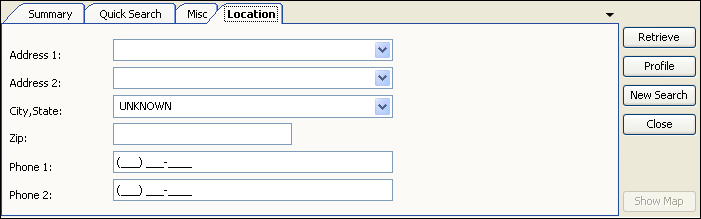
Address 1 |
First line of the Pay To’s street address. |
Address 2 |
Second line of the Pay To’s street address. |
City, State |
The company’s city, state/province, and county. Note: The county designation appears when a state has more than one city with the same name. |
Zip |
The company’s ZIP/postal code. |
Phone 1 |
Pay To’s primary phone number. |
Phone 2 |
Additional phone number for the Pay To; for example, fax number. |
Pay To scroll - Accessing the Profile window
When the list of Pay To records is displayed, do one of the following:
-
Double-click on a pay to line.
The profile window opens as a tab within TMW Operations. You can easily switch from one tab to another.
-
Select the pay to line, and then click the Profile button.
The profile window for that Pay To opens.
The profile window opens as a separate window from TMW Operations. While this window is open you cannot access the TMW Operations window.
View profile data on sub tabs.
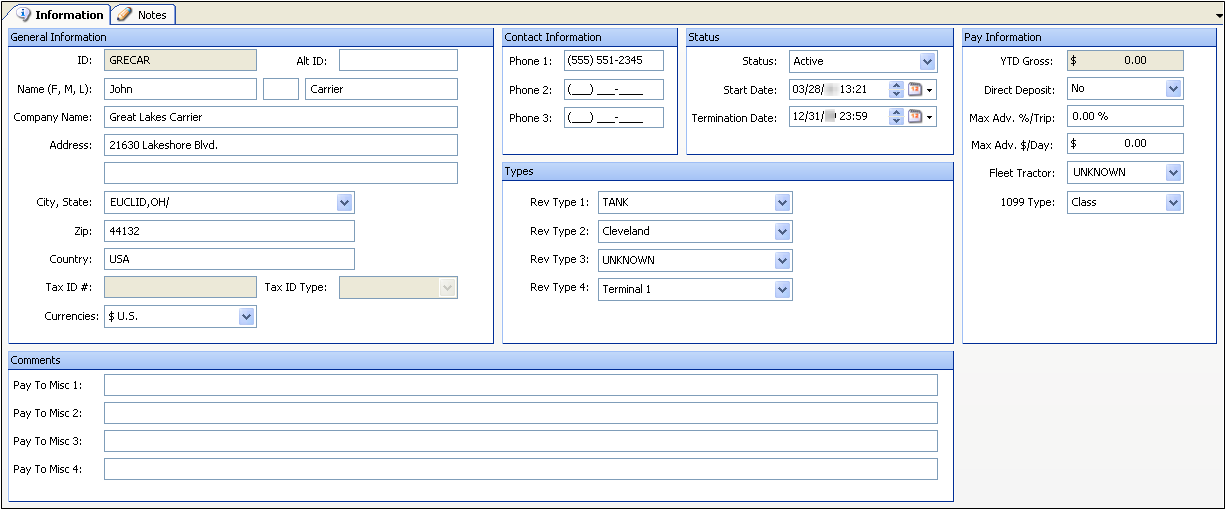
Pay To |
Displays Pay To ID at the top of the profile window when any sub tab is selected.
|
Information |
Displays Pay To profile information, which is grouped in these categories:
Note: Only system administrators can read the information in the Tax ID # and Tax ID Type fields. For other users, these fields display as XXXXXX. |
Notes |
Displays a list of free form notes and alerts recorded for the Pay To. These notes/alerts are visible wherever a Pay To can be viewed. The Notes tab displays these colors:
In the above example, only notes are listed. |