Using Cisco Click to Call
If your company uses the Cisco® Unified Communications Manager call-processing system, the Cisco Click to Call application will allow you to automatically call co-workers, business partners, and customers from your computer without entering telephone numbers.
Beginning with version 3.15.20.0 of the Trimble .NET applications, you can place a call from any field that displays a telephone number. For example, you can place a call from the phone fields in TMW Operations, CRM Right, Inventory Services, and Fuel Dispatch.
Before you can set up Click to Call to work with the Trimble .NET applications, you must install these applications on your computer:
-
Cisco Unified Personal Communicator
-
TMWSuite Add-Ins interface (required only for TMWSuite core applications)
You can install Click to Call on your desktop system if your company uses the Cisco Unified Communications Manager call-processing system and has a Technical Support Services Agreement with Cisco.
Contact your company’s phone administrator or system administrator about installing Click to Call on your desktop system.
| As a courtesy, Trimble provides instructions on using Cisco Click to Call. The information included here is relevant to Cisco Click to Call Version 7.0 using a Windows XP operating system. Trimble does not track updates to third party applications. If you are using a later version of Click to Call and/or a different operating system, you should consult the vendor’s user documentation for instructions. |
Specifying your Click to Call preferences
After Click to Call has been installed on your desktop system, you must specify your user and system information for accessing Click to Call.
-
In the notification area of the Windows taskbar, right-click on the
 Click to Call icon.
 -
In the shortcut menu, select Click to Call Preferences.
-
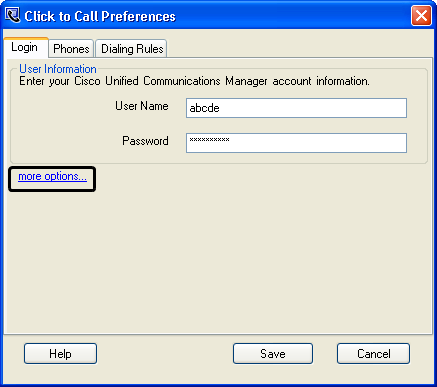
In the Login tab of the Click to Call Preferences window, enter your User Name and Password for your company’s Windows network.
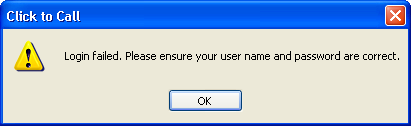
Note: When you change your Windows password, you must return to this window and enter your new password in the Password field. If you do not, this warning message will appear when you attempt to use Click to Call to make a call.
-
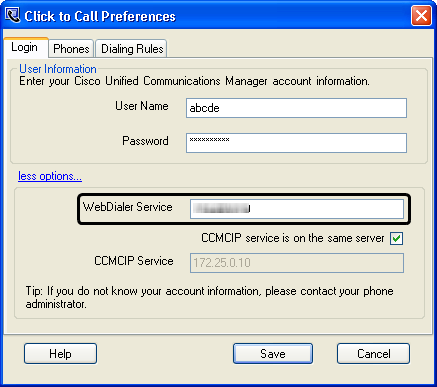
Click the more options link.
-
In the WebDialer Service field, enter the IP address for the WebDialer Service.
-
Click Save.
Notes:
-
If necessary, contact your company’s phone administrator for the WebDialer Service IP address.
-
Information about your phone and your company’s dialing rules will be entered in the Windows Control Panel.
-
Setting up your phone location in the Windows Control Panel
You must provide information about your company’s dialing rules, such as whether you must dial 9 to access an outside line before making a call. You also need to provide information about individual phones. You do this using the Phone and Modem Options window, accessed from the Control Panel.
Instructions are provided in the following subsections for an initial setup and subsequent setup.
Performing the initial phone location setup
If this is the first time you have entered your phone location information, follow these steps.
-
In the Control Panel, double-click on Phone and Modem Options.
-
In the Location Information window, enter or select information about your location.
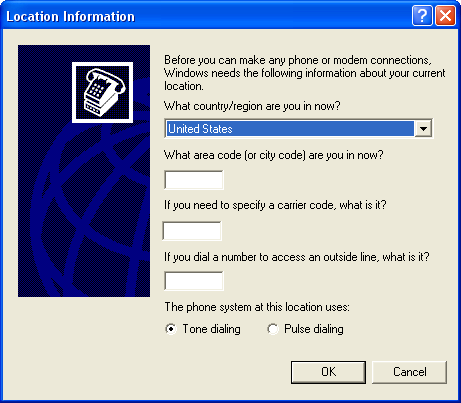
Setup question Action What country/region are you in now?
Select your current country location.
What area code (or city code) are you in now?
Enter the area or city code for your location.
If you need to specify a carrier code, what is it?
Enter the carrier code required by your company’s long distance provider for making long distance and/or international calls.
Note: If none is required, leave blank.
If you dial a number to access an outside line, what is it?
Enter the number that must be dialed to access an outside line for local calls.
Note: If none is required, leave blank.
The phone system at this location uses:
-
Select Tone dialing if you have a touch-tone phone.
-
Select Pulse dialing if you have a rotary phone.
-
-
Close the Control Panel.
If you have previously set up phone location information
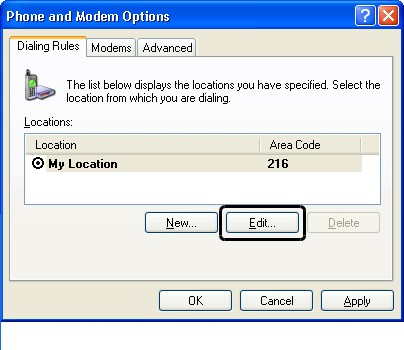
If phone location information already exists on your desktop system, the Phone and Modem Options window is displayed. Use this window to verify your information and modify it, if necessary.
-
In the Control Panel, double-click on Phone and Modem Options.
-
In the Phone and Modem Options window, click Edit.
-
On the General tab in the Edit Location window, enter information about your company’s phone system.
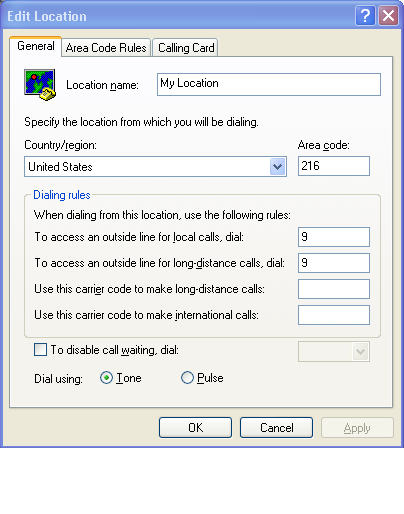
Specify the location from which you will be dialing Country/region
Select your current country location.
Area code
Enter the three-digit area code for your location.
Dialing rules To access an outside line for local calls, dial
Enter the number that must be dialed to access an outside line for local calls.
Note: If none is required, leave blank.
To access an outside line for long-distance calls, dial
Enter the number that must be dialed to access an outside line for international calls.
Note: If none is required, leave blank.
Use this carrier code to make long-distance calls
Enter carrier code required by your company’s long distance provider to make long distance calls.
Note: If none is required, leave blank.
Use this carrier code to make international calls
Enter carrier code required by your company’s long distance provider to make international calls.
Note: If none is required, leave blank.
To disable call waiting
Select the checkbox if your phone uses call waiting. In the drop-down list, select or enter the code provided by your phone company used to turn off call waiting when you make data or fax calls from your computer.
Dial using
-
Select Tone if you have a touch-tone phone.
-
Select Pulse if you have a rotary phone.
-
-
Click OK to save your changes and close the Edit Location window.
-
In the Phone and Modem Options window, click OK.
-
Close the Control Panel.
Setting up Click to Call for Trimble software
To use the Click to Call feature with Trimble applications, you must do the following:
-
Enable the Click to Call interface.
-
Specify the path to the Click to Call executable file.
Activating the Click to Call application
You use the [Misc]ClickToCallInstalled=T in your TTS50 to activate the Click to Call application within the core TMWSuite system and/or Trimble .NET applications.
Specifying the Click to Call path
Use the [Misc]ClickToCallPath INI setting to indicate the path to the Click to Call application’s executable file.
Using Click to Call
Beginning with version 3.15.20.0 of the Trimble .NET applications, you can place a call from any field that displays a telephone number.
From your desktop, you can use Click to Call to dial a phone number with just a few clicks in any Trimble .NET application.
-
Verify that the
Click to Call icon is displayed in the notification area of your Windows taskbar.Note: If the icon is not displayed, open and log into Cisco Unified Personal Communicator.
-
In any Trimble .NET application, click on the
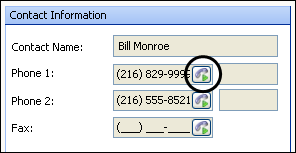 telephone icon in any field that displays a phone number.
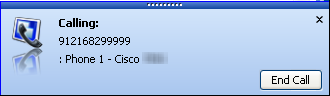
The Calling prompt displays the number being called at the bottom of the window:
-
When finished with the call, click End Call to hang up.
Using the Click to Call number archive
Click to Call maintains an archive of the last ten numbers dialed. You can use this archive to access frequently dialed numbers.
-
Right-click on the
Click to Call icon. The shortcut menu displays up to the last ten numbers dialed.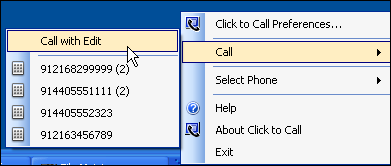
-
Click on the number that you wish to call.
Entering numbers manually or from your Windows Clipboard
The Call with Edit feature allows you to enter phone numbers manually and cut and paste numbers from other applications.
-
Copy an area code and phone number in another application.
Note: The number can be in any format (for example, 216-555-1212 or 216.555.1212).
Click to Call will remove all special characters before dialing. -
Right-click on the
Click to Call icon. -
In the shortcut menu, go to Call > Call with Edit.
-
In the Call with Edit window, click OK to dial the number copied to your Clipboard, or enter a different number and click OK.
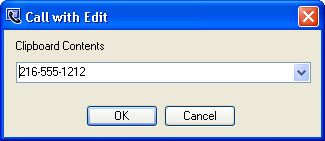
Note: The first 32 characters of the most recent text copied to your Clipboard will appear in the Call with Edit window, not necessarily the most recent phone number copied to your Clipboard.